SmartWorkForce is a comprehensive platform designed to manage and streamline
workplace operations for both administrators and employees. Admins have the
ability to assign projects to employees, who can access all relevant information
and track their progress until completion. The system includes a dynamic salary
generation feature, where the admin calculates employee salaries based on
check-in and check-out times, along with an integrated attendance system. Admins
can also send employment letters to employees dynamically and make important
announcements, including file attachments. The project management system tracks
tasks, sprints, task types, and project statuses, providing a clear board view
for employees and admins. Additionally, employees can manage sticky notes, check
out, and review their attendance history with detailed timestamps.
Requirements
PHP Version
SmartWorkForce System minimum required PHP version: >= 8.0.
MySQL Version
SmartWorkForce System MySQL version : >= 5.7
Recommended MySQL version>= 8.3
Required Extension
Memory Limit
SmartWorkForce System requires at least 128 MB PHP memory
limit.
Browser Support
Google Chrome
Safari
Microsoft Edge
Mozilla Firefox
Domain Name
To install the SmartWorkForce System, your server must have a domain name.
You won’t be able to access the system using just the server's IP address –
it must be accessed through the domain name.
SmartWorkForce Installation Guide
SmartWorkForce comes with a user-friendly web installer that helps you set
up
the system in just a few steps without needing to modify any code or files.
Important:
Since the SmartWorkForce is built using Laravel, it requires the
root of
SmartWorkForce to be placed in the root directory for proper
installation.
Note:
Before you begin the installation, please ensure you’ve checked the
requirements page to confirm your system meets the necessary prerequisites.
Installation Video Tutorials
To make the process easier, we’ve created an installation video specifically
for Hostinger hosting. Watch the video tutorials to become familiar with the
steps and see just how easy it is to install the SmartWorkForce.
Note:
While the steps shown in the video are tailored for Hostinger, other shared
hosting servers may have slight differences in configuration. However, the
general process and steps will remain the same across most hosting
environments.
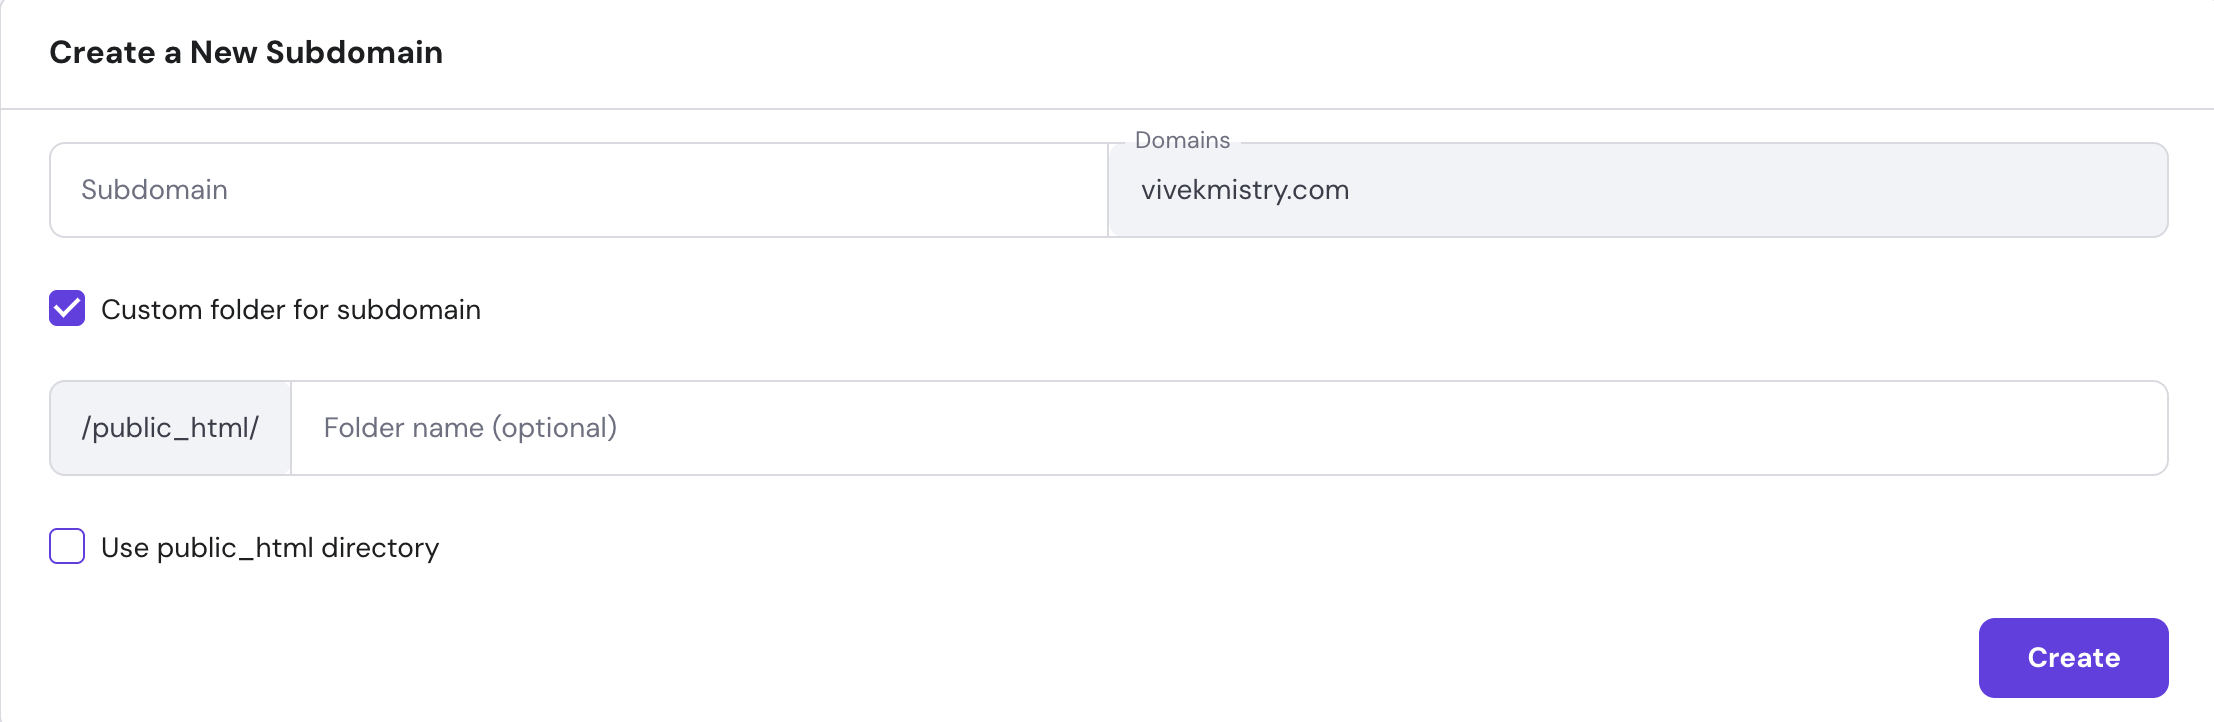
Installation Step 1 : Create Sub Domain
You will need to create a subdomain for your installation, for example,
You have two options for hosting your SmartWorkForce
installation:
Hosting on the Main Domain:
If you choose to host the system on the main domain, ensure that you
upload the files into the public_html directory (or
equivalent, depending on your hosting provider).
Hosting on a Subdomain:
If you opt for a subdomain, first make sure to verify the
subdomain's directory path. Afterward, upload the files into the
corresponding subdomain directory.
NOTE :
Always double-check the directory path to ensure the system is installed
correctly.
Installation Step 2 : Upload Zip
In the above video, we have provided a demo for uploading the SmartWorkForce
zip file.
If you are hosting on the main domain, you need to upload the zip file into
the public_html directory (or the root directory for your
hosting).
If you are hosting on a subdomain, upload the zip file into the subdomain's
directory.
In the demo, we have uploaded the files to the
public_html/demo-smartworkforce directory. This serves as
an example, but you should upload the zip file according to your specific
domain or subdomain directory structure.
Installation Step 3 : Create A Database
The next step is to create a new database for your SmartWorkForce
installation.
Log in to your Hostinger Panel.
Navigate to the "Manage Database" section.
Create a New Database:
Click on "Create New Database" and fill in the
required fields.
Important: Remember the following details for
later use:
Database Name
Username
Password
These details will be necessary for the
installation process.
Installation Step 4 : Perform Install
After completing the previous steps, go ahead and hit your domain:
Main Domain: www.yourdomain.com
Subdomain: subdomain.yourdomain.com
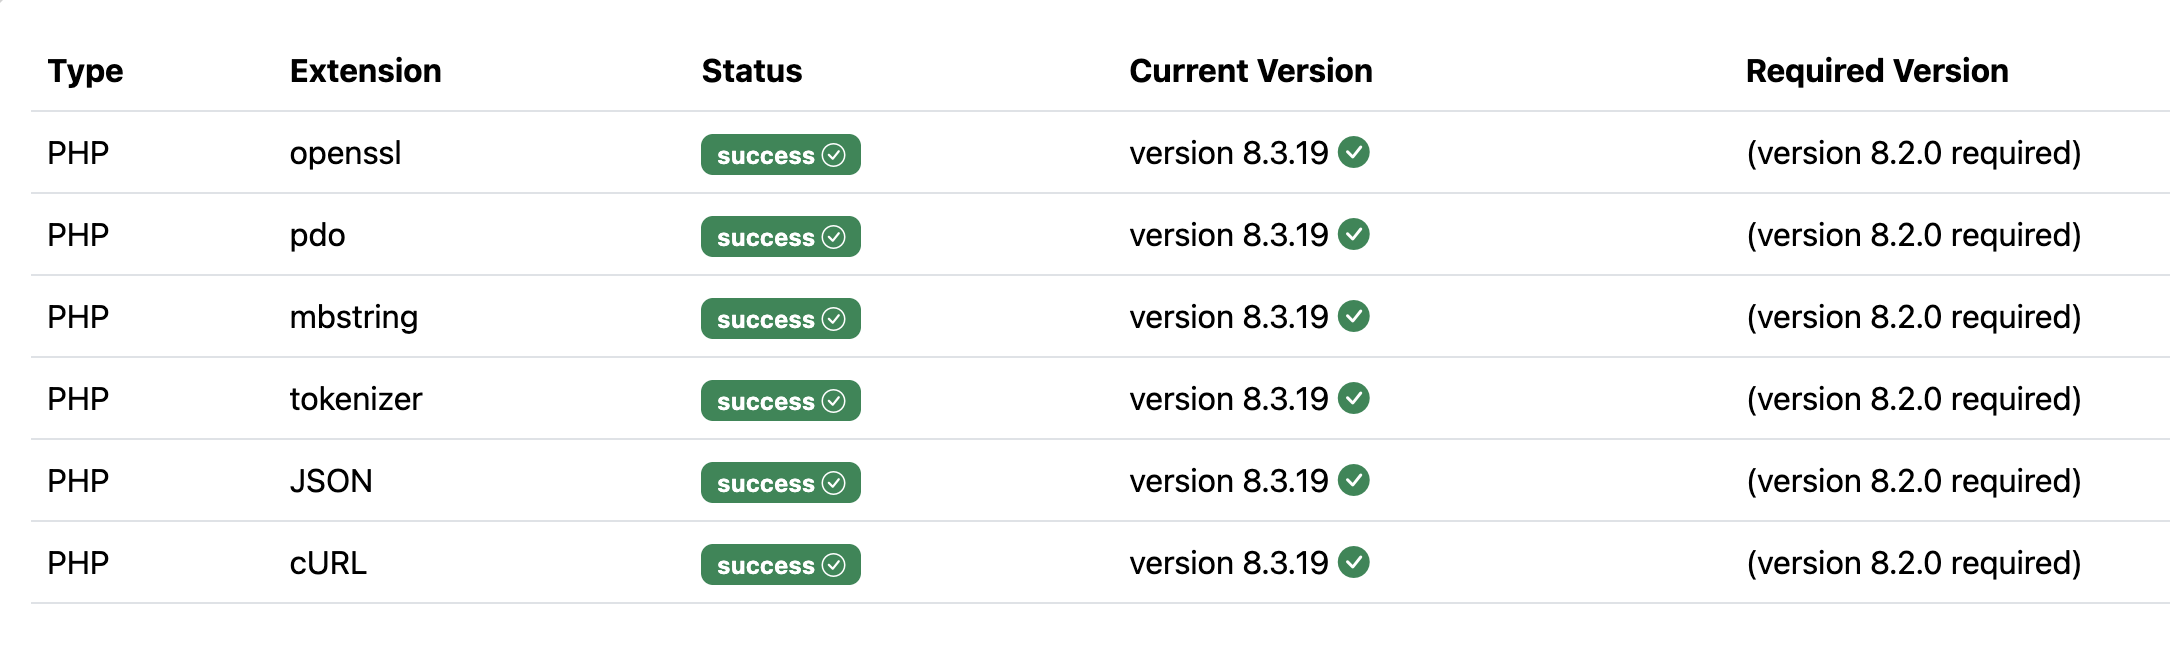
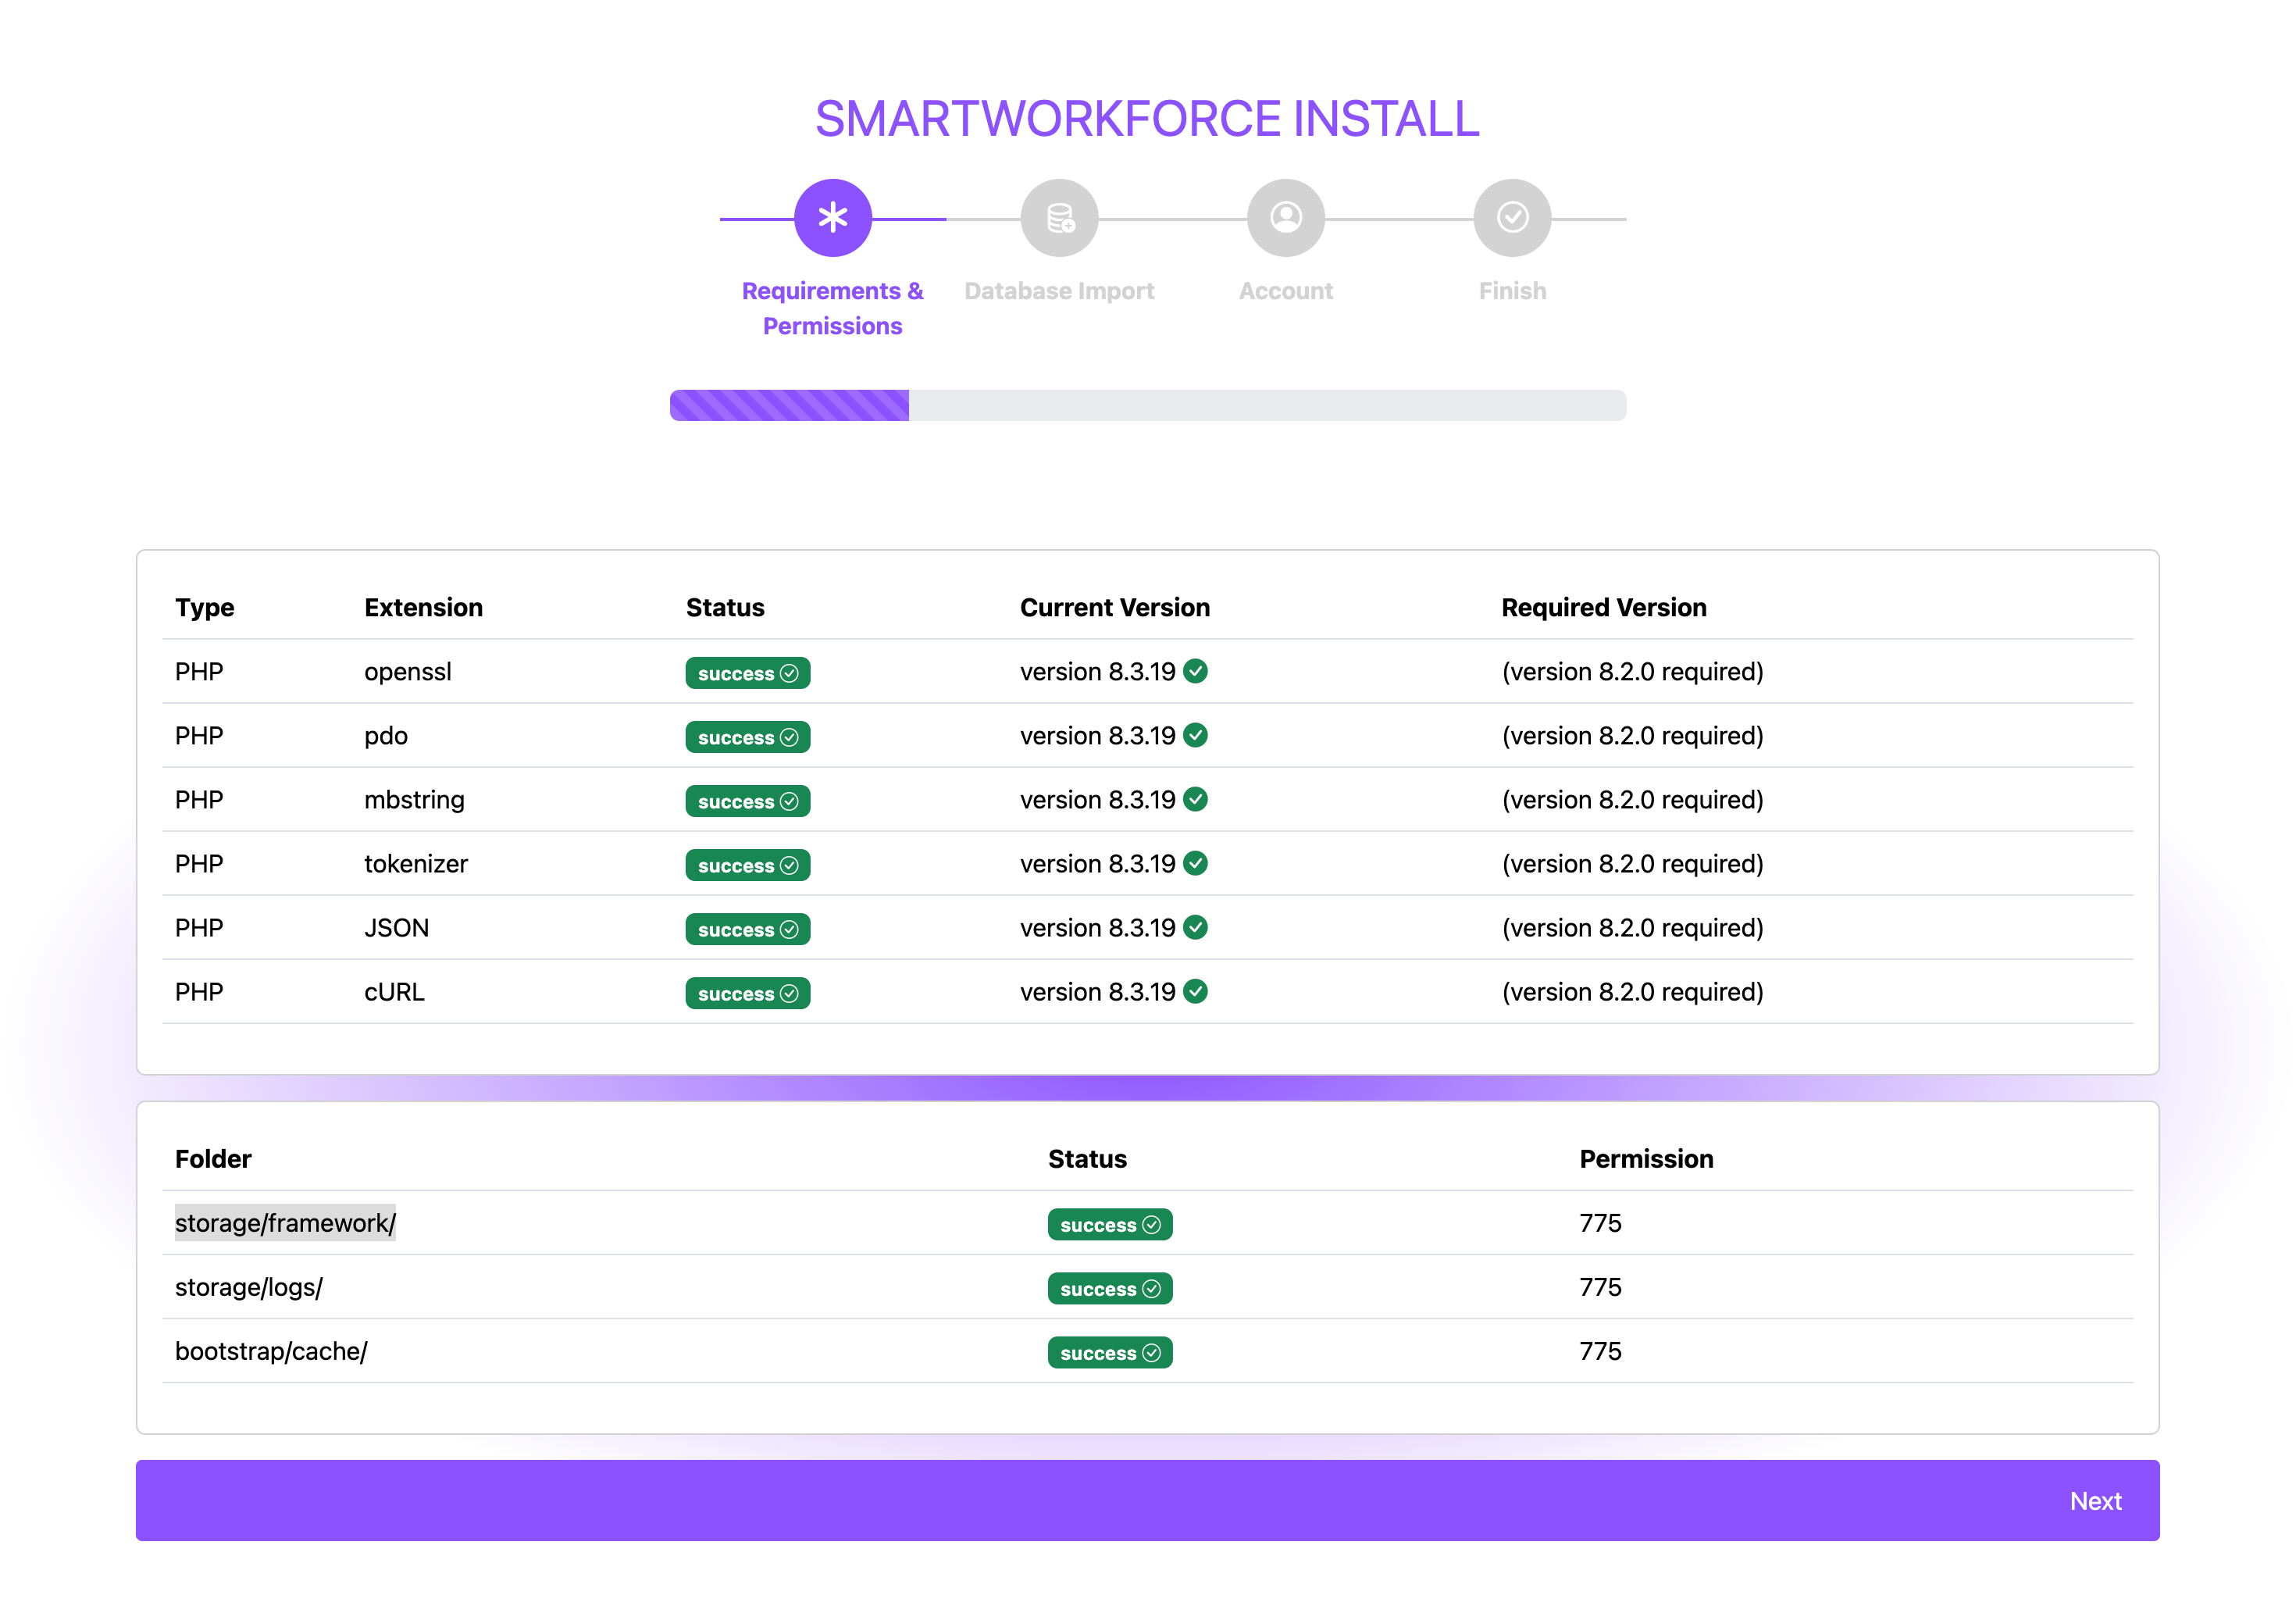
1. Requirements Form:
Upon visiting the URL, the installer will check your server for necessary
requirements. If any required extensions are missing on your server, the
installer will notify you. In that case, you can enable the necessary PHP
extensions from your hosting panel to proceed.
File Permissions:
As shown in the video, some directories may not have the proper permissions
by default. If directories like the following don't have 775 permissions,
the installation won't proceed correctly:
storage/logs/
storage/framework/
bootstrap/cache/
You will need to manually set these permissions, as shown in the video, to
allow the system to function properly.
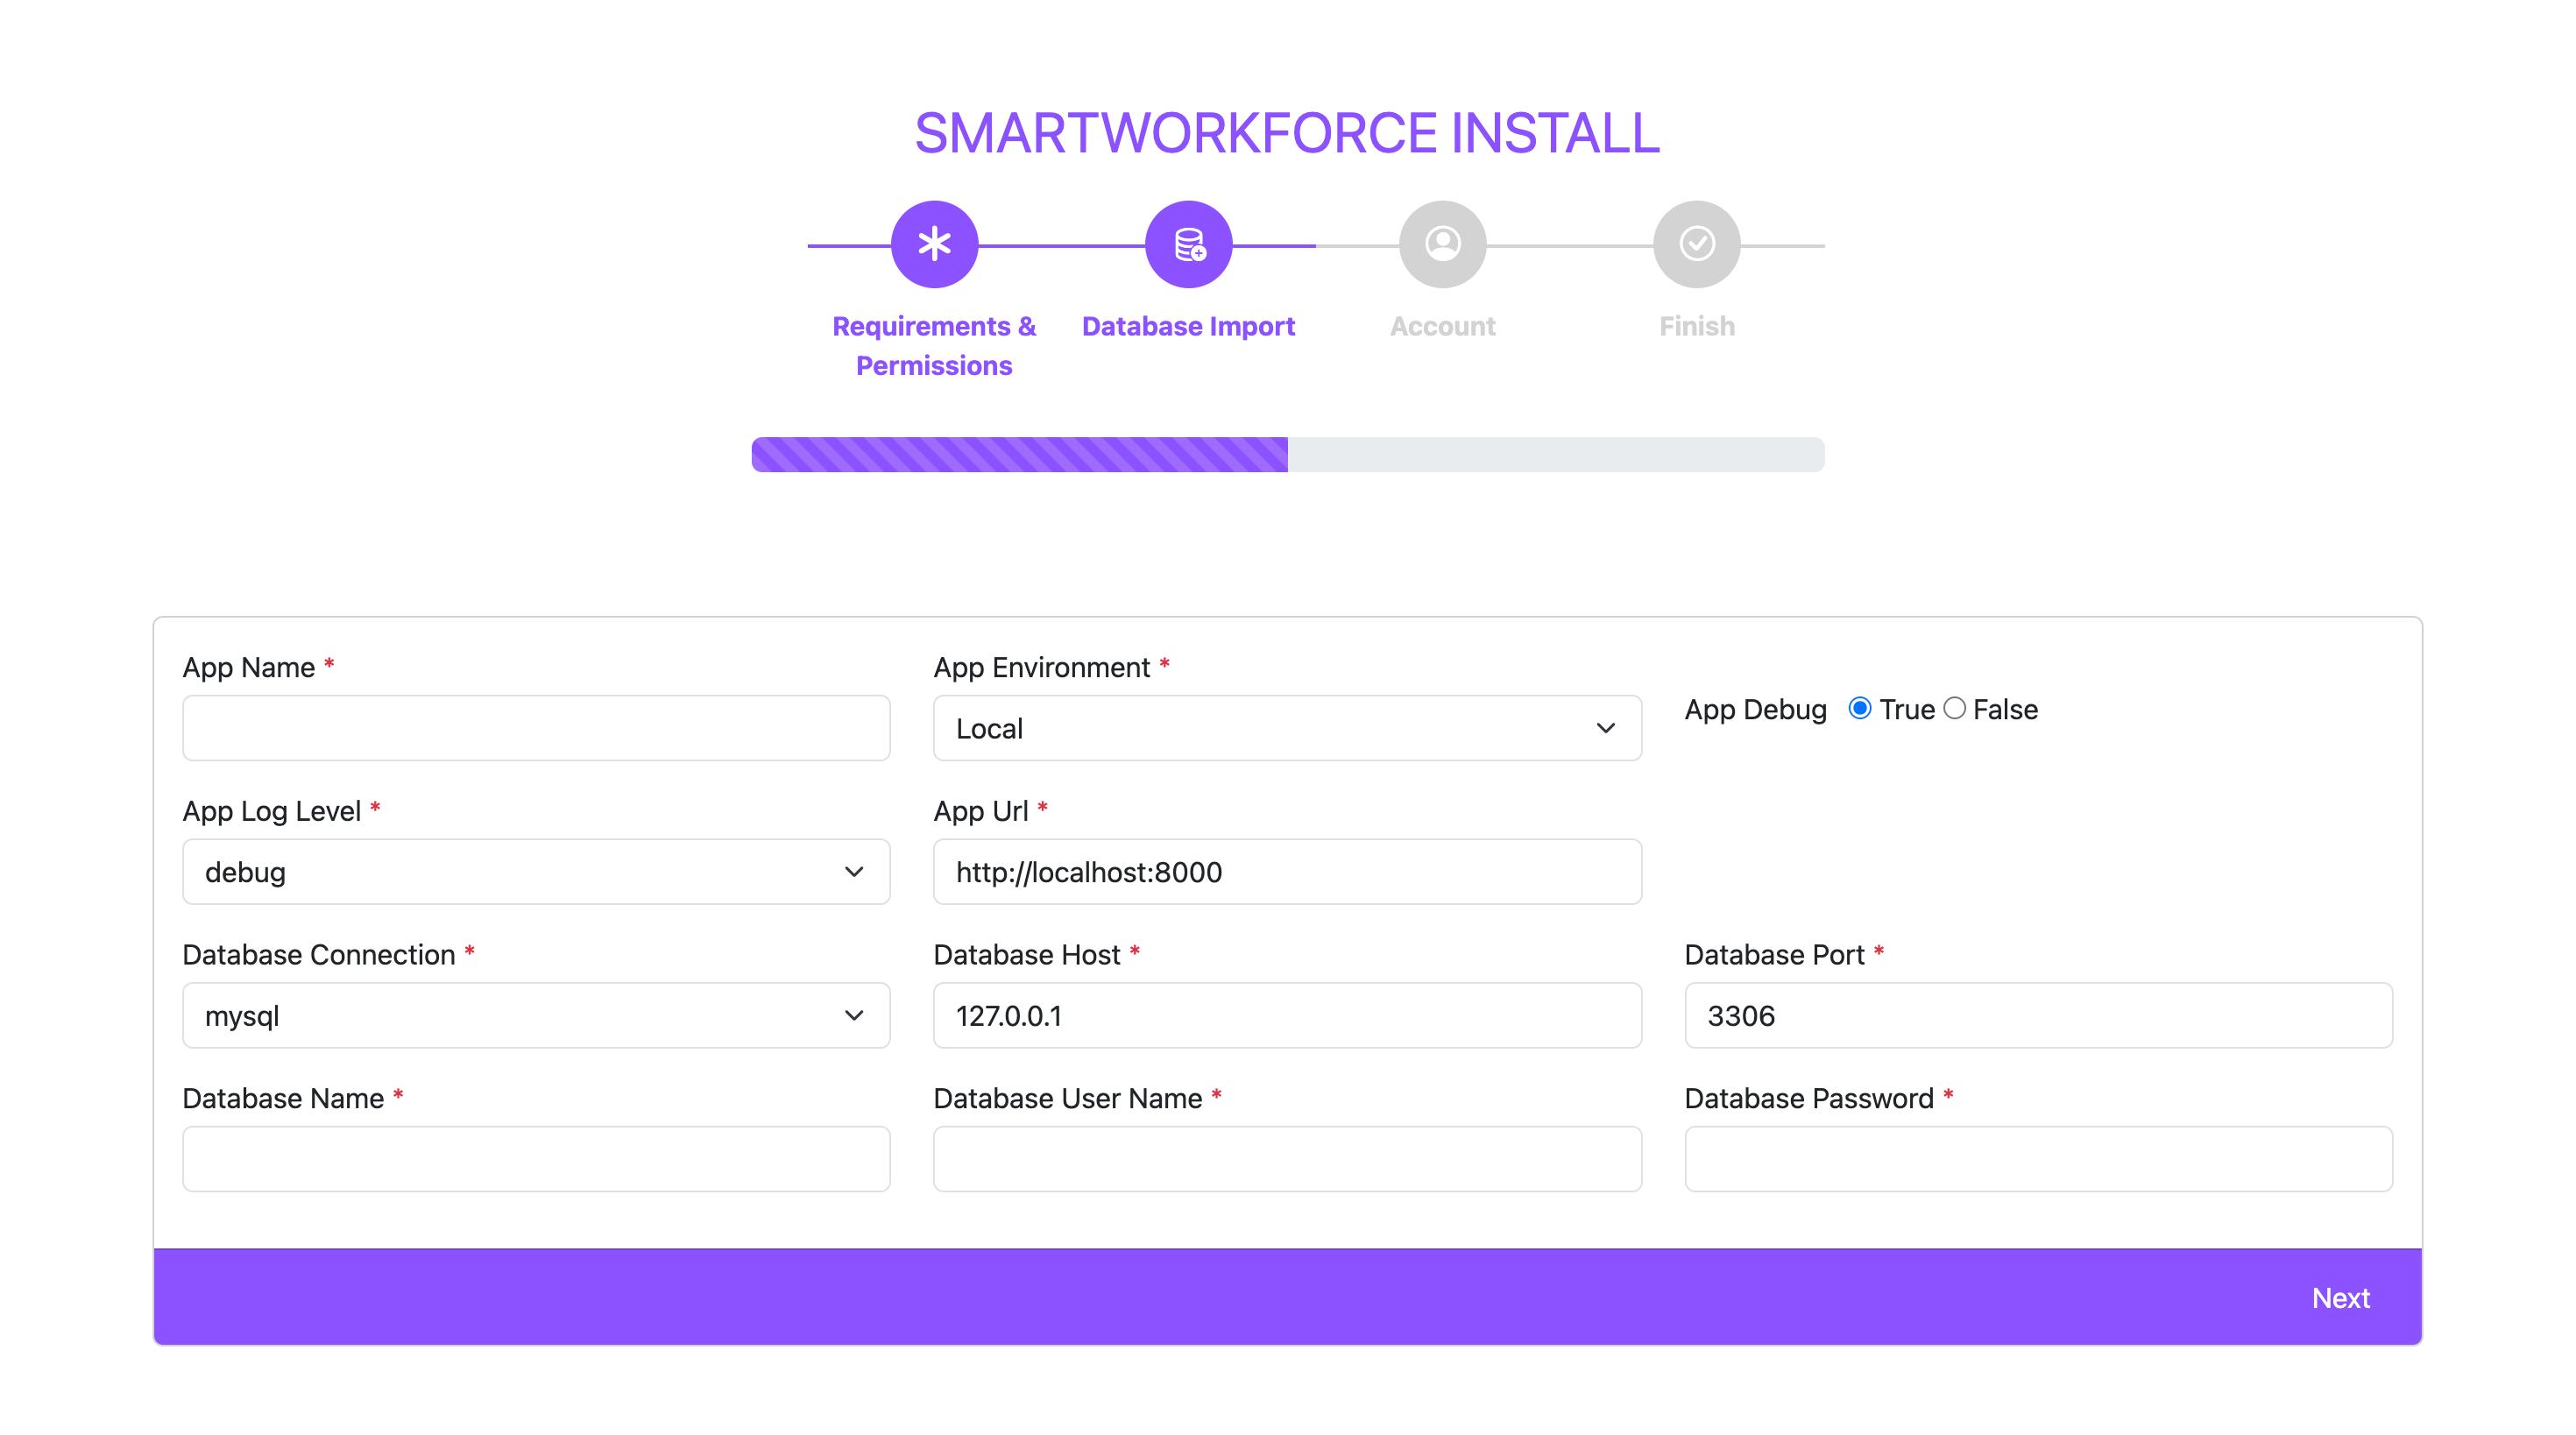
2. Database Import
In this step, you'll configure the application settings:
App Name: Enter the name of your application.
App Environment: Choose the appropriate environment (e.g., "Production"
or "Local").
Suggestion: If you are in production, select No for "Debug Mode."
App URL: The system will default to the URL where you installed it, but
if it's incorrect, you can manually set it here.
For Database Connection:
Set the Connection Type to MySQL.
The Database Host will generally be 127.0.0.1 (default on most
servers), but if your host differs, make sure to adjust it.
The Database Port is typically 3306, but again, adjust if your
server uses a different port.
Enter the following information you configured earlier:
Database Username
Database Password
Database Name
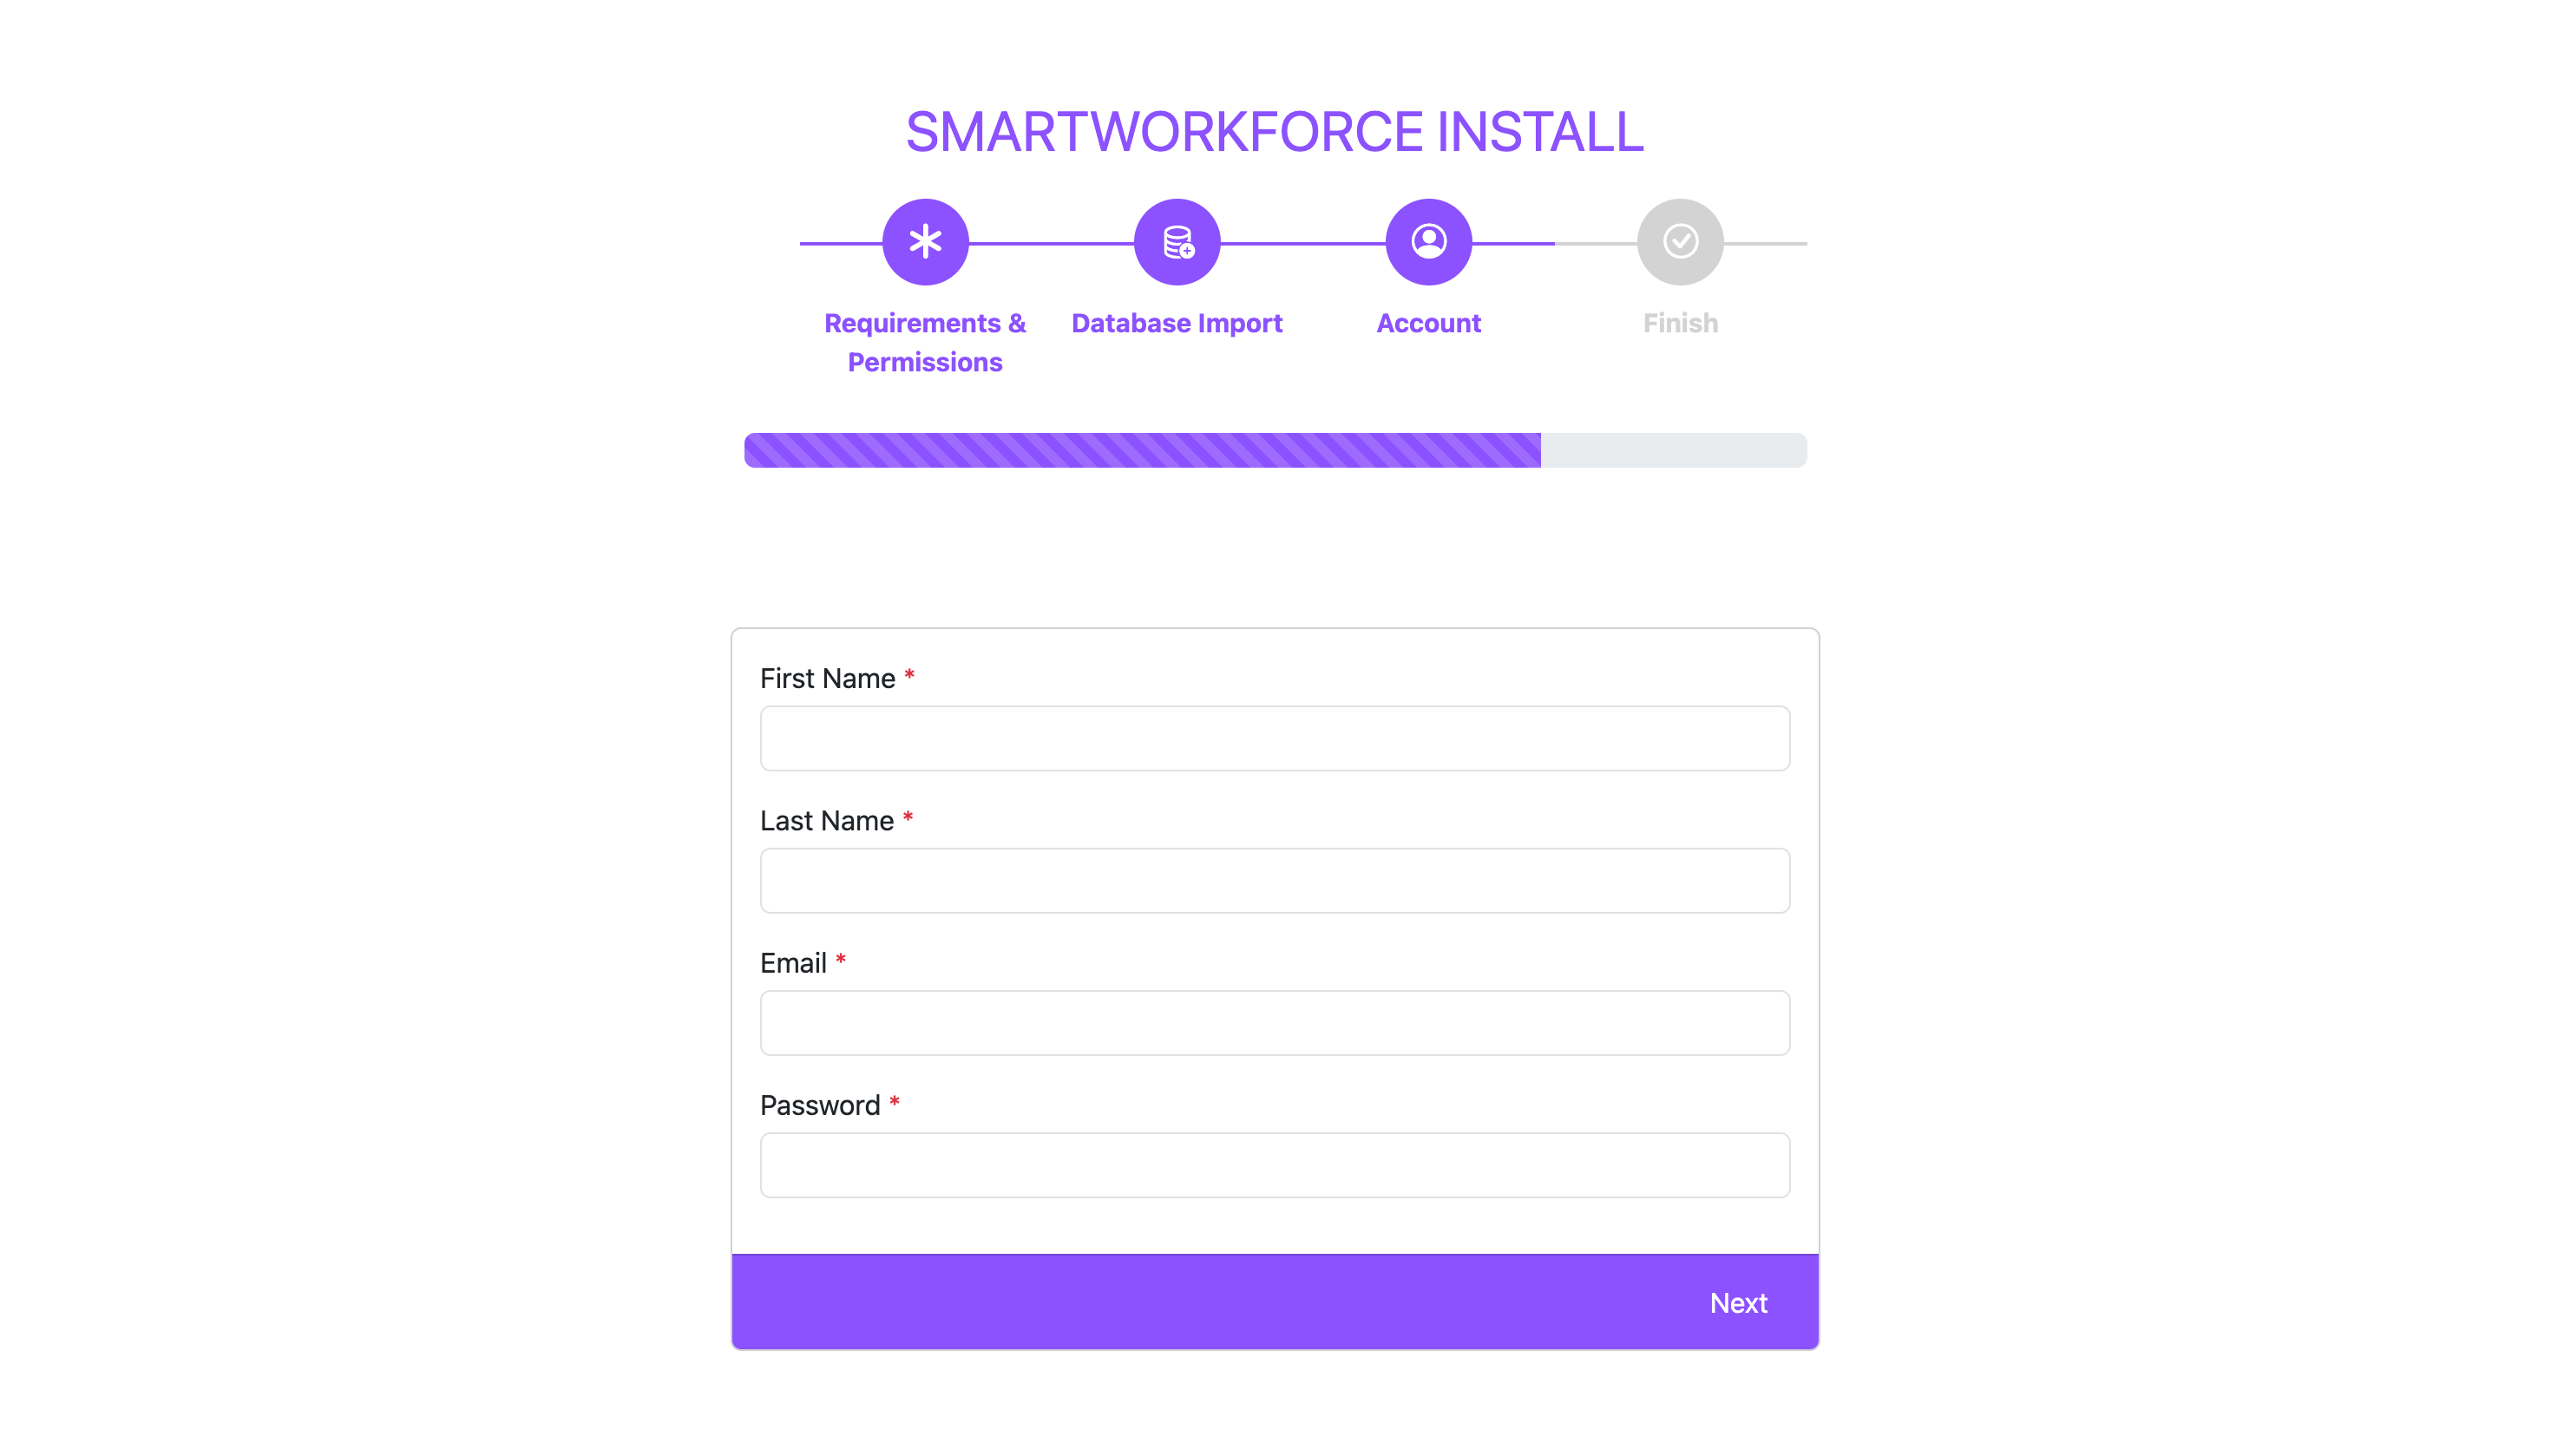
3. Create Admin Account
Next, you will need to create a super admin account to manage the system.
First Name
Last Name
Email
Password
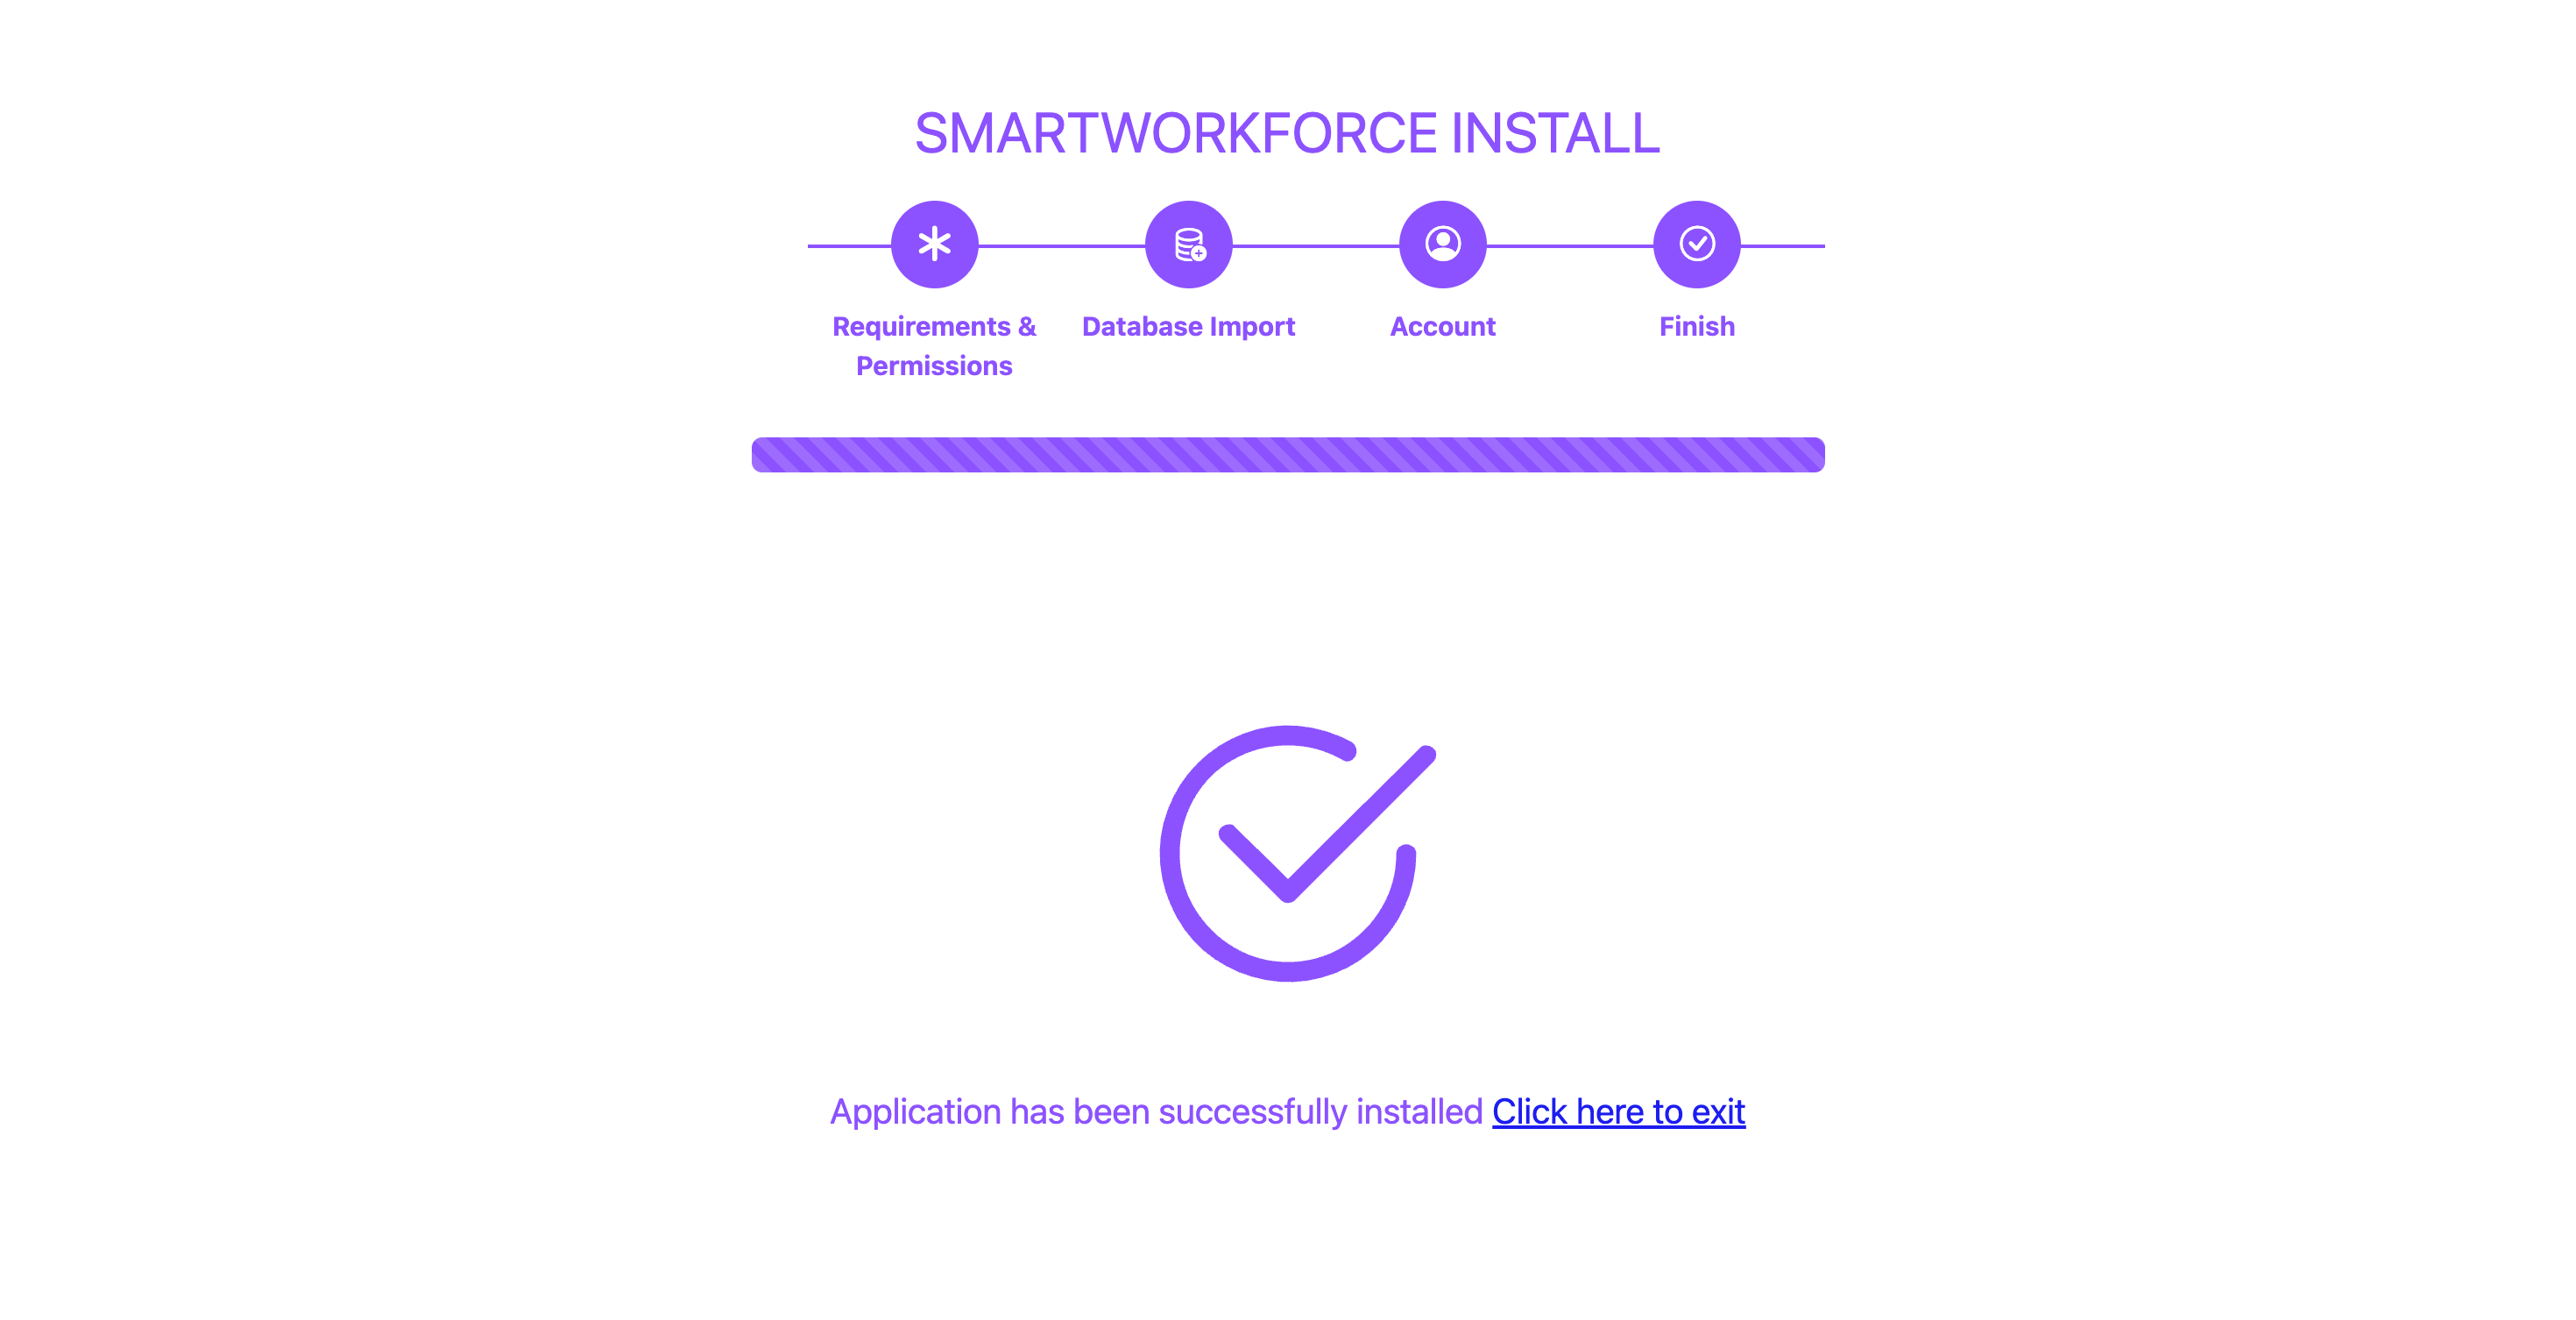
Installation Step Finish
Once all steps are completed, you’ll see a “Finish” screen confirming that
your configuration is set up. Now, you can access the SmartWorkForce System
and begin managing your projects, attendance, and employee data.
Updating to New Version
Download the latest version from your CodeCanyon Account.
Double click the downloaded file to extract it.
Copy smart-work-force.zip file to the root of your server (same place where files were uploaded during installation).
Delete "vendor" directory from your server (So there are no old unused files left from previous versions).
Extract the smart-work-force.zip file into the root directory to "new" folder.
Select All File and folder except .env and move to run directory
Important : Do not move .env file
"Login" with your admin credentials and it will hardly redirect you to change logs.
Verify your logs and click on Install Your Release.
If you've still doubt follow this steps in given the video.
Admin Features
Admin have all the rights throughtout the whole system information to access
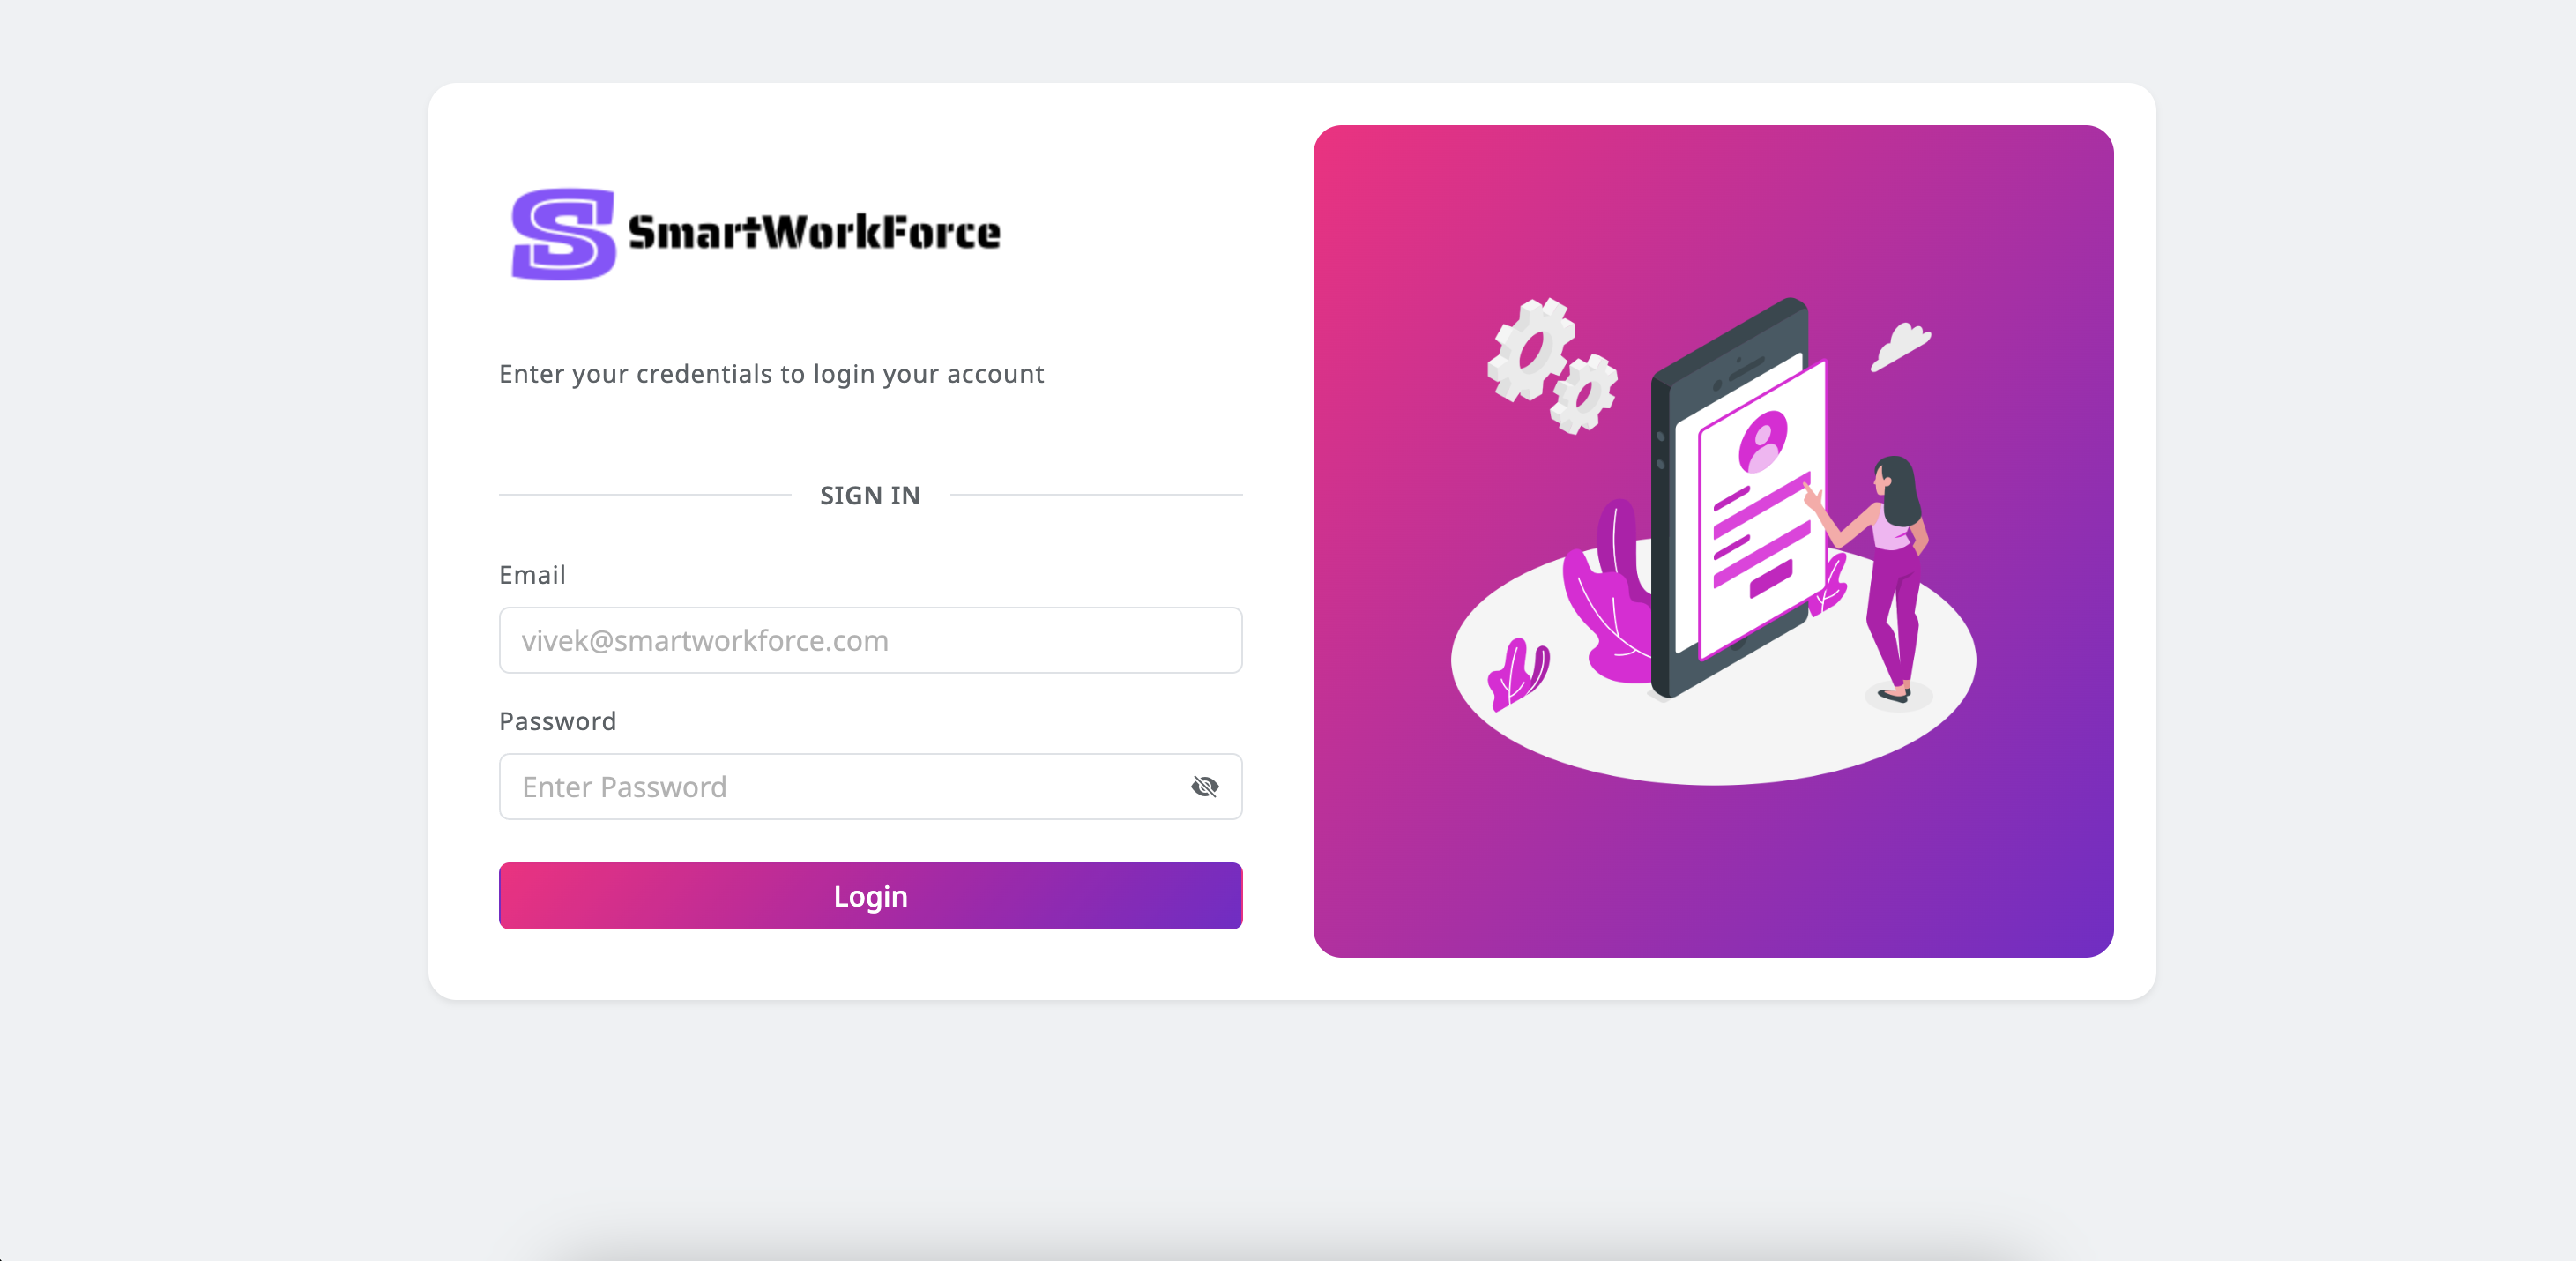
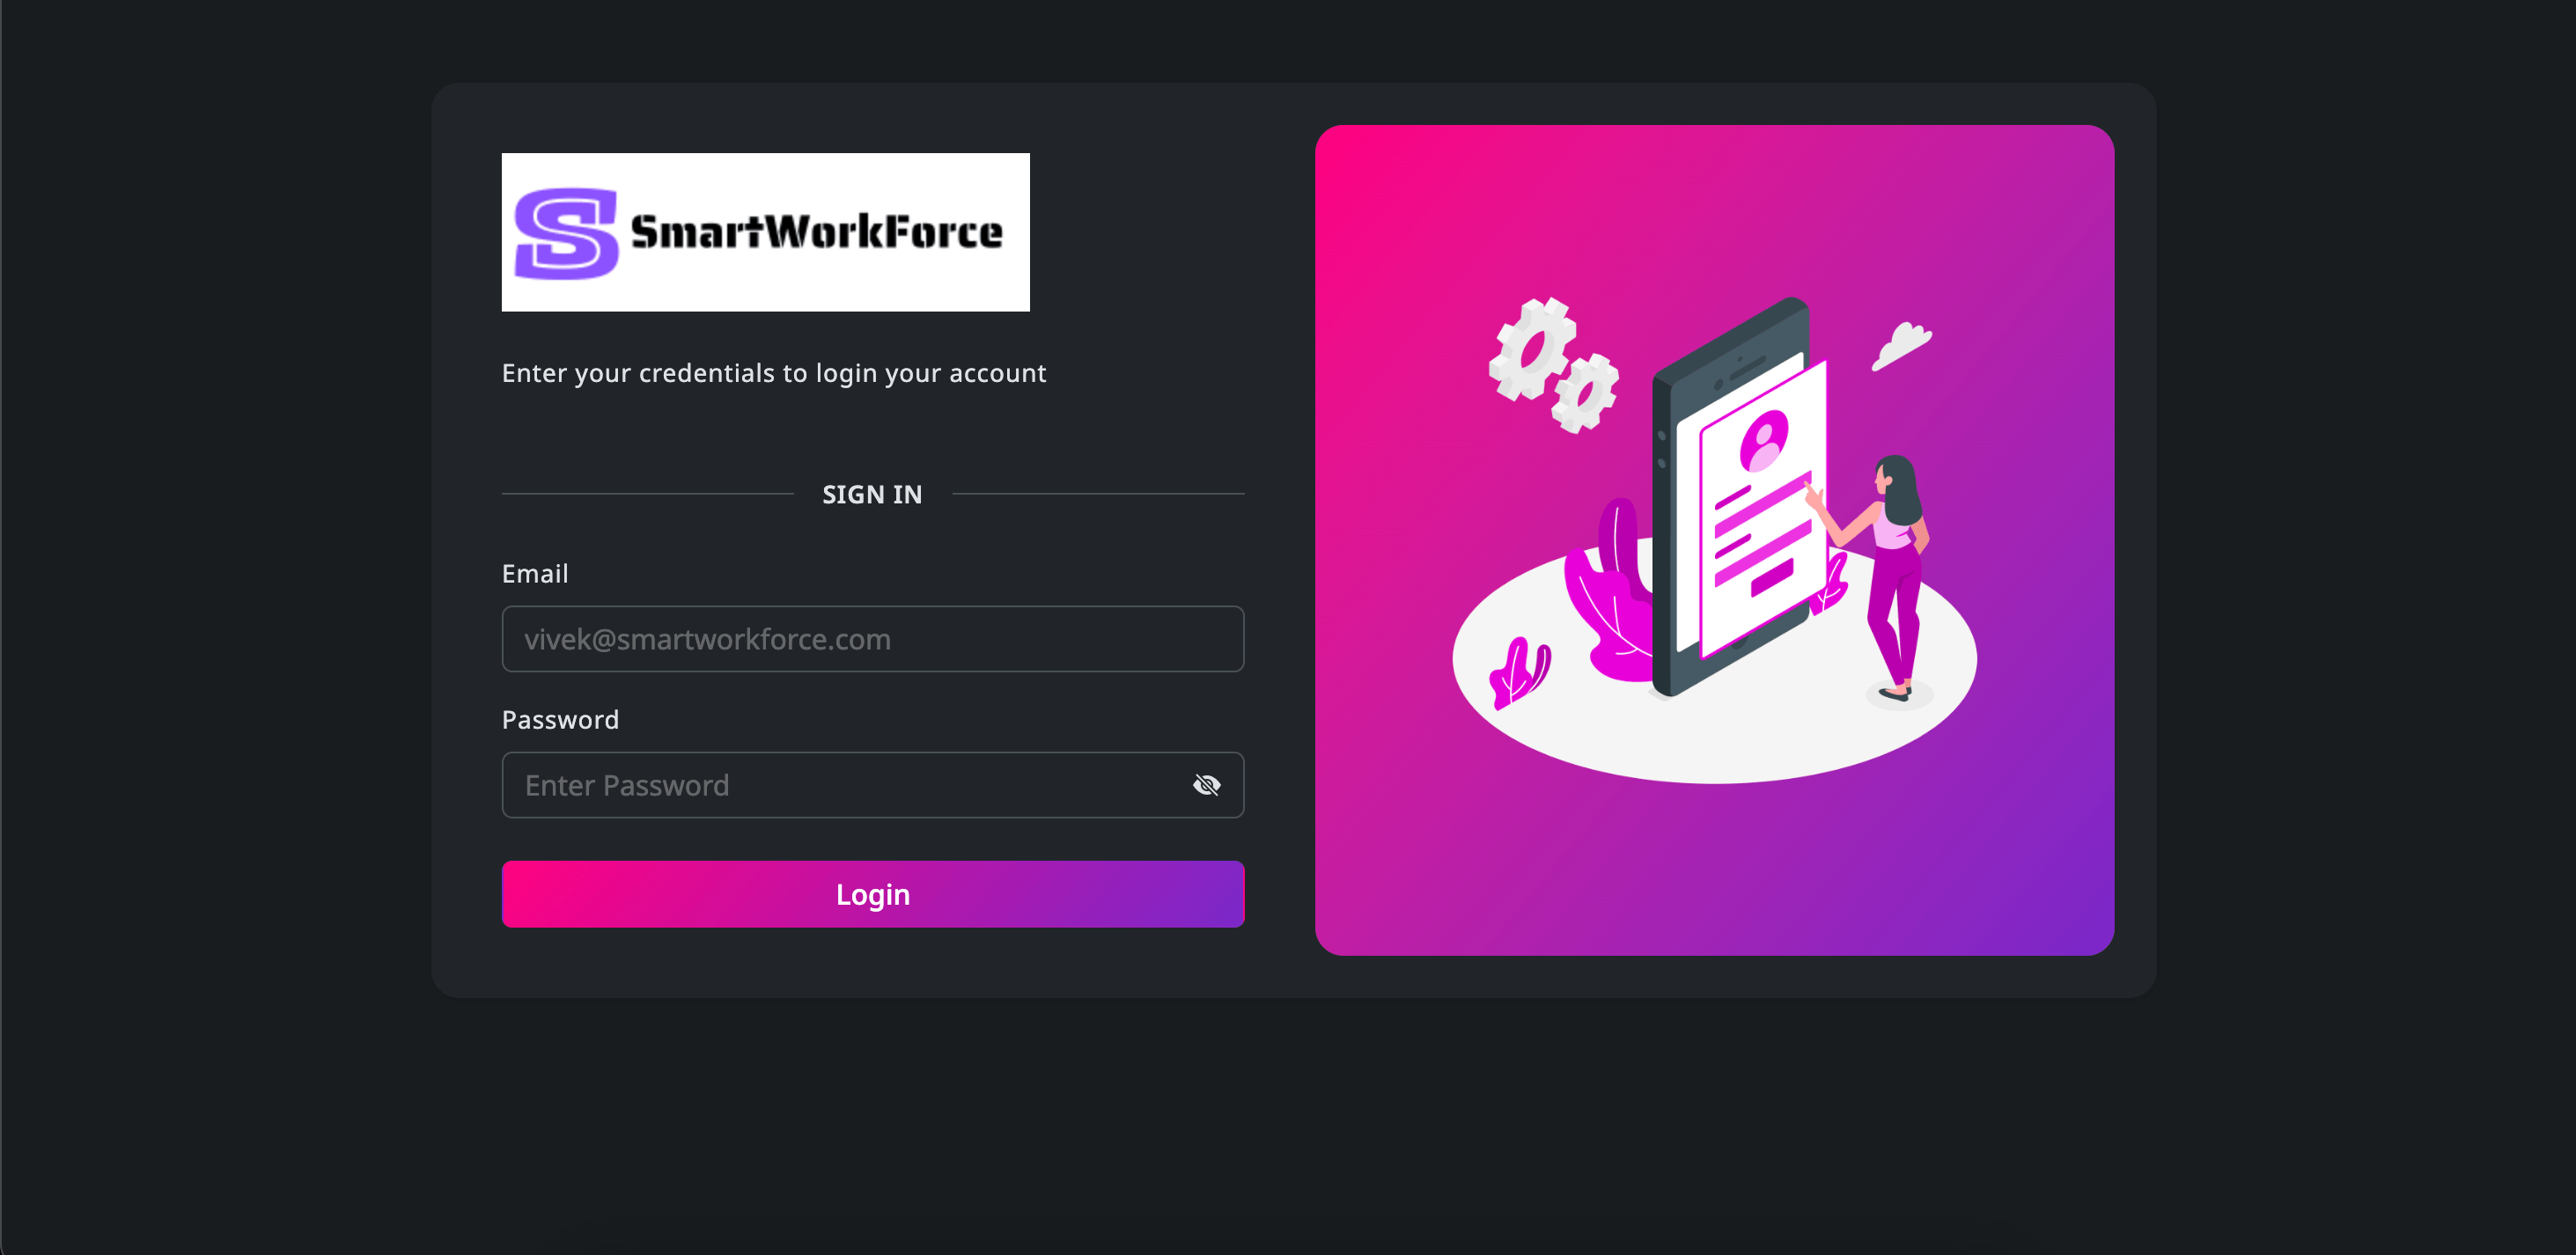
Authentication
This is a basic authentication page where the admin can log in. It includes
a login form for secure access. Validation is also implemented to ensure
correct credentials are entered.
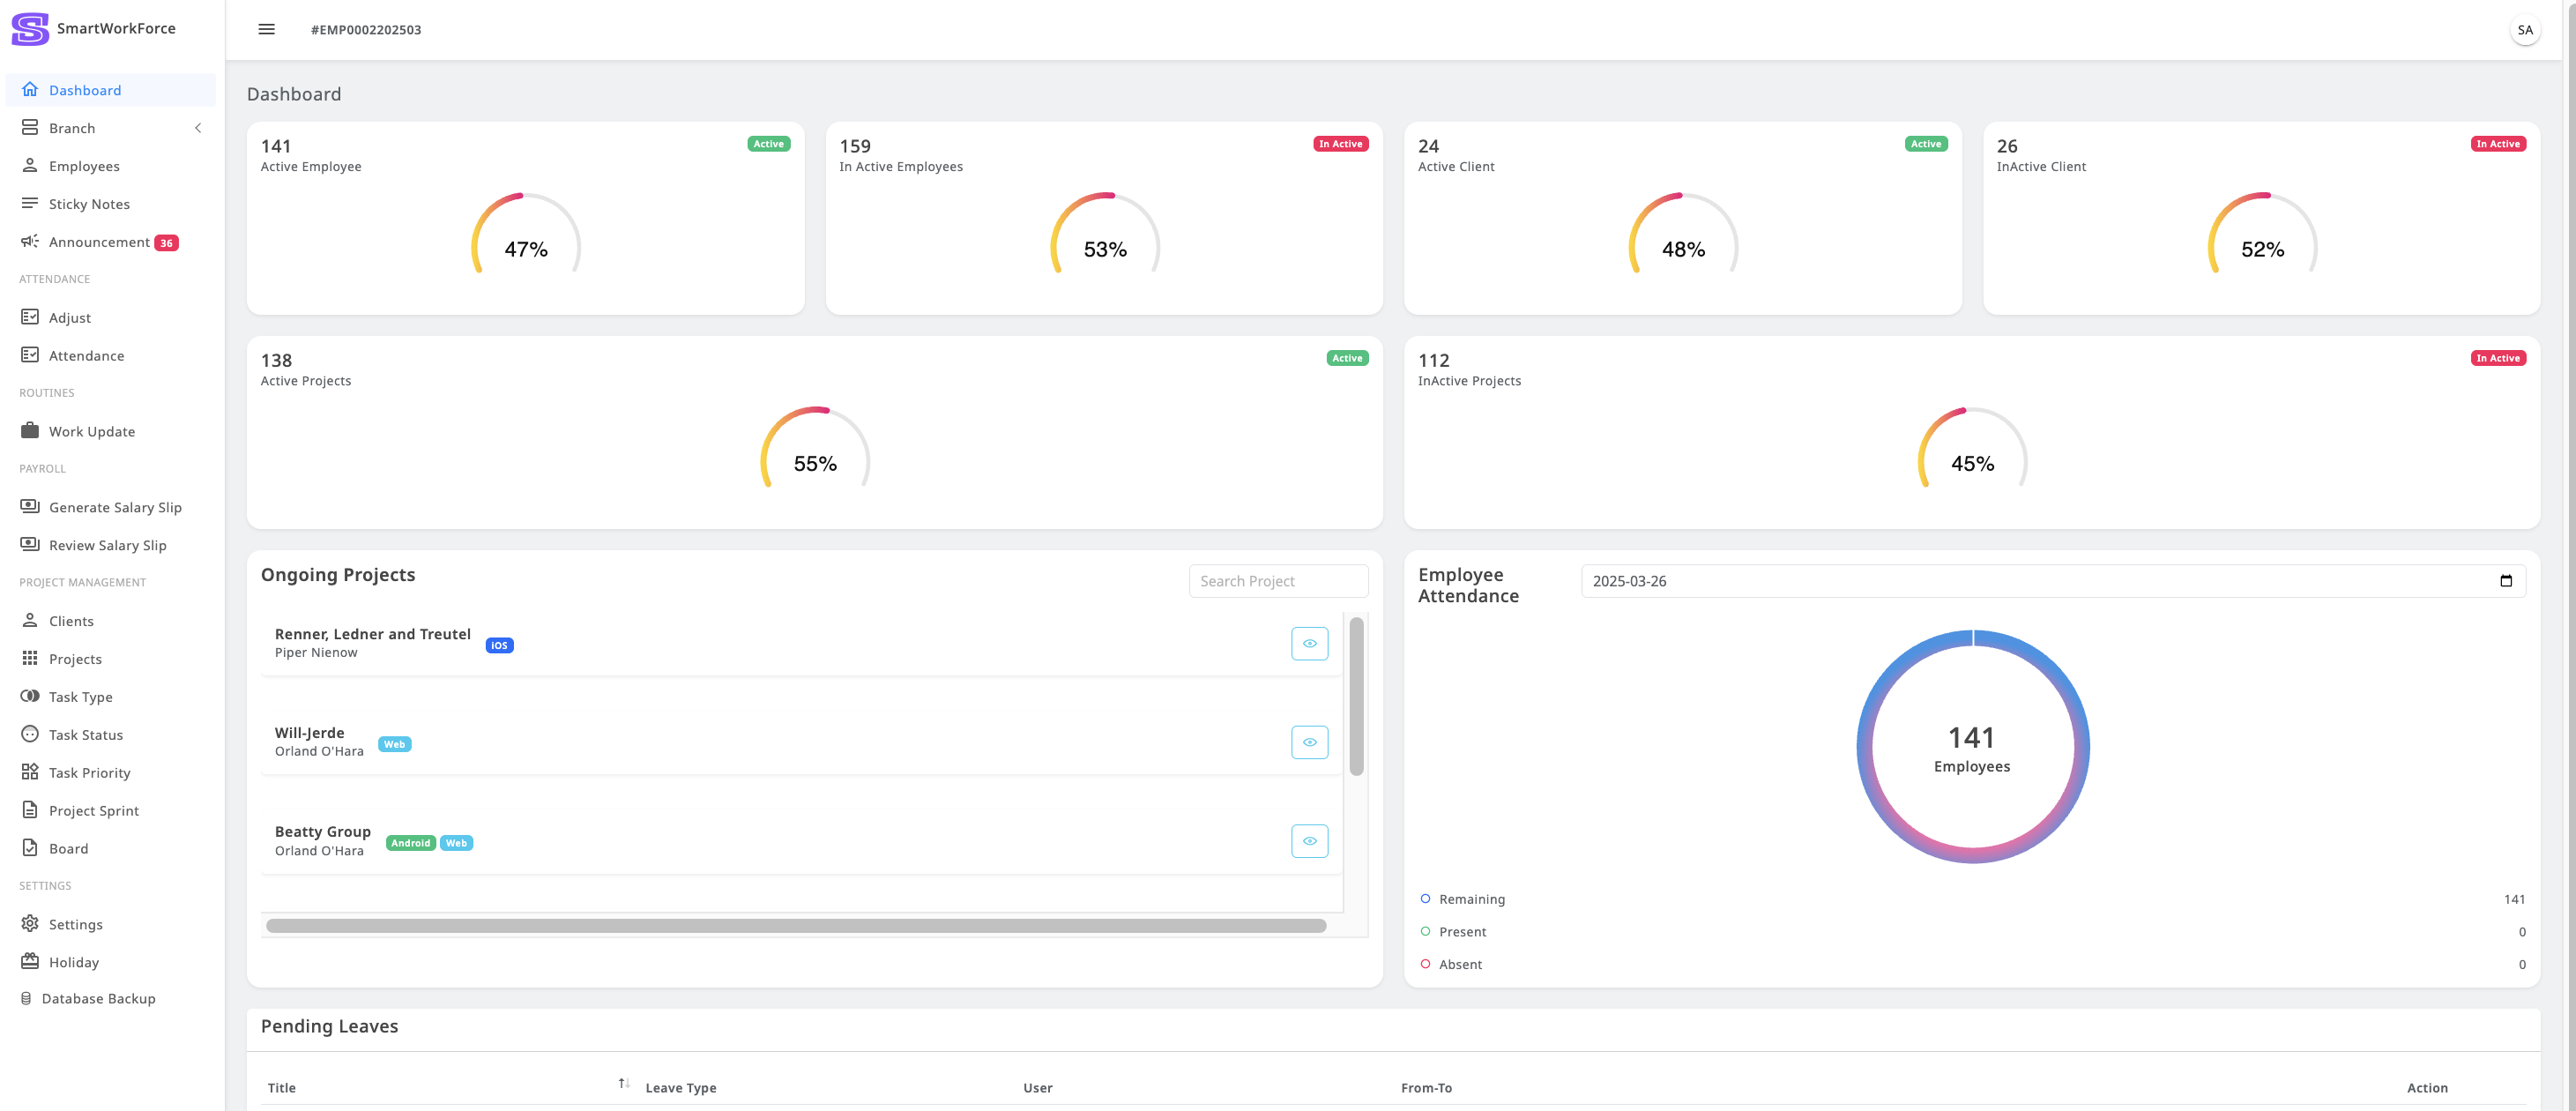
Dashboard
The SmartWorkForce dashboard provides admins with a comprehensive overview
of key system metrics and employee activities. Key features include:
Project and Client Overview :
Admins can view the number of active and inactive projects, clients,
and employees.
Ongoing Projects :
A detailed list of ongoing projects, including their status and
other relevant details.
Attendance Tracking :
A visual attendance diagram displays the number of present and
absent employees, as well as whether attendance has been taken for
the day.
Leave Management:
Admins can view a list of employees who have applied for leave and
have the ability to accept or reject those requests.
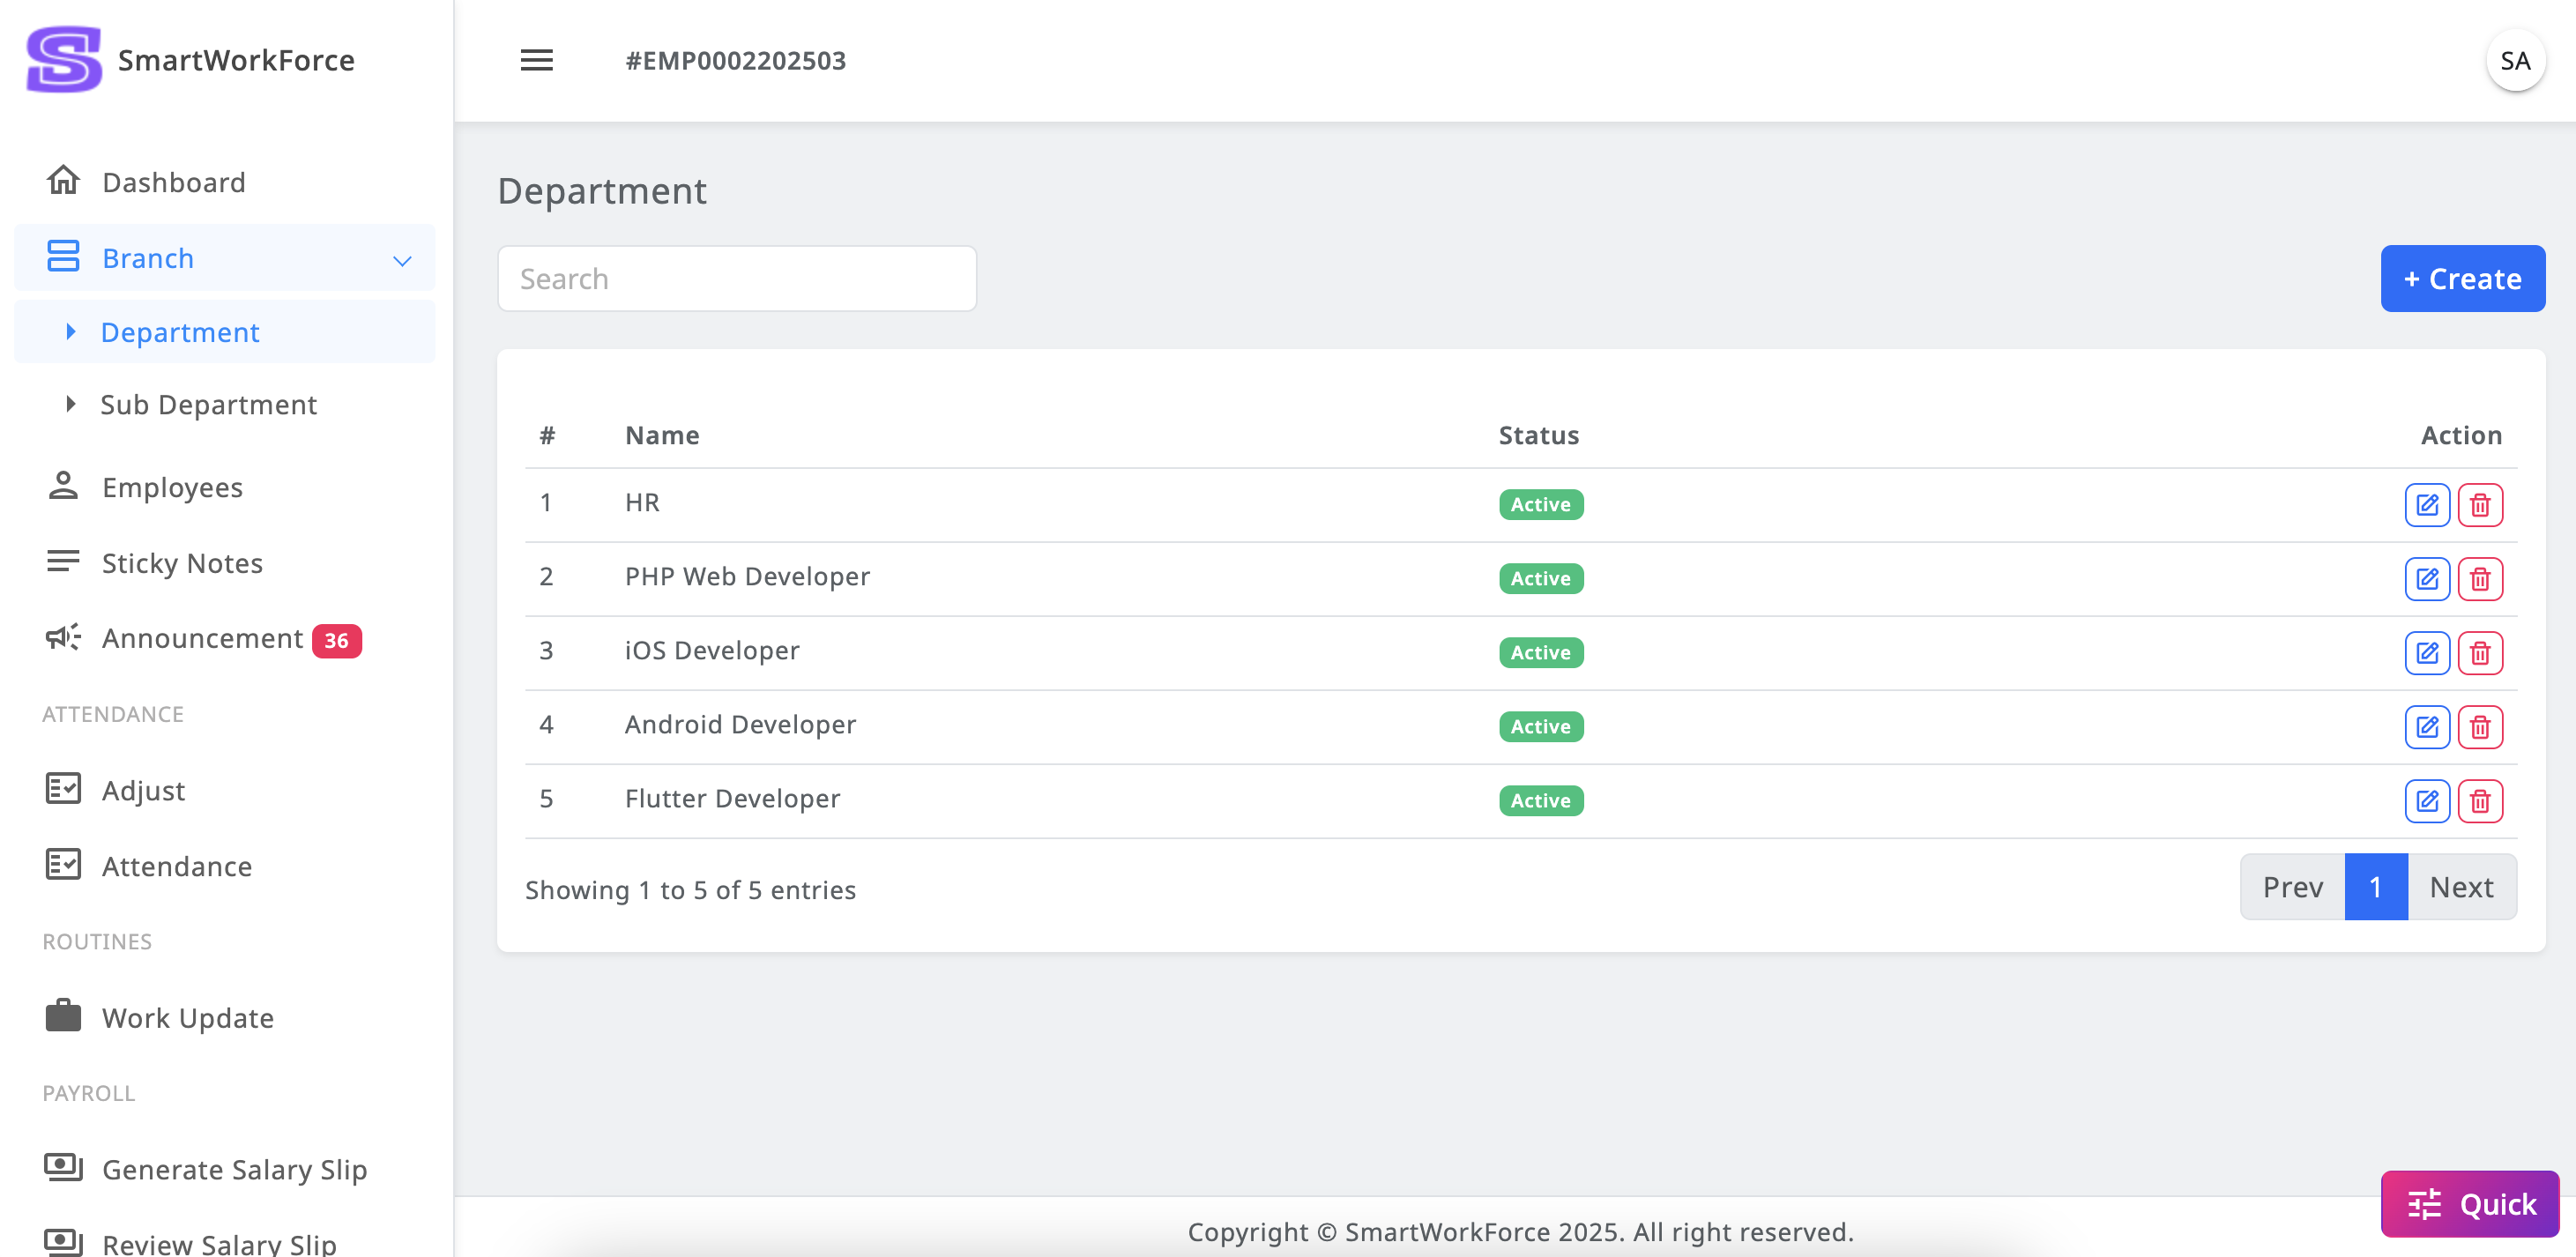
Branch : Department
SmartWorkForce admin has the ability to create new department within the
system.
They can also view a list of existing department and manage them by editing
or updating department details.
Additionally, the admin can mark department as active or inactive, providing
full control over department management within the platform.
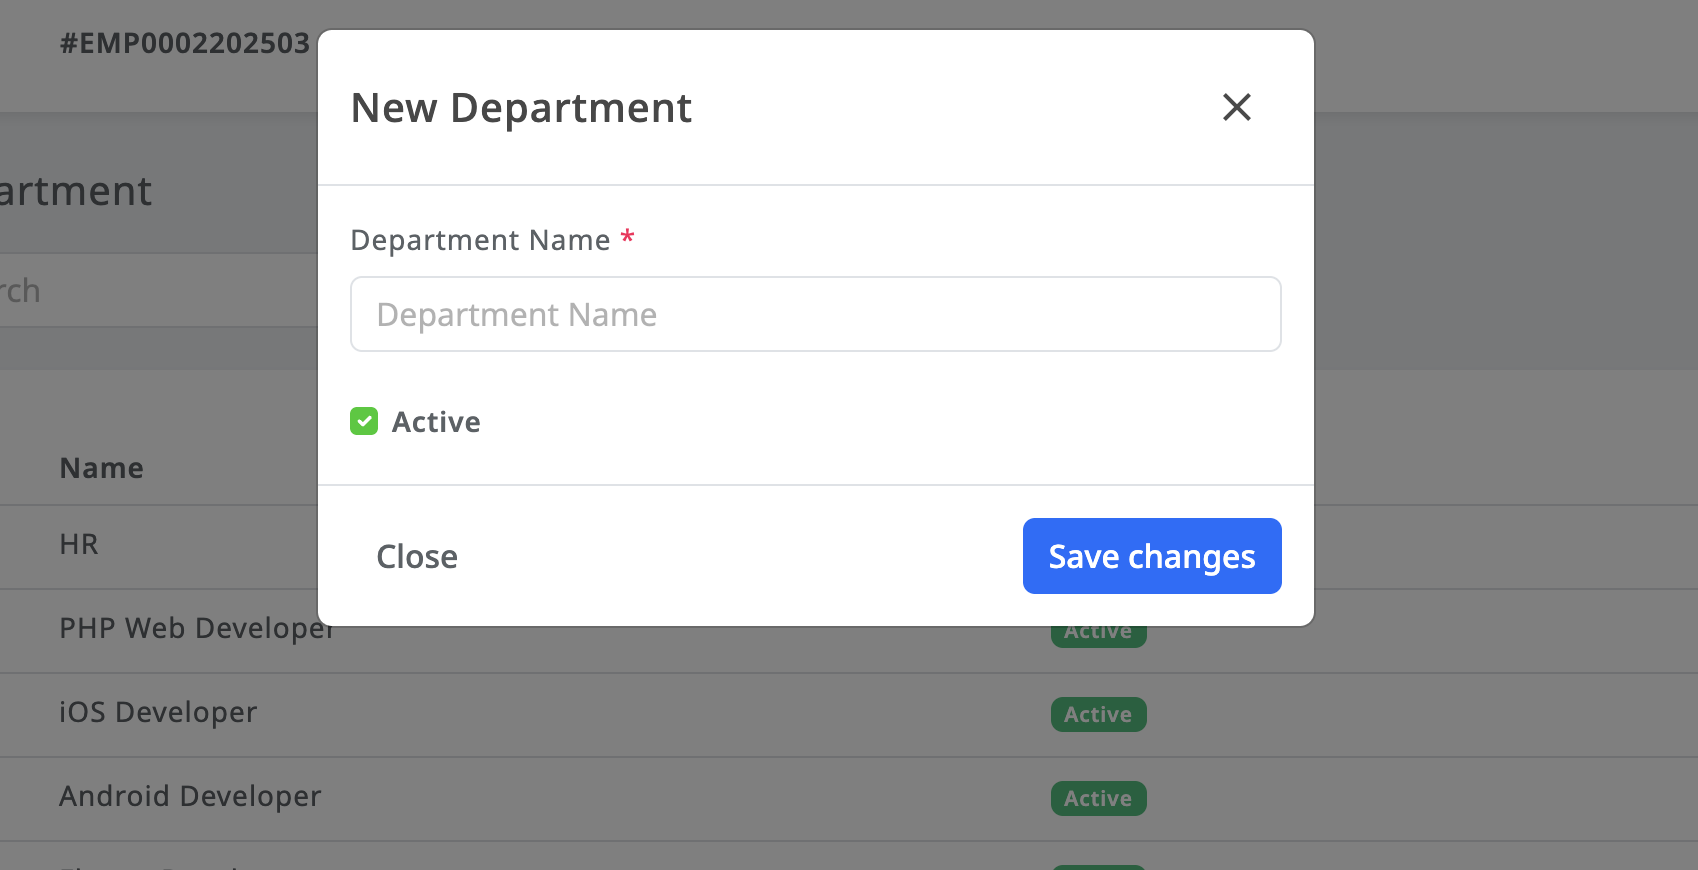
Branch : DepartmentBranch : Department Create/Edit-Update
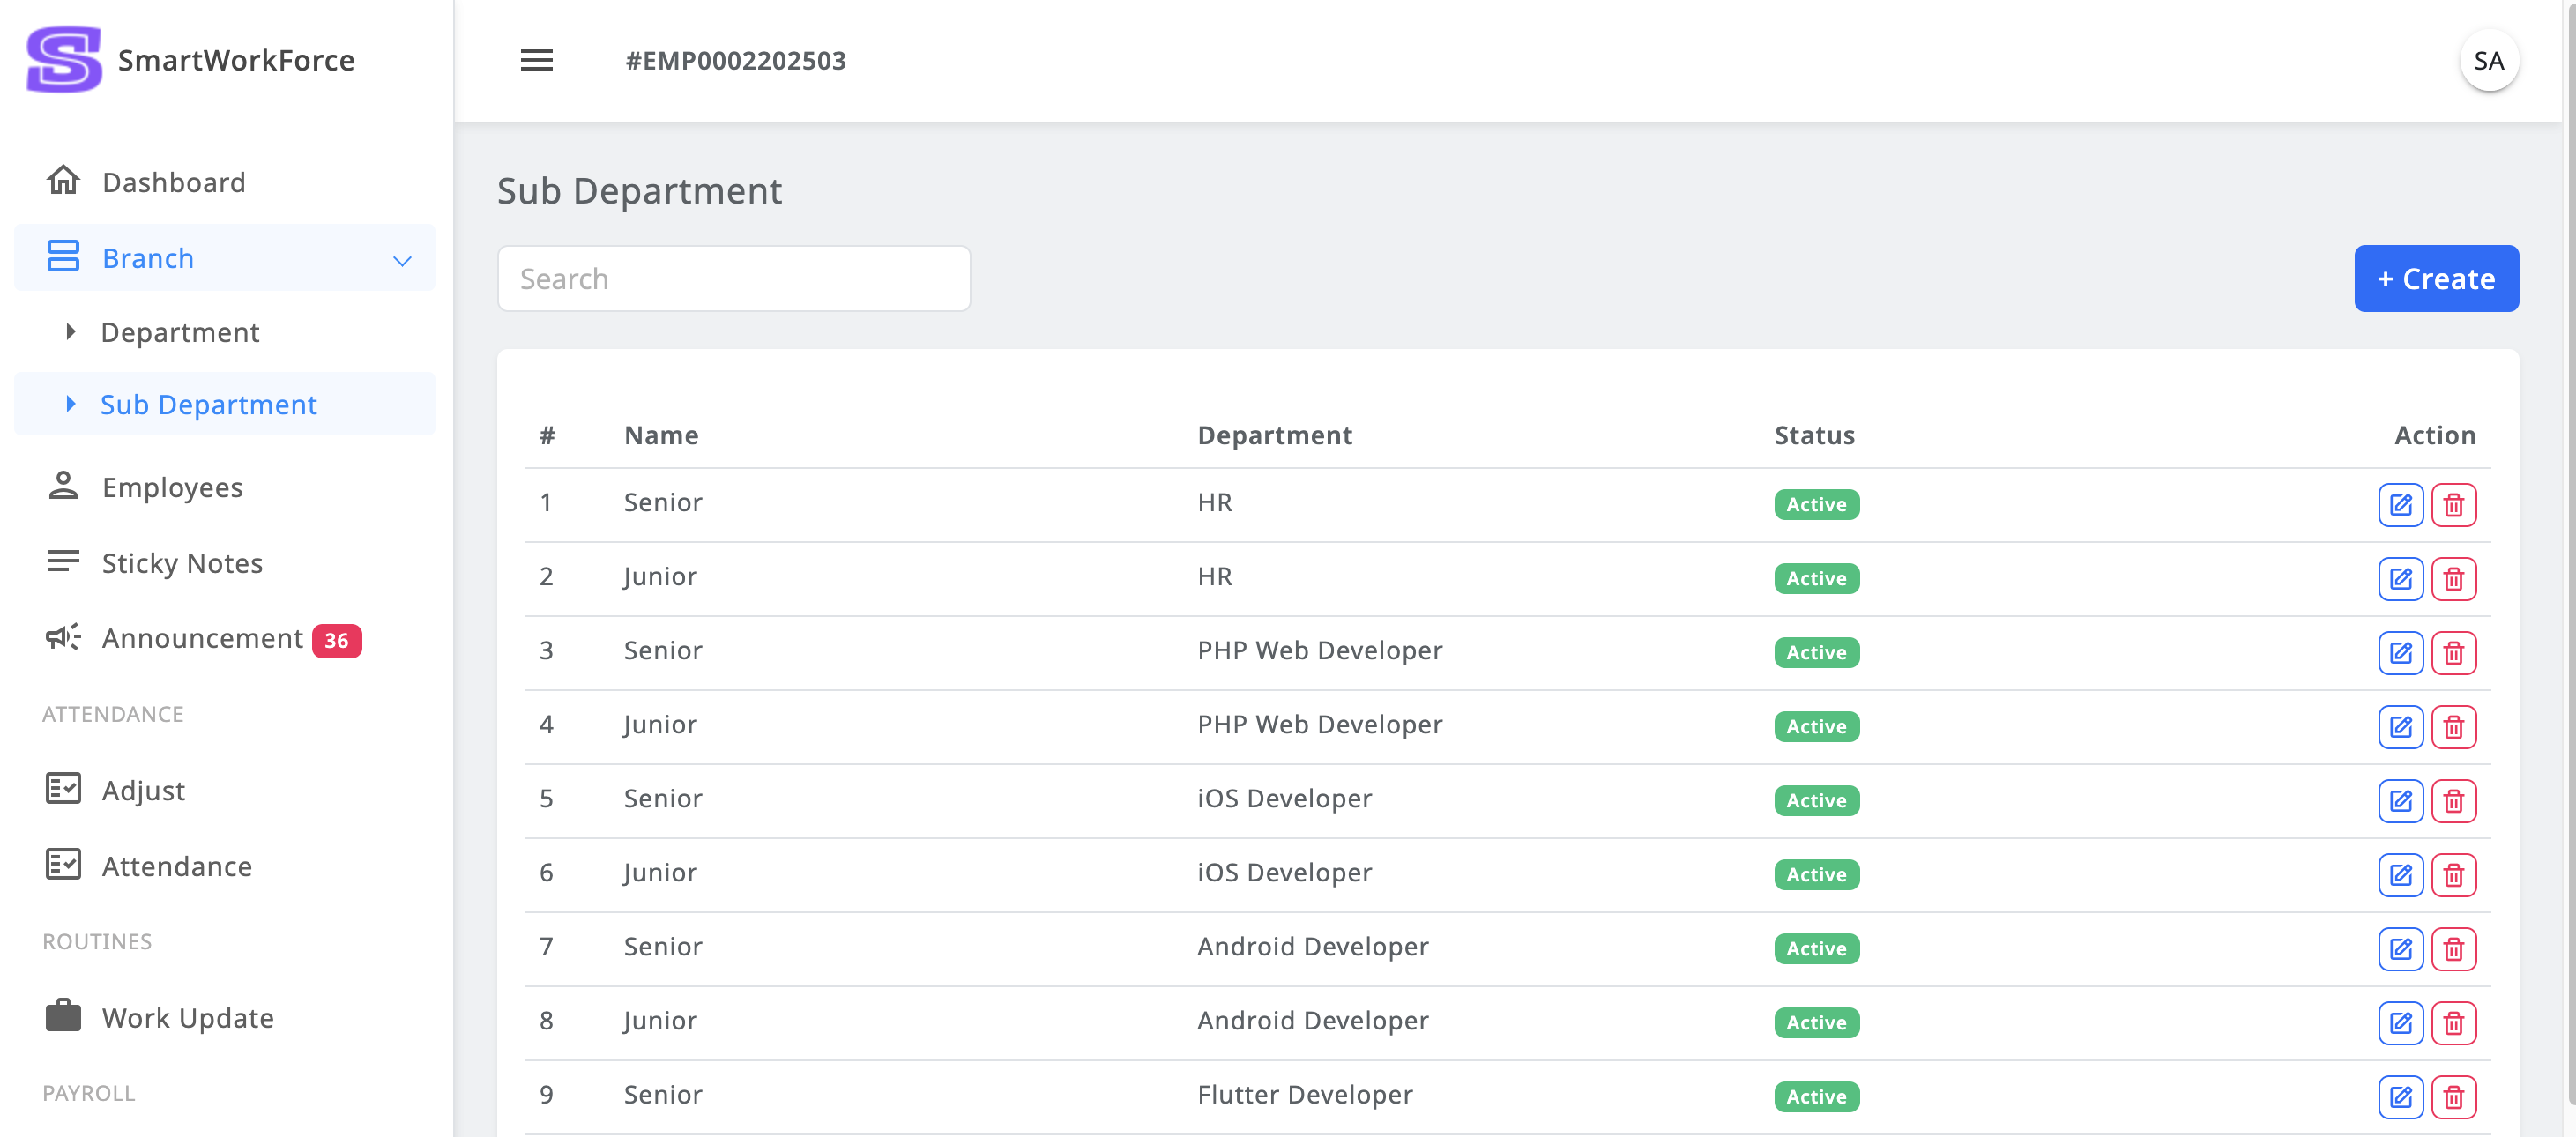
Branch : Sub Department
SmartWorkForce admin has the ability to create new sub department within the
system.
They can also view a list of existing sub department and manage them by
editing or updating sub department details.
Additionally, the admin can mark sub department as active or inactive,
providing full control over sub department management within the platform.
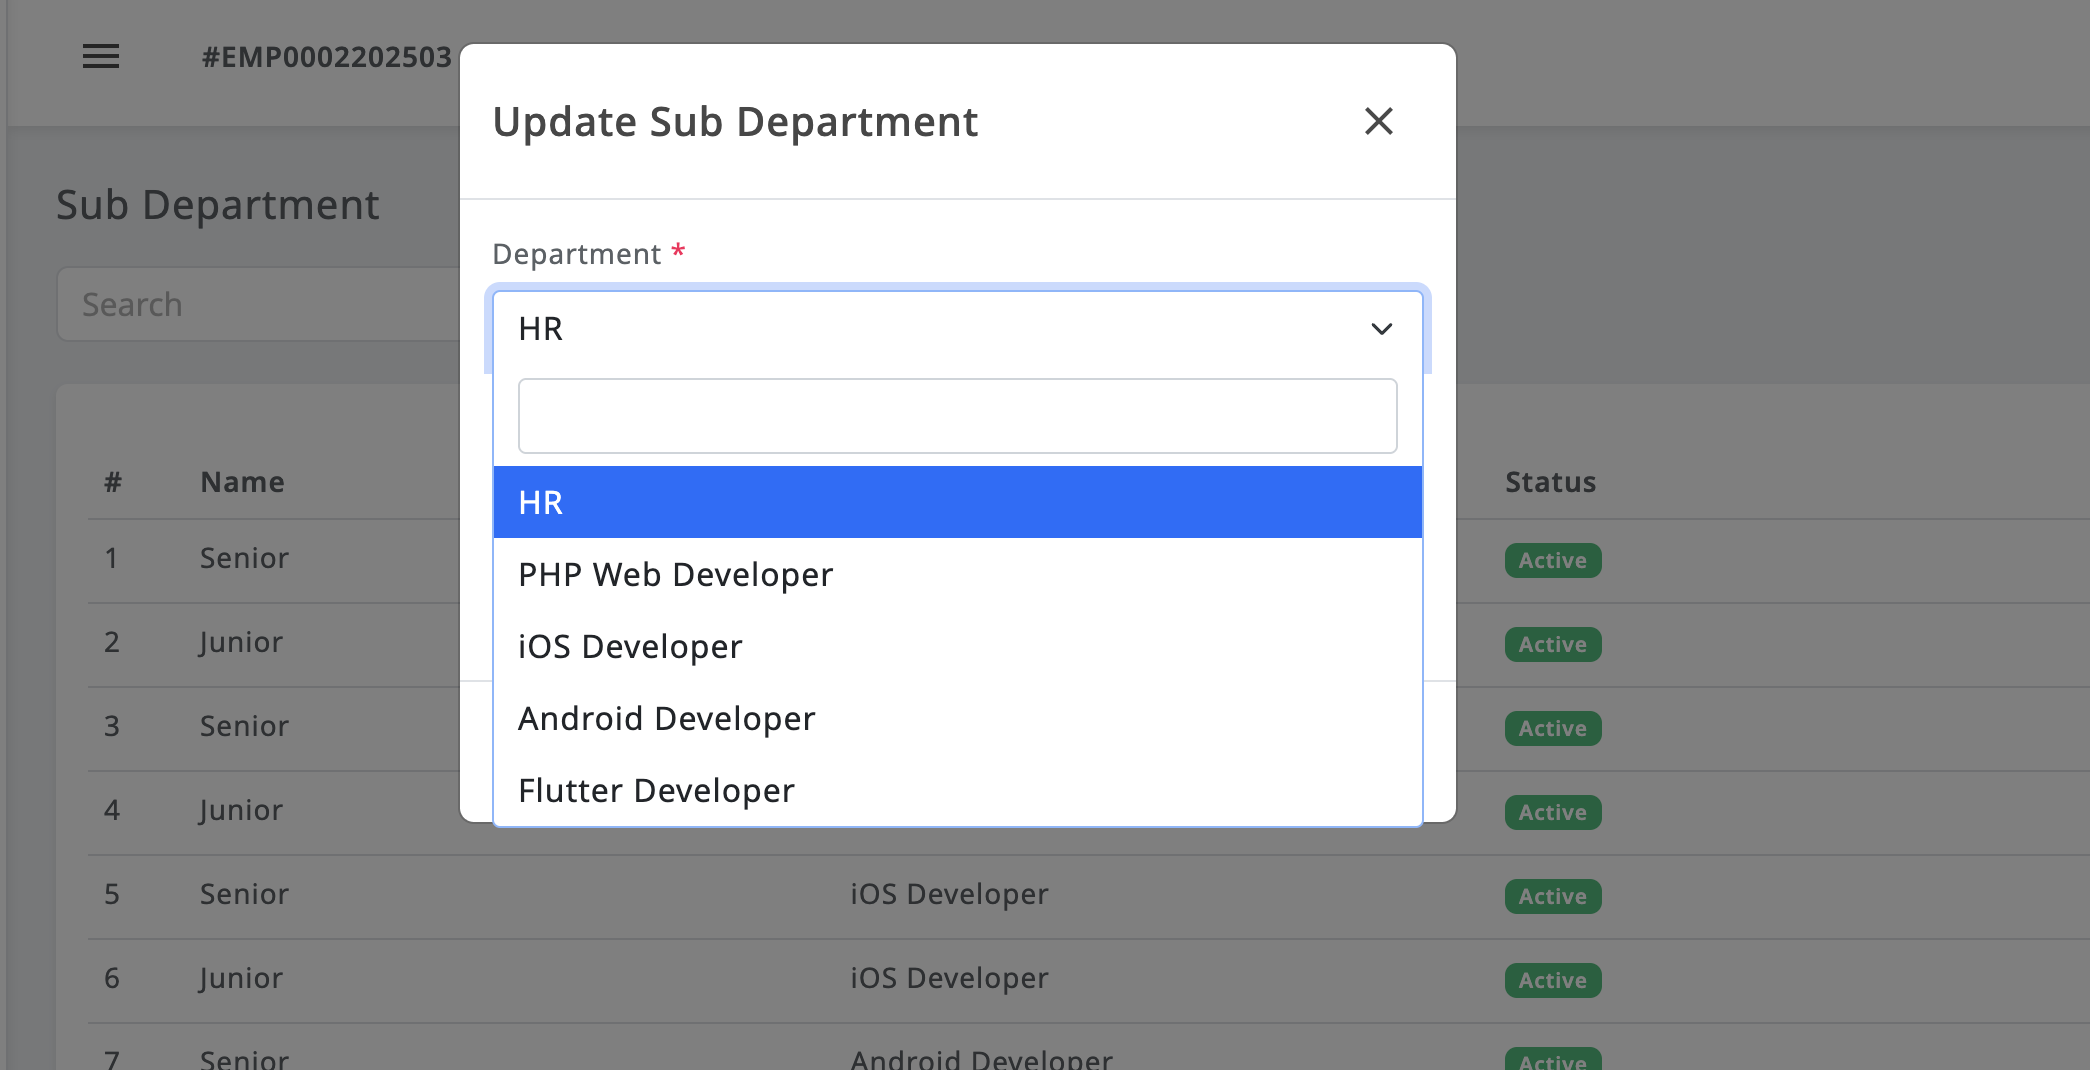
Branch : Sub DepartmentBranch : Sub Department Create/Edit-Update
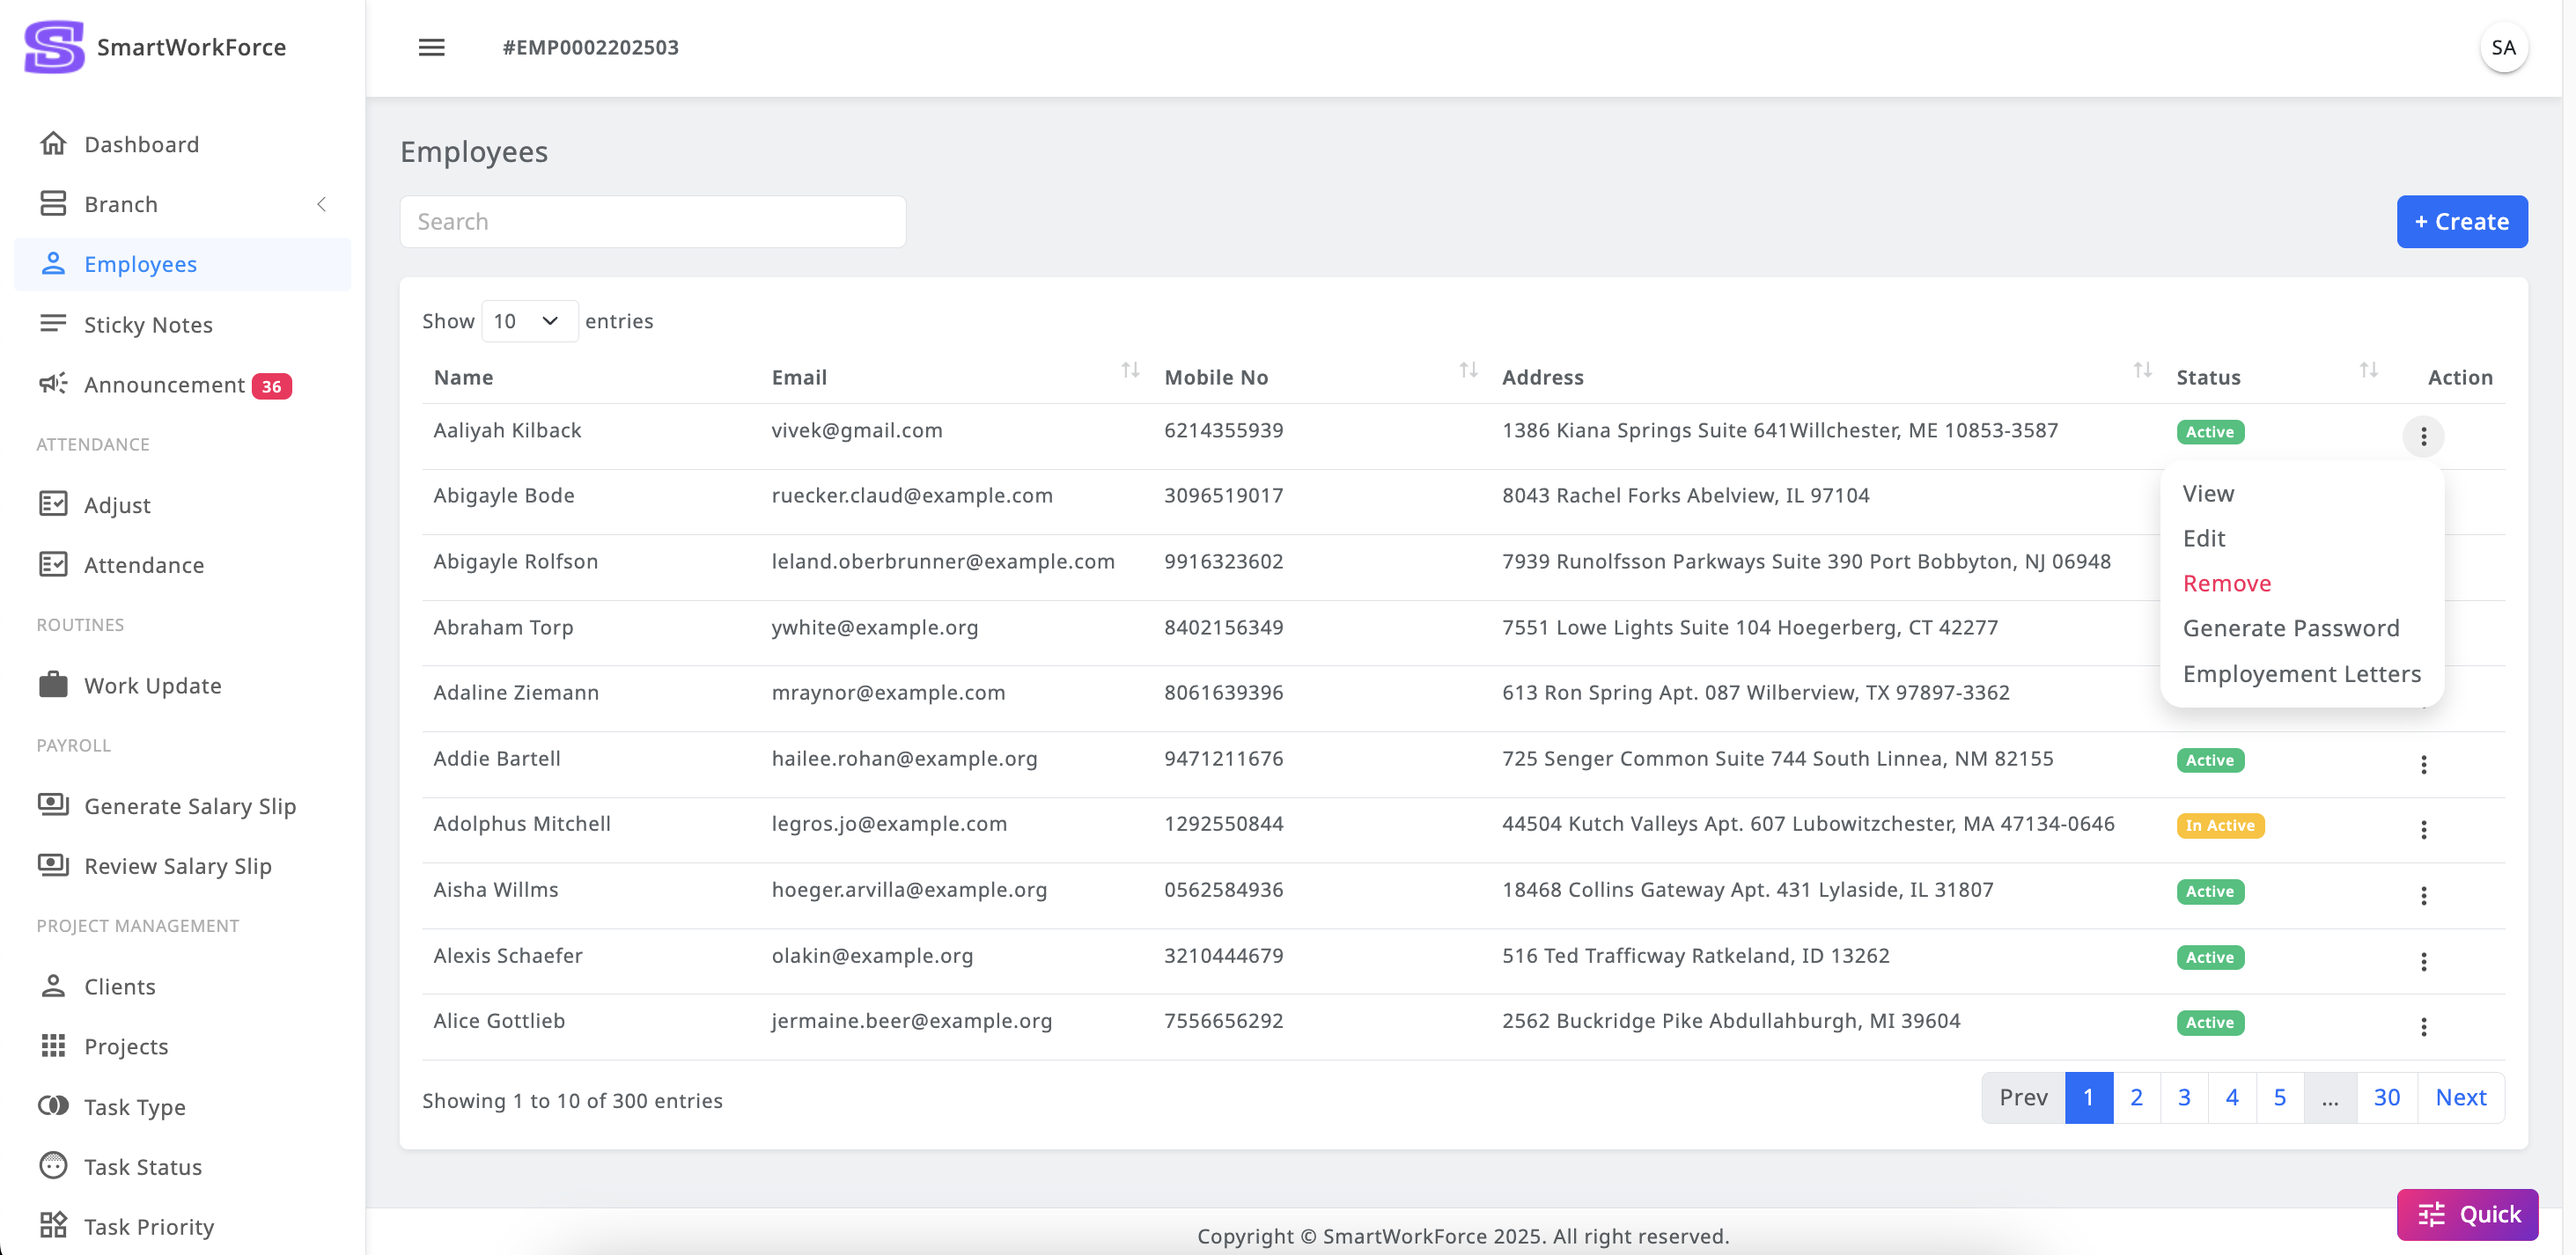
Employees
The Employee Module in SmartWorkForce provides admins with a comprehensive
set of features to manage employee information effectively.
Key functionalities include:
Employee List Management:
Admins can view a complete list of employees, with the ability to mark them
as active or inactive as needed.
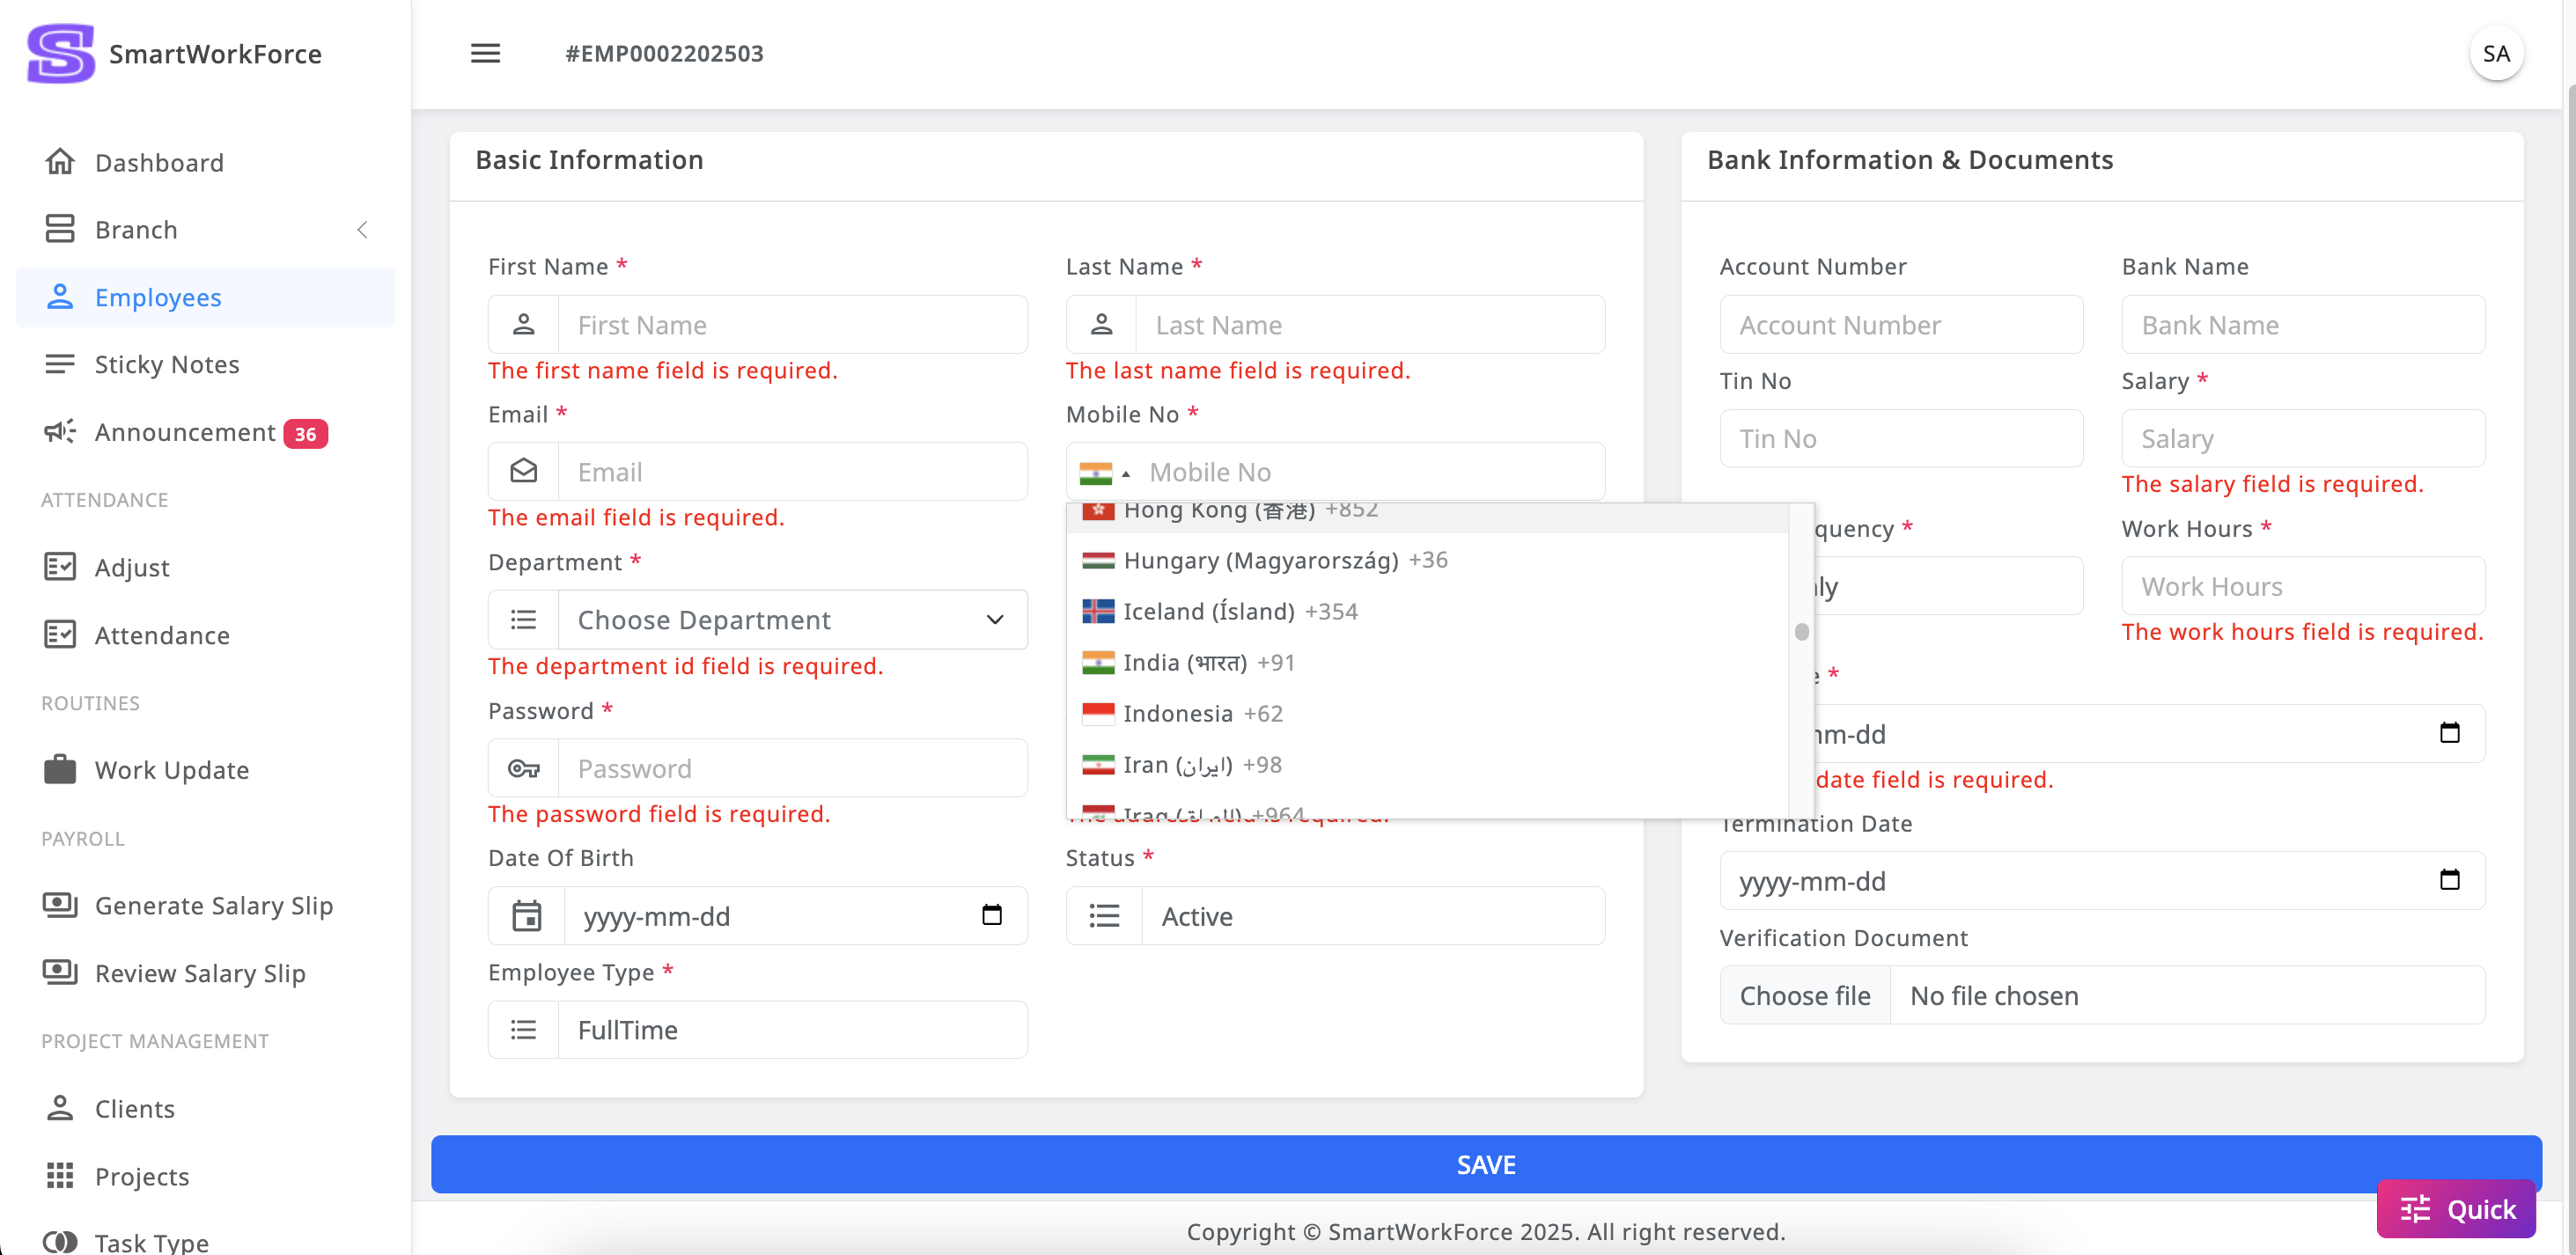
Add and Edit Employees:
Admins can create new employee profiles and update existing ones with the
necessary information.
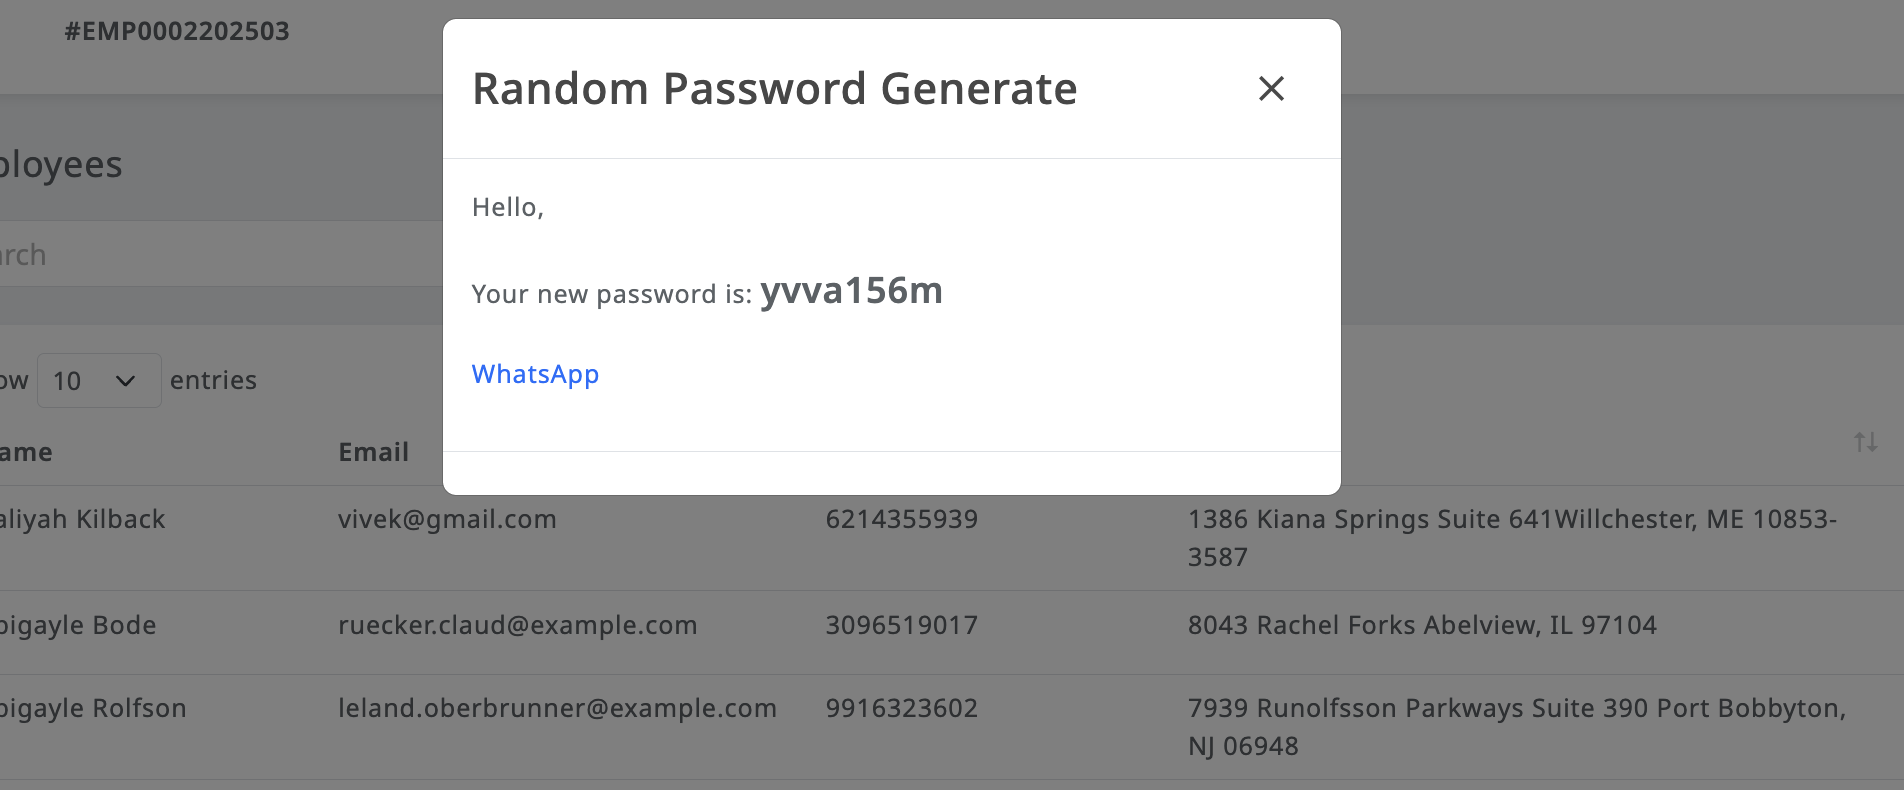
Random Password Management:
Admins have the ability to regenerate an employee's password and send the
new credentials directly to the employee via WhatsApp.
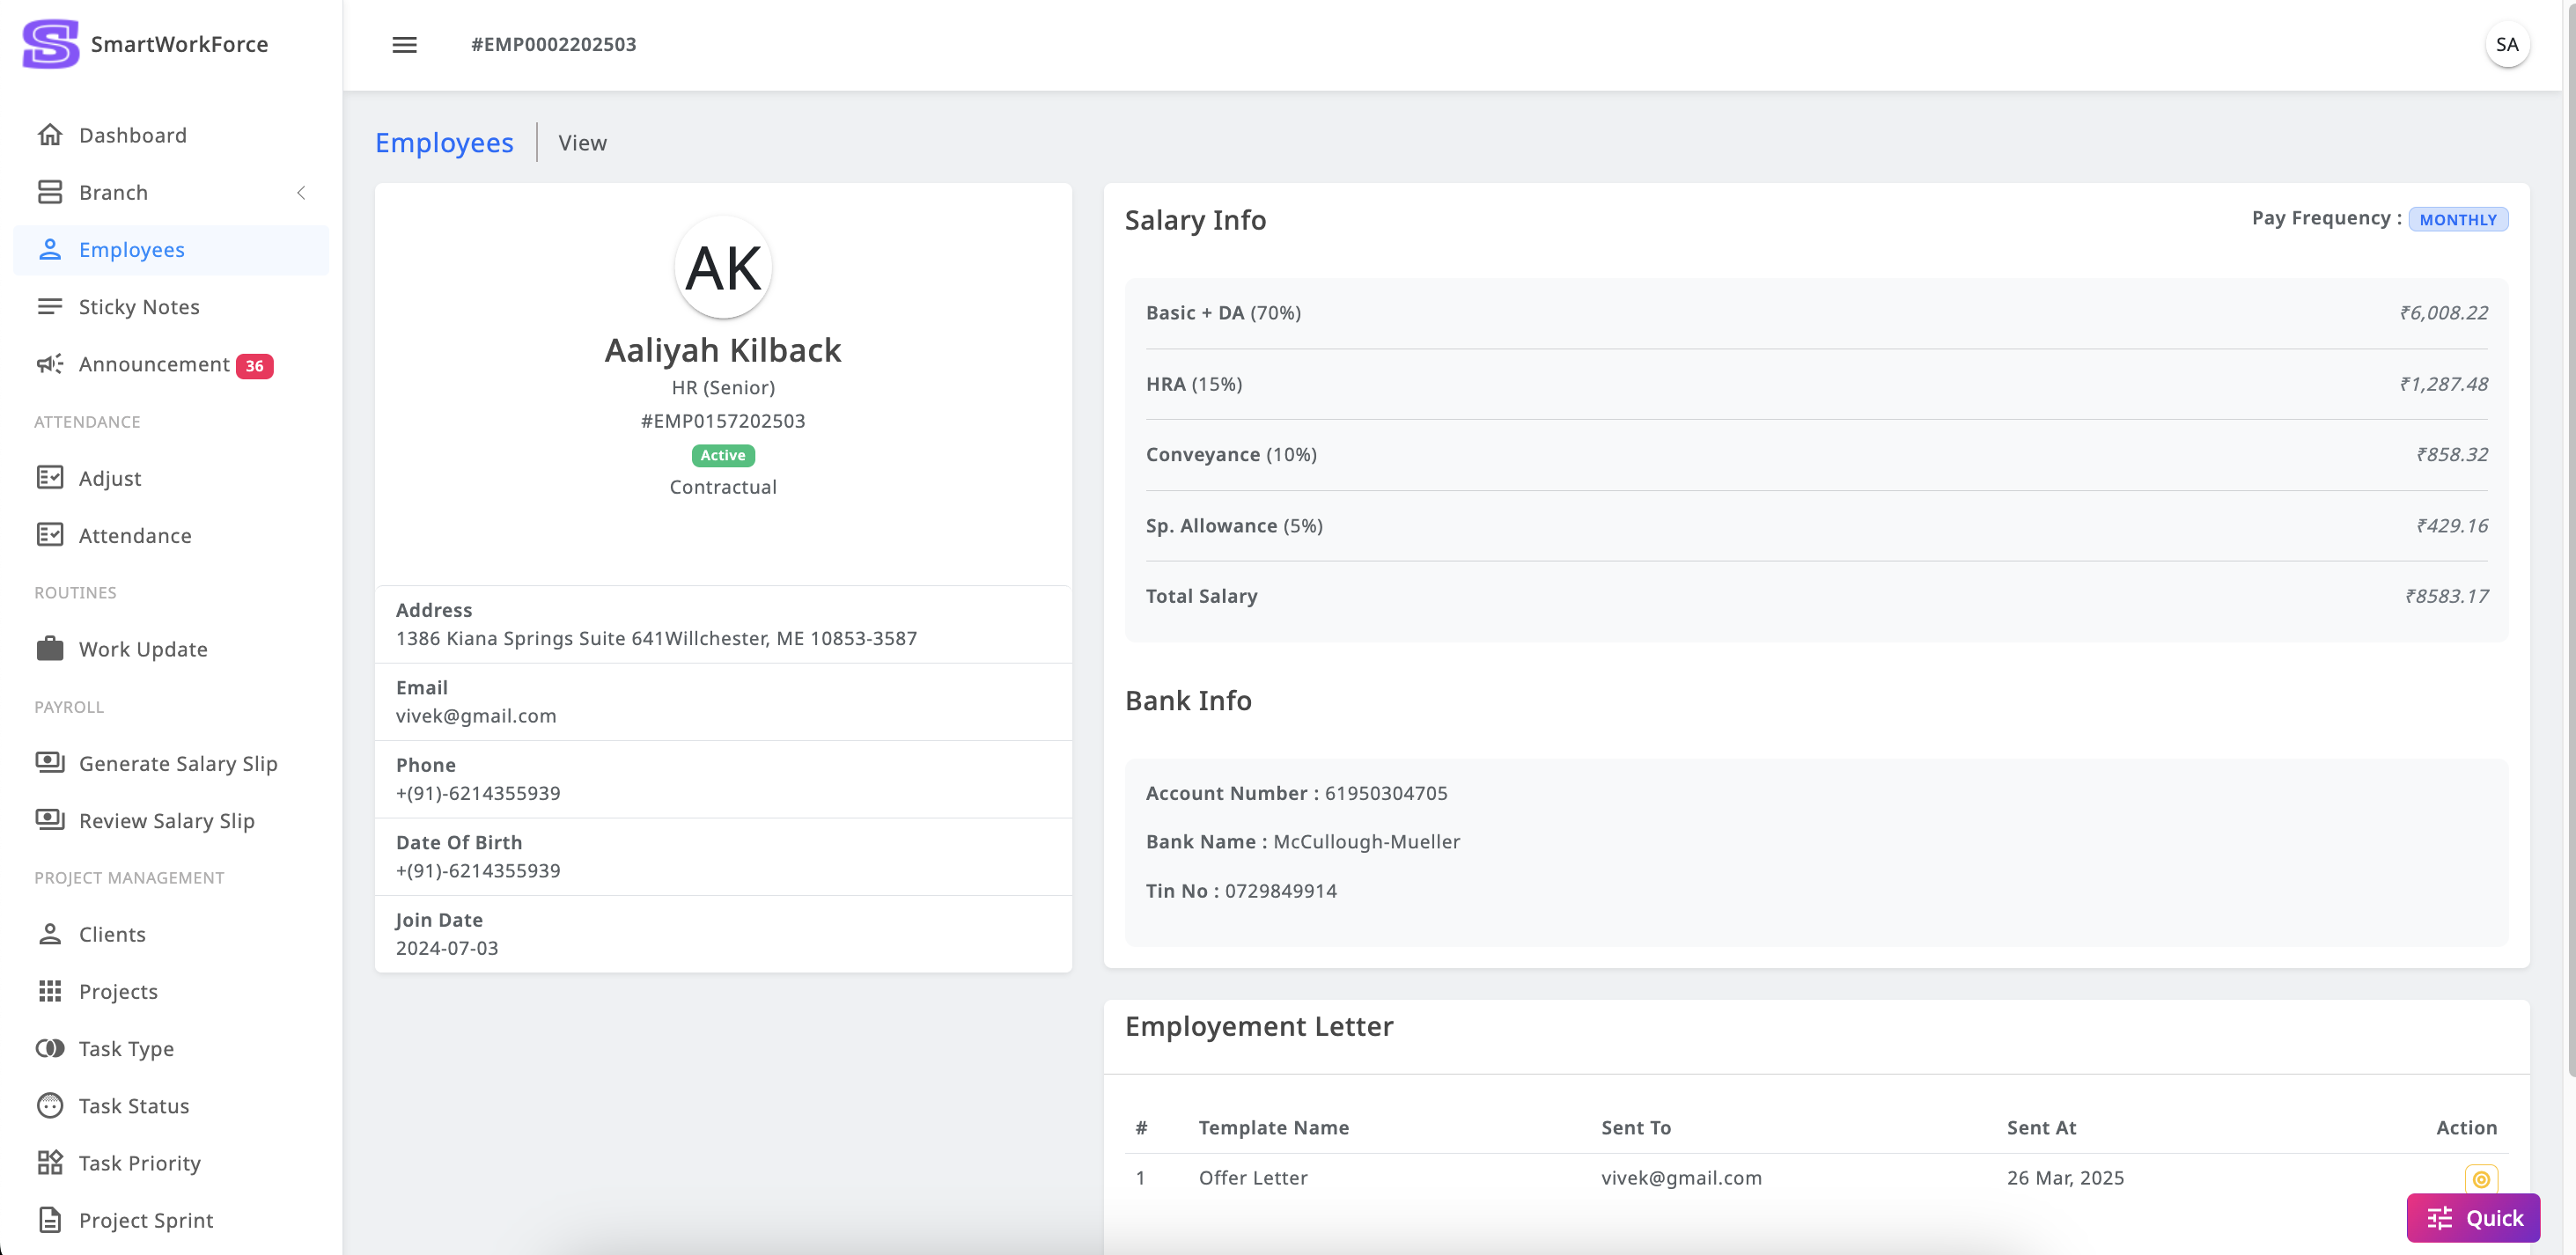
Employee Details:
Admins can access detailed information about each employee, including
personal, job-related, and contact details.
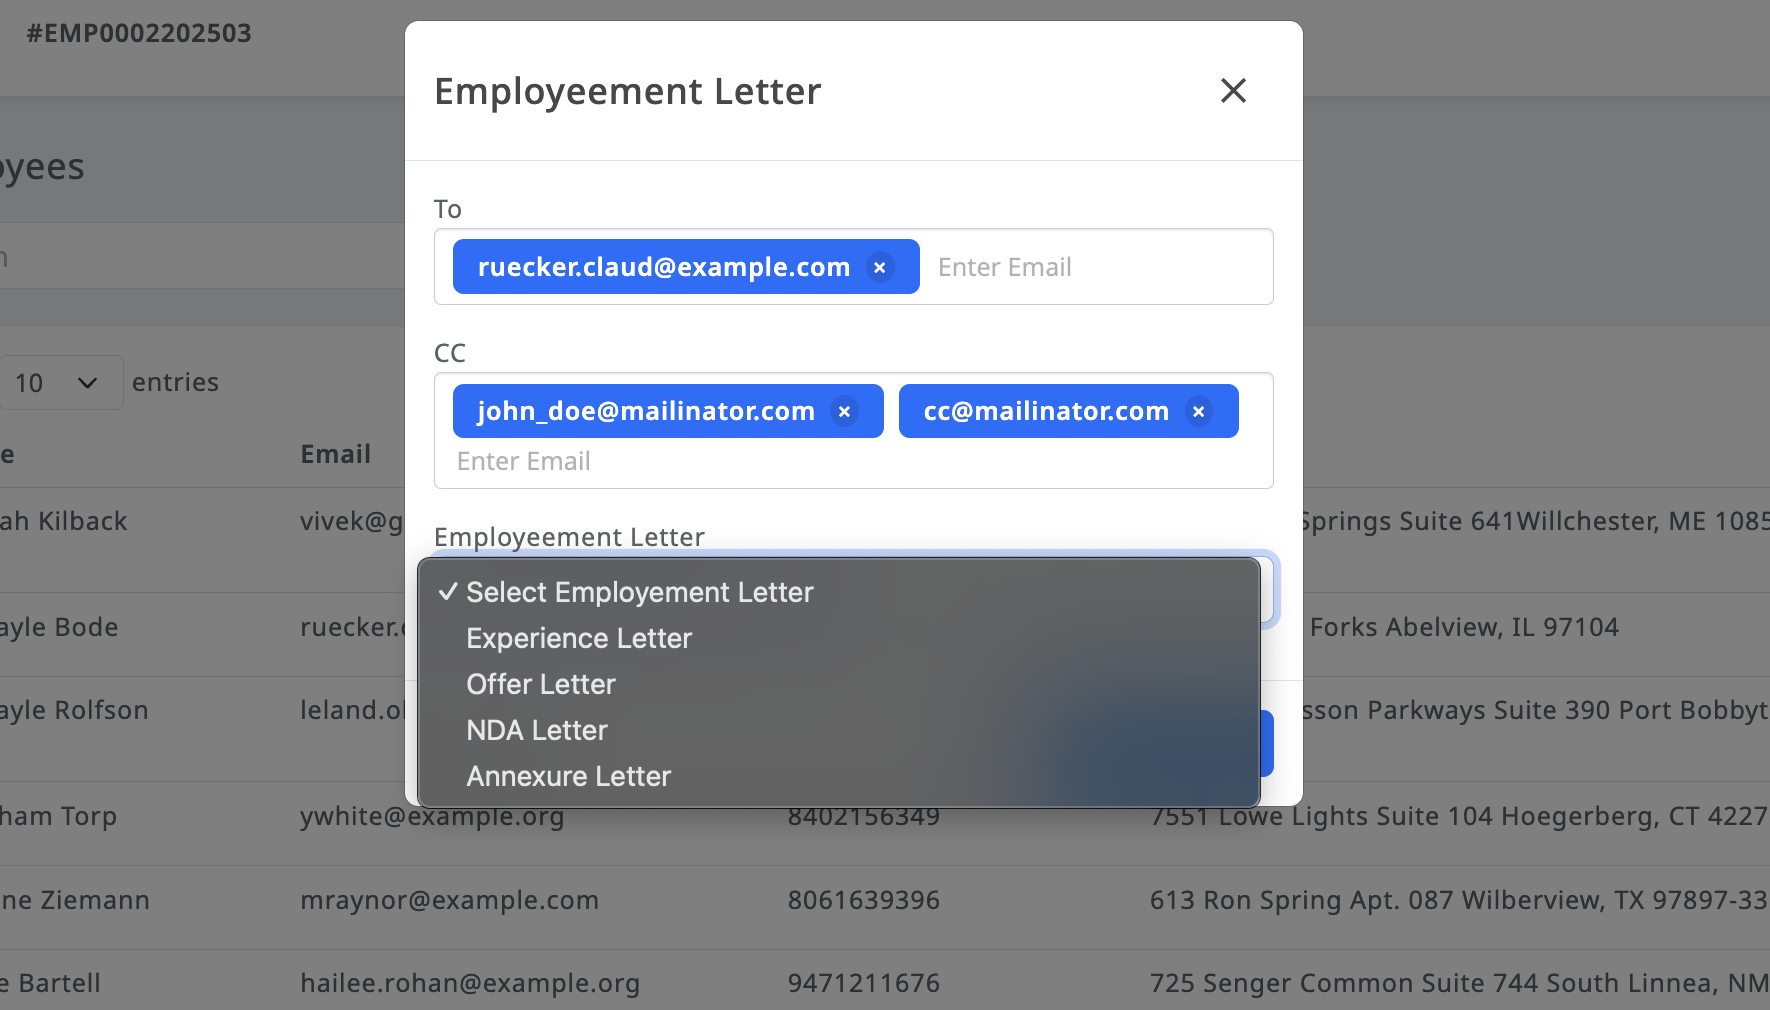
Employment Letter:
The system allows admins to send employment letters to employees directly
from the platform.
View Sent Employment Letters:
In the employee's details section, admins can view a history of employment
letters that have been sent, along with the details of each letter.
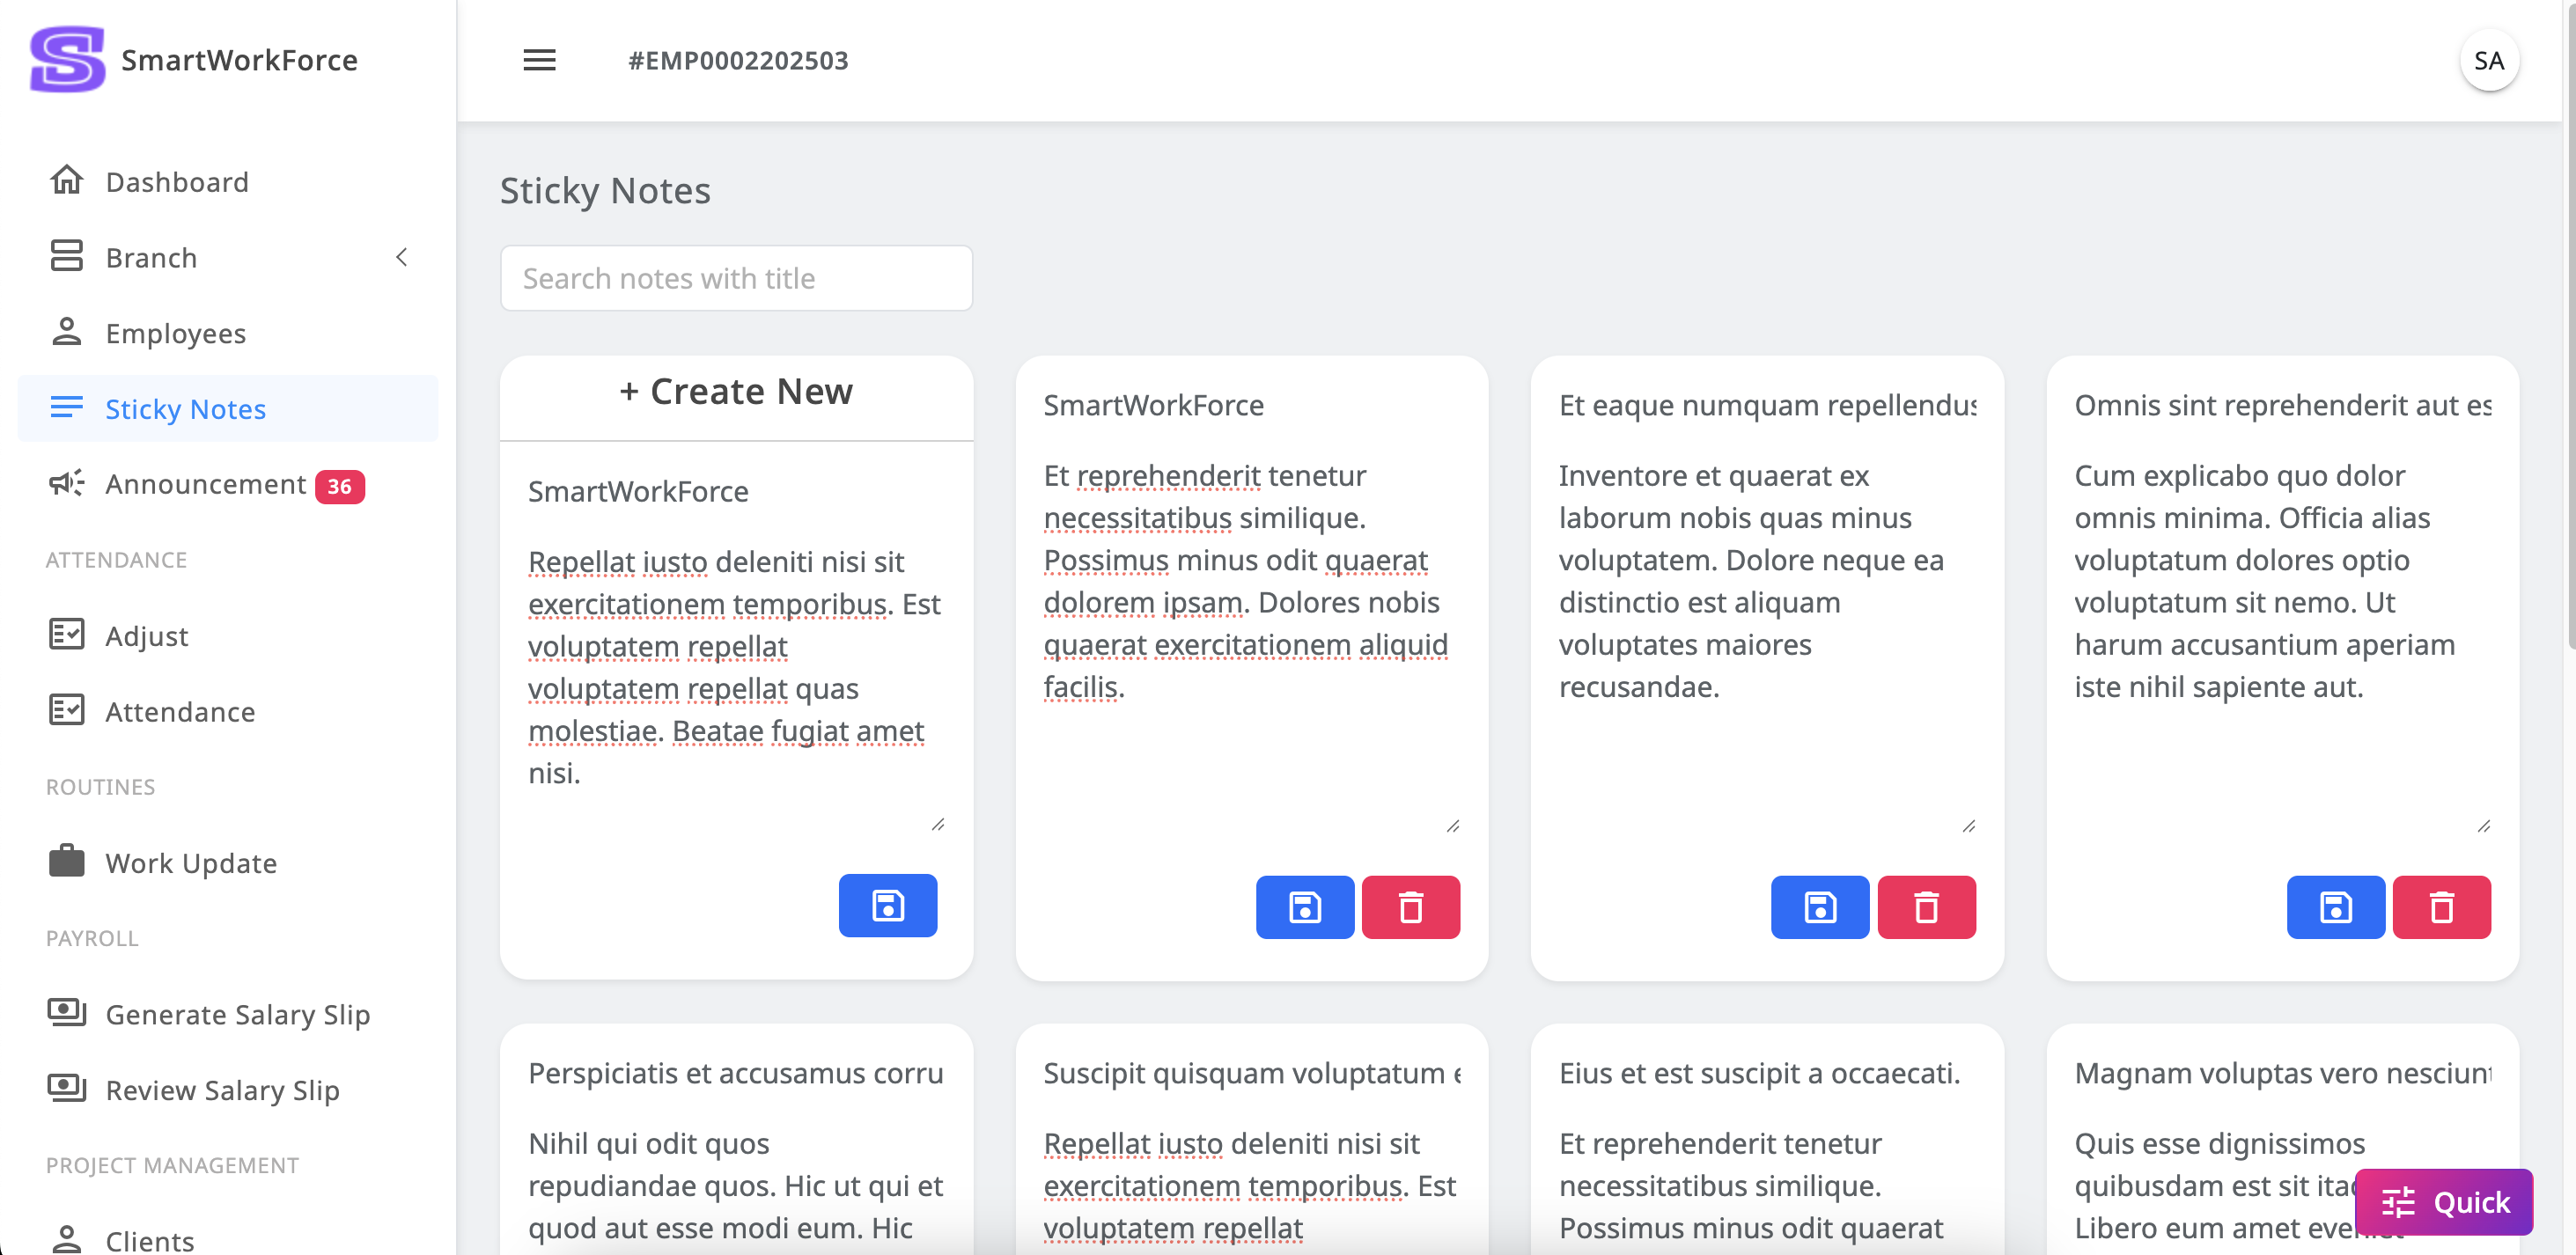
Sticky Notes
The SmartWorkForce admin has a personal sticky notes feature that
allows them to easily create, edit, and update notes. Admins can also delete
notes whenever necessary, making it simple to keep track of important
reminders or information.
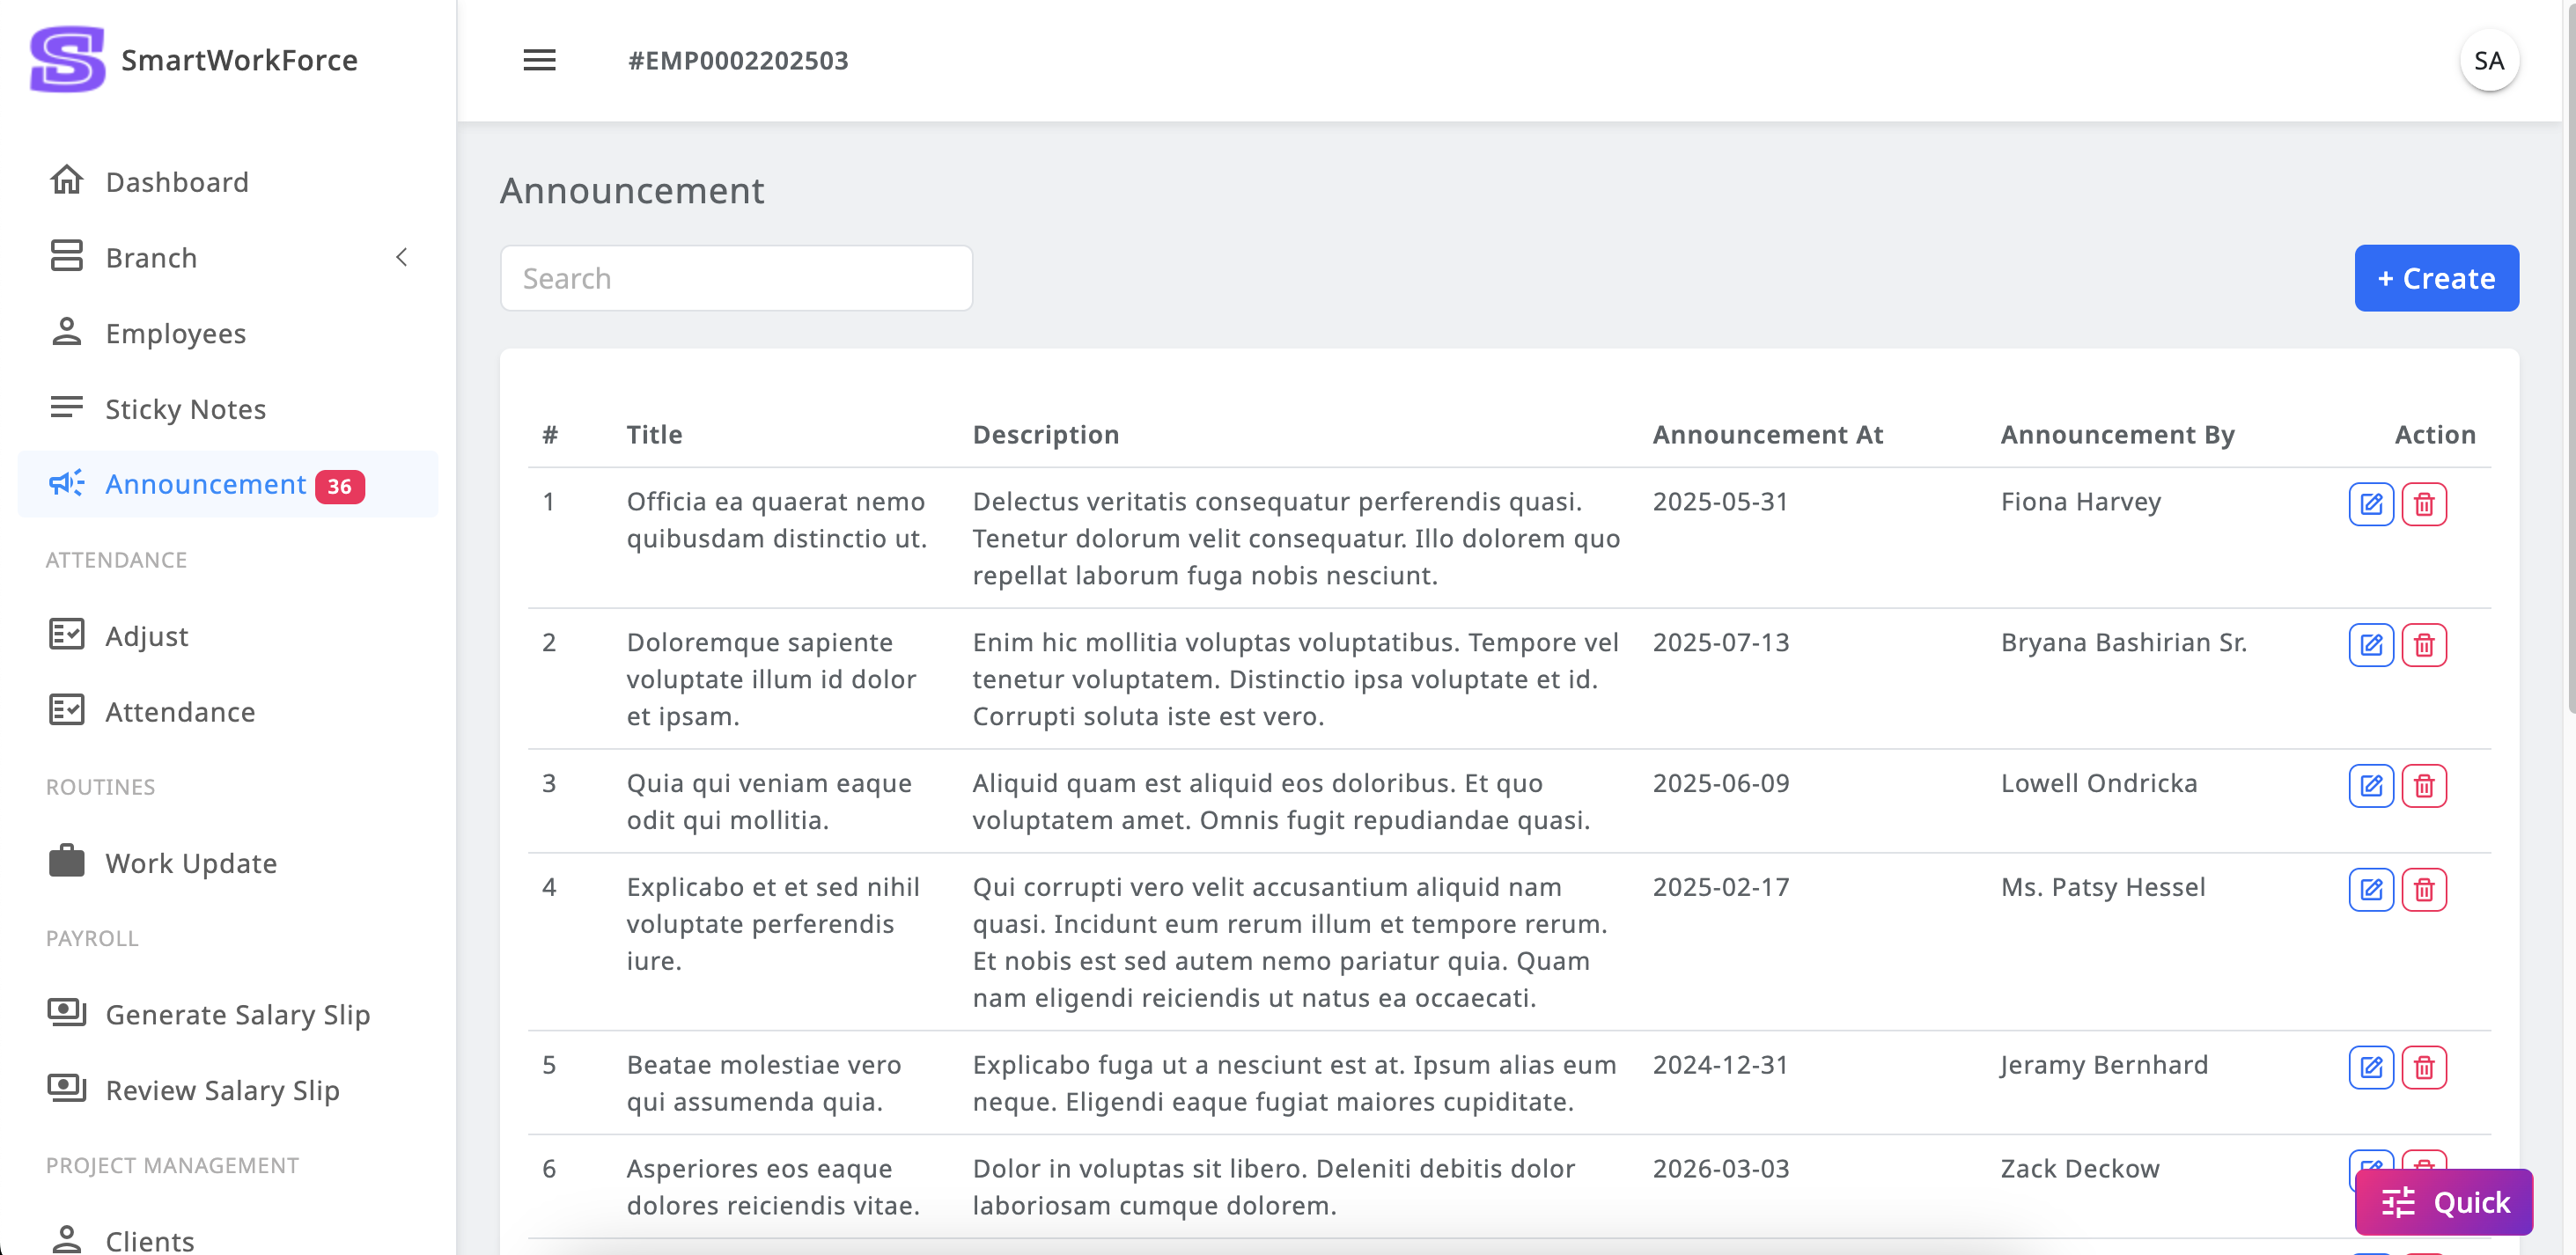
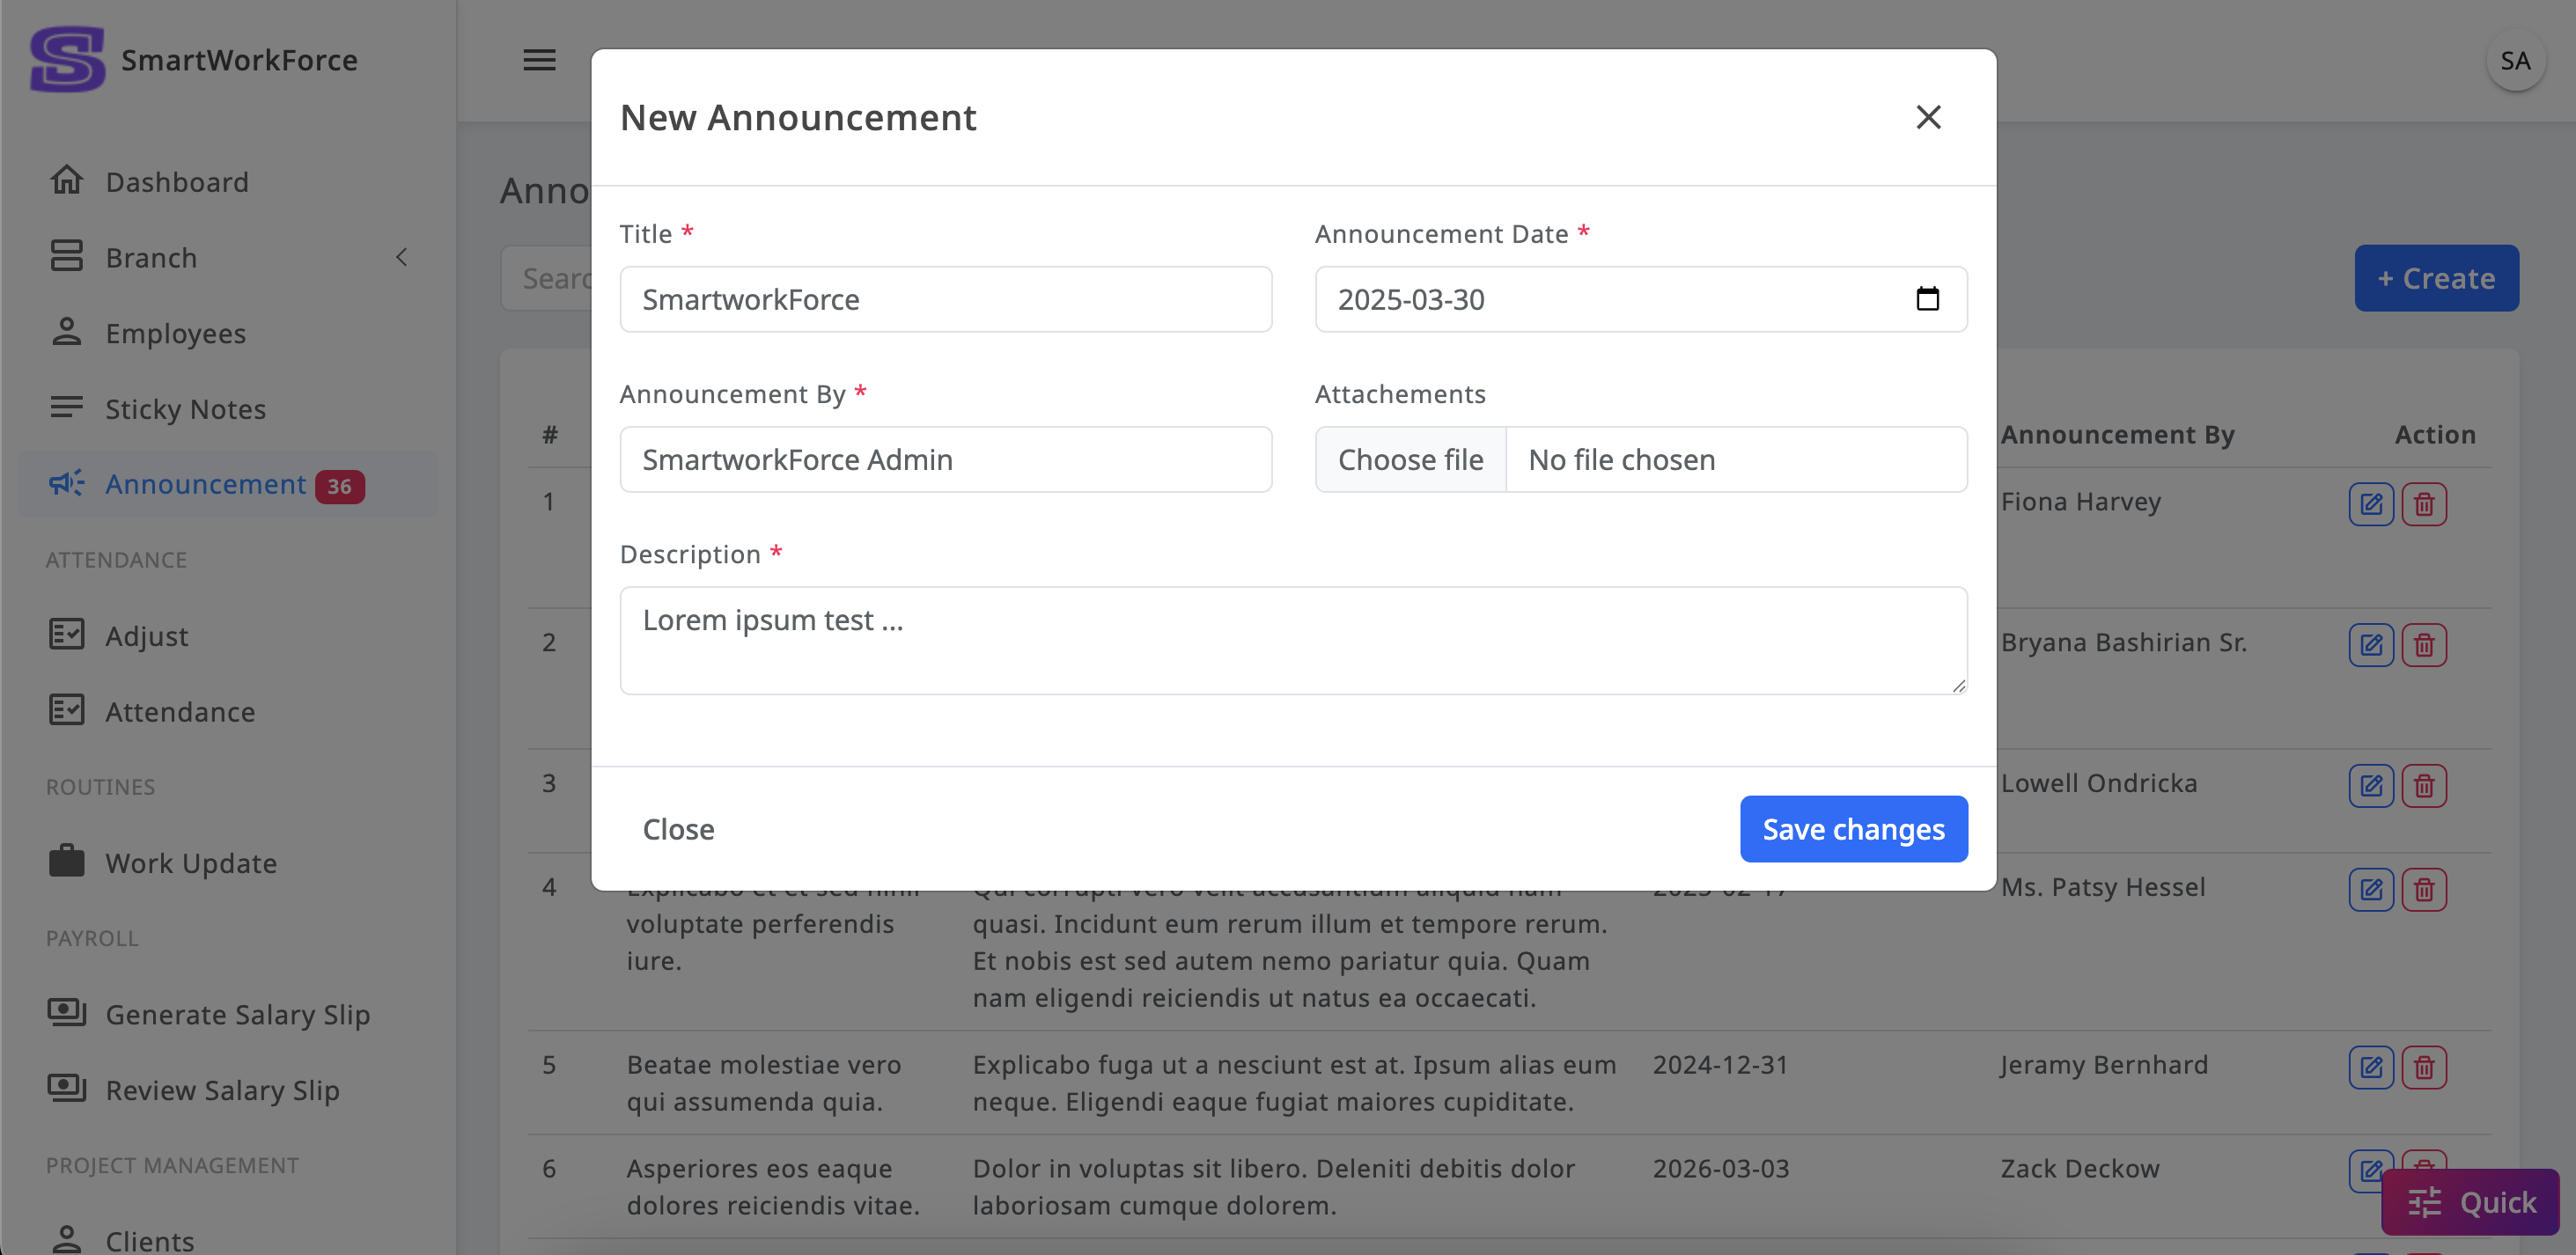
Announcement
The SmartWorkForce admin has the ability to make announcements across the
organization, ensuring that all employees are informed about future updates.
The announcement sidebar displays a count of upcoming announcements, making
it easy to stay aware of what's coming next.
Admins can create, update, and remove announcements as needed, giving them
full control over communication within the organization.
AnnouncementAnnouncement Cretae-Update
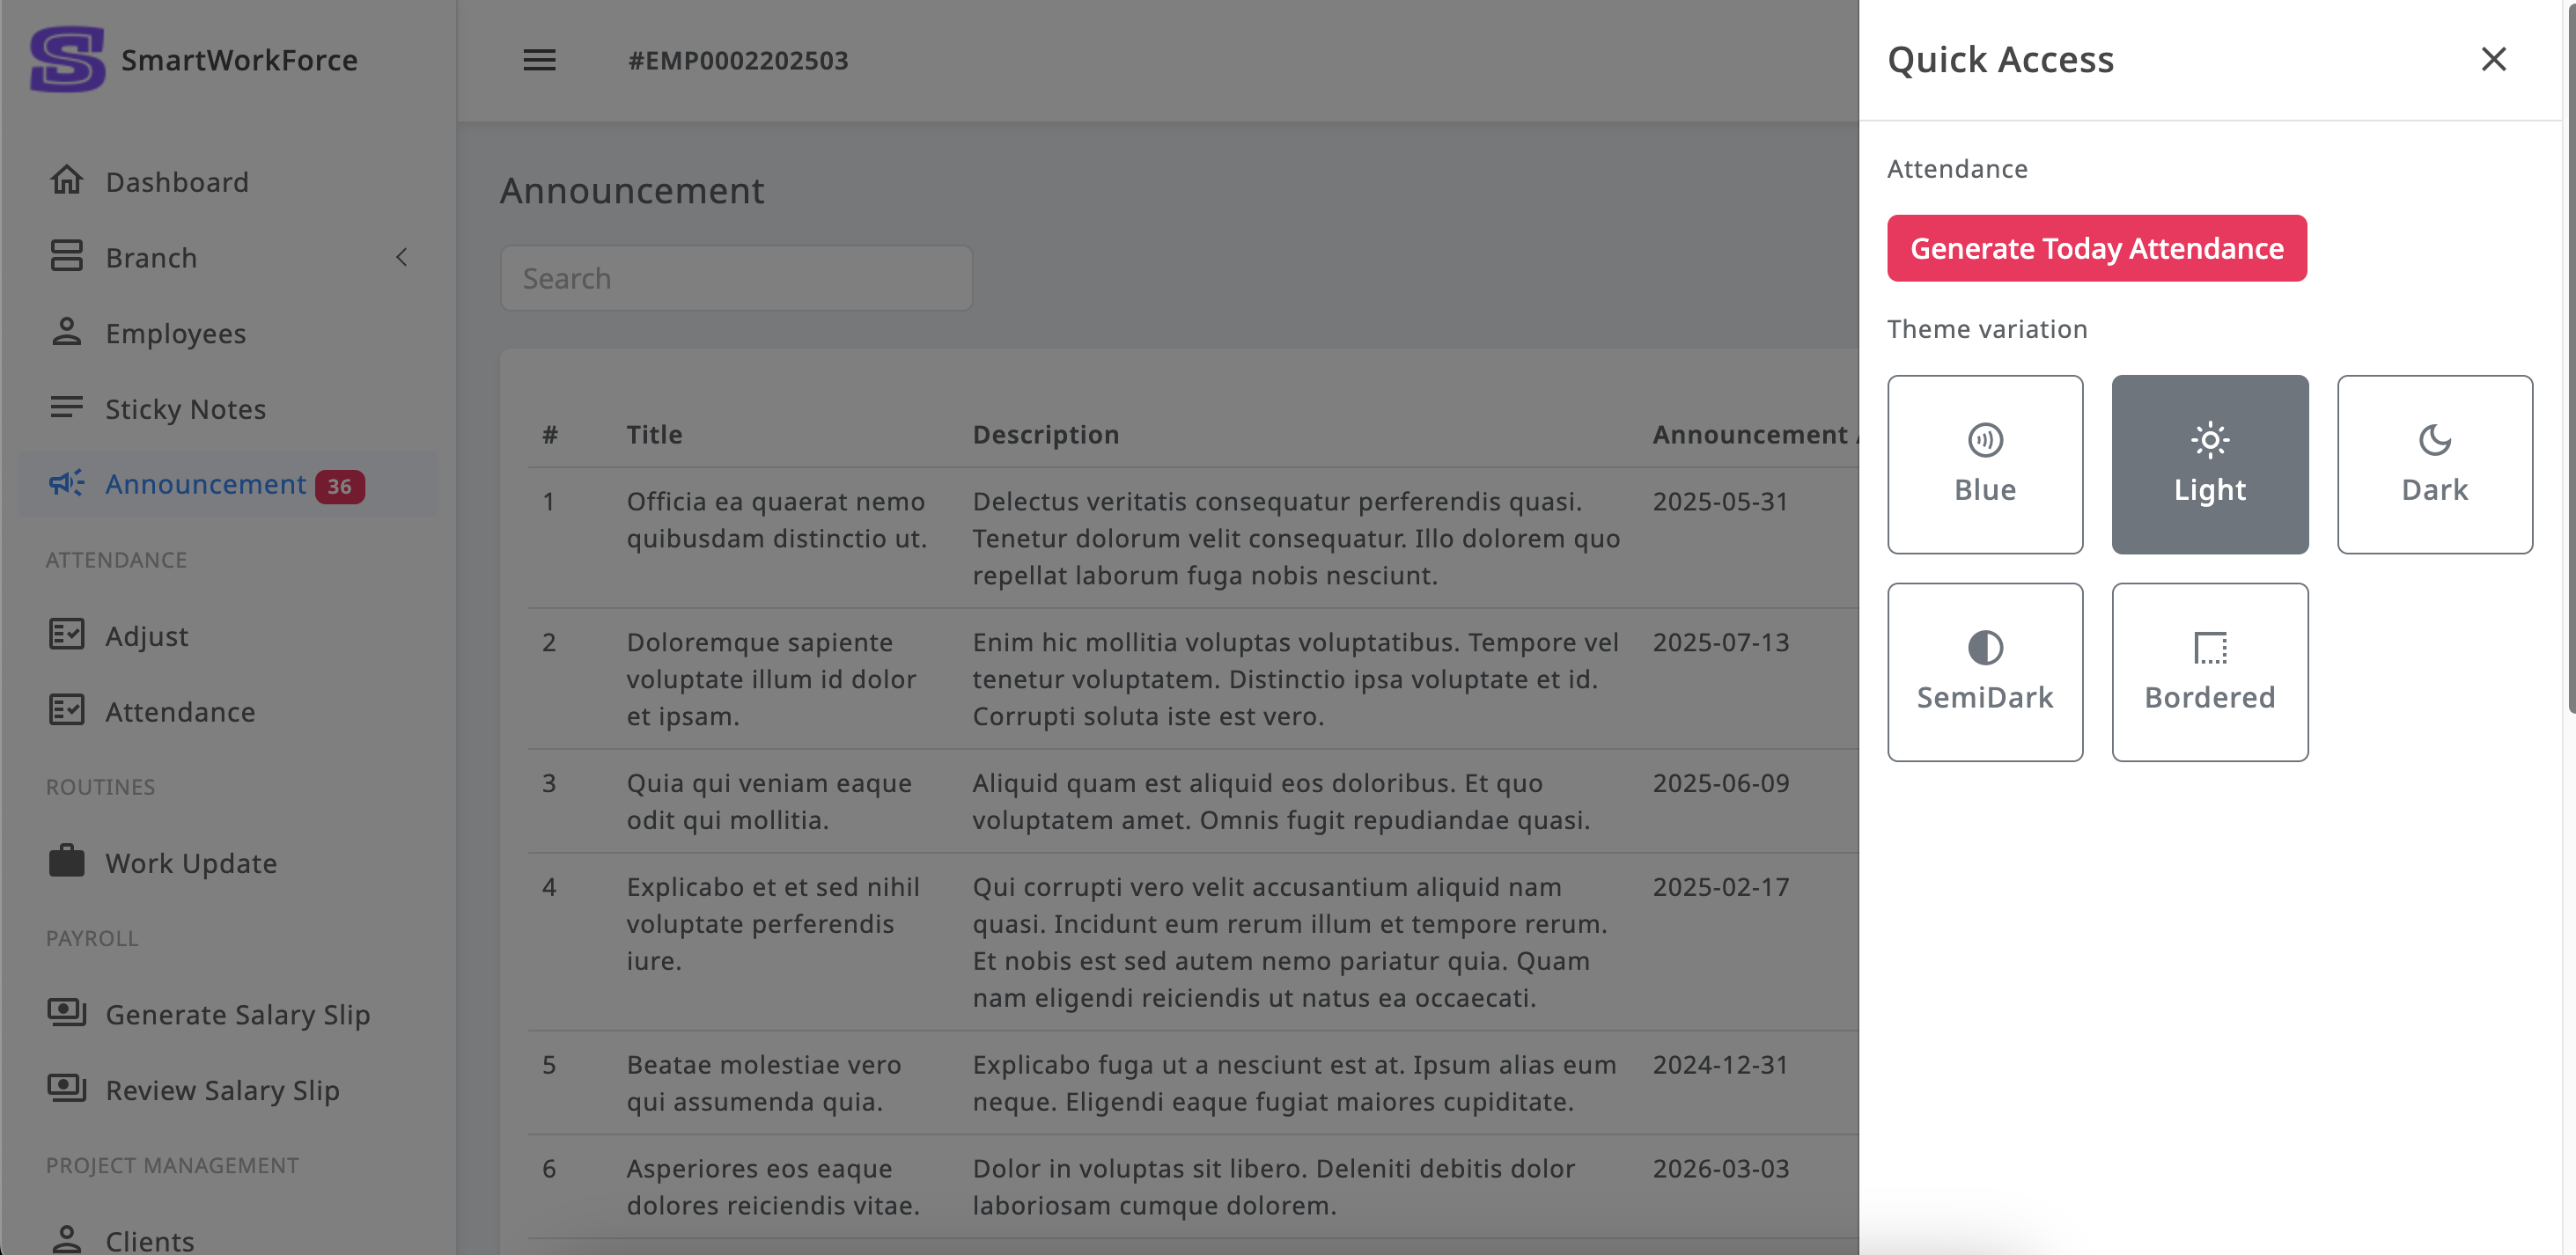
Quick Access
The Quick Access Sidebar in SmartWorkForce provides admins with easy
navigation and functionality. Admins can quickly change the theme of the
system, choosing between light, dark, bordered, or blue themes to suit their
preferences. Additionally, the sidebar includes a "Generate
Attendance"
button, allowing admins to instantly generate the day's attendance. Once the
attendance is generated, employees can then check in and check out of the
system, ensuring accurate tracking of attendance for the day.
While Generating the attendance all employees will be
"Absent". Once they checkin it will
automatically turn to "Present" so admin don't have to done
it manually.
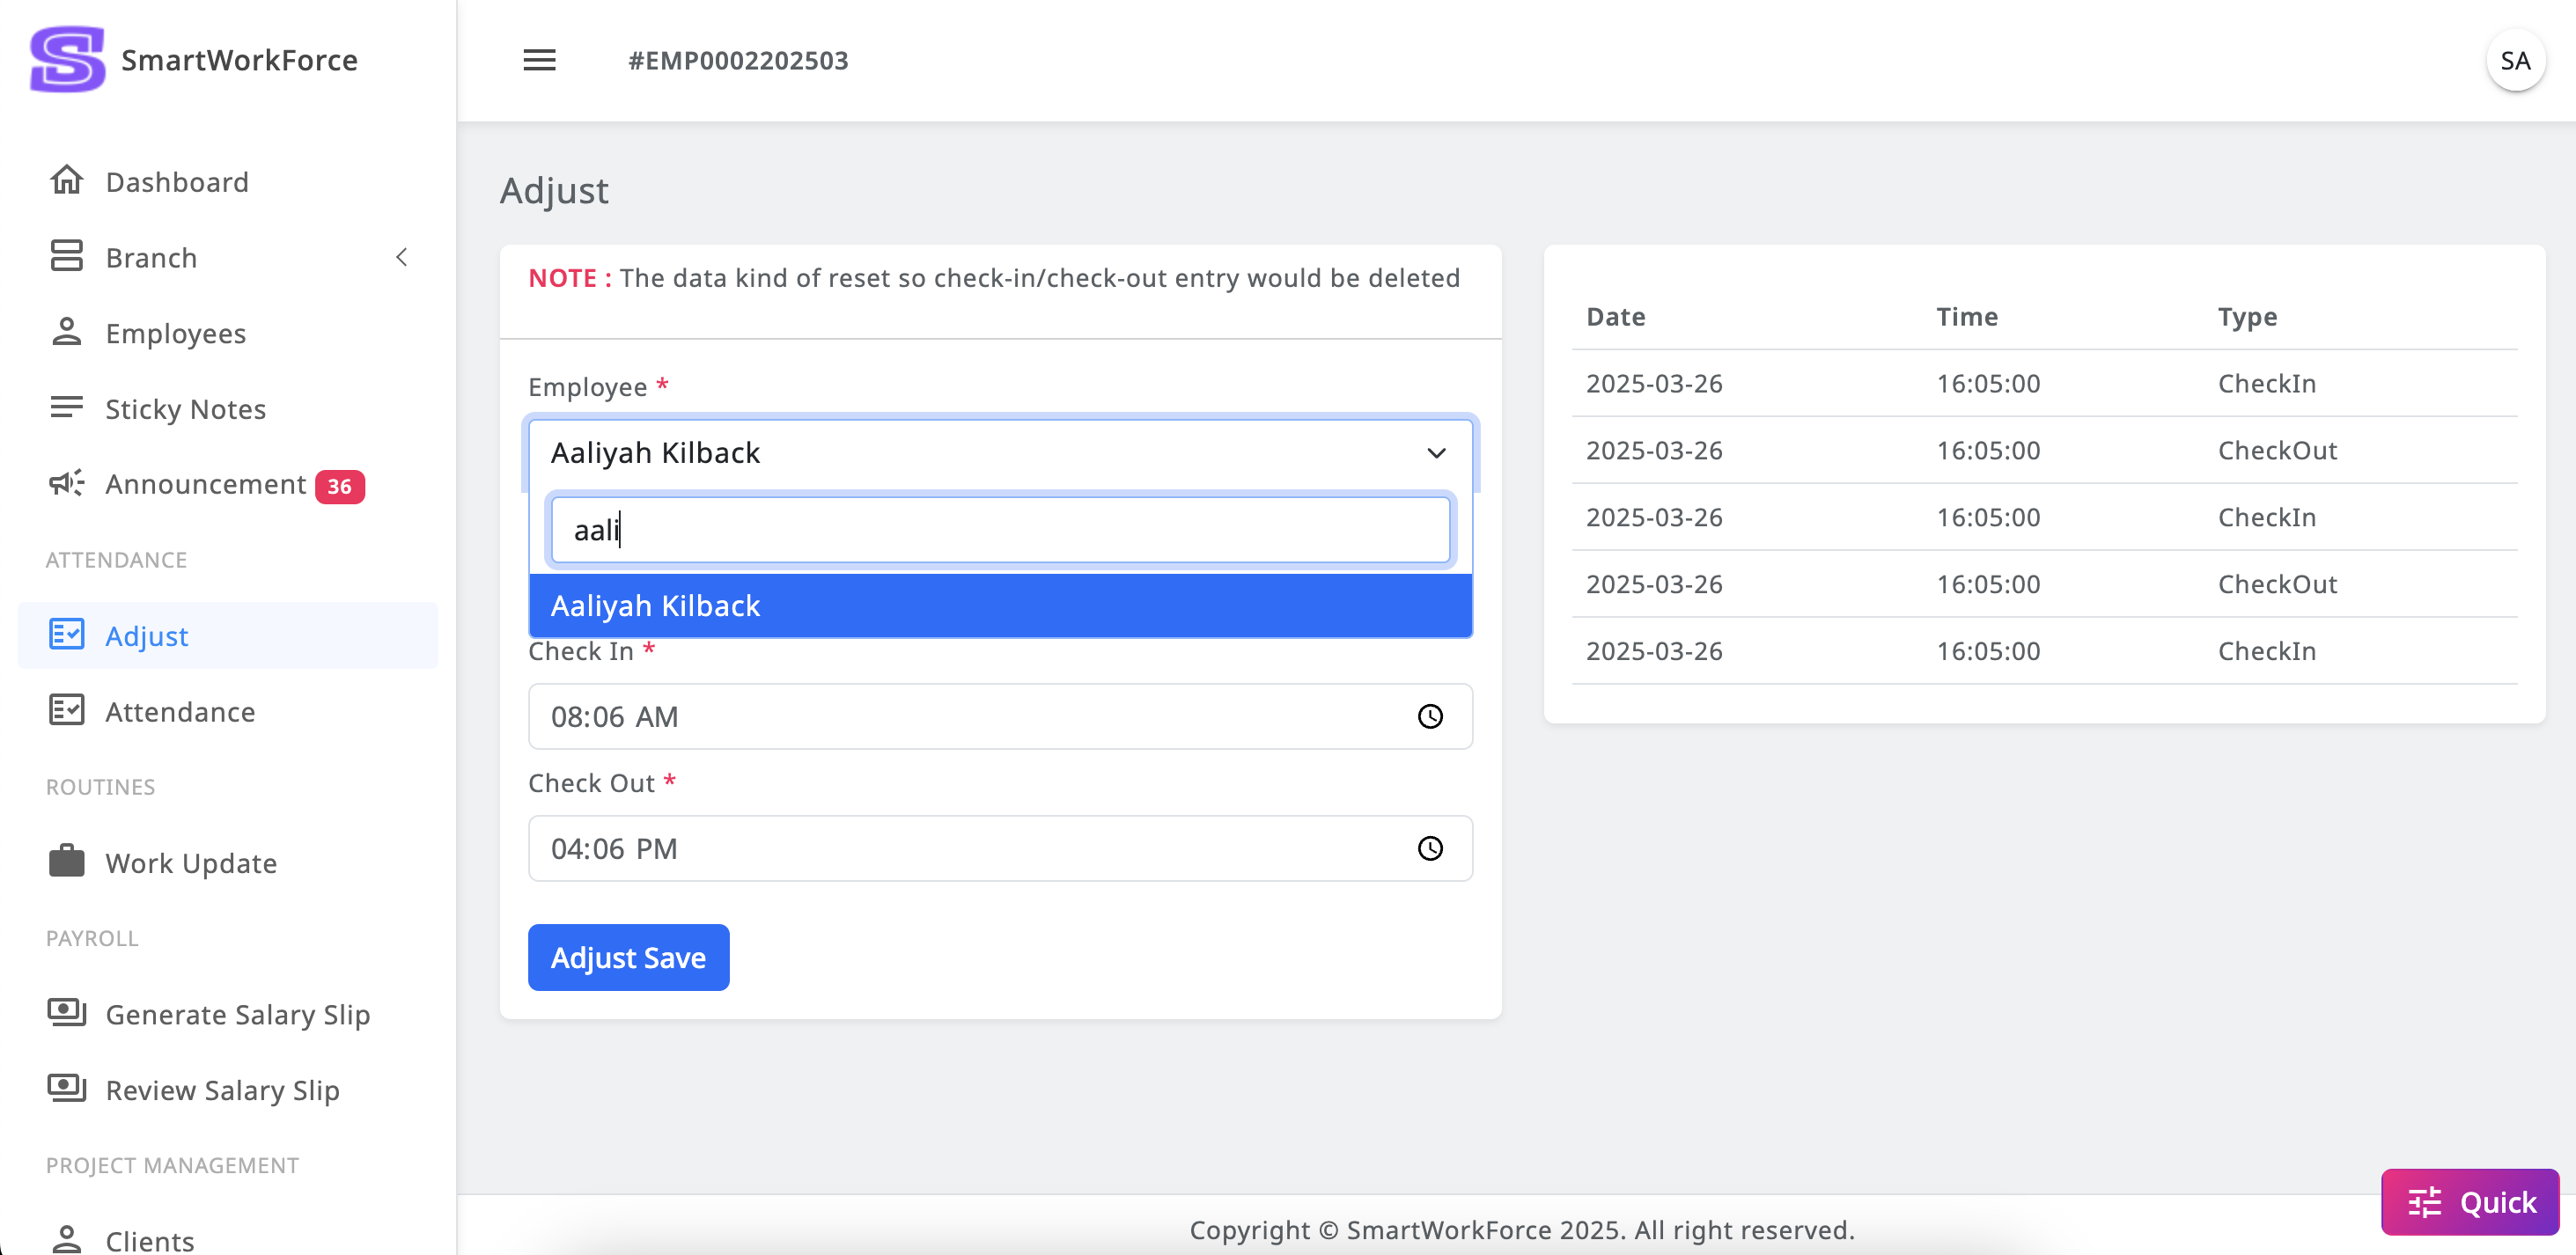
Attendance : Adjust
The SmartWorkForce admin has the authority to adjust employee leave records
as needed. They can also view the history of employee check-ins and
check-outs. Once the admin adjusts an employee's leave, the original
check-in and check-out history is removed and replaced with the updated
leave records, reflecting the changes made by the admin.
JavaScript Files
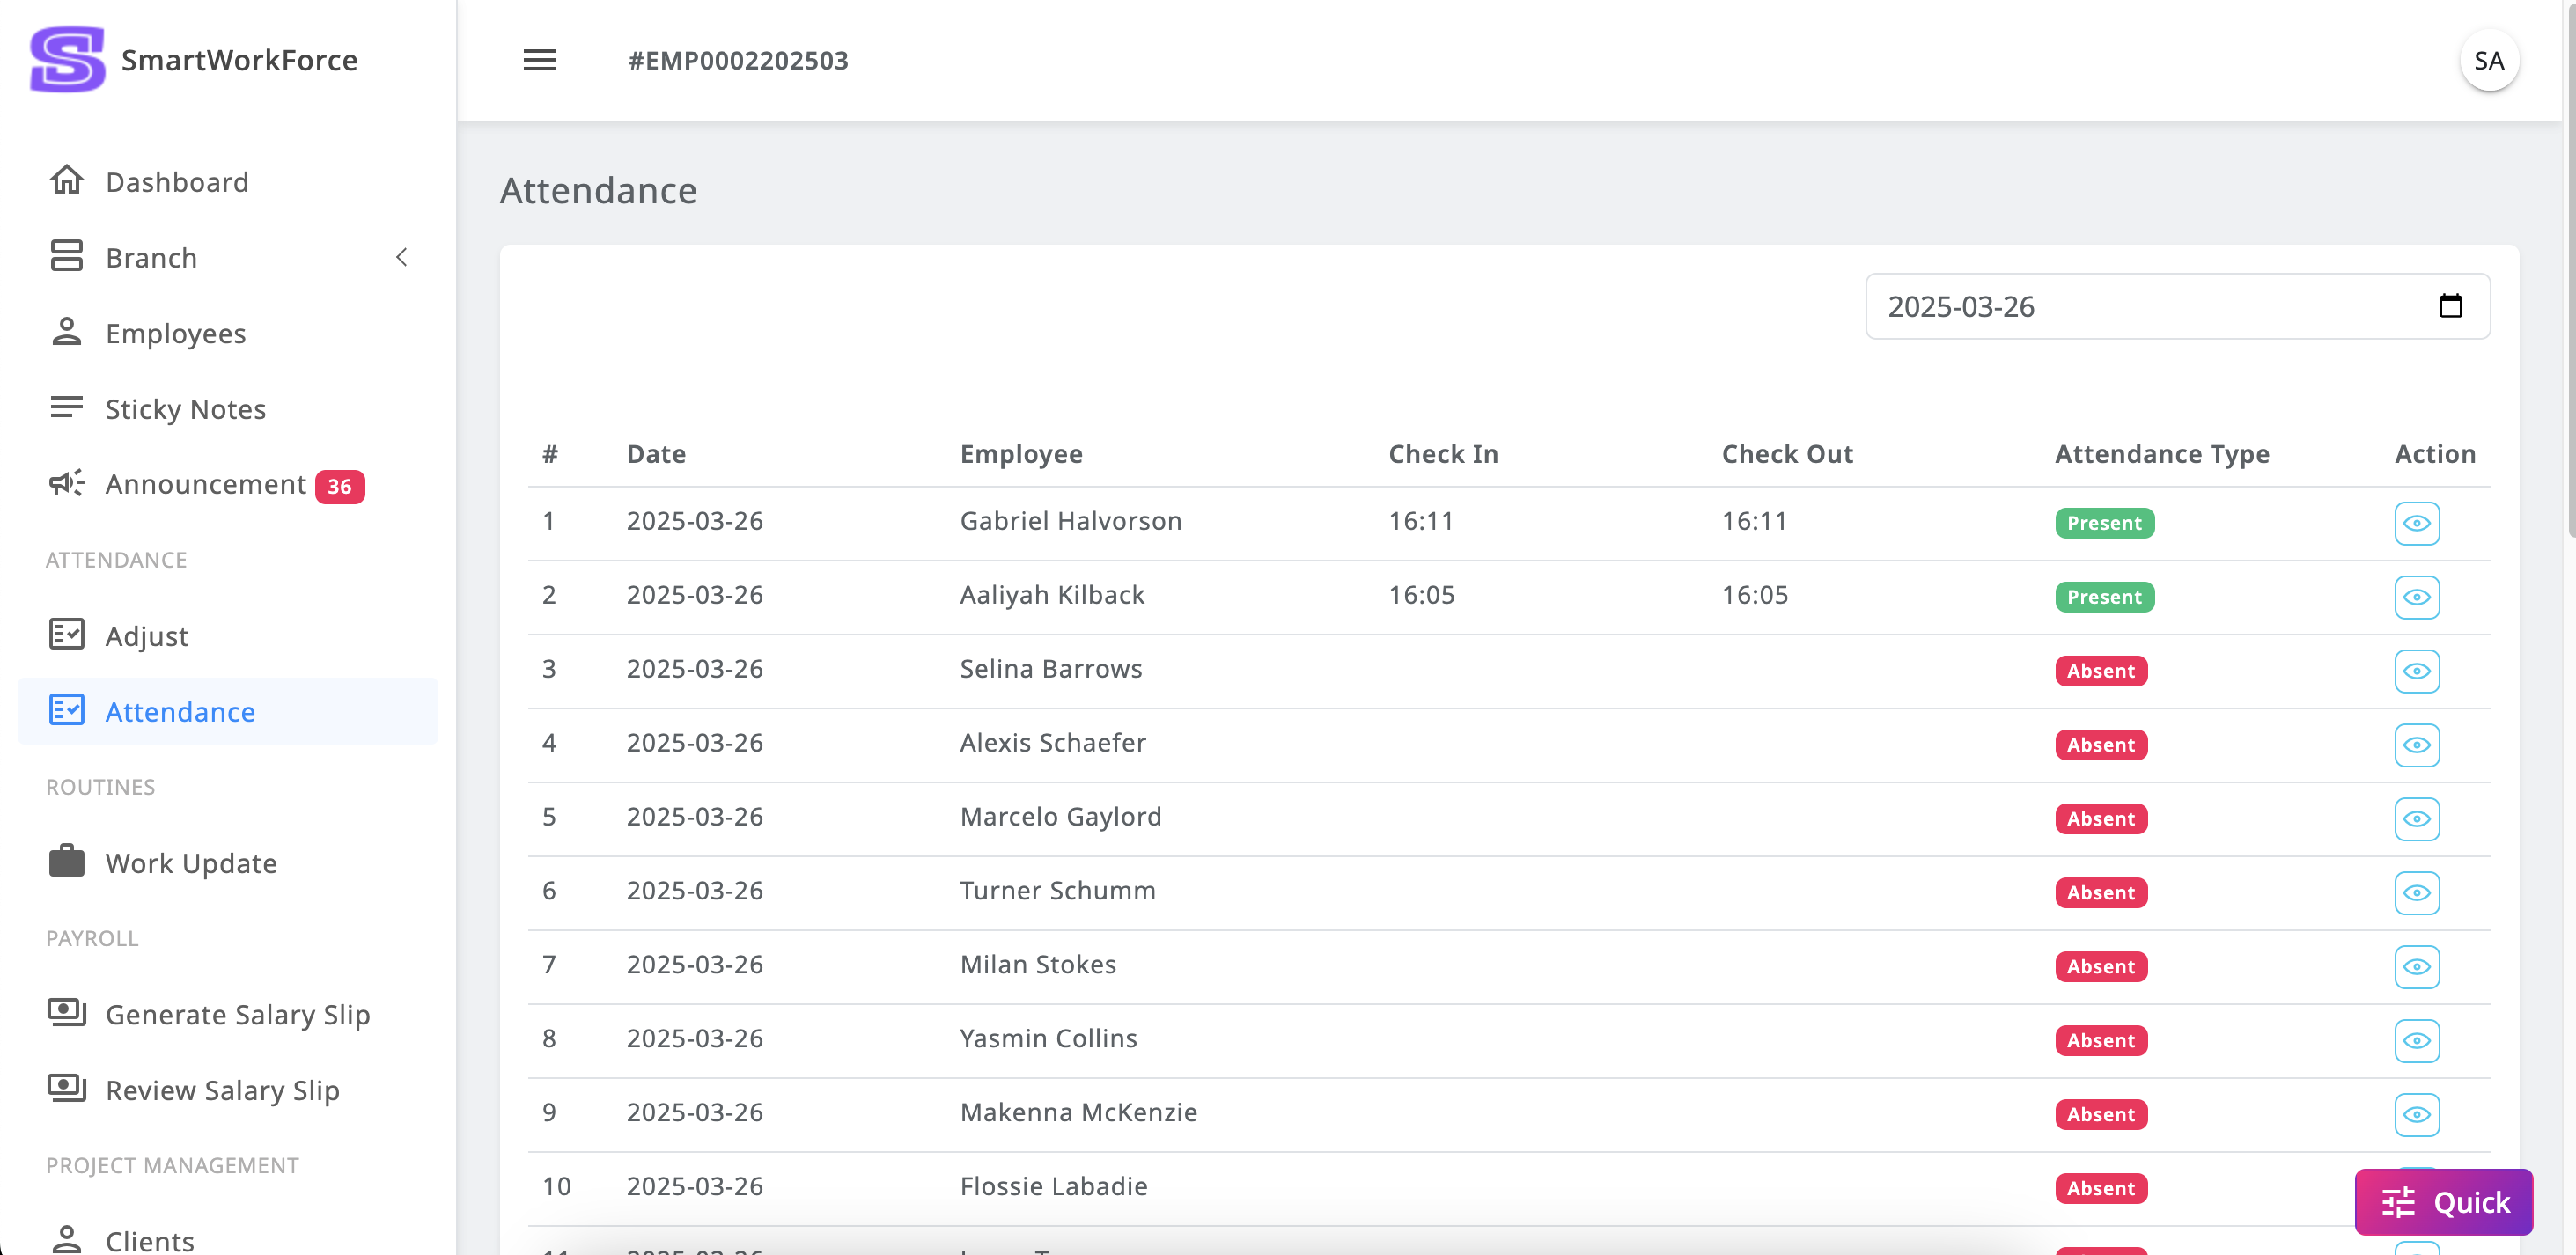
Attendance : Attendance
The SmartWorkForce Attendance module provides a detailed list of employees
along with their attendance history. Admins can filter attendance records by
date, allowing them to easily check the attendance of employees on specific
days. This feature helps in quickly reviewing attendance patterns and
ensuring accurate tracking of employee presence.
AttendanceAttendance History
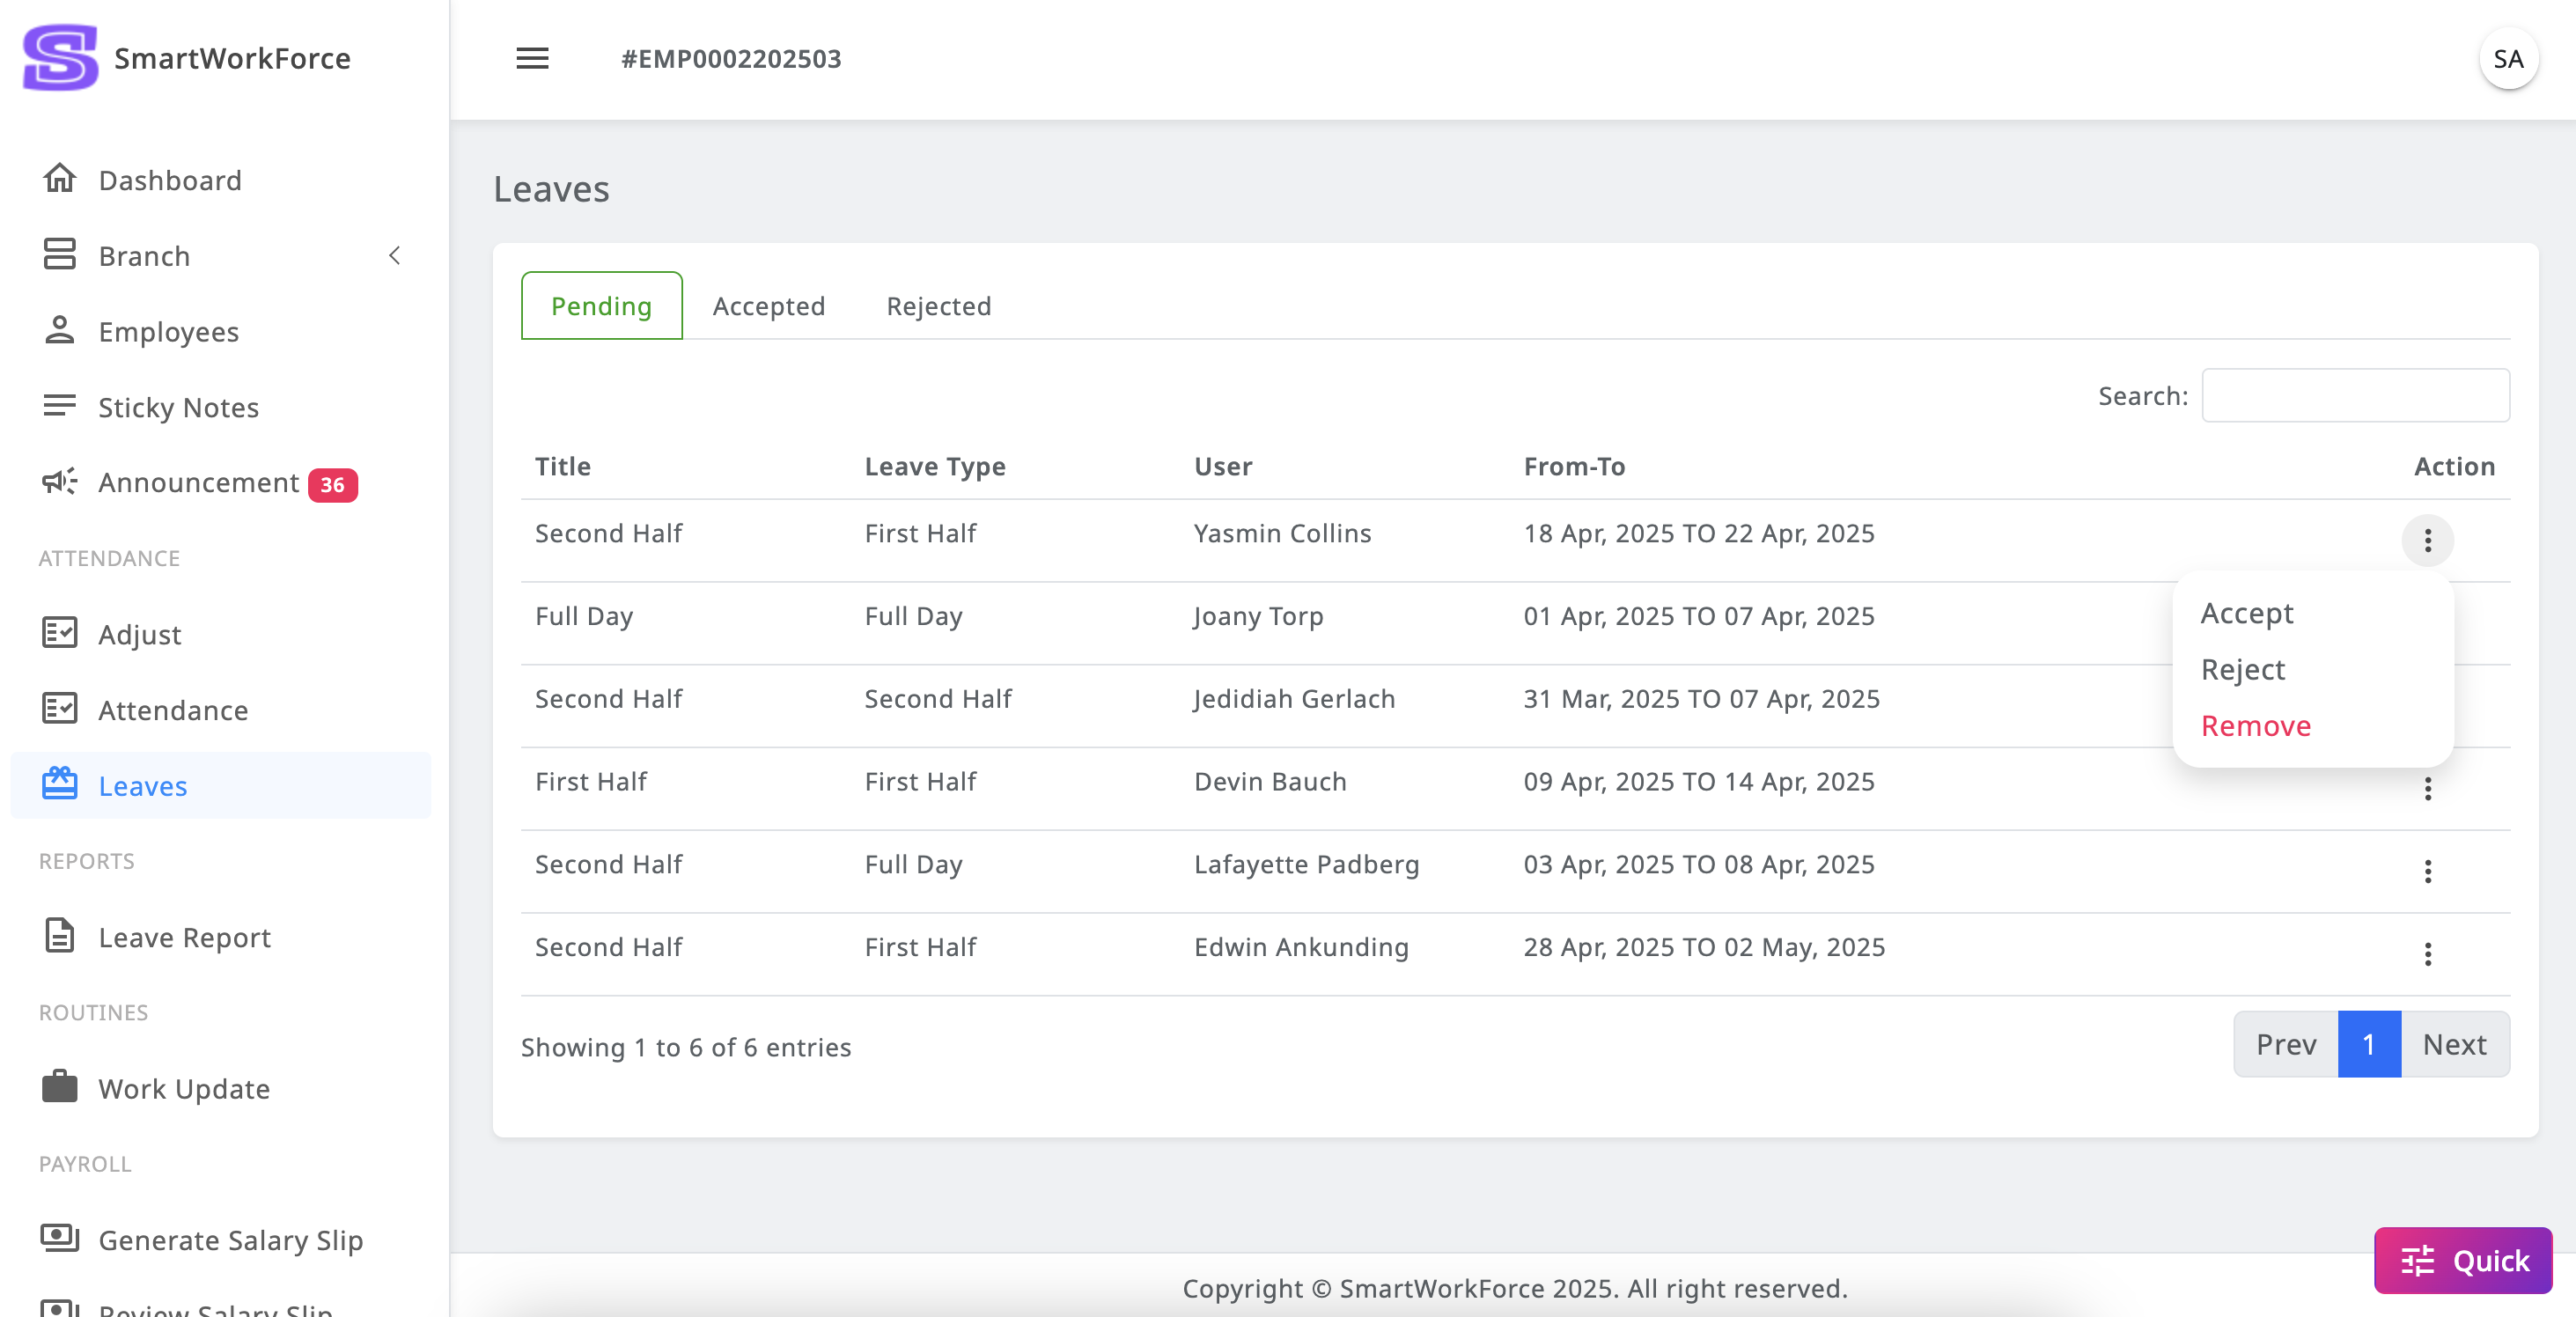
Attendance : Leaves
In SmartWorkForce, the admin can view the leave requests of employees and
has the ability to accept, reject, or delete these leave requests.
The "Pending" tab shows the leave requests that employees have applied for.
If the admin takes action to accept a request, it will move to the
"Accepted" tab. If the request is rejected, it will appear in the "Rejected"
tab.
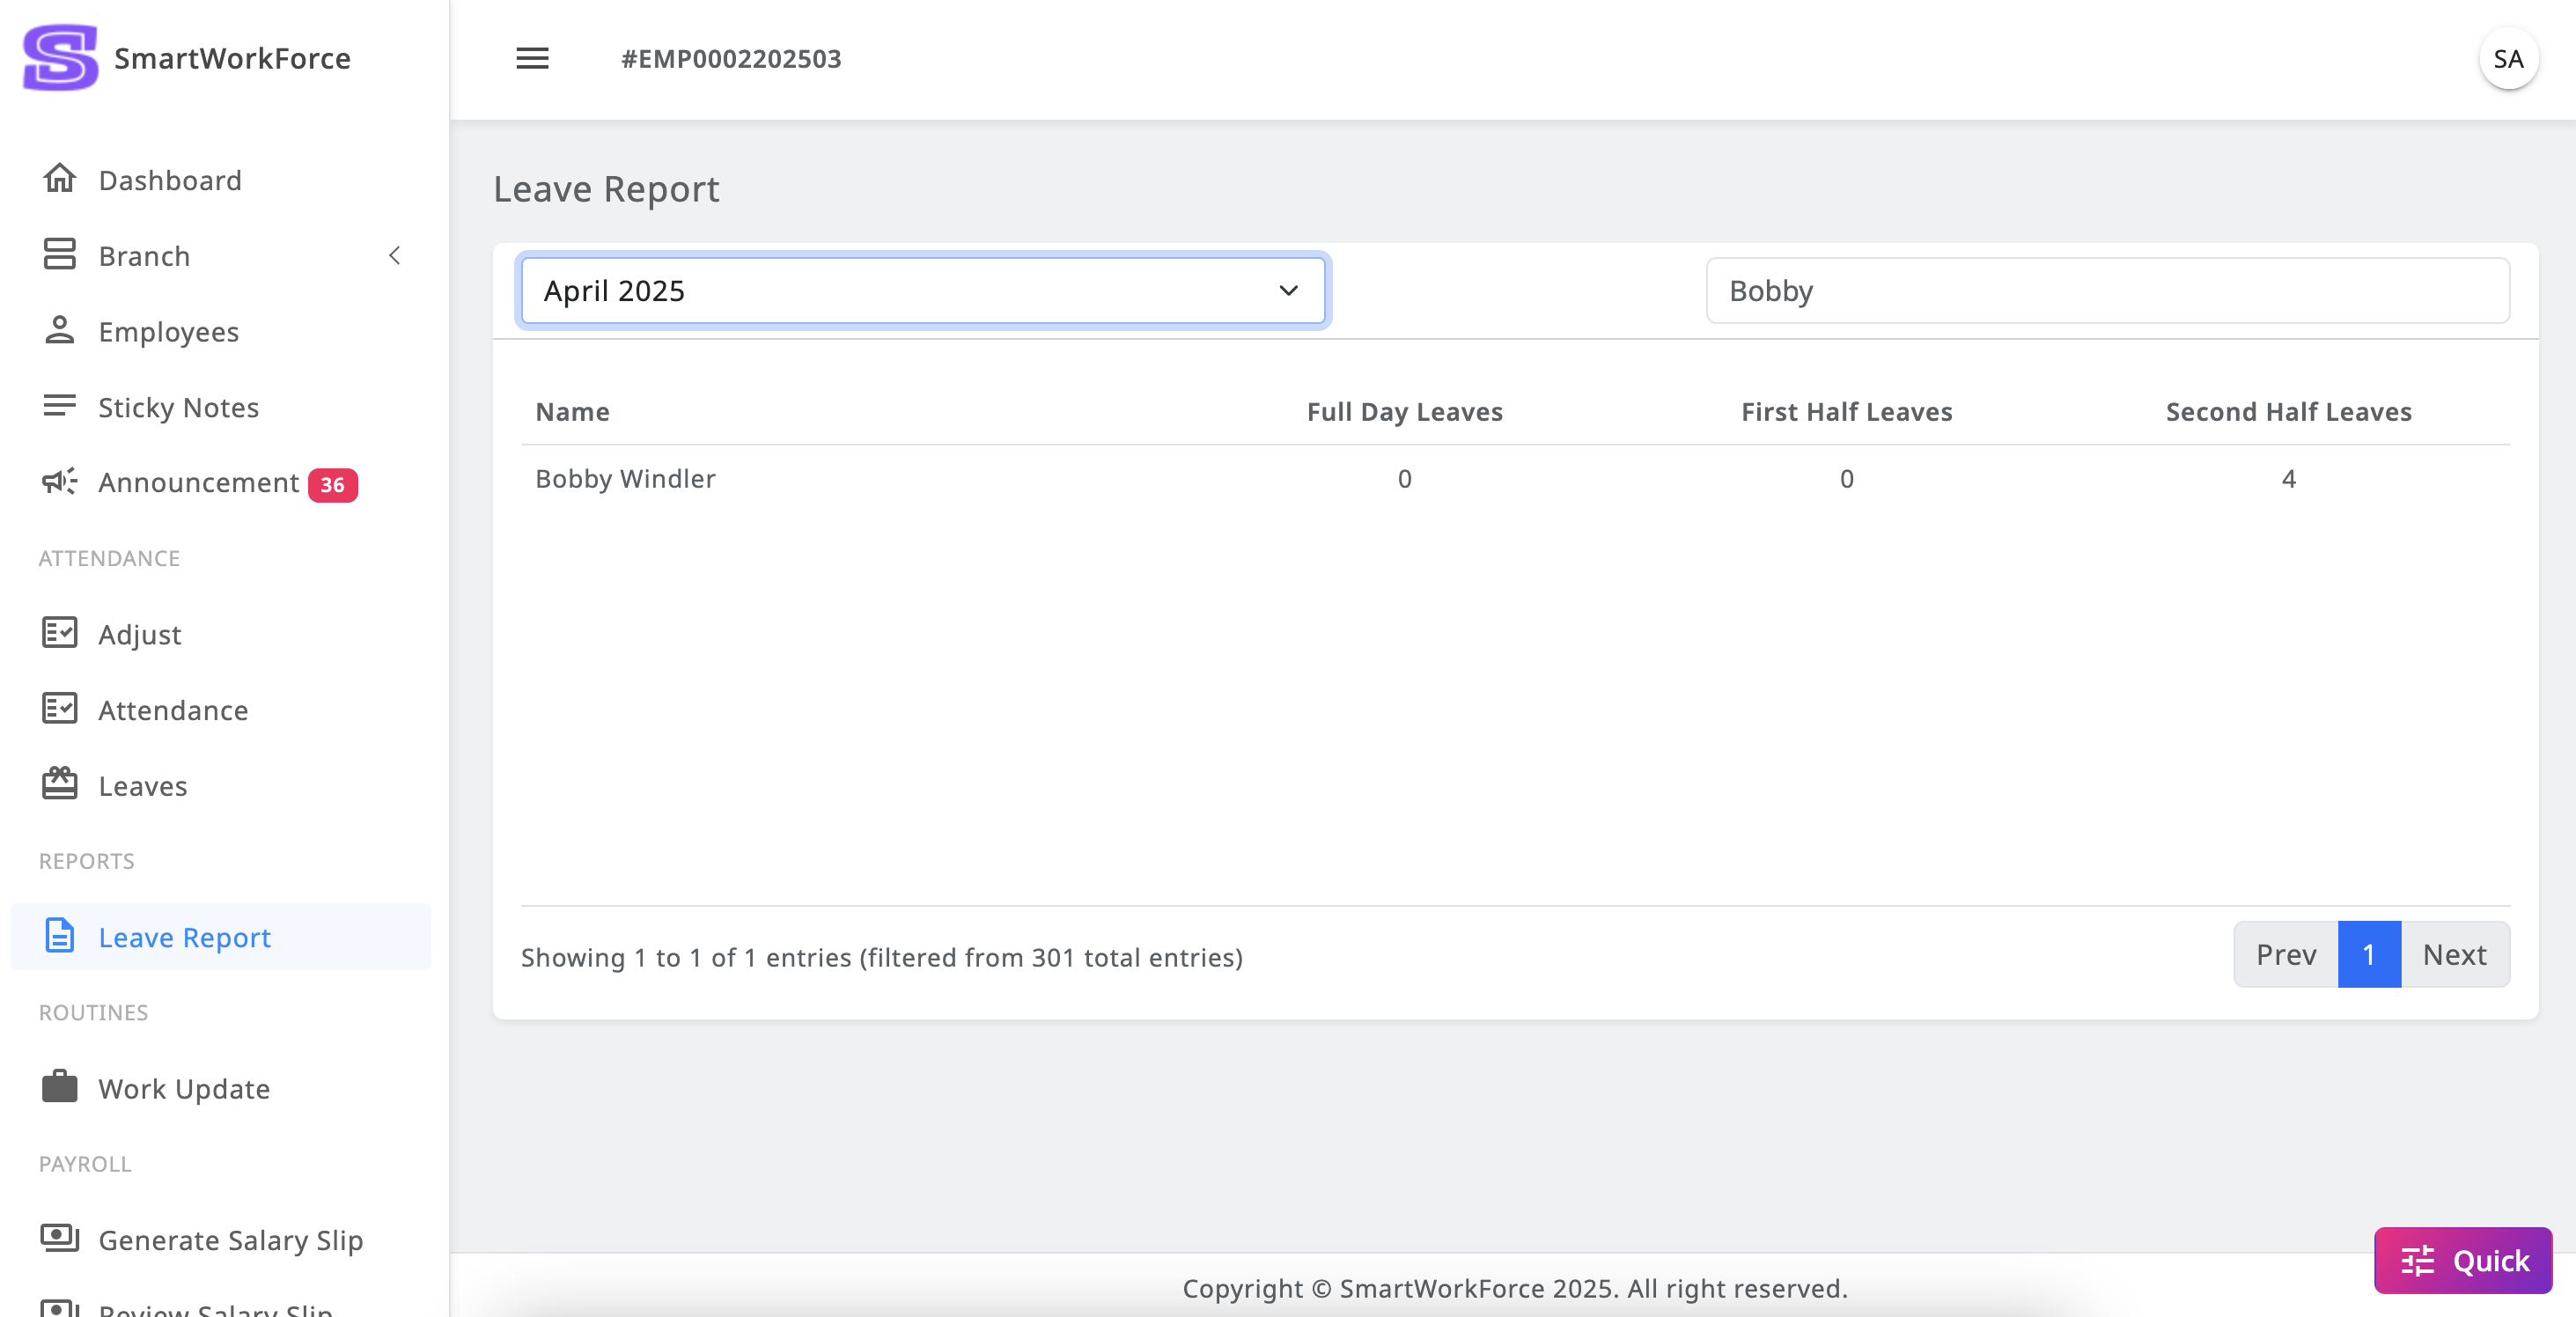
Report : Leaves Report
SmartWorkForce provides monthly leave reports, allowing admins to track
leaves taken by employees. Using the month and year filter or search
function, admins can easily find specific leave records. This feature
ensures efficient leave management and quick access to employee leave
history.
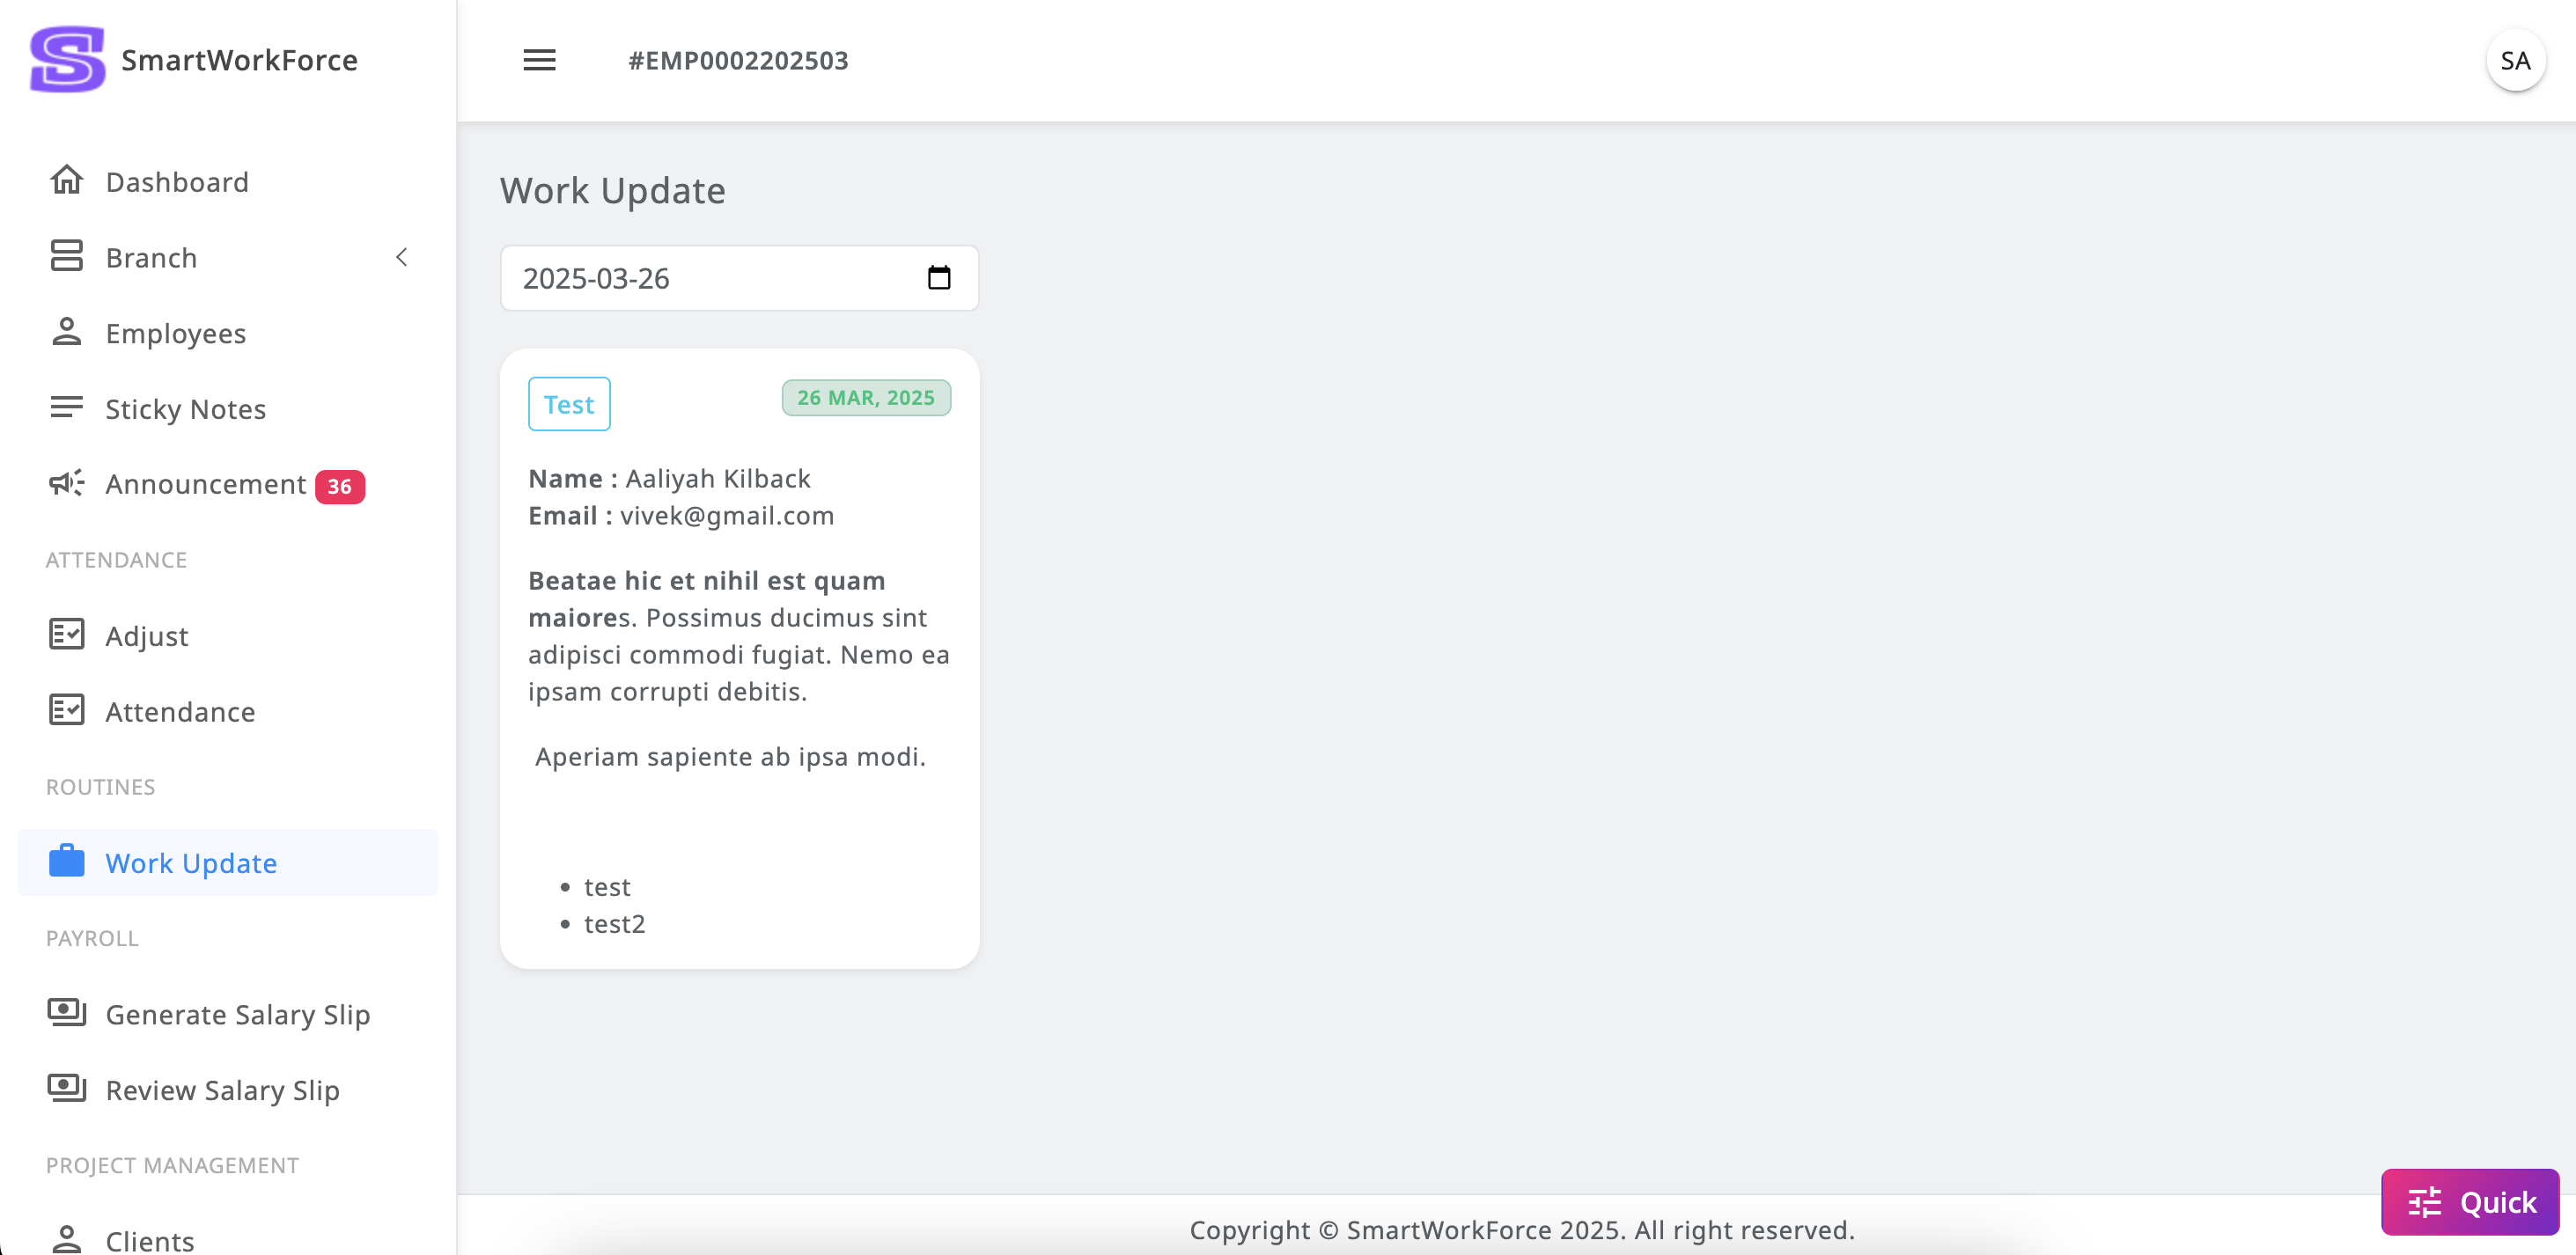
Routines : Work Update
The SmartWorkForce admin can track daily work updates submitted by
employees. Admins have the ability to filter and view these work updates on
a date-by-date basis. This feature allows admins to see who has provided
their work updates and the details of what has been completed each day.
There is a daily restriction in place, ensuring that employees can submit
only one collective work update per day. This helps maintain organized and
concise records of employee activities.
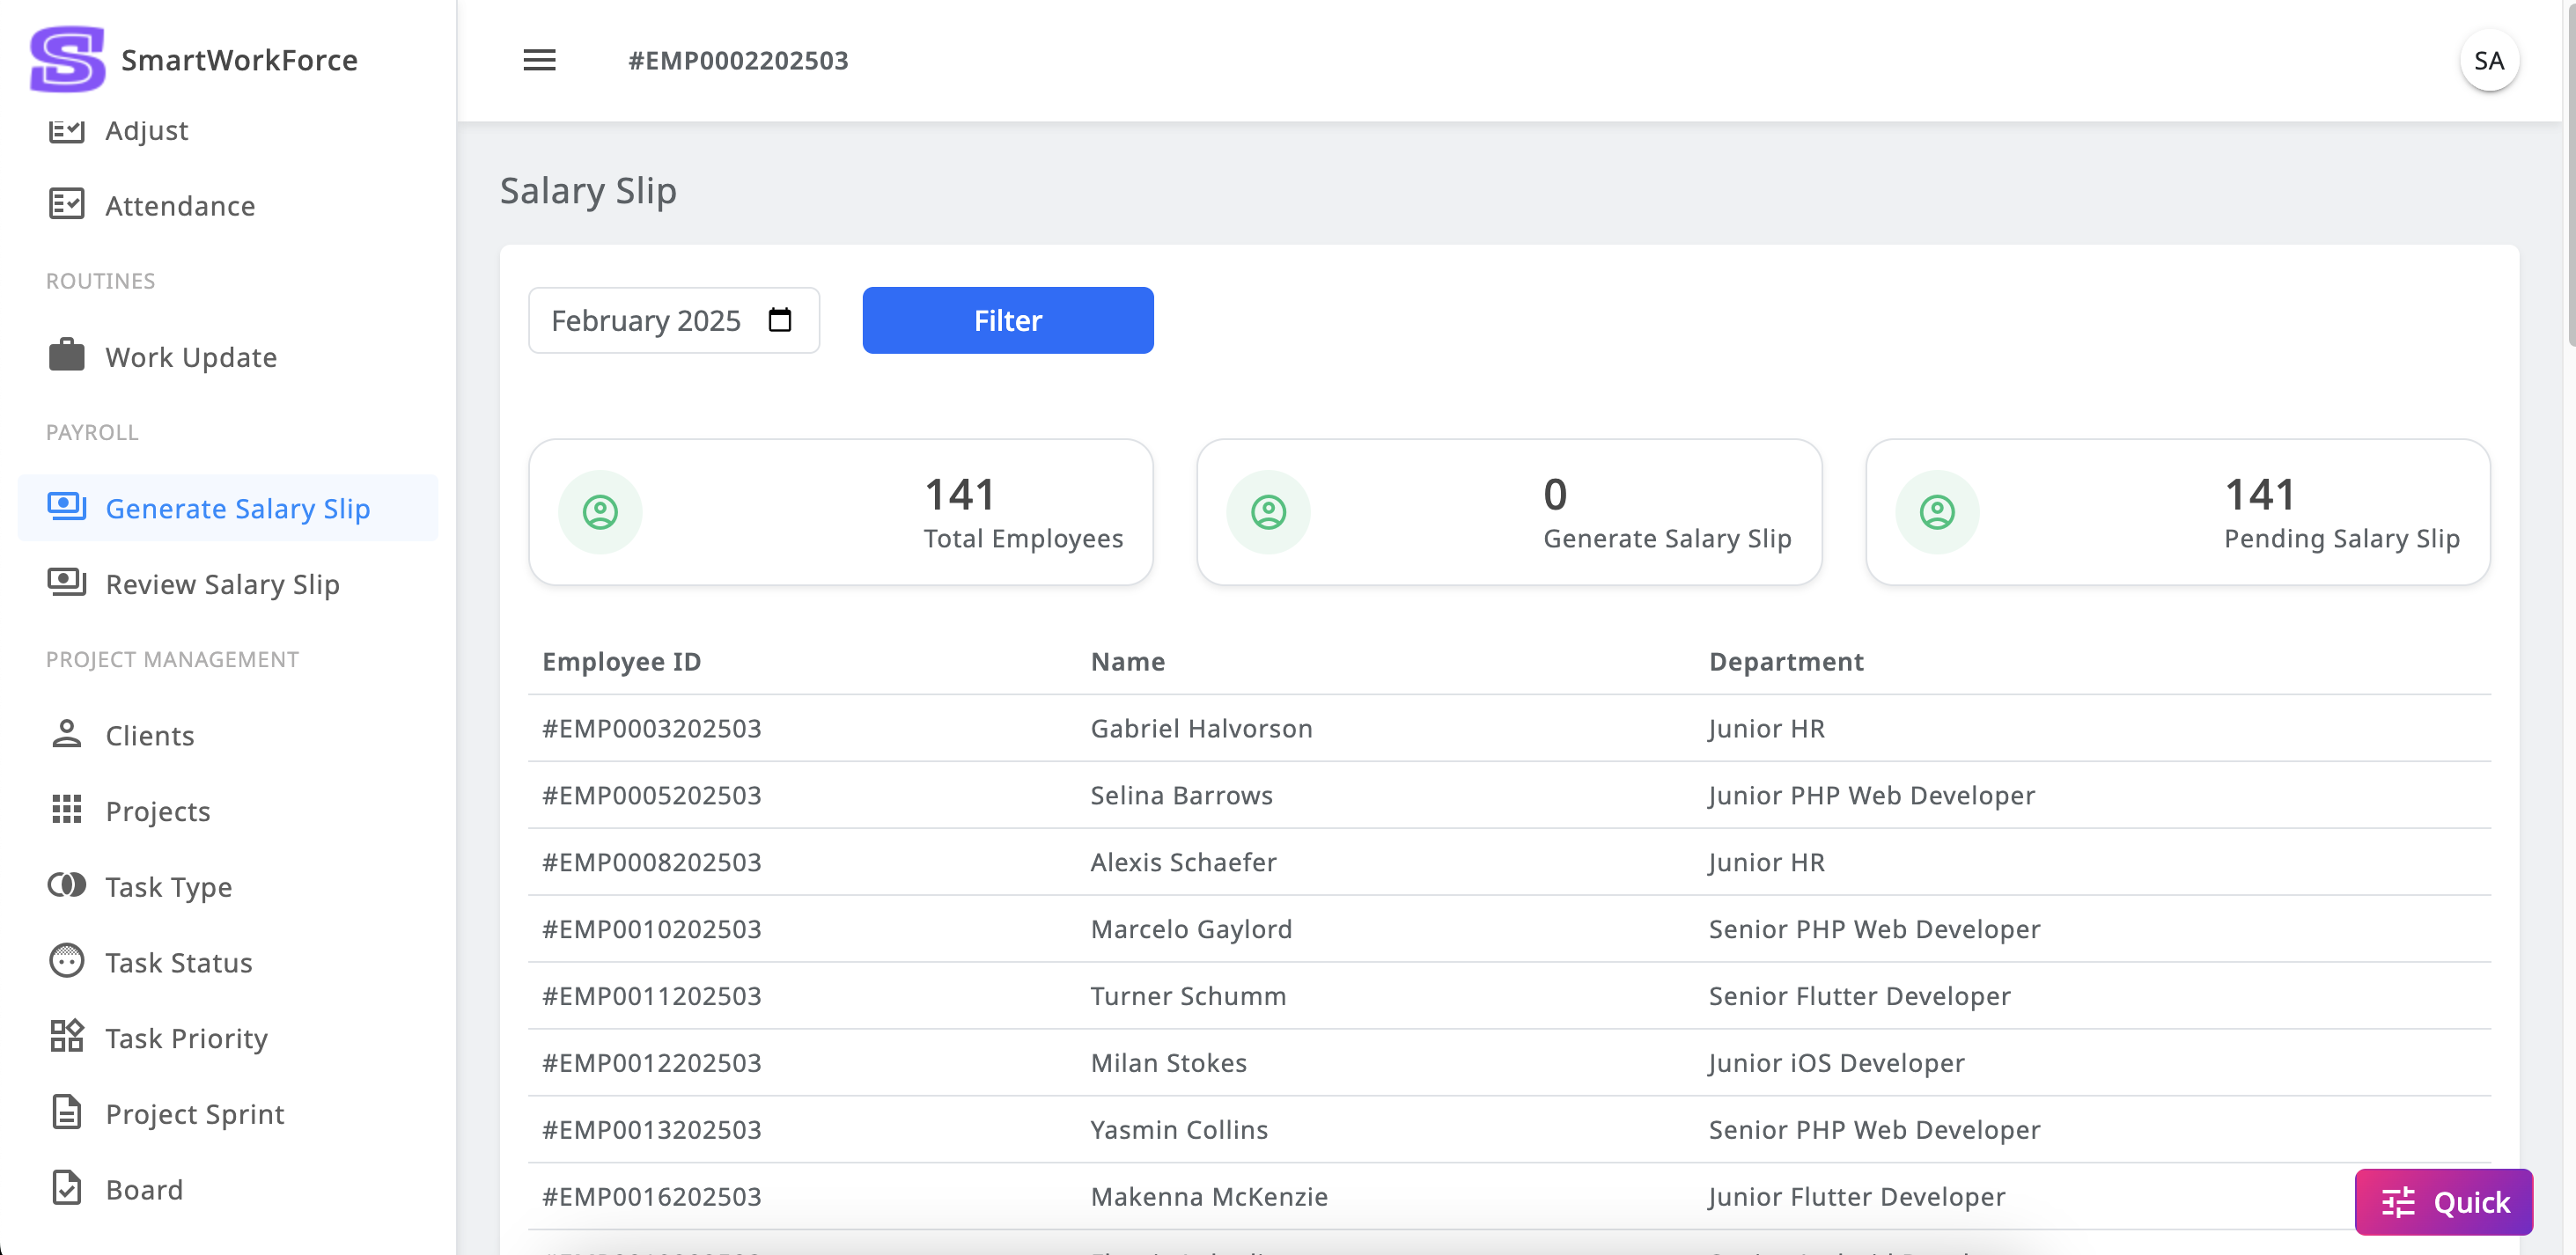
Payroll : Generate Salary Slip
The SmartWorkForce admin can generate monthly salaries for all employees
with the following features and process:
Monthly Salary Generation: Each month, the admin must
generate the
salary for all active employees. This can be done in a single action,
eliminating the need to generate salaries for each employee
individually.
Automatic Data Integration: Once the salary is
generated, all relevant
attendance data, including check-ins, check-outs, and absences, will be
automatically added to the salary records.
Review Process: After generating the salary, the admin
must review each
employee's salary slip individually to verify the details.
Approval: Once the review is complete, the admin can
accept the salary
slip, finalizing the process.
Next Step
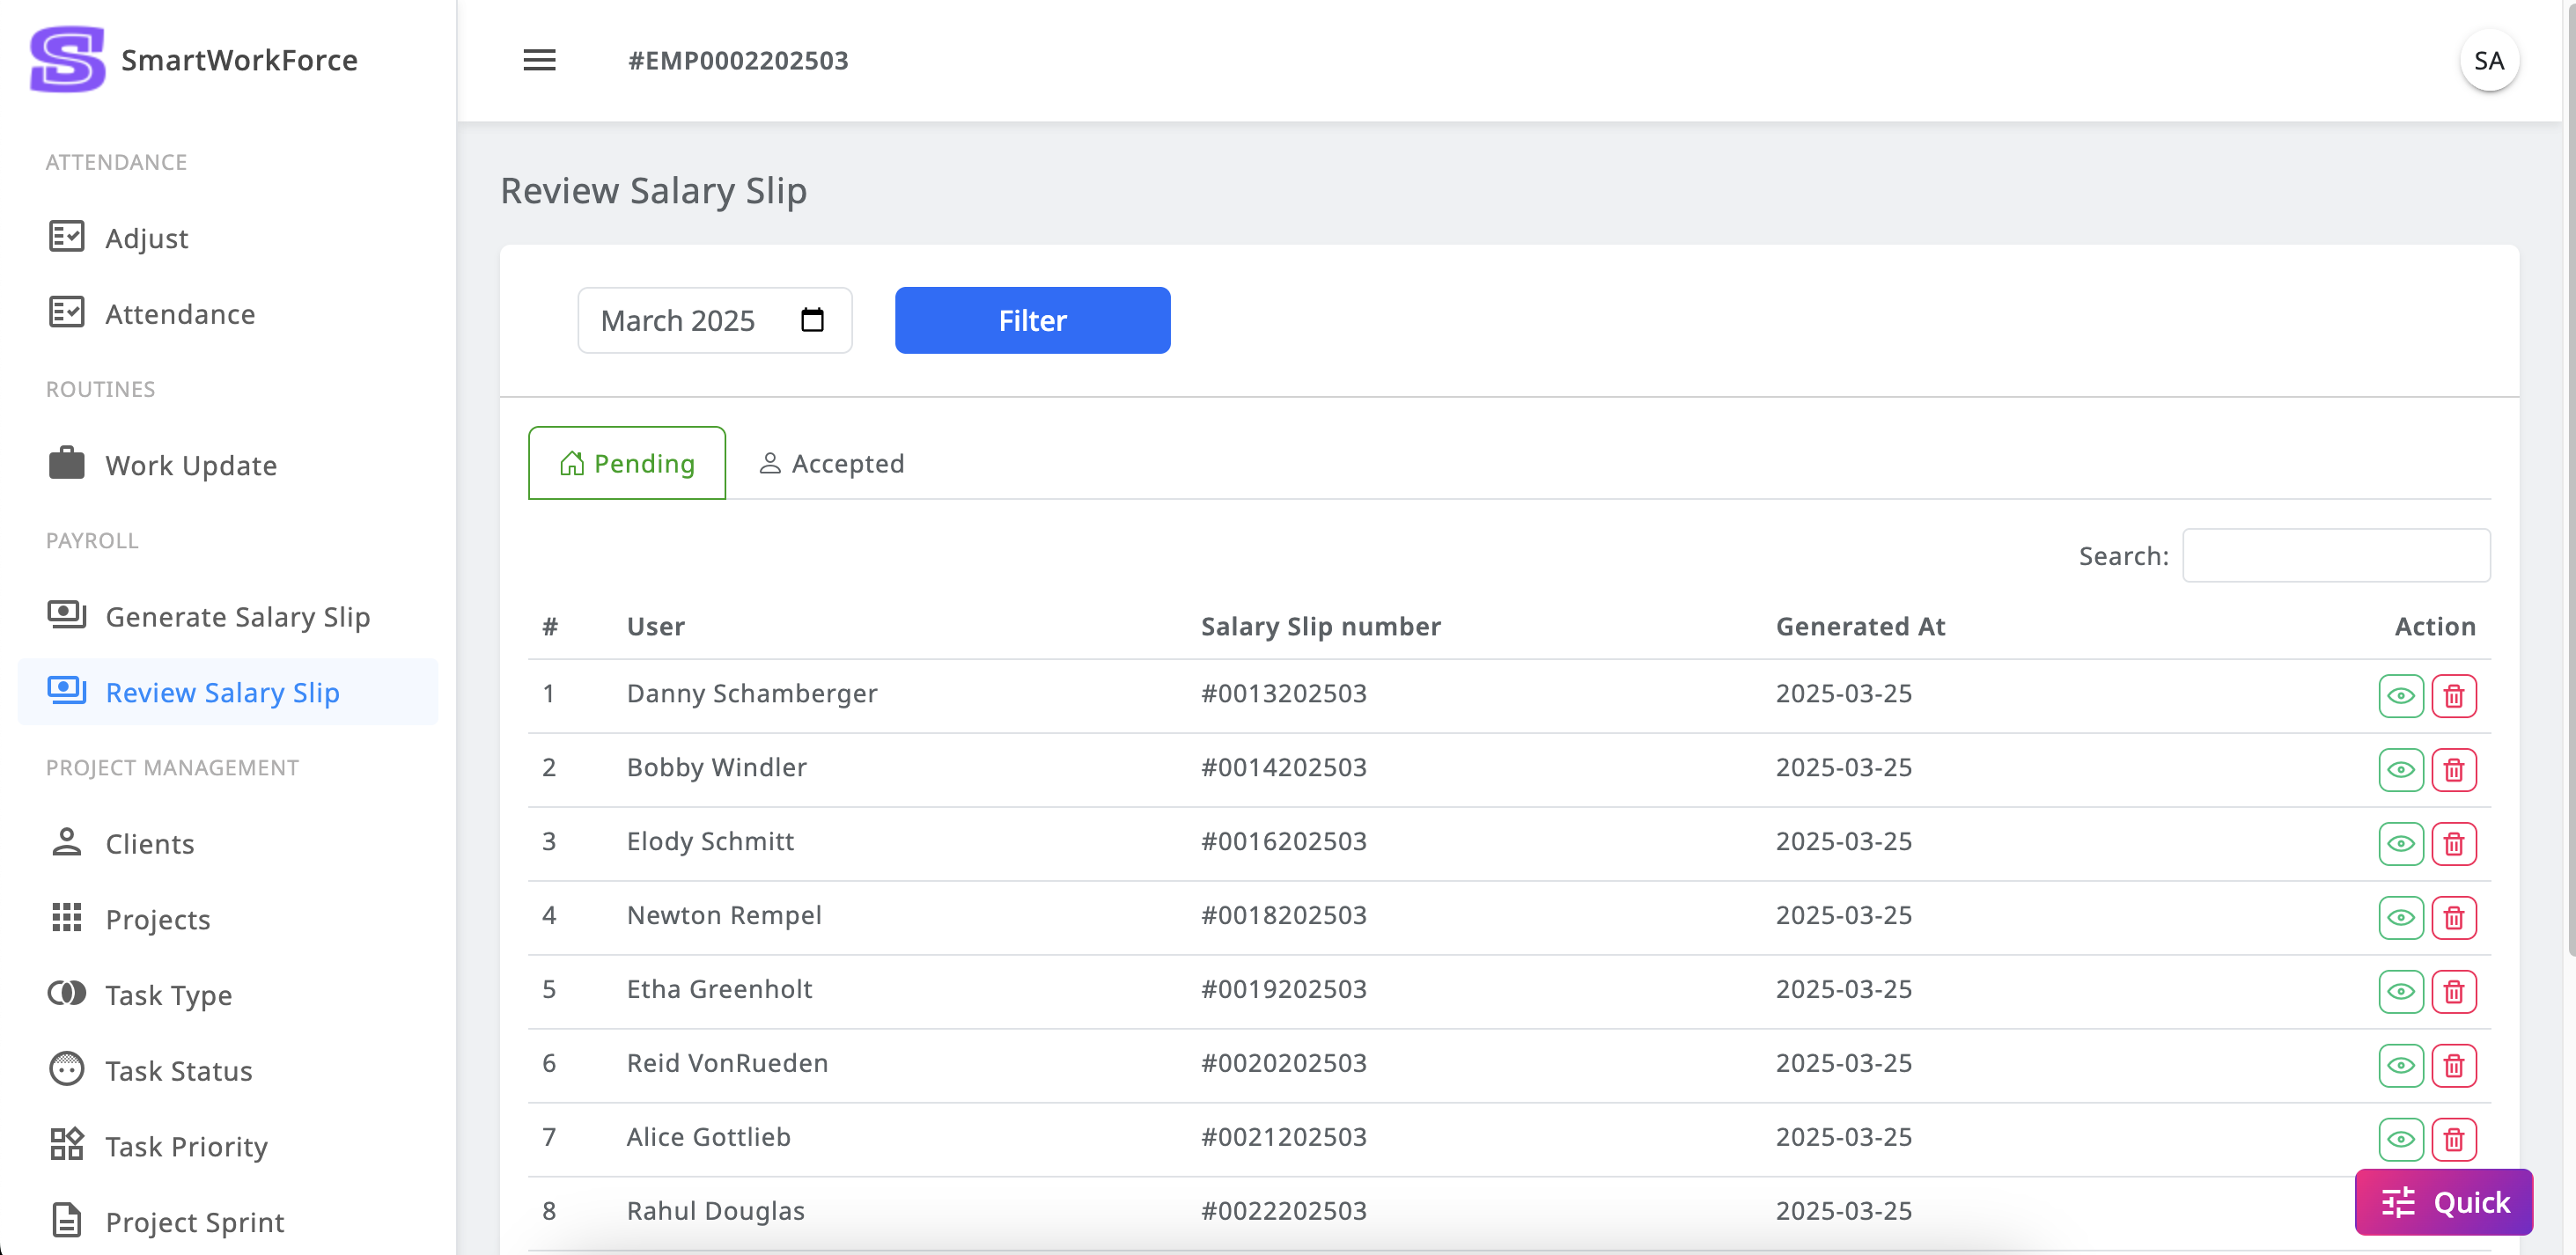
Payroll : Review Salary Slip
The Payroll Review Salary Slip feature in SmartWorkForce provides admins
with an organized way to review and manage employee salary slips. Key
functionalities include:
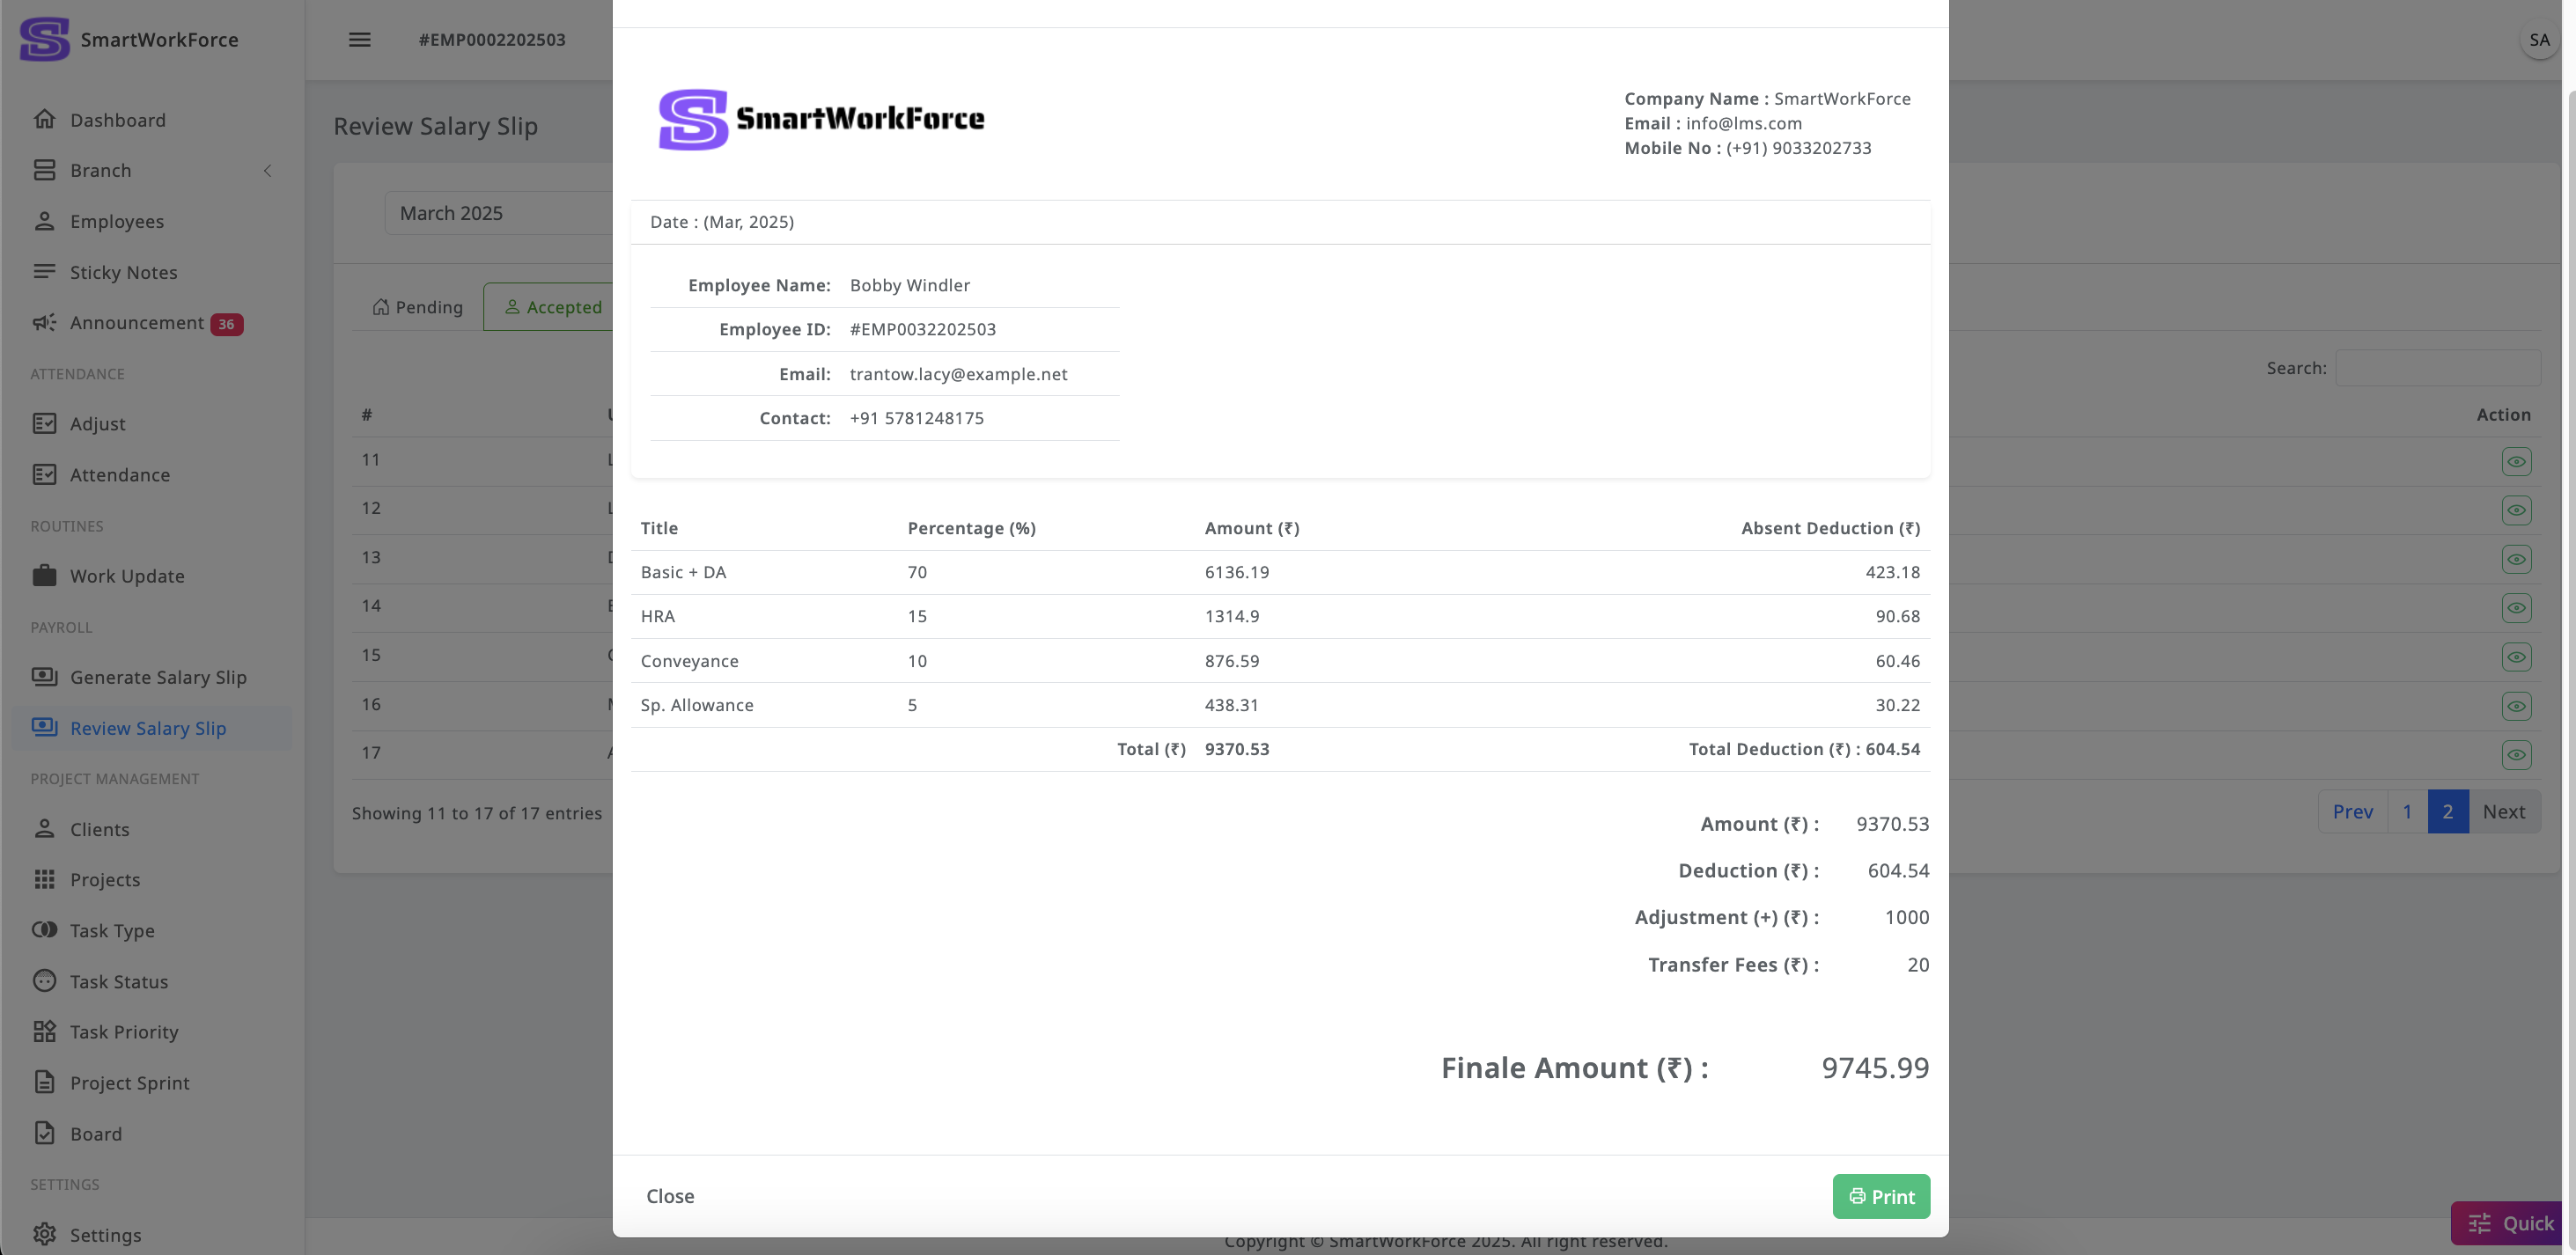
Tabs for Pending and Accepted Slips: There are two
tabs — Pending
and Accepted — where admins can easily distinguish between salary
slips that are still awaiting review and those that have been
reviewed and accepted for payment.
Month and Year Filter: Admins can filter salary
slips by month and
year, allowing for quick navigation and review of the correct
period.
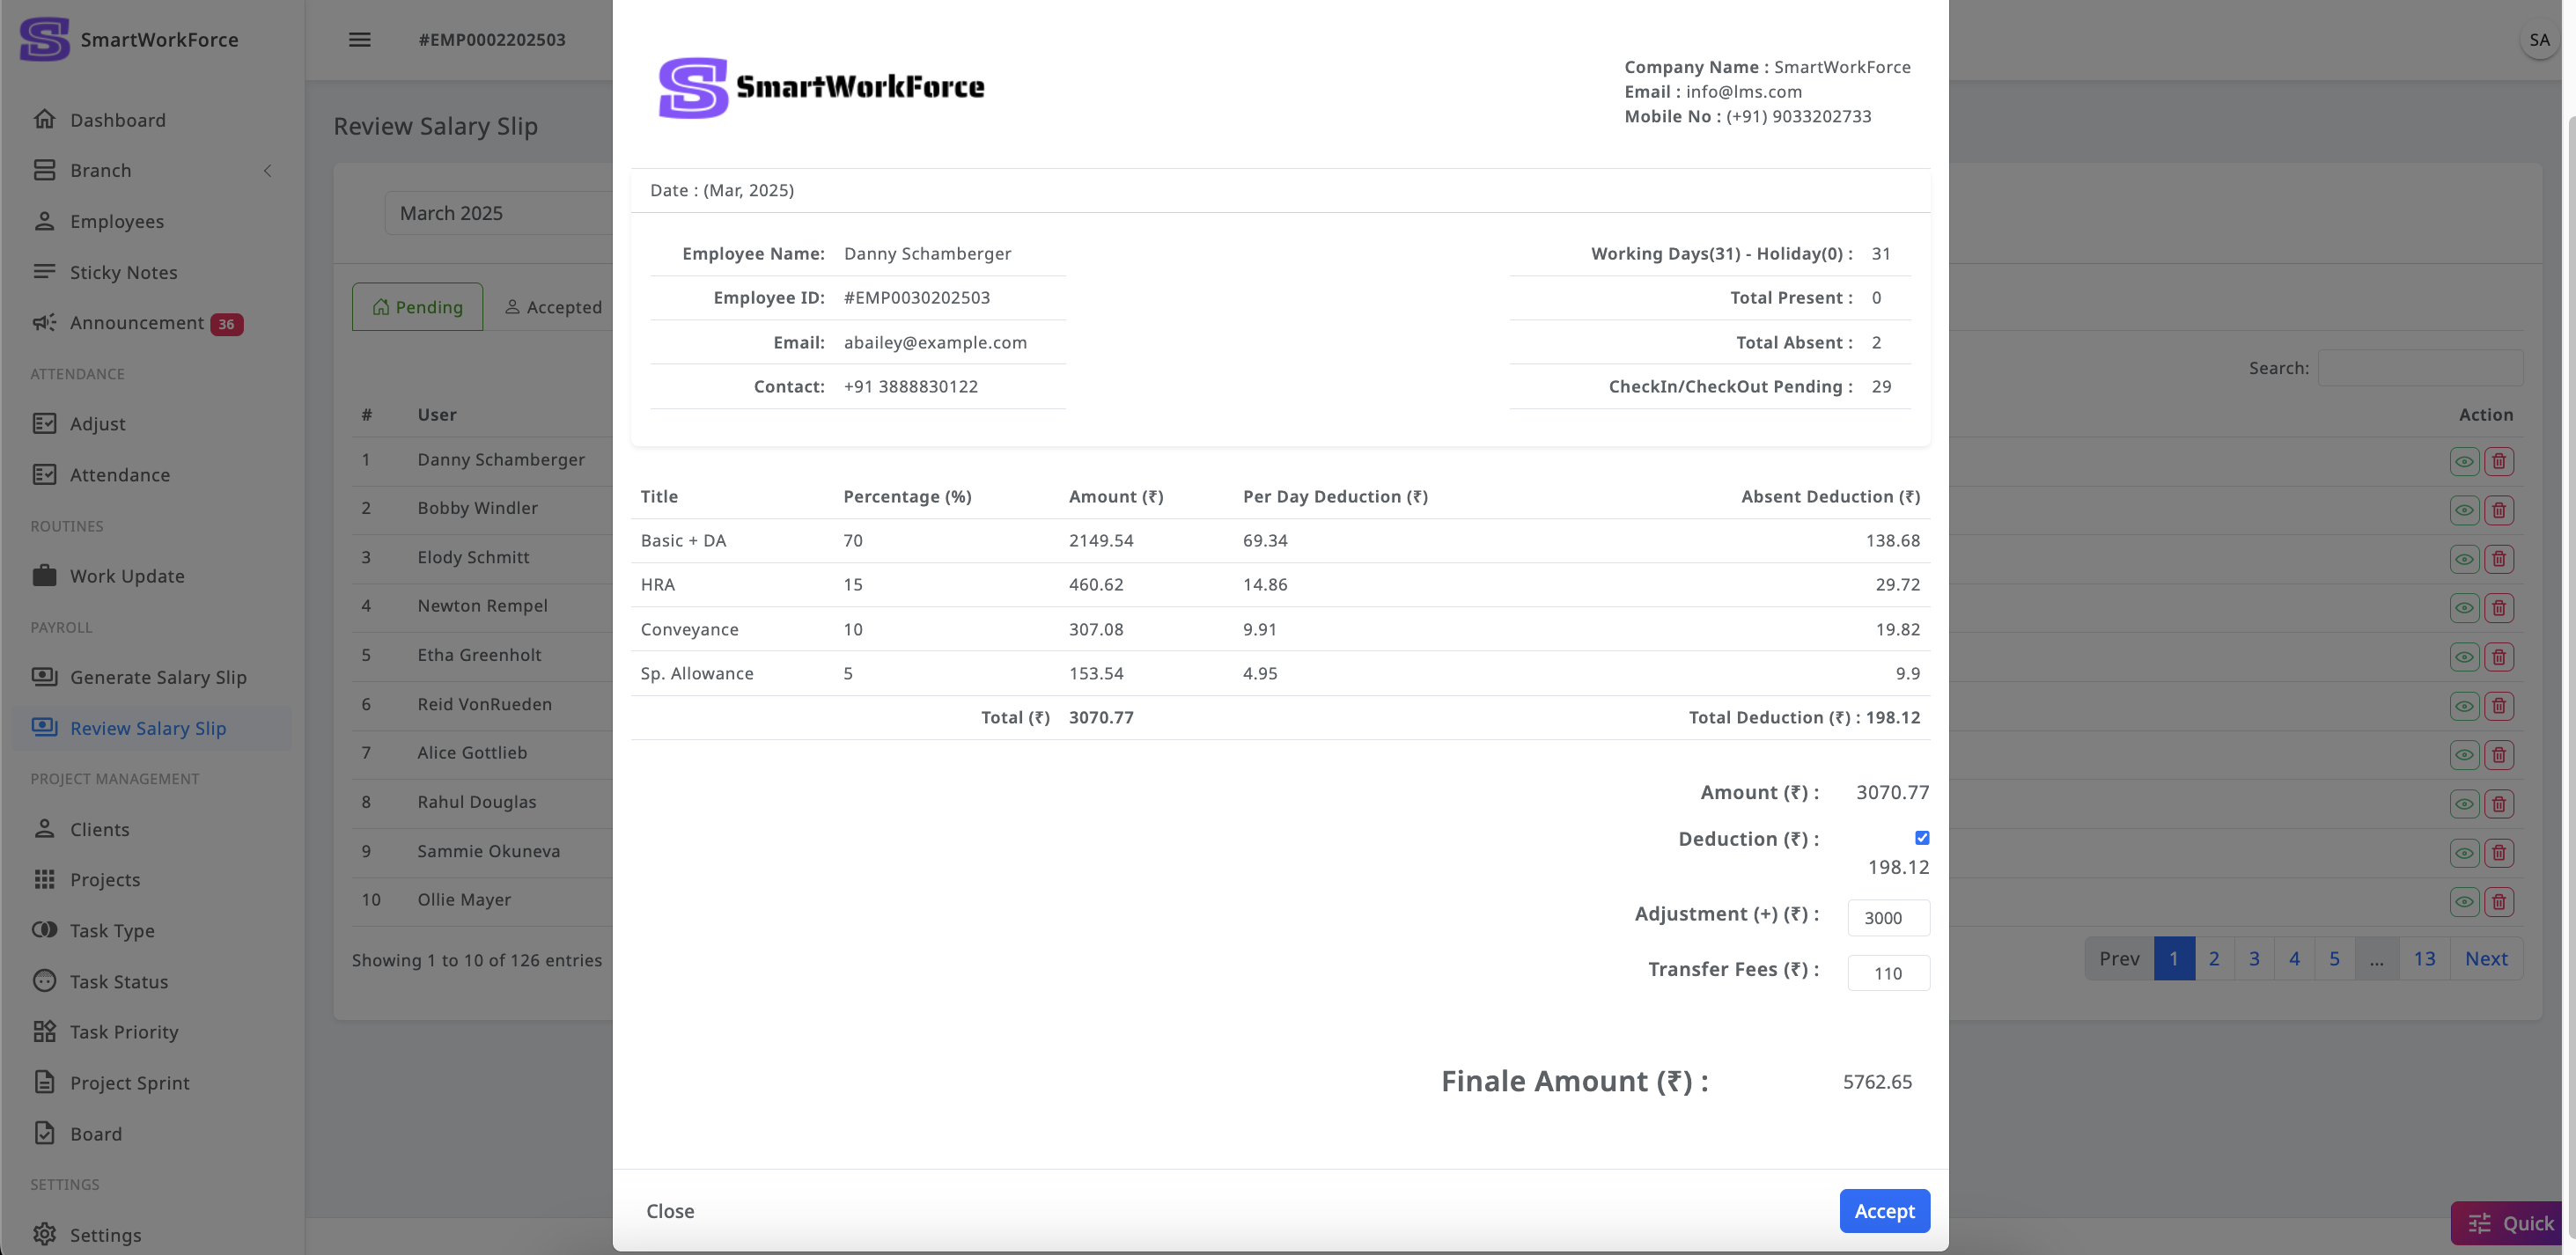
Pending Salary Slip Details: The Pending tab lists
all salary slips
that require review. Admins can click the View button to access the
detailed attendance information for each employee, including their
present and absent days, as well as other necessary data.
Leave Deductions: If an employee was absent, the
admin can deduct
leave days from their salary. If the employee was present, the
salary remains unchanged.
Regenerating Incorrect Salary Slips: If an error is
found in a
salary slip, the admin has the option to remove the incorrect slip
and regenerate it.
Adjusting Amounts: Admins can add or subtract amounts,
such as adjusting
for transfer fees or other deductions, before finalizing the salary
slip.
Finalizing and Accepting Salary Slips: Once the review
and adjustments
are complete, the admin can accept the salary slip, finalizing it and
making it available for the employee to view.
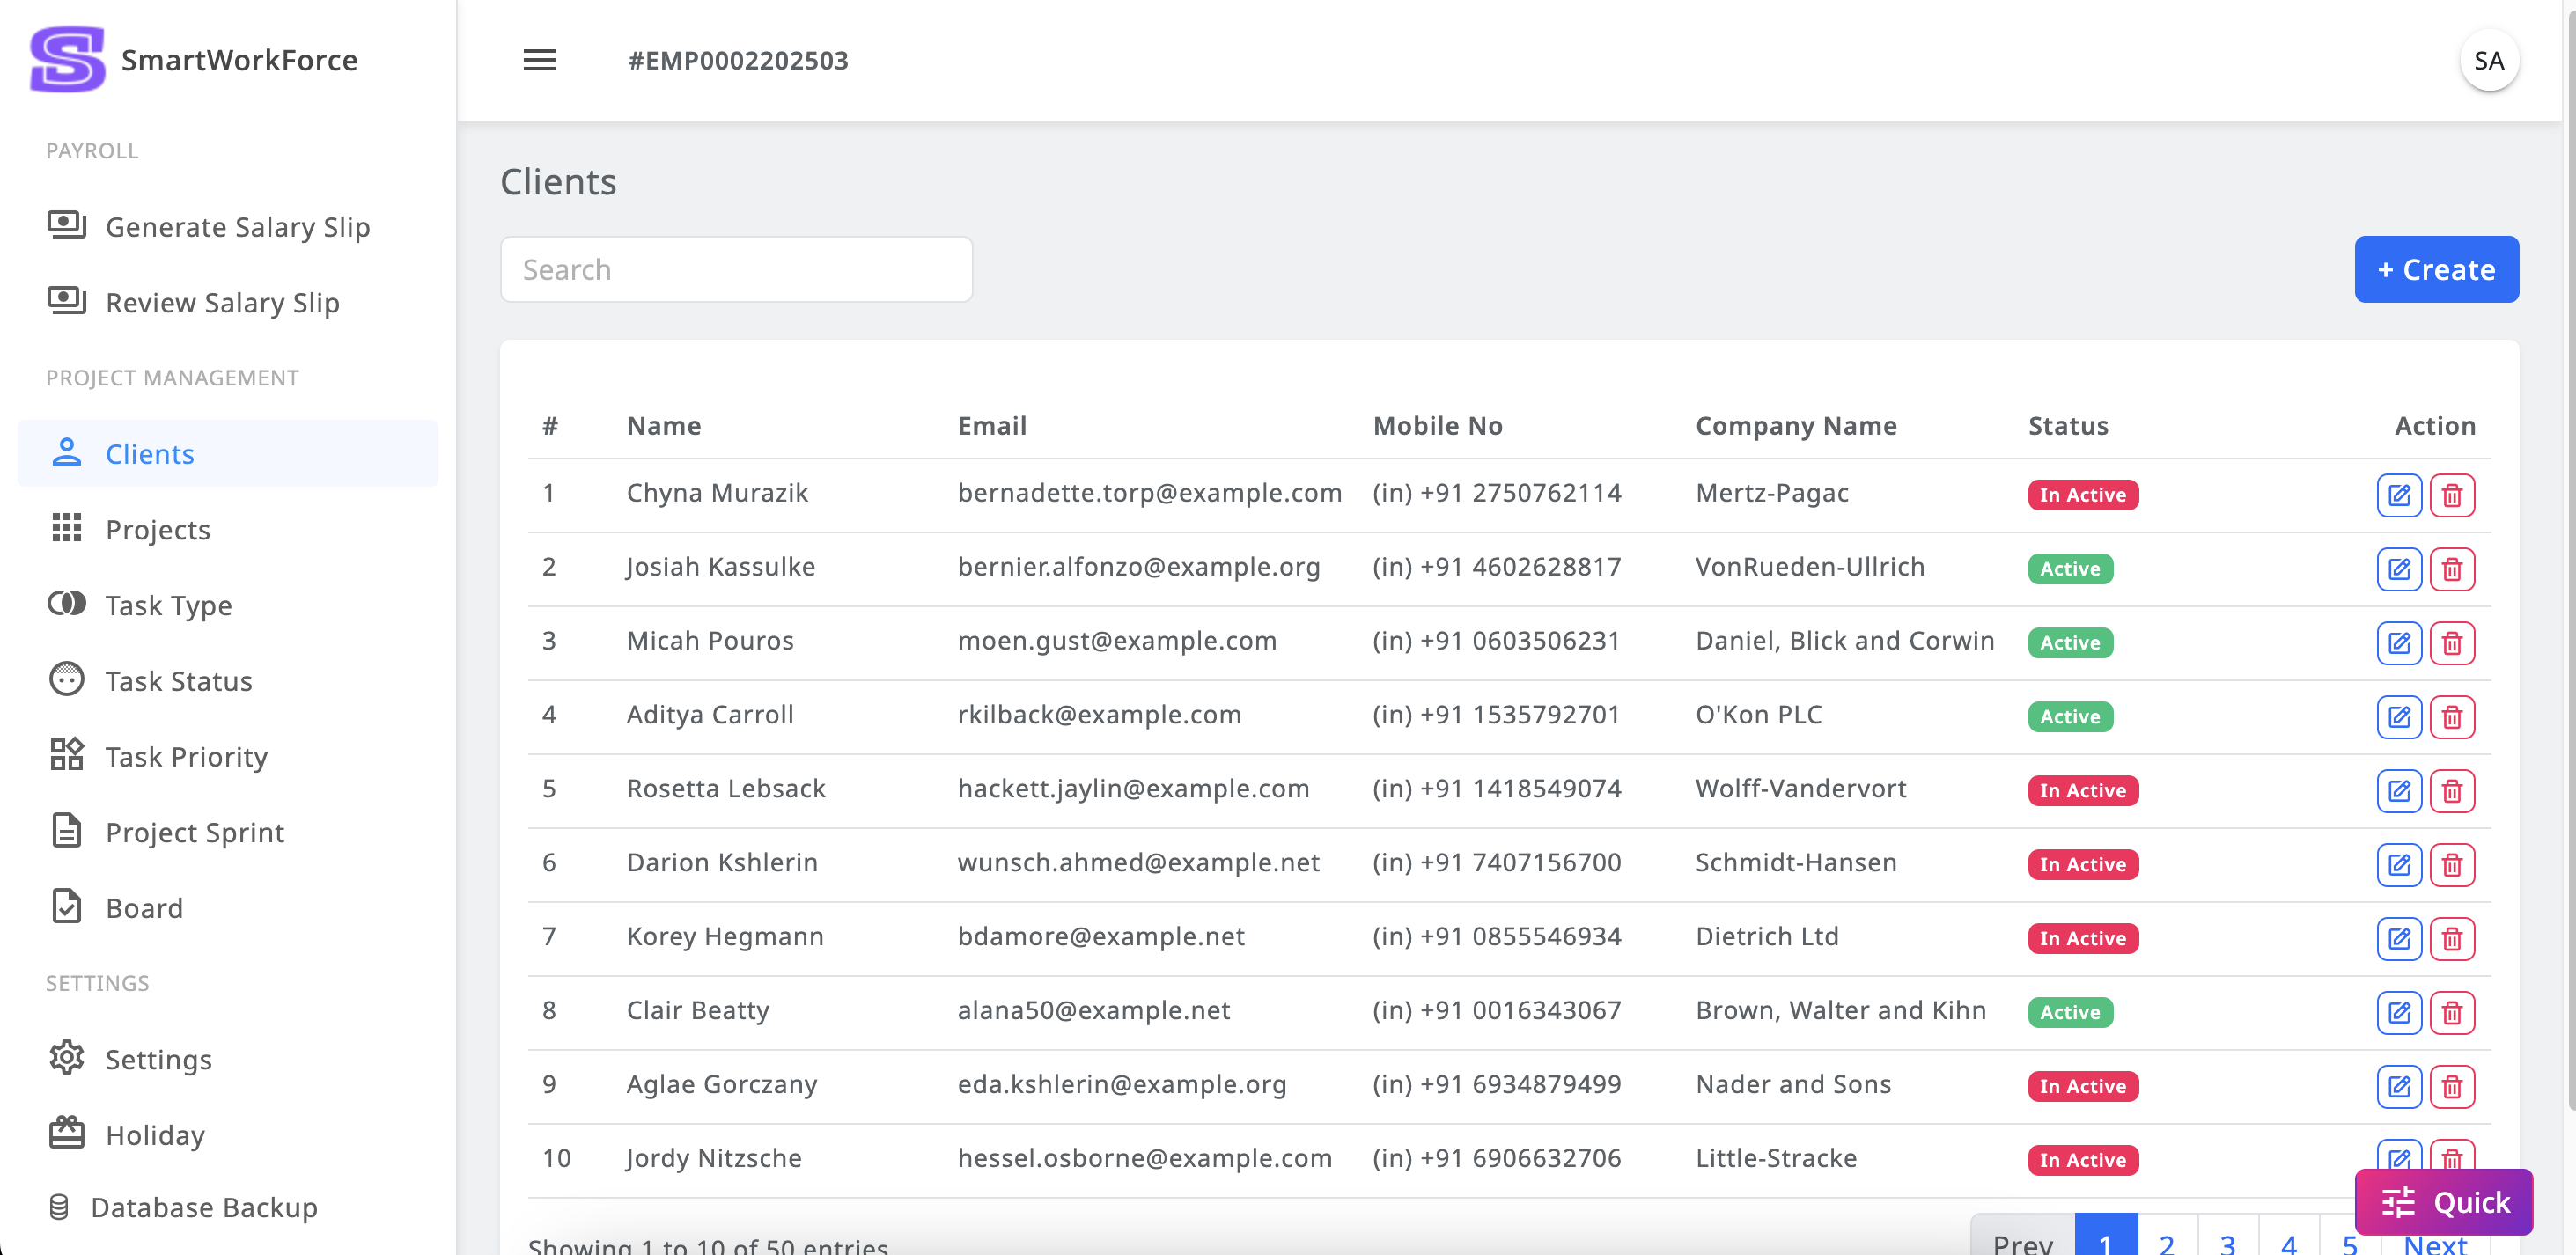
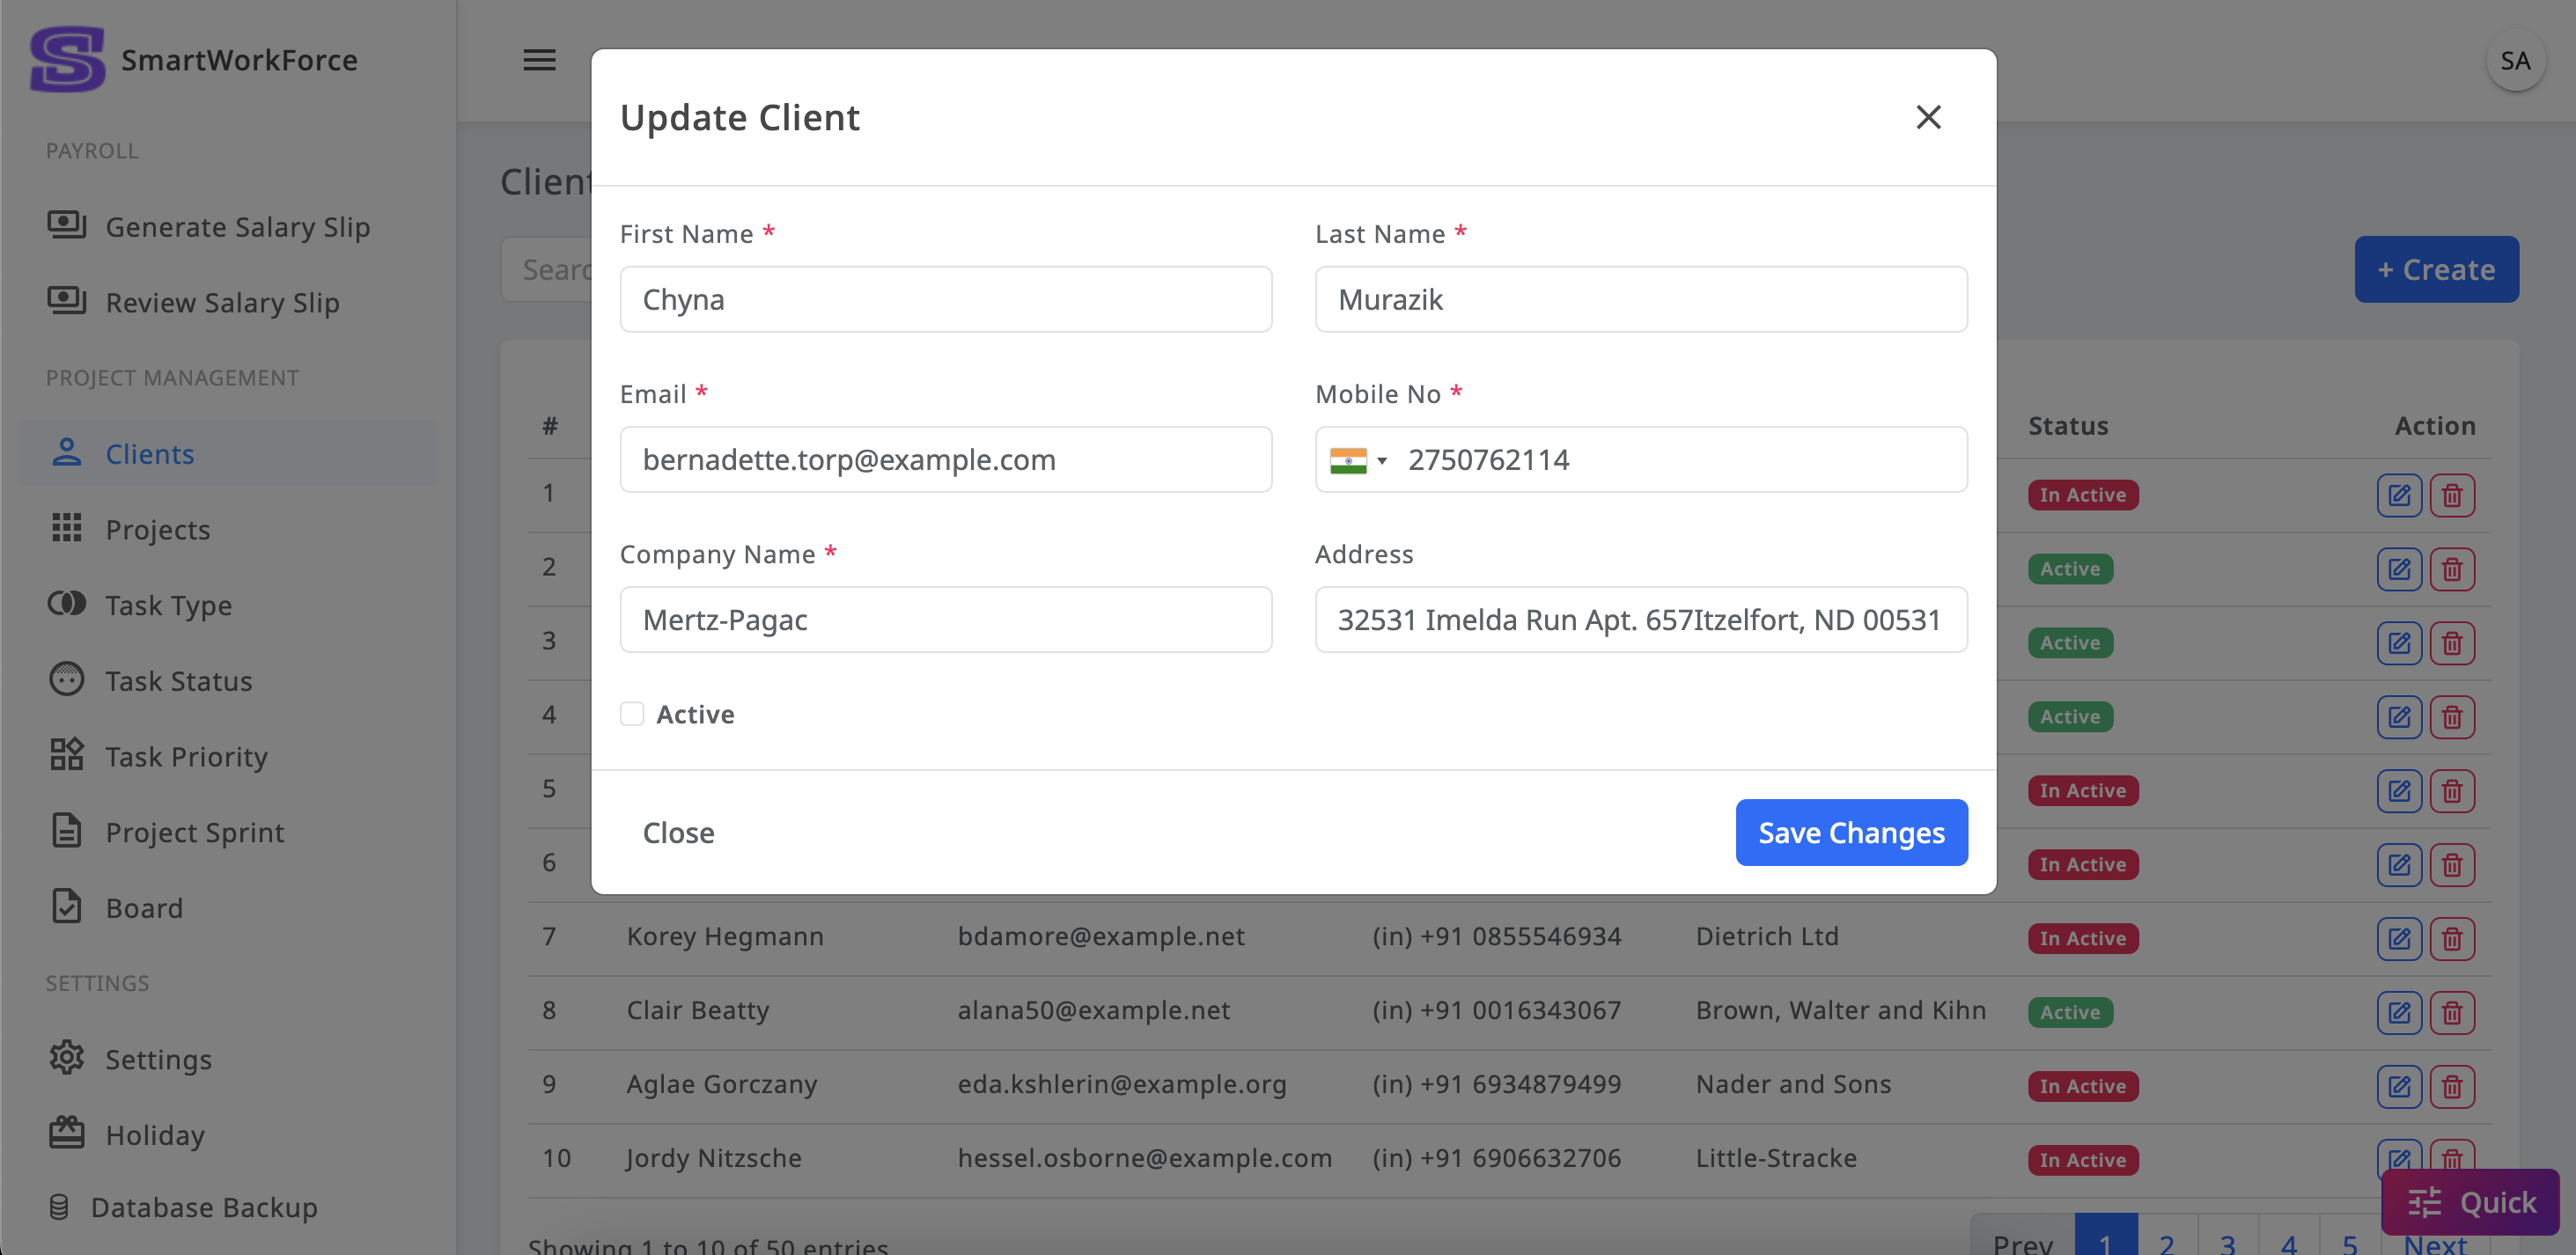
The Project Management Client Module in SmartWorkForce allows admins to
manage clients efficiently. Admins can add new clients, view a list of
existing clients, and edit or update client information as needed. They can
also activate or deactivate clients based on the project's requirements,
providing easy control over client management within the system.
ClientClient Create/Edit-Update
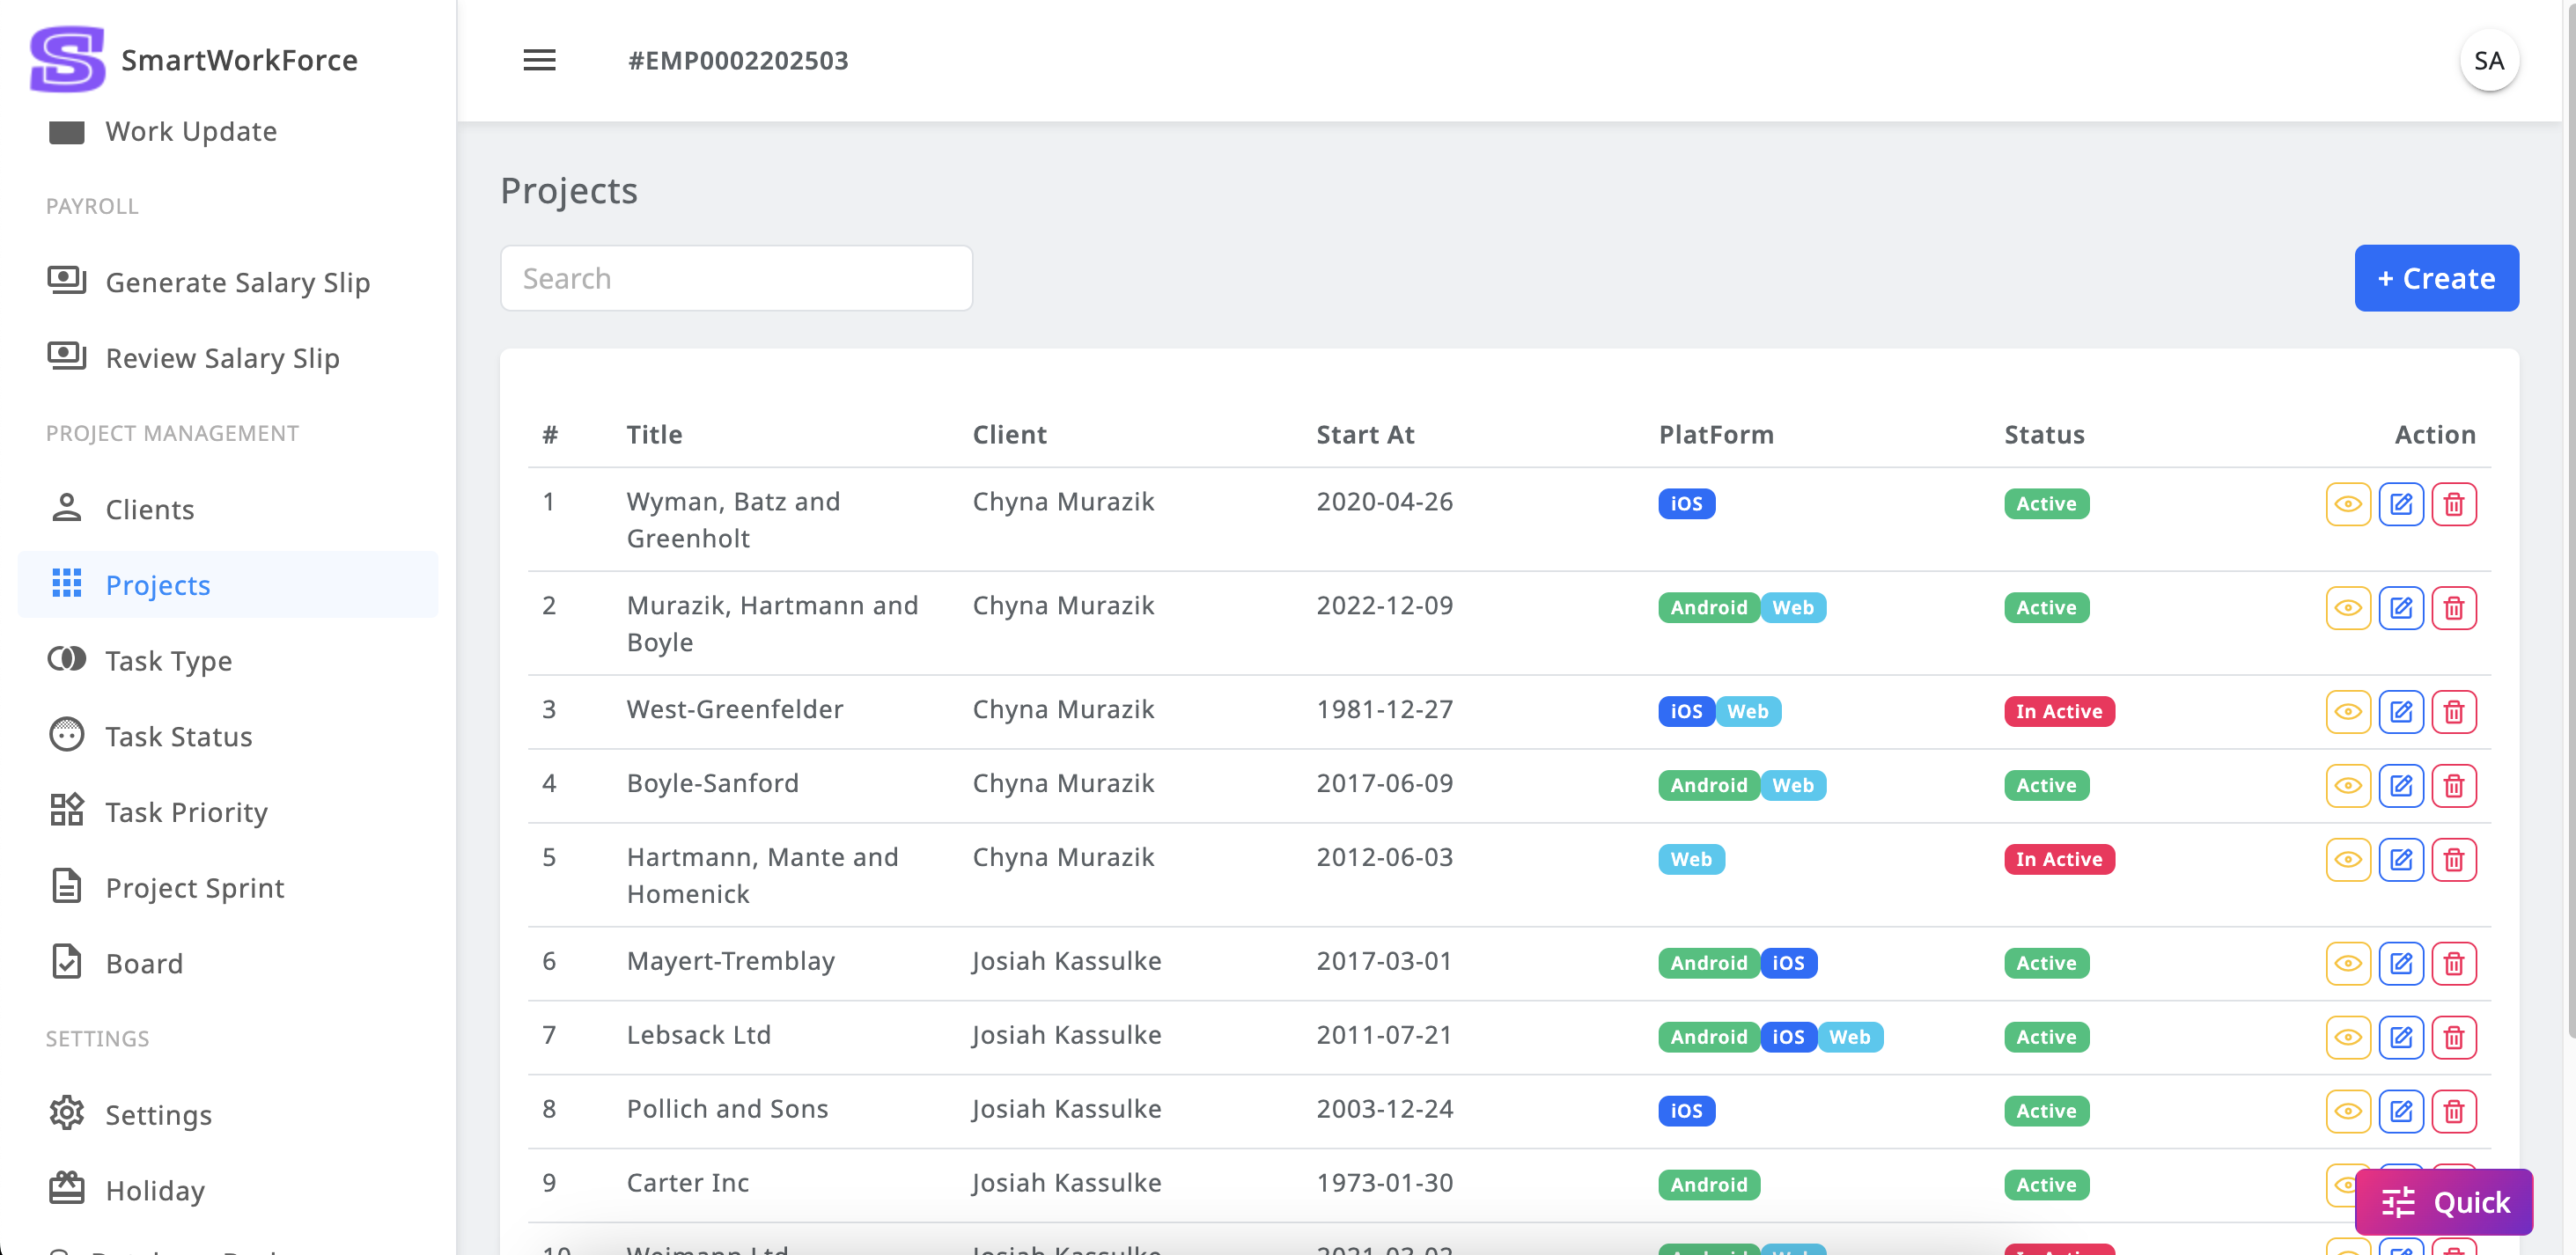
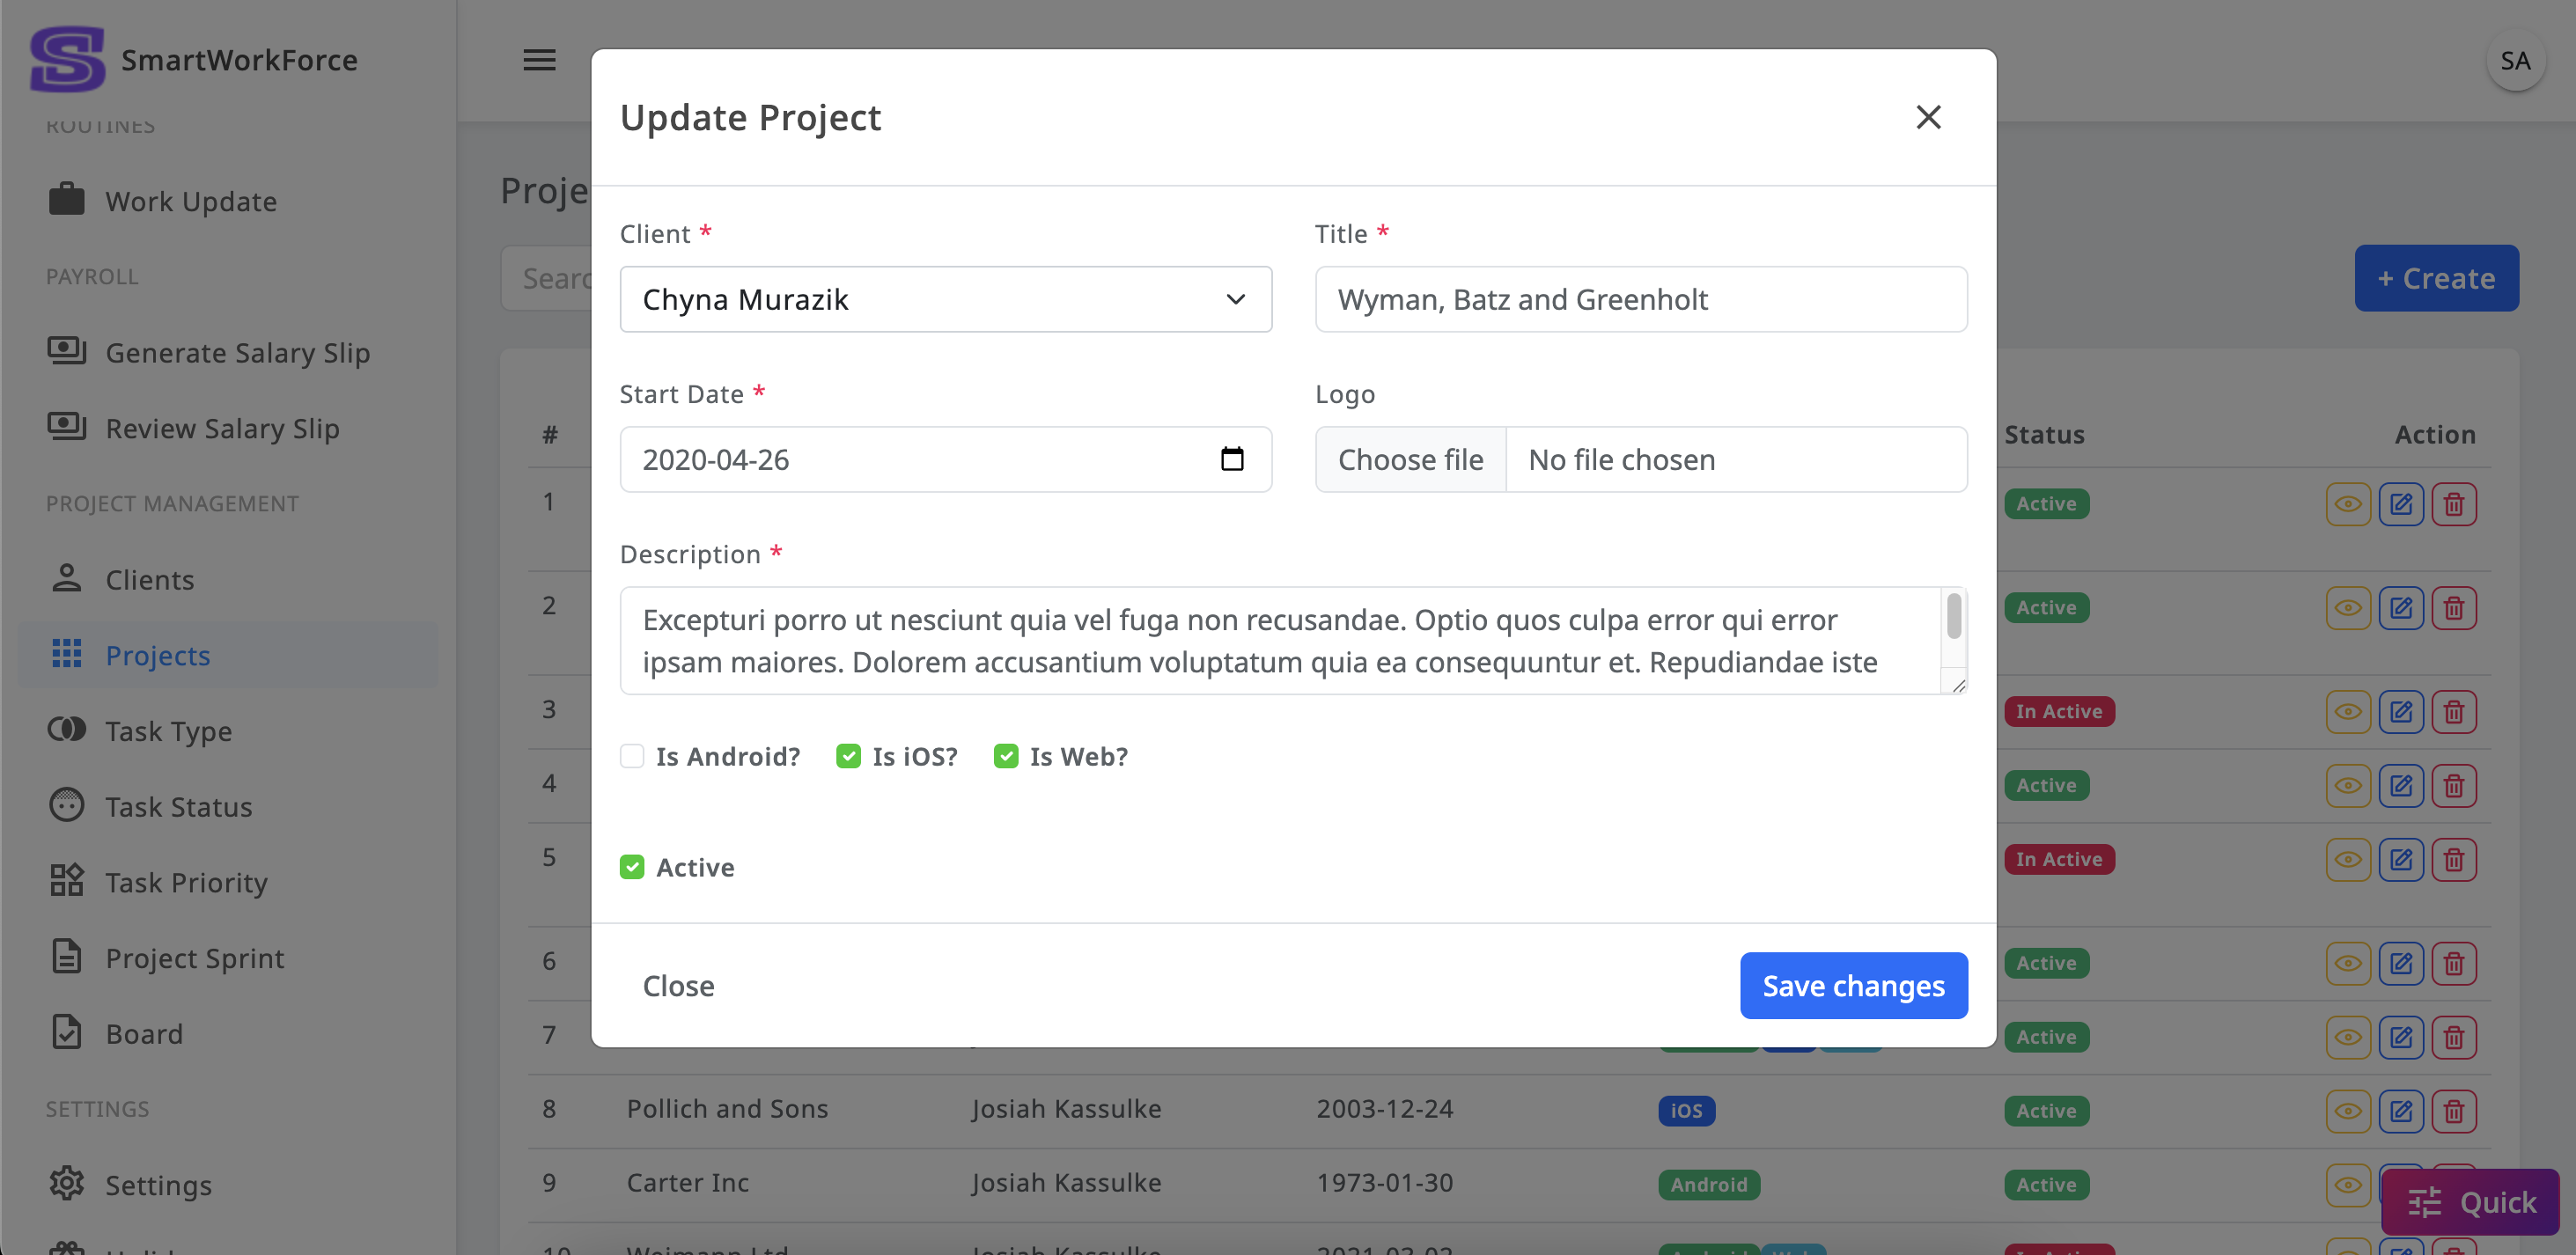
Project Management : Projects
In the Client's Project Management module of SmartWorkForce, each client can
have multiple projects associated with them. Admins can create, edit,
update, and remove projects as needed.
When a project is created for a client, three default entries are
automatically generated:
Task Types:
By default, three task types are created — New Task and Bug.
Task Status:
The project automatically includes three task statuses — TODO,
DOING, and DONE.
Task Priority:
Three priority levels are set by default — High, Low, and Medium.
ProjectsProjects Create/Edit-Update
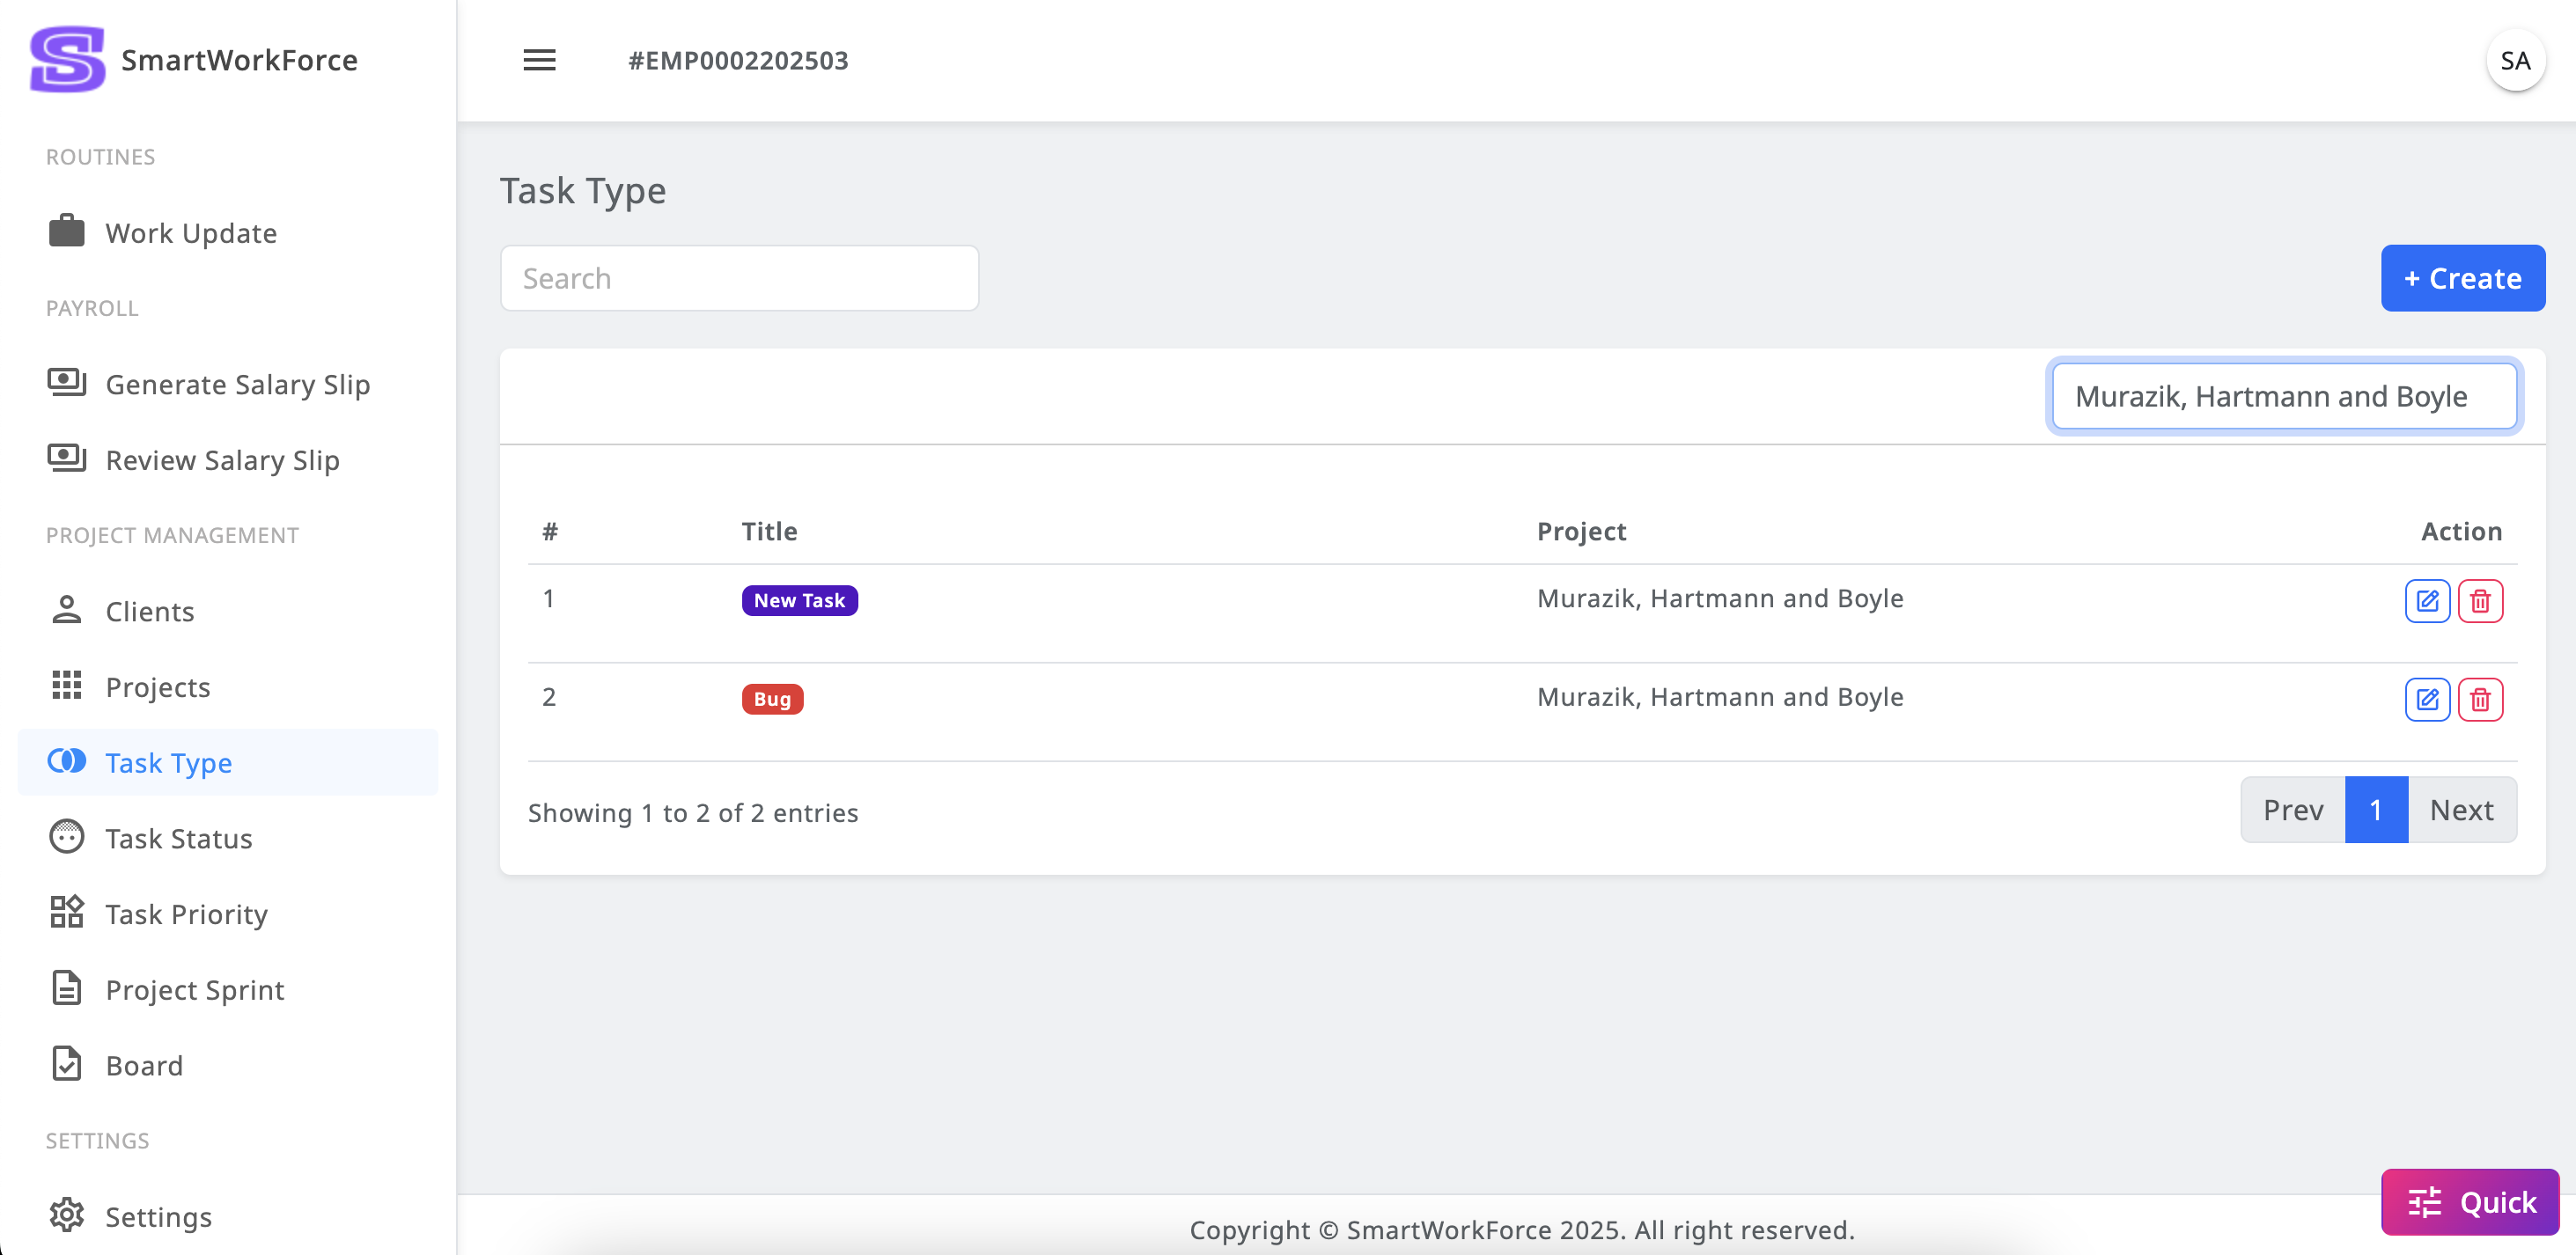
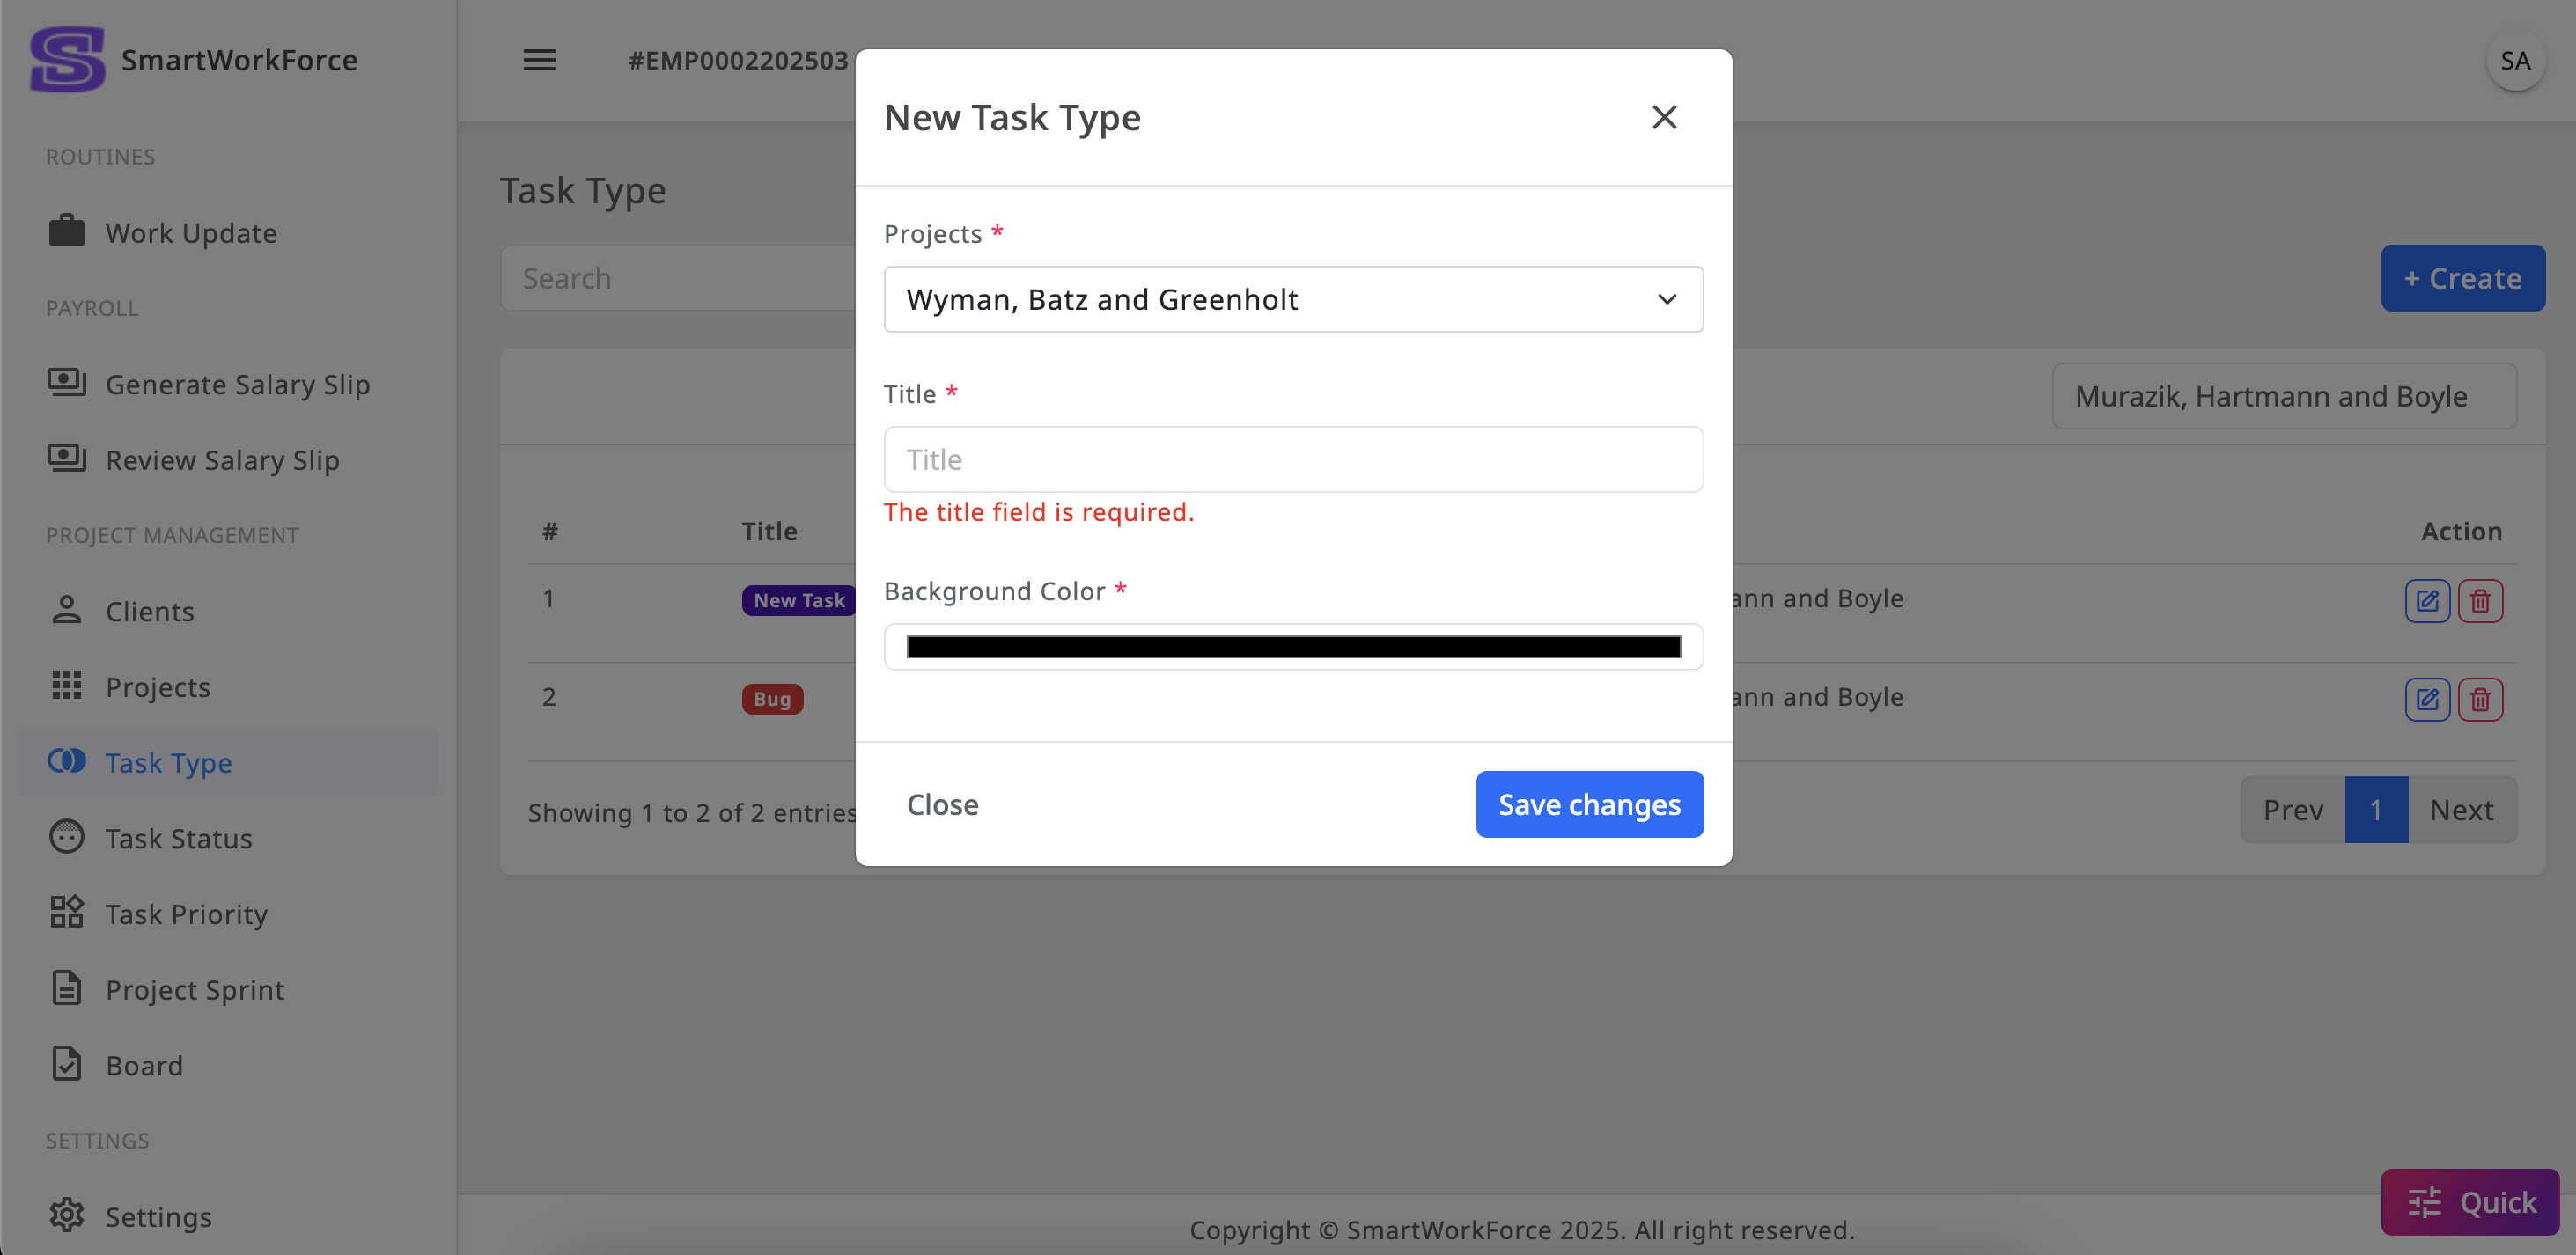
Project Management : Task Type
The Task Types List in SmartWorkForce allows admins to view and manage
project task types. Admins can create new task types, edit or update
existing ones, and delete them when necessary. However, once a task type is
removed, there is a chance that the associated tasks may be deleted as well,
so it should be done with caution to avoid unintended loss of data.
Task TypeTask Type Create/Edit-Update
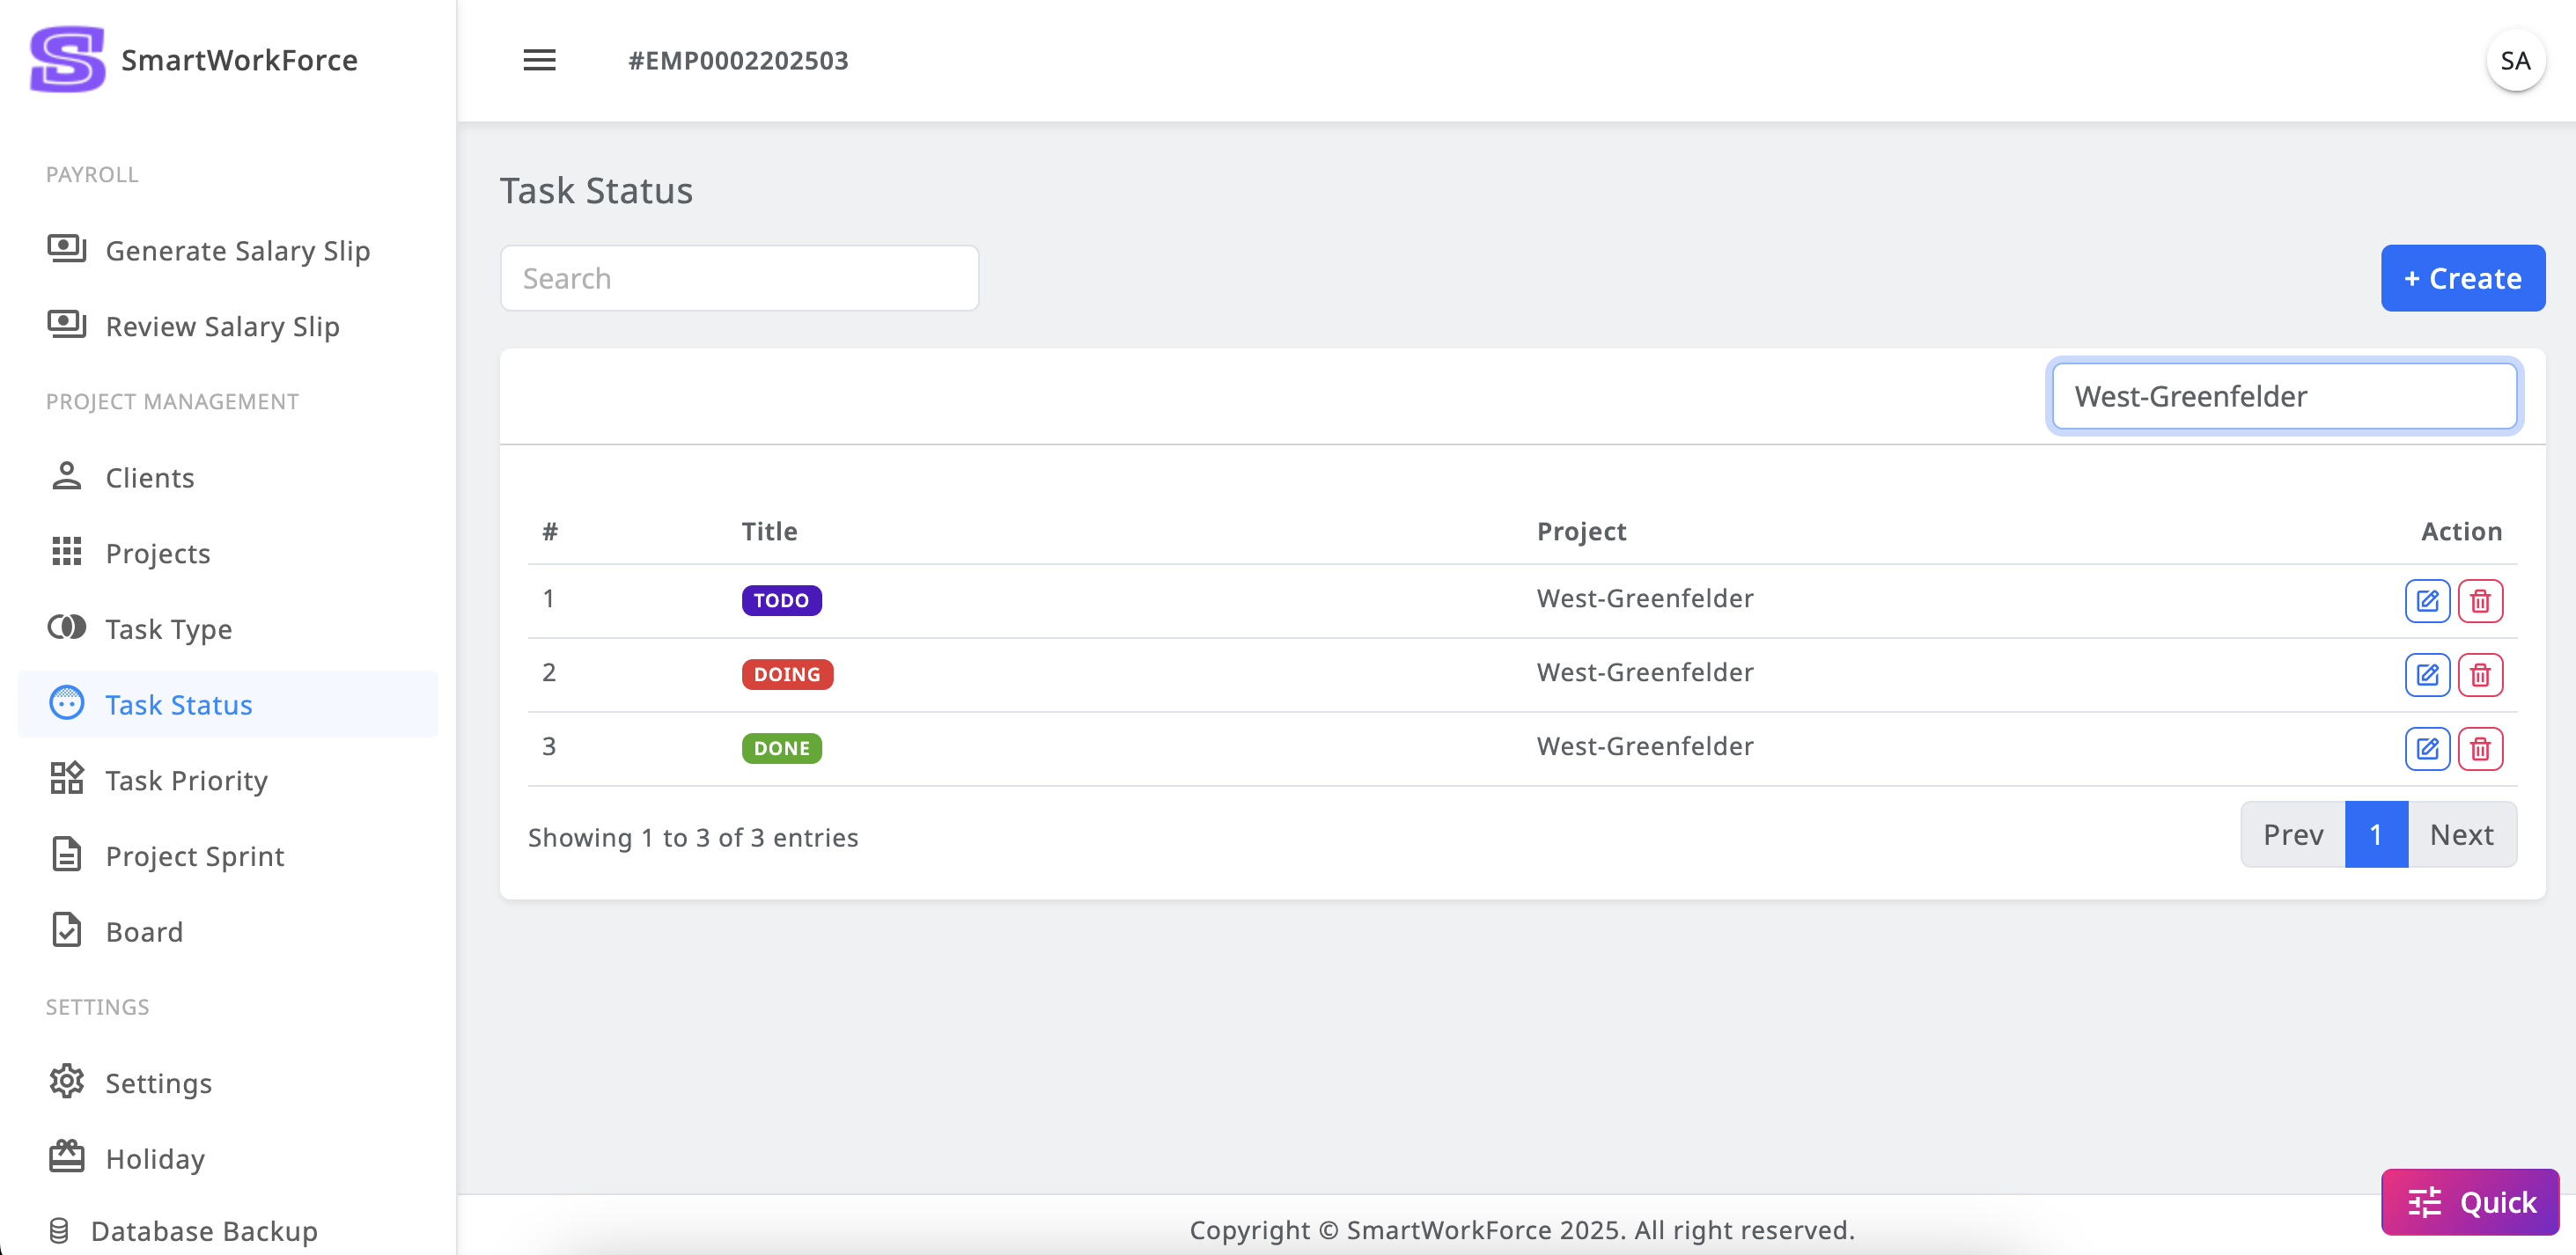
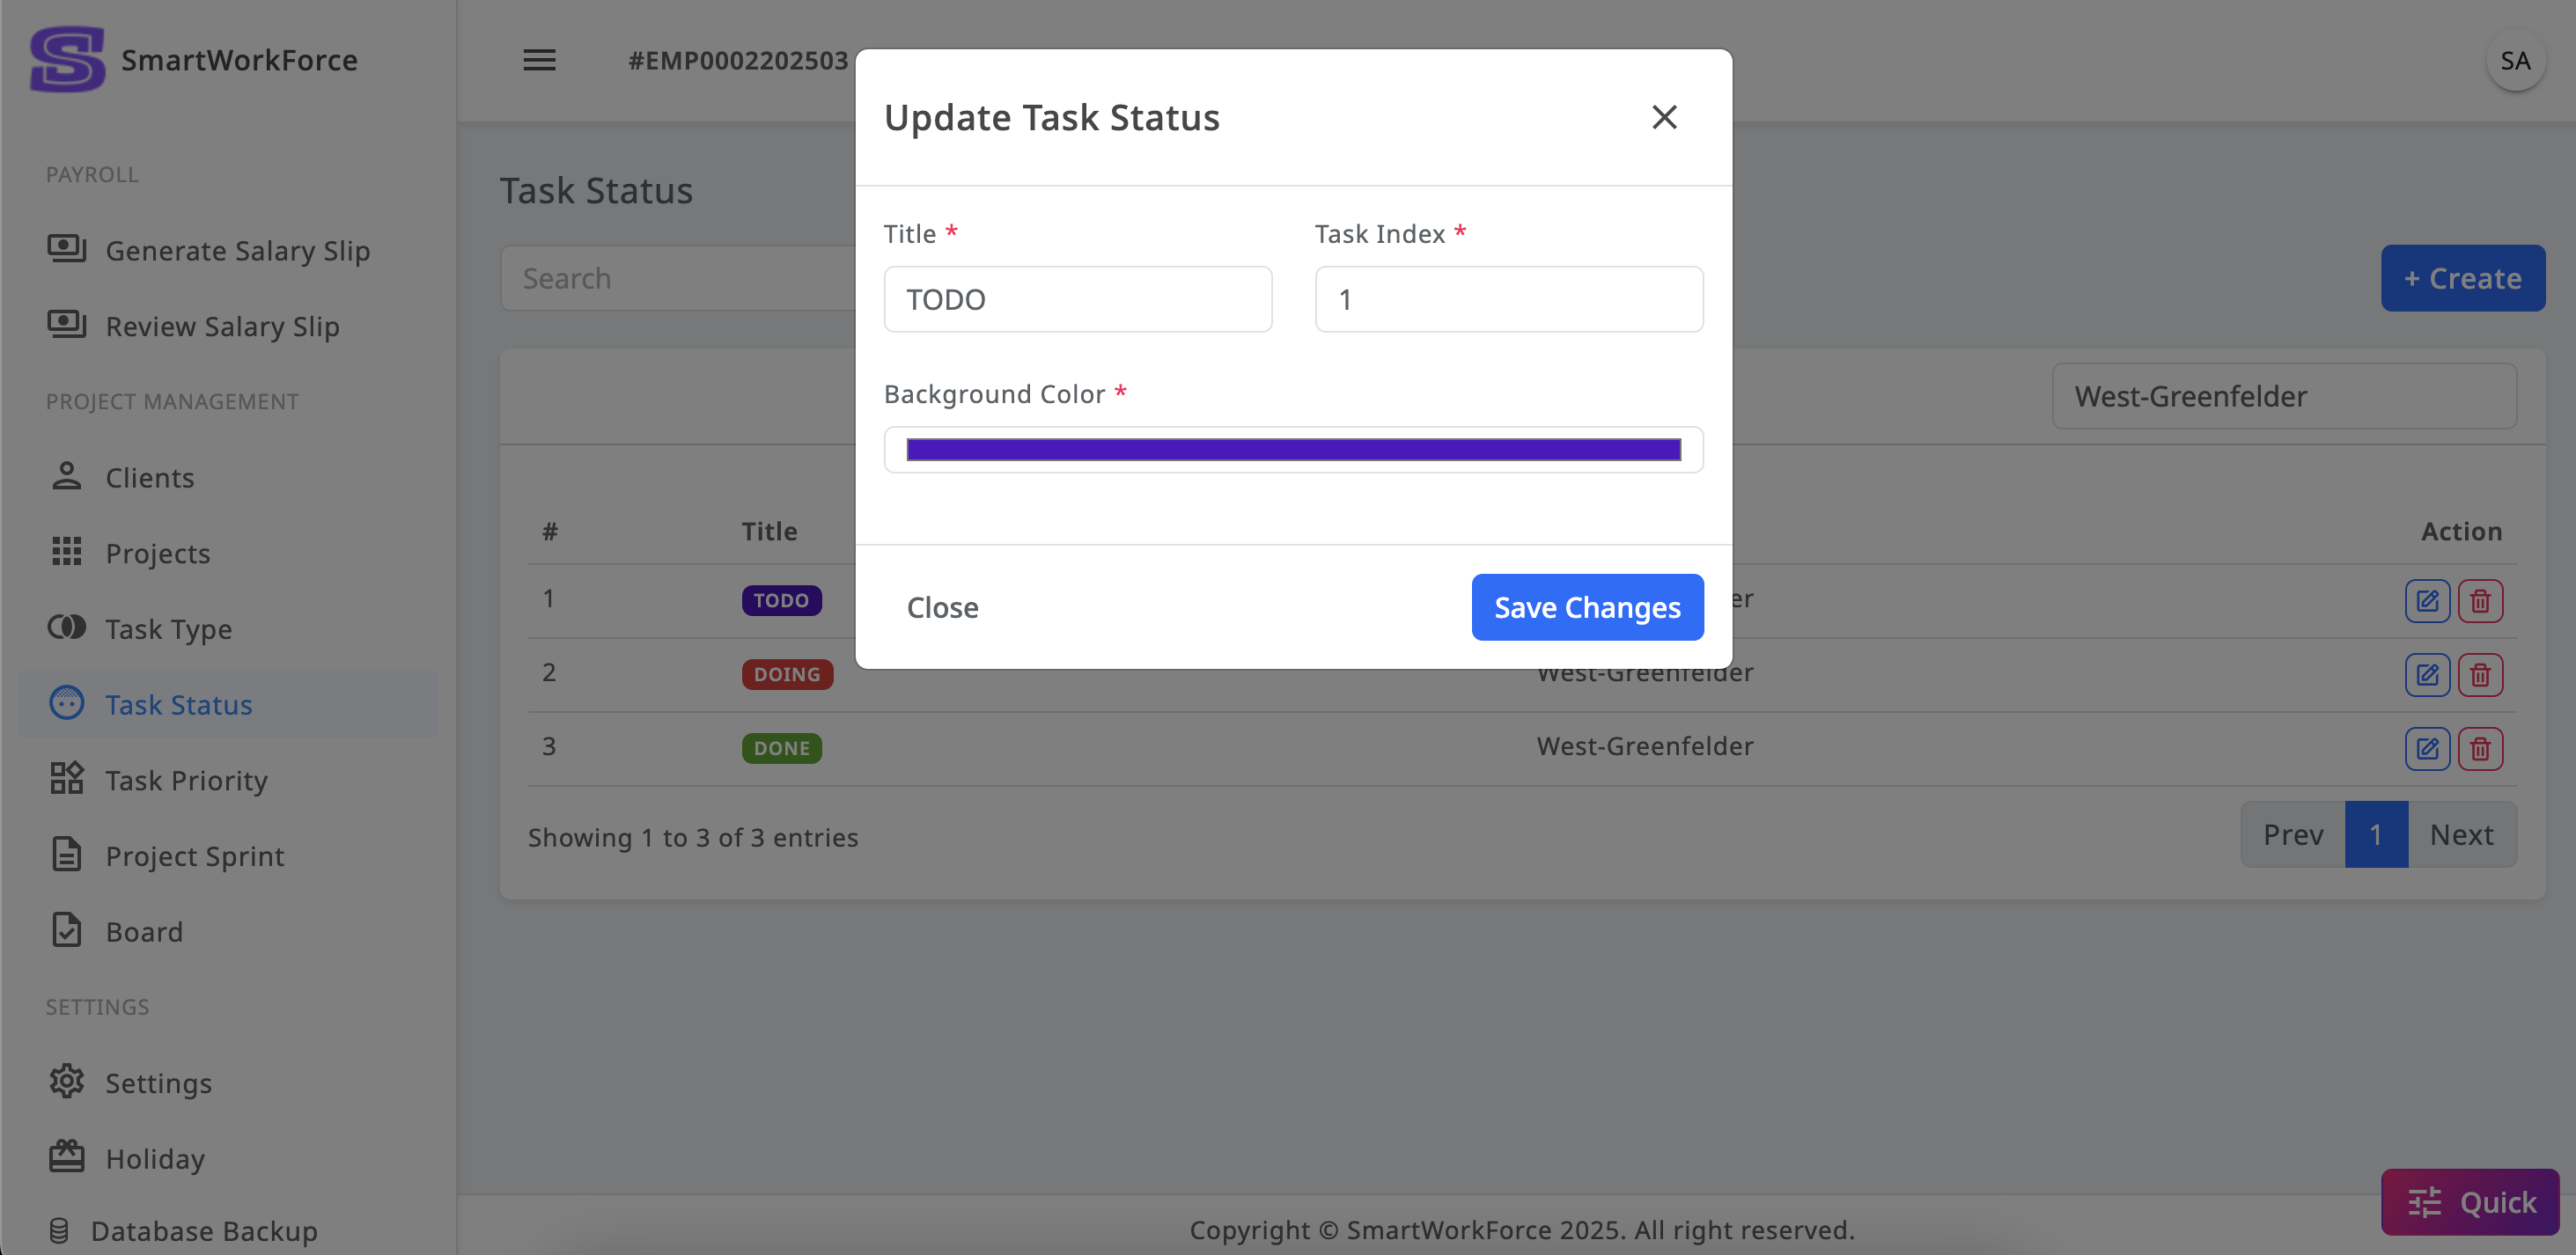
Project Management : Task Status
The Task Status List in SmartWorkForce allows admins to manage project task
statuses. Admins can view the list, create new statuses, edit or update
existing ones, and delete them when necessary. However, once a task status
is removed, there is a risk of deleting associated tasks, so it should be
done with caution to avoid any unintended loss of task data.
Task StatusTask Status Create/Edit-Update
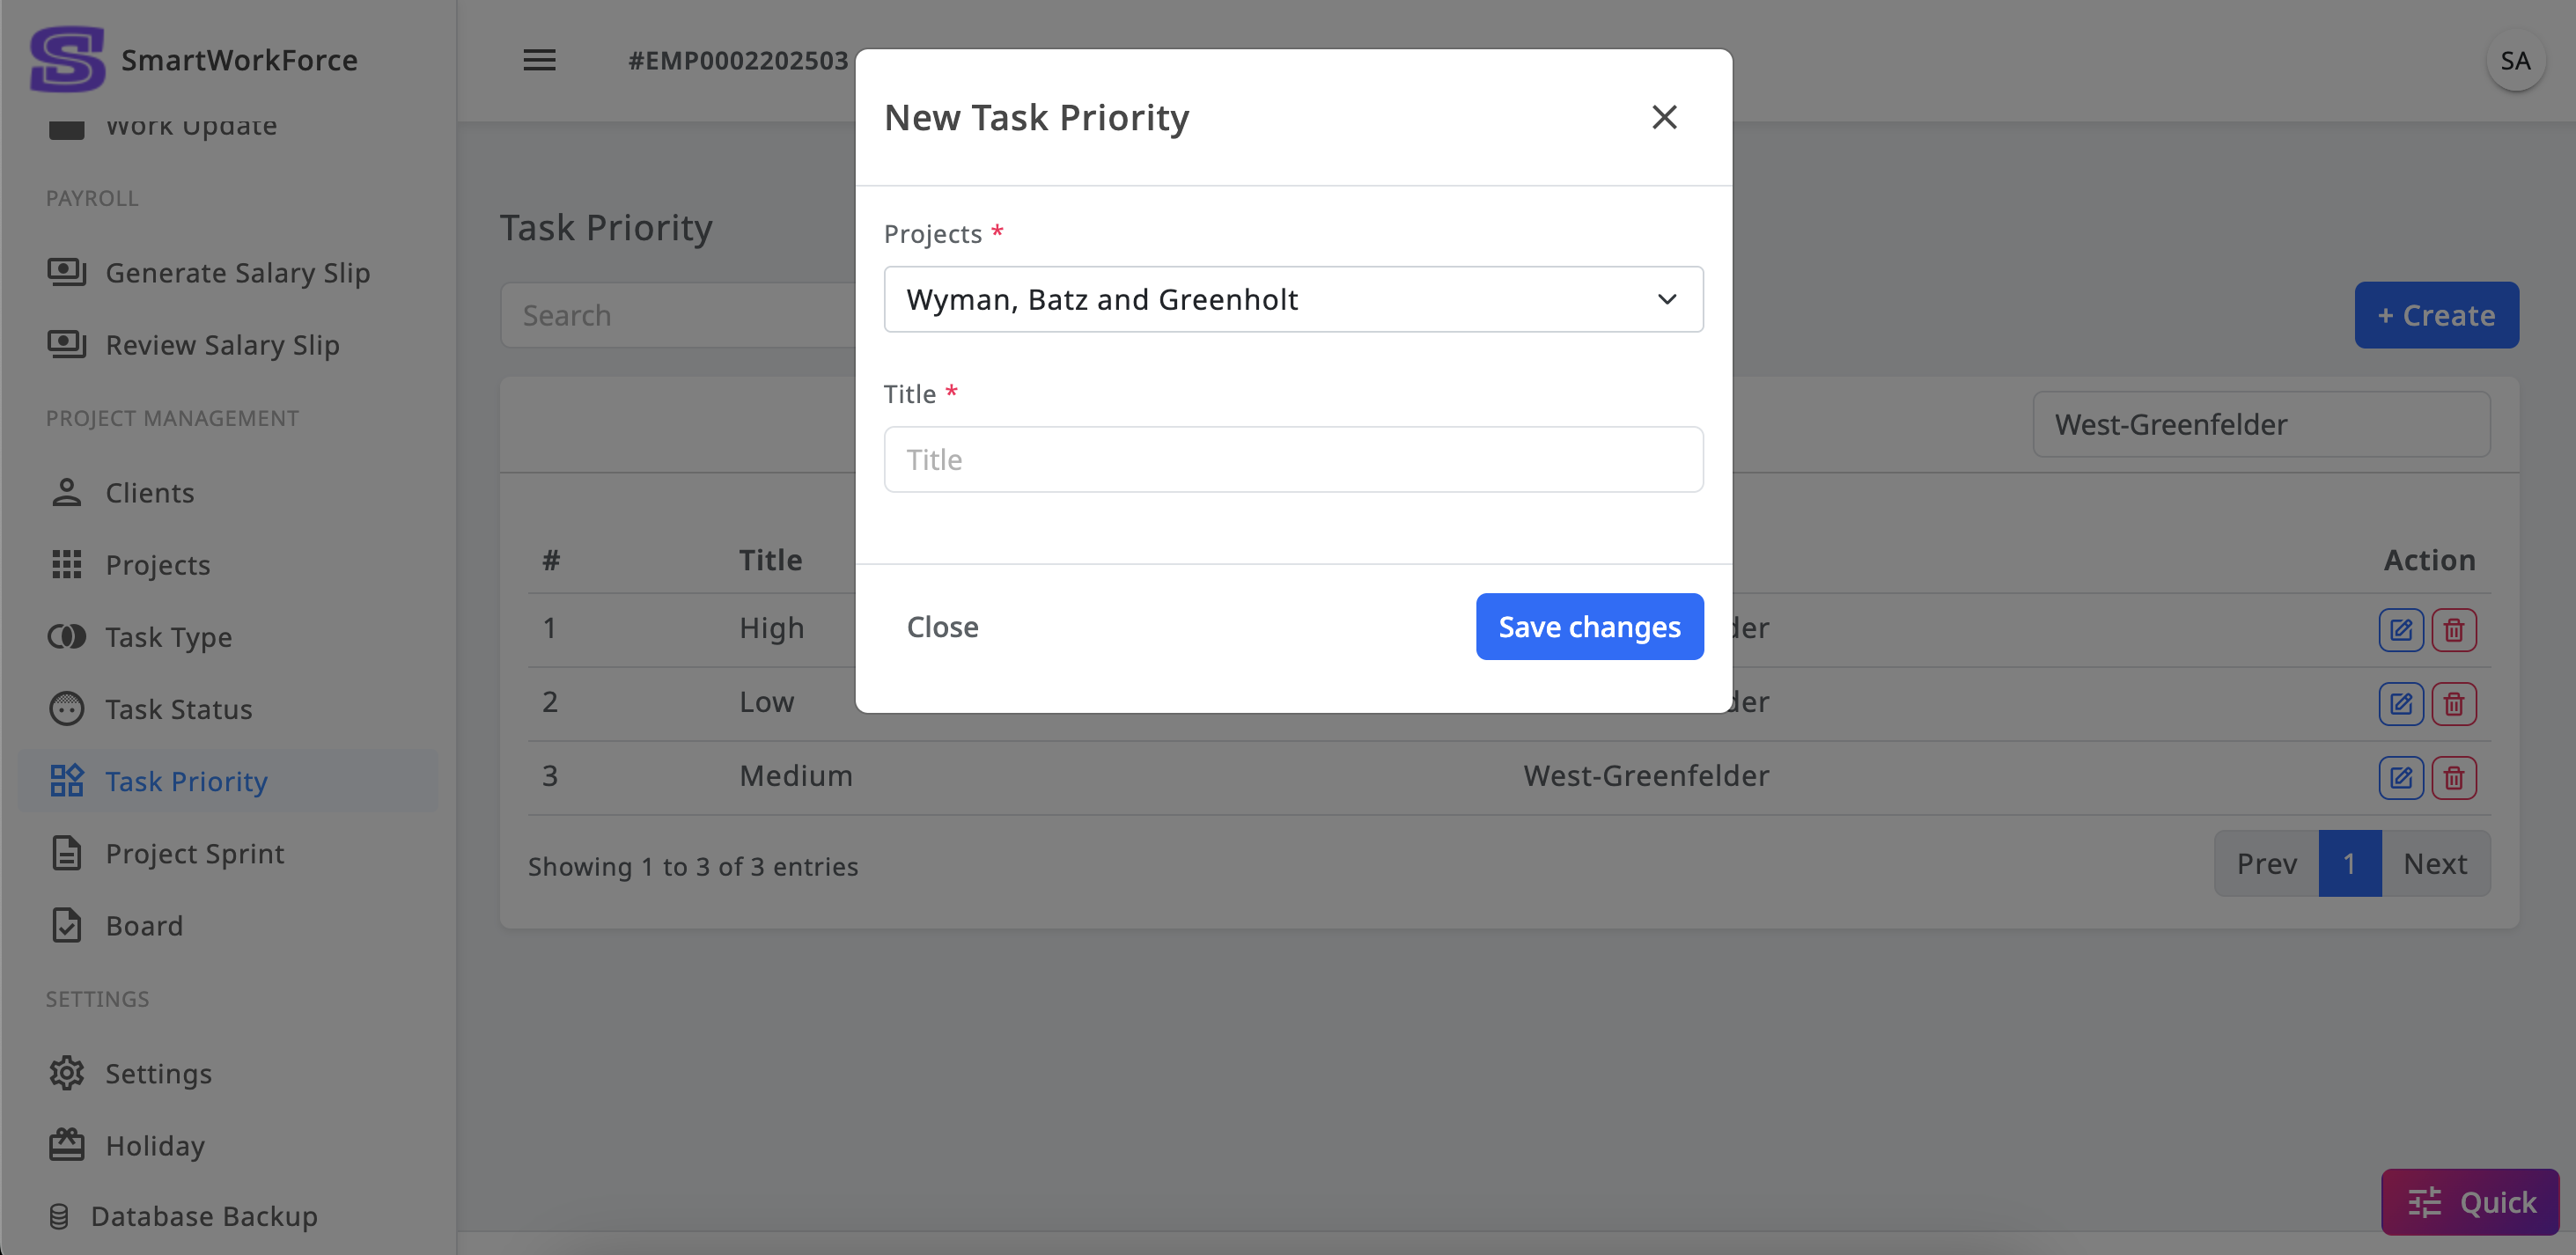
Project Management : Task Priority
The Task Priority List in SmartWorkForce allows admins to manage project
task priorities. Admins can view the list, create new priorities, edit or
update existing ones, and delete them as needed. However, removing a task
priority may also remove associated tasks, so it should be done with caution
to prevent unintended data loss.
Task StatusTask Status Create/Edit-Update
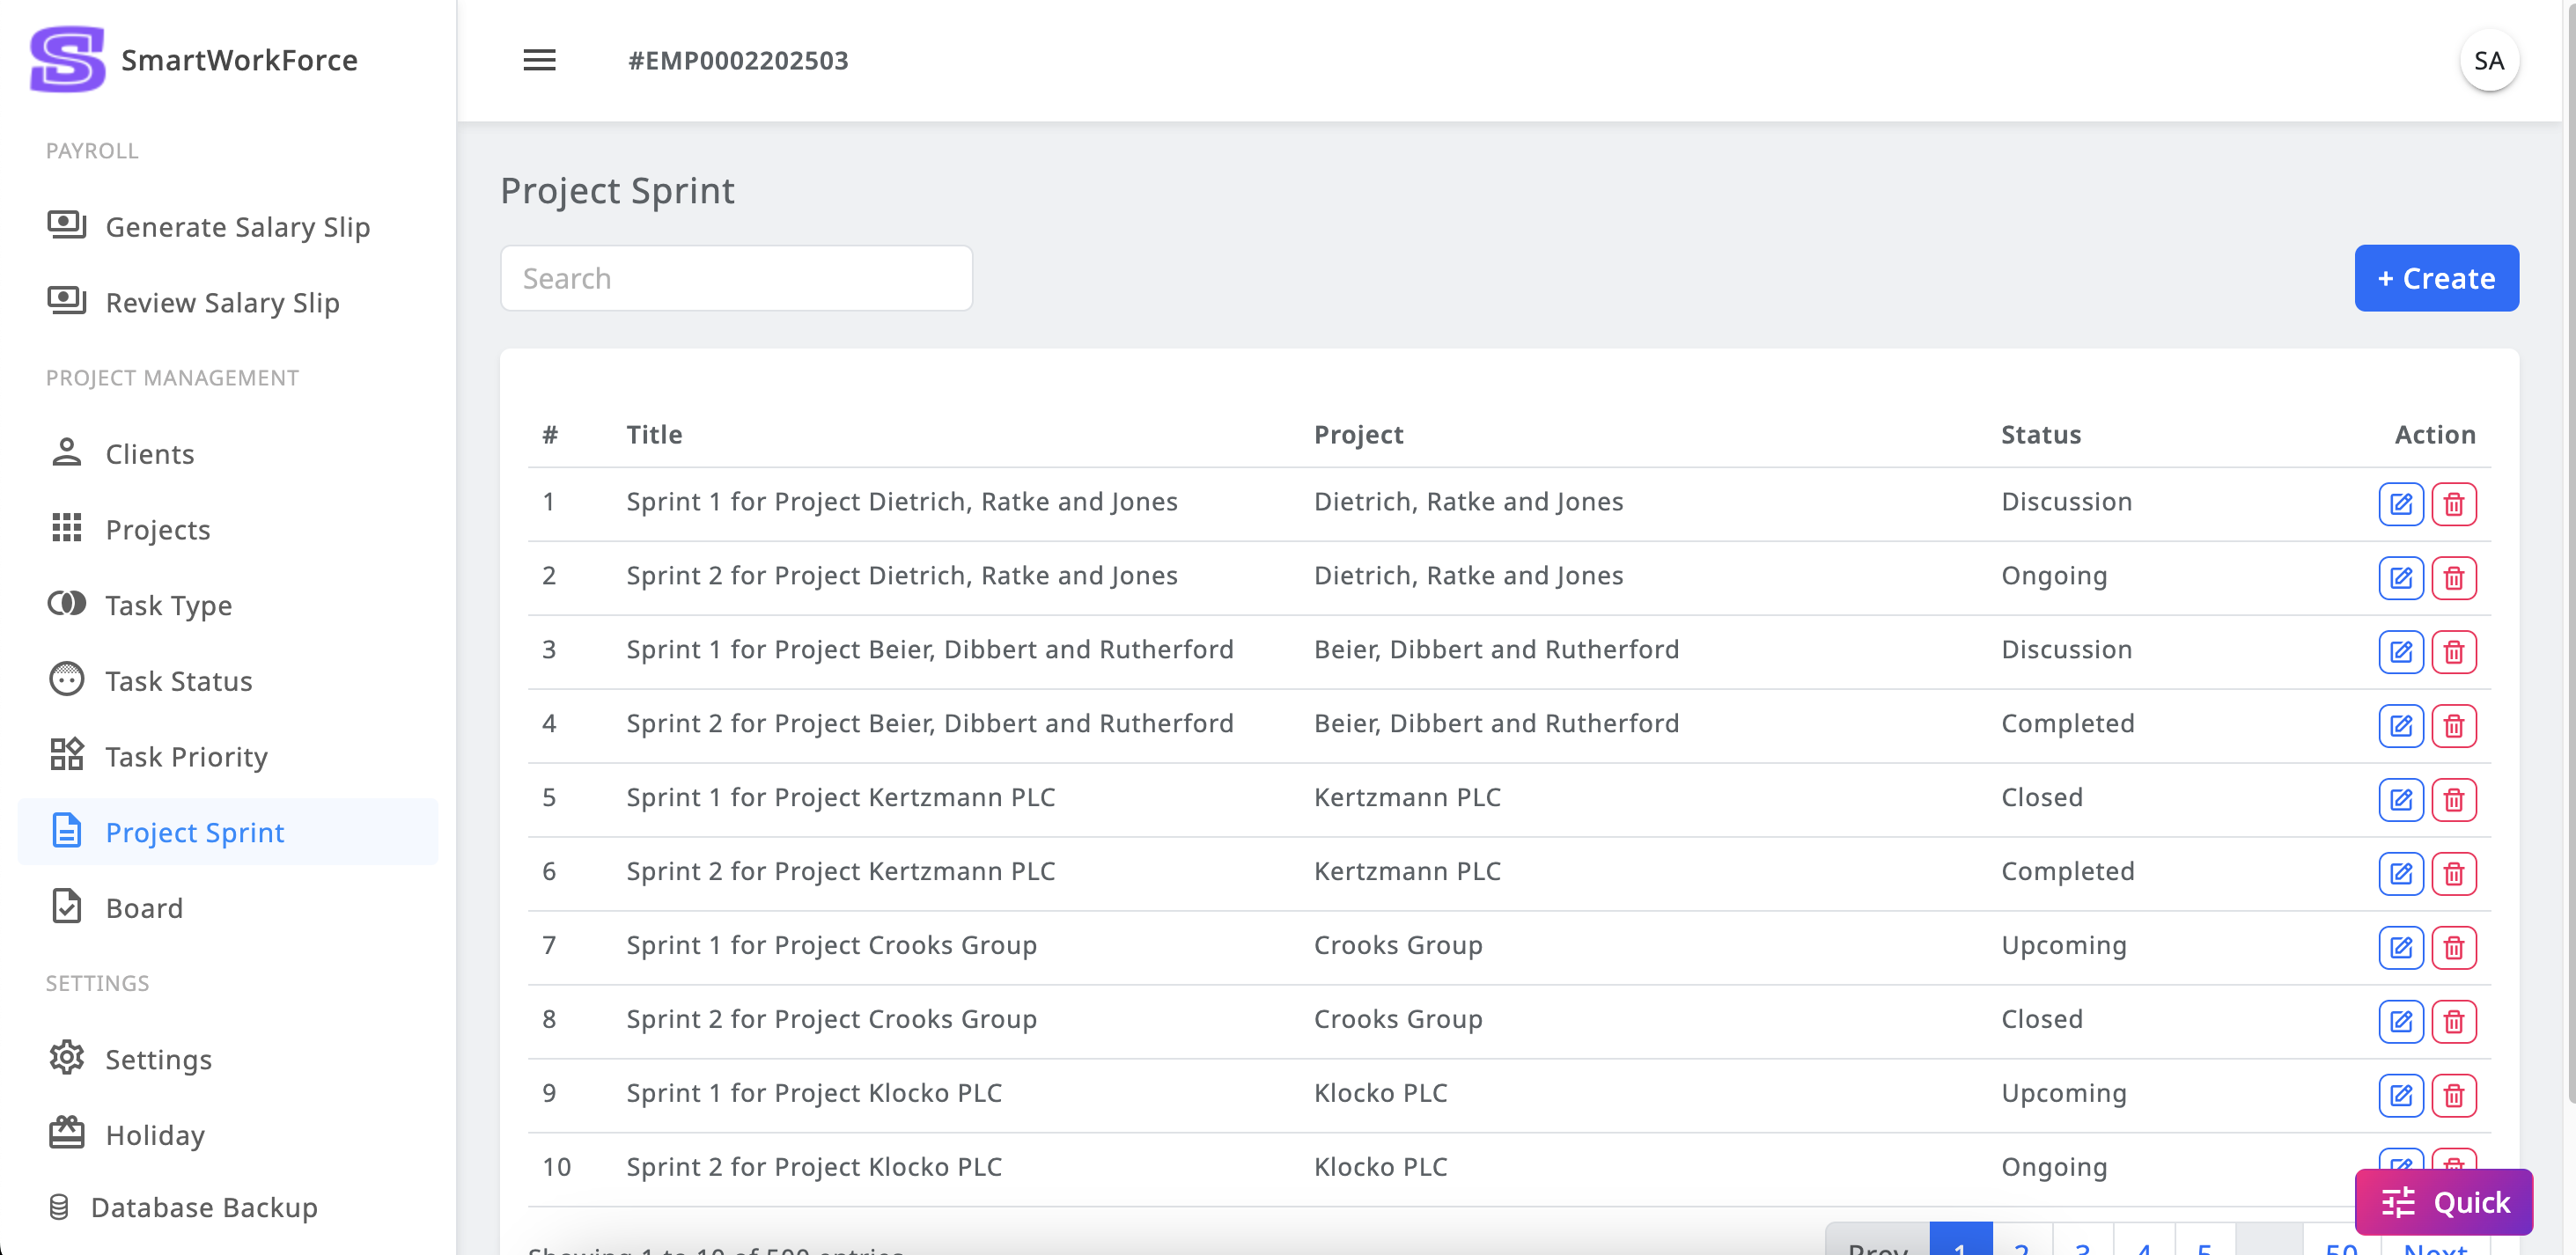
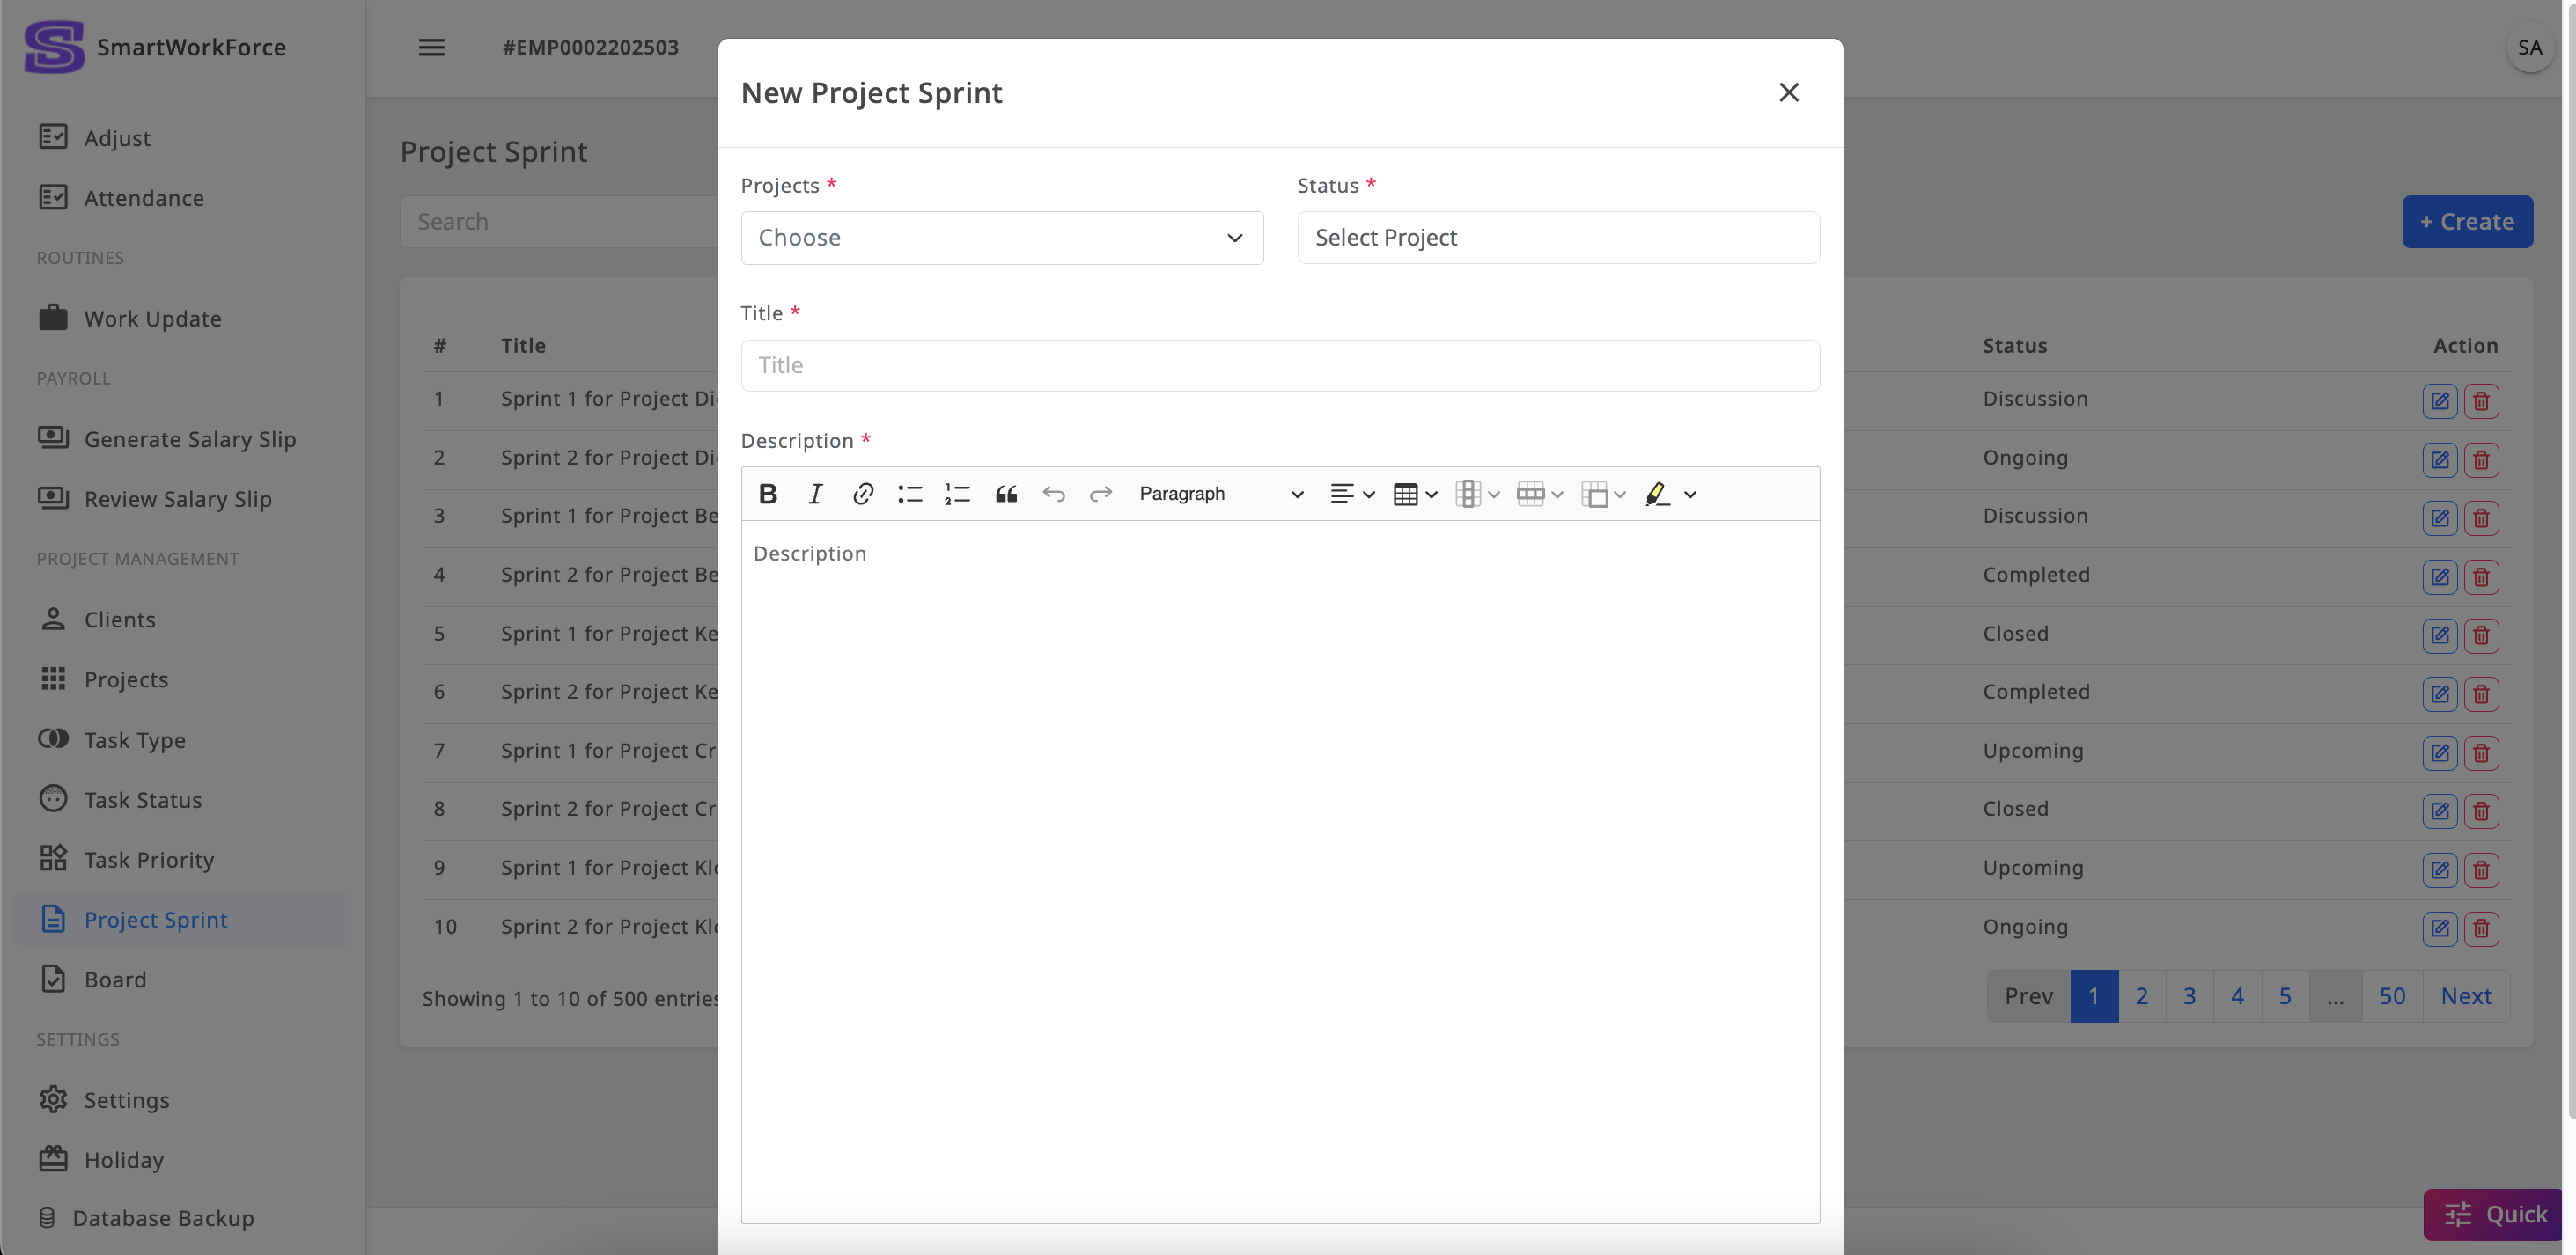
Project Management : Project Sprint
In SmartWorkForce, each project can have its own sprint for the first
release. Admins can add sprint stories to outline the tasks and objectives
for the initial phase, helping employees understand what needs to be done.
Admins can create, edit, update, and delete multiple sprints for a project
as needed. However, if a sprint is removed, it may also result in the loss
of associated tasks, so it should be done with caution to avoid any
unintended data loss.
Project SprintProject Sprint Create/Edit-Update
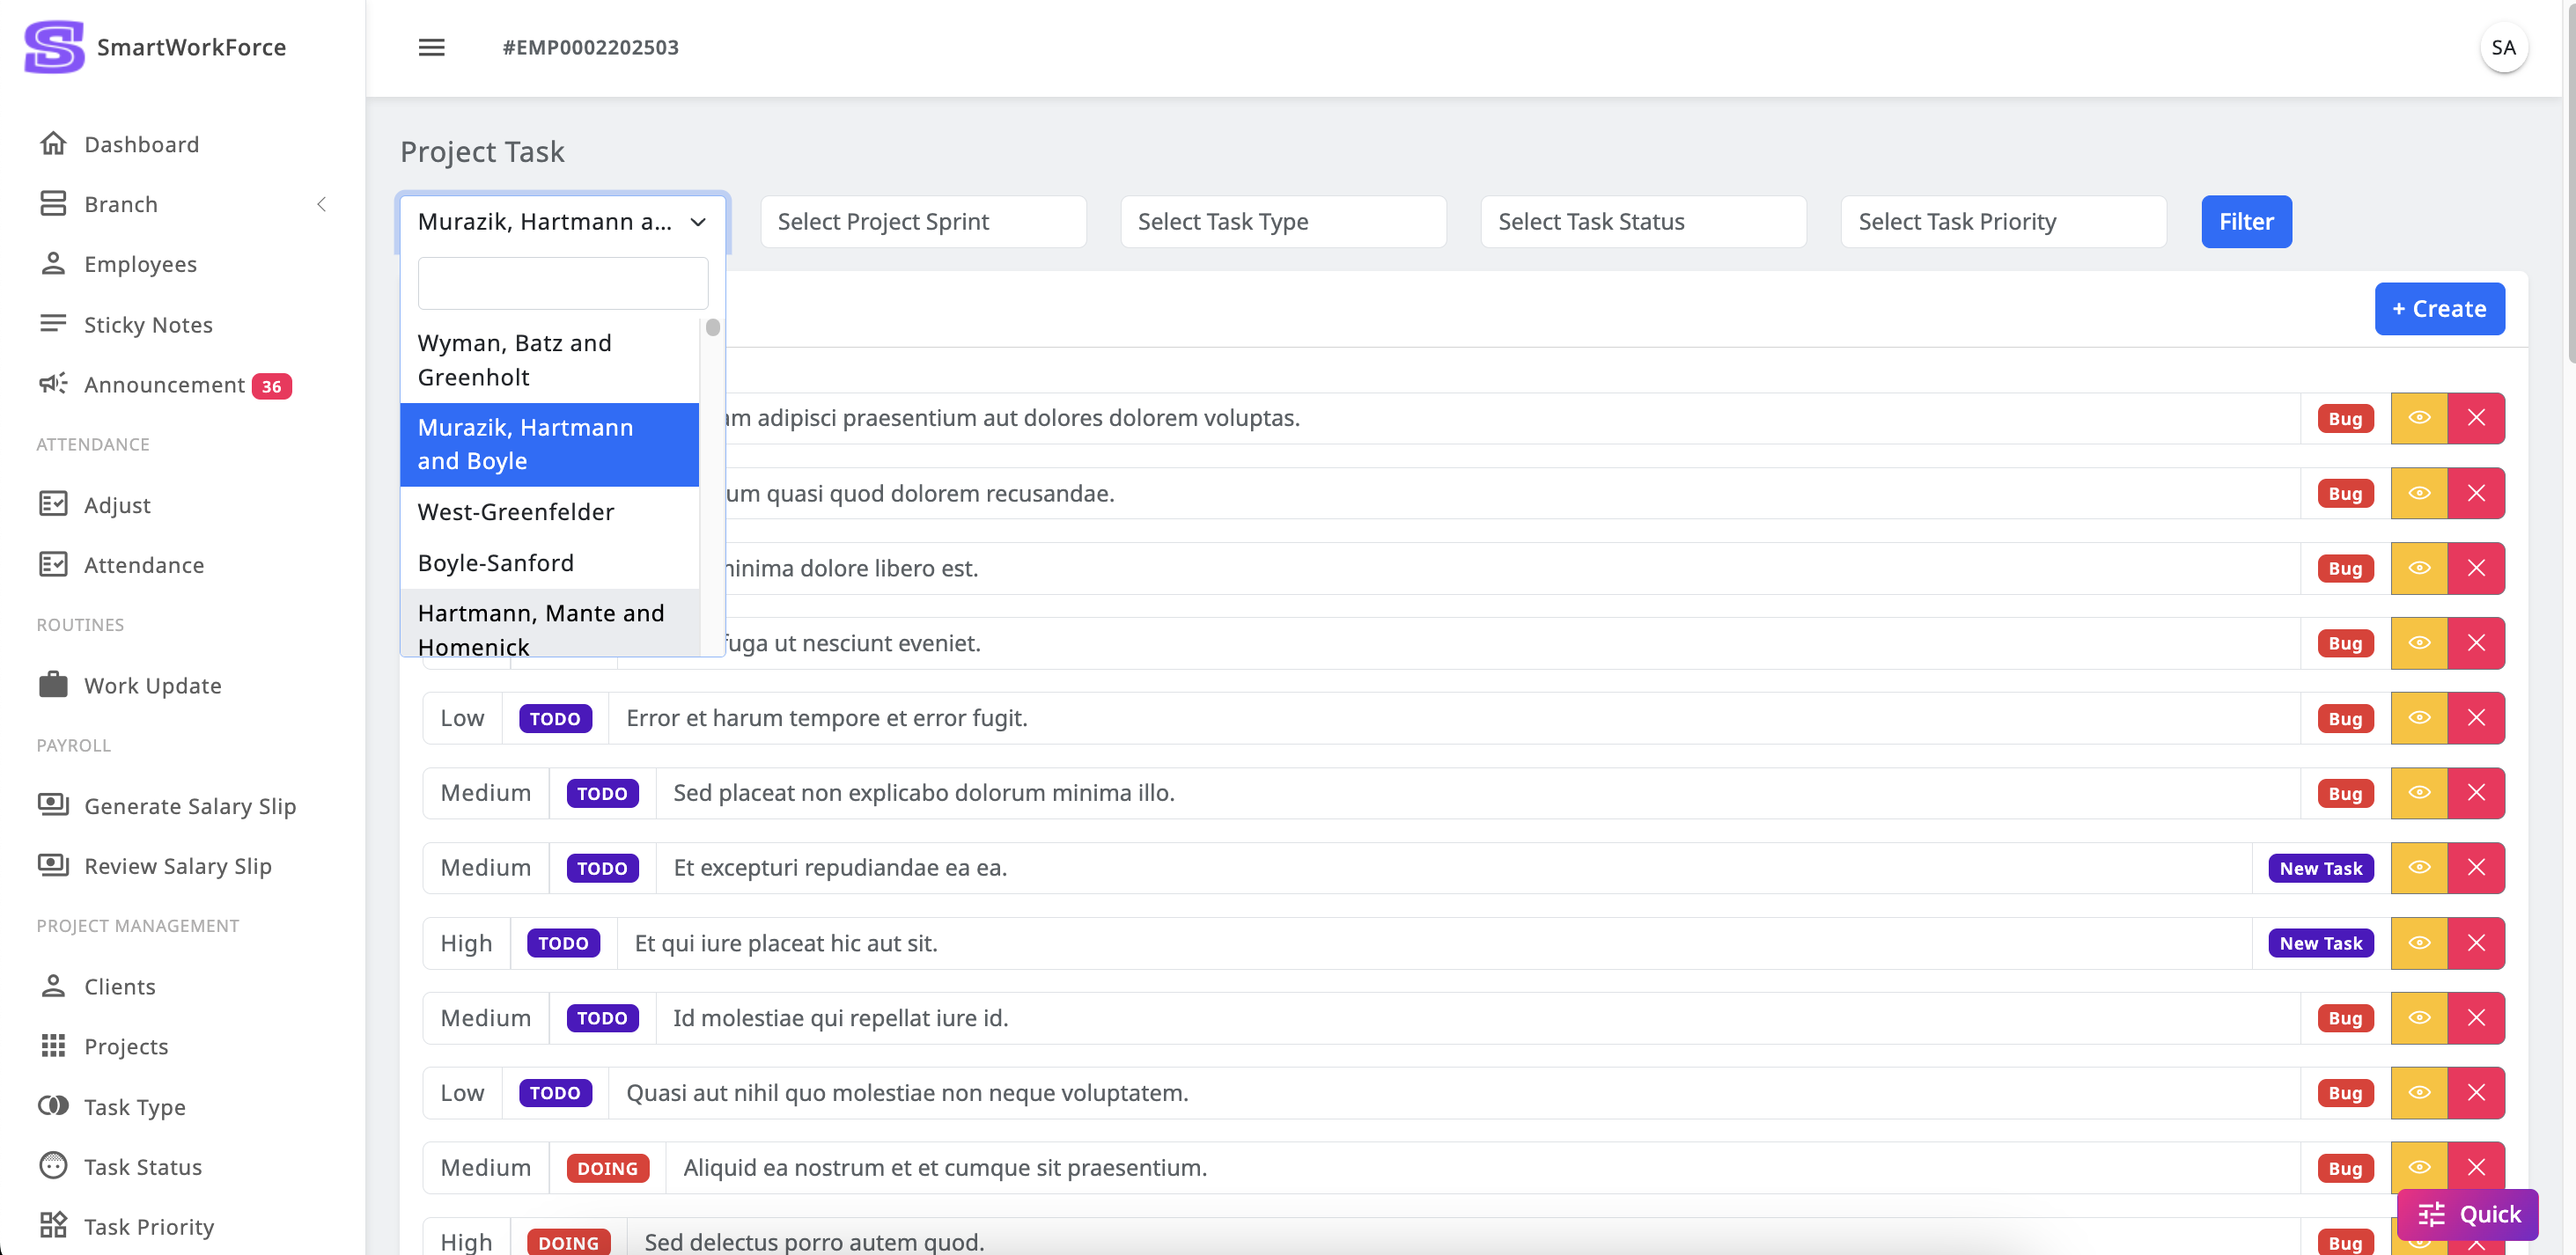
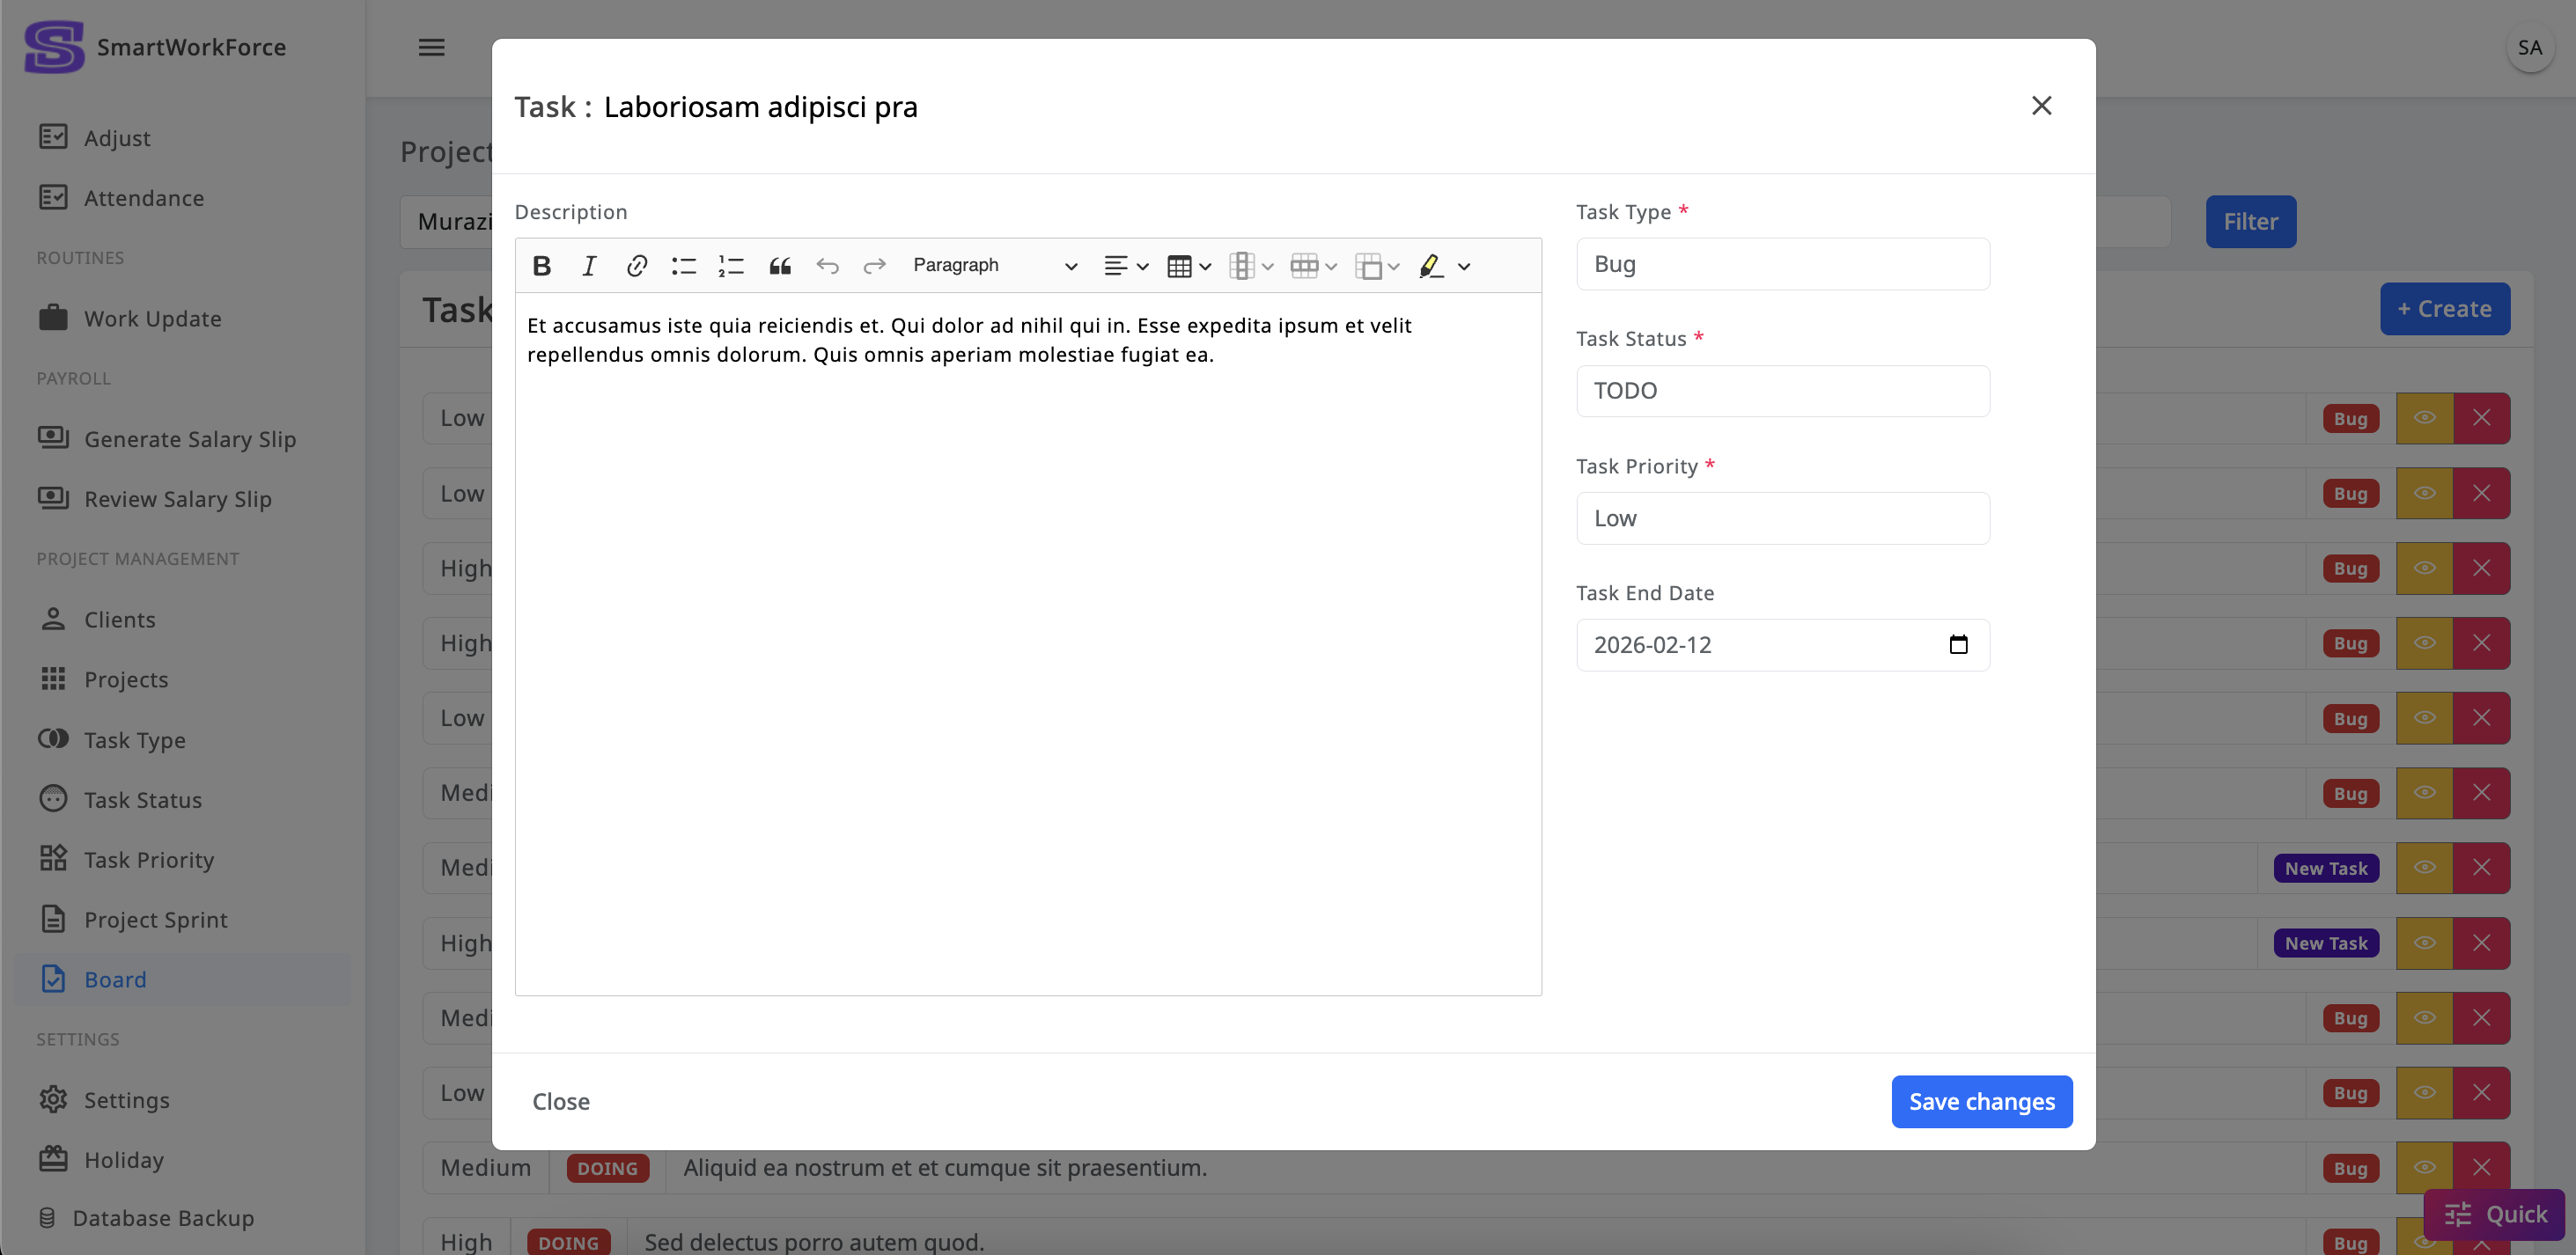
Project Management : Board
SmartWorkForce includes a task board where tasks can be listed within a
project. Admins can create tasks, assign task statuses, types, and
priorities to ensure employees know what needs to be done. The task board
also features a filter functionality, allowing users to easily search for
tasks based on different criteria, making task management and tracking more
efficient.
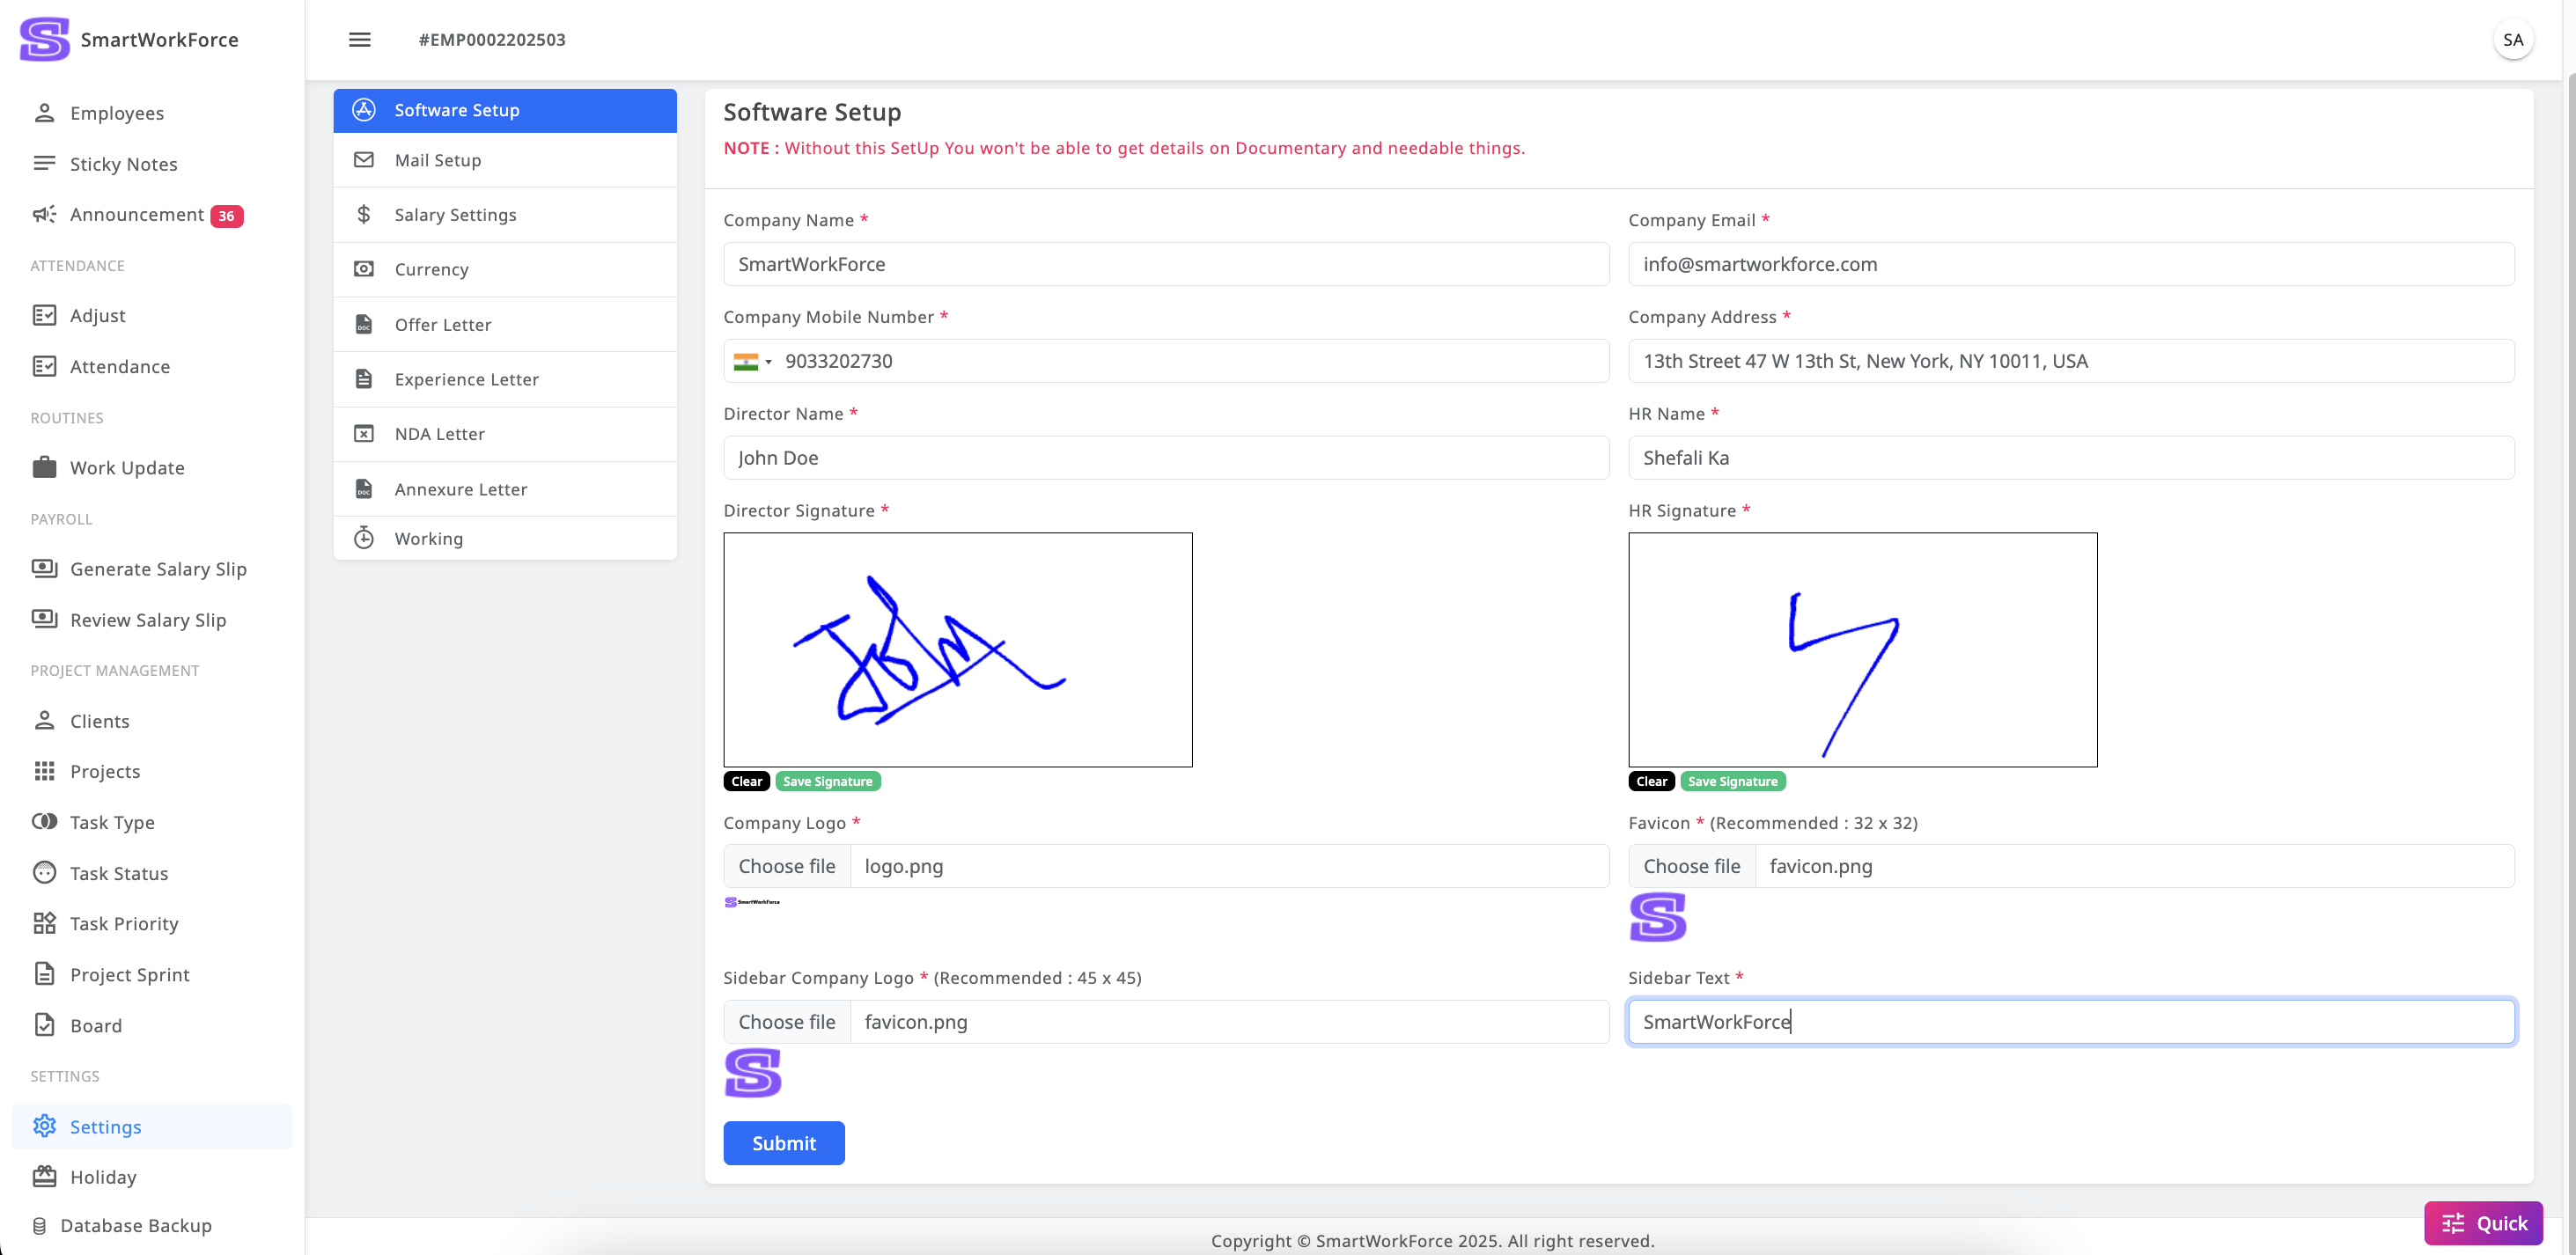
In SmartWorkForce, under Settings > Software Setup, admins can configure key
company details such as the company name, logo, email, director's signature,
HR's signature, and sidebar text. These settings are used to personalize
documents like employment letters and salary slips, as well as to display
relevant information throughout the website where needed.
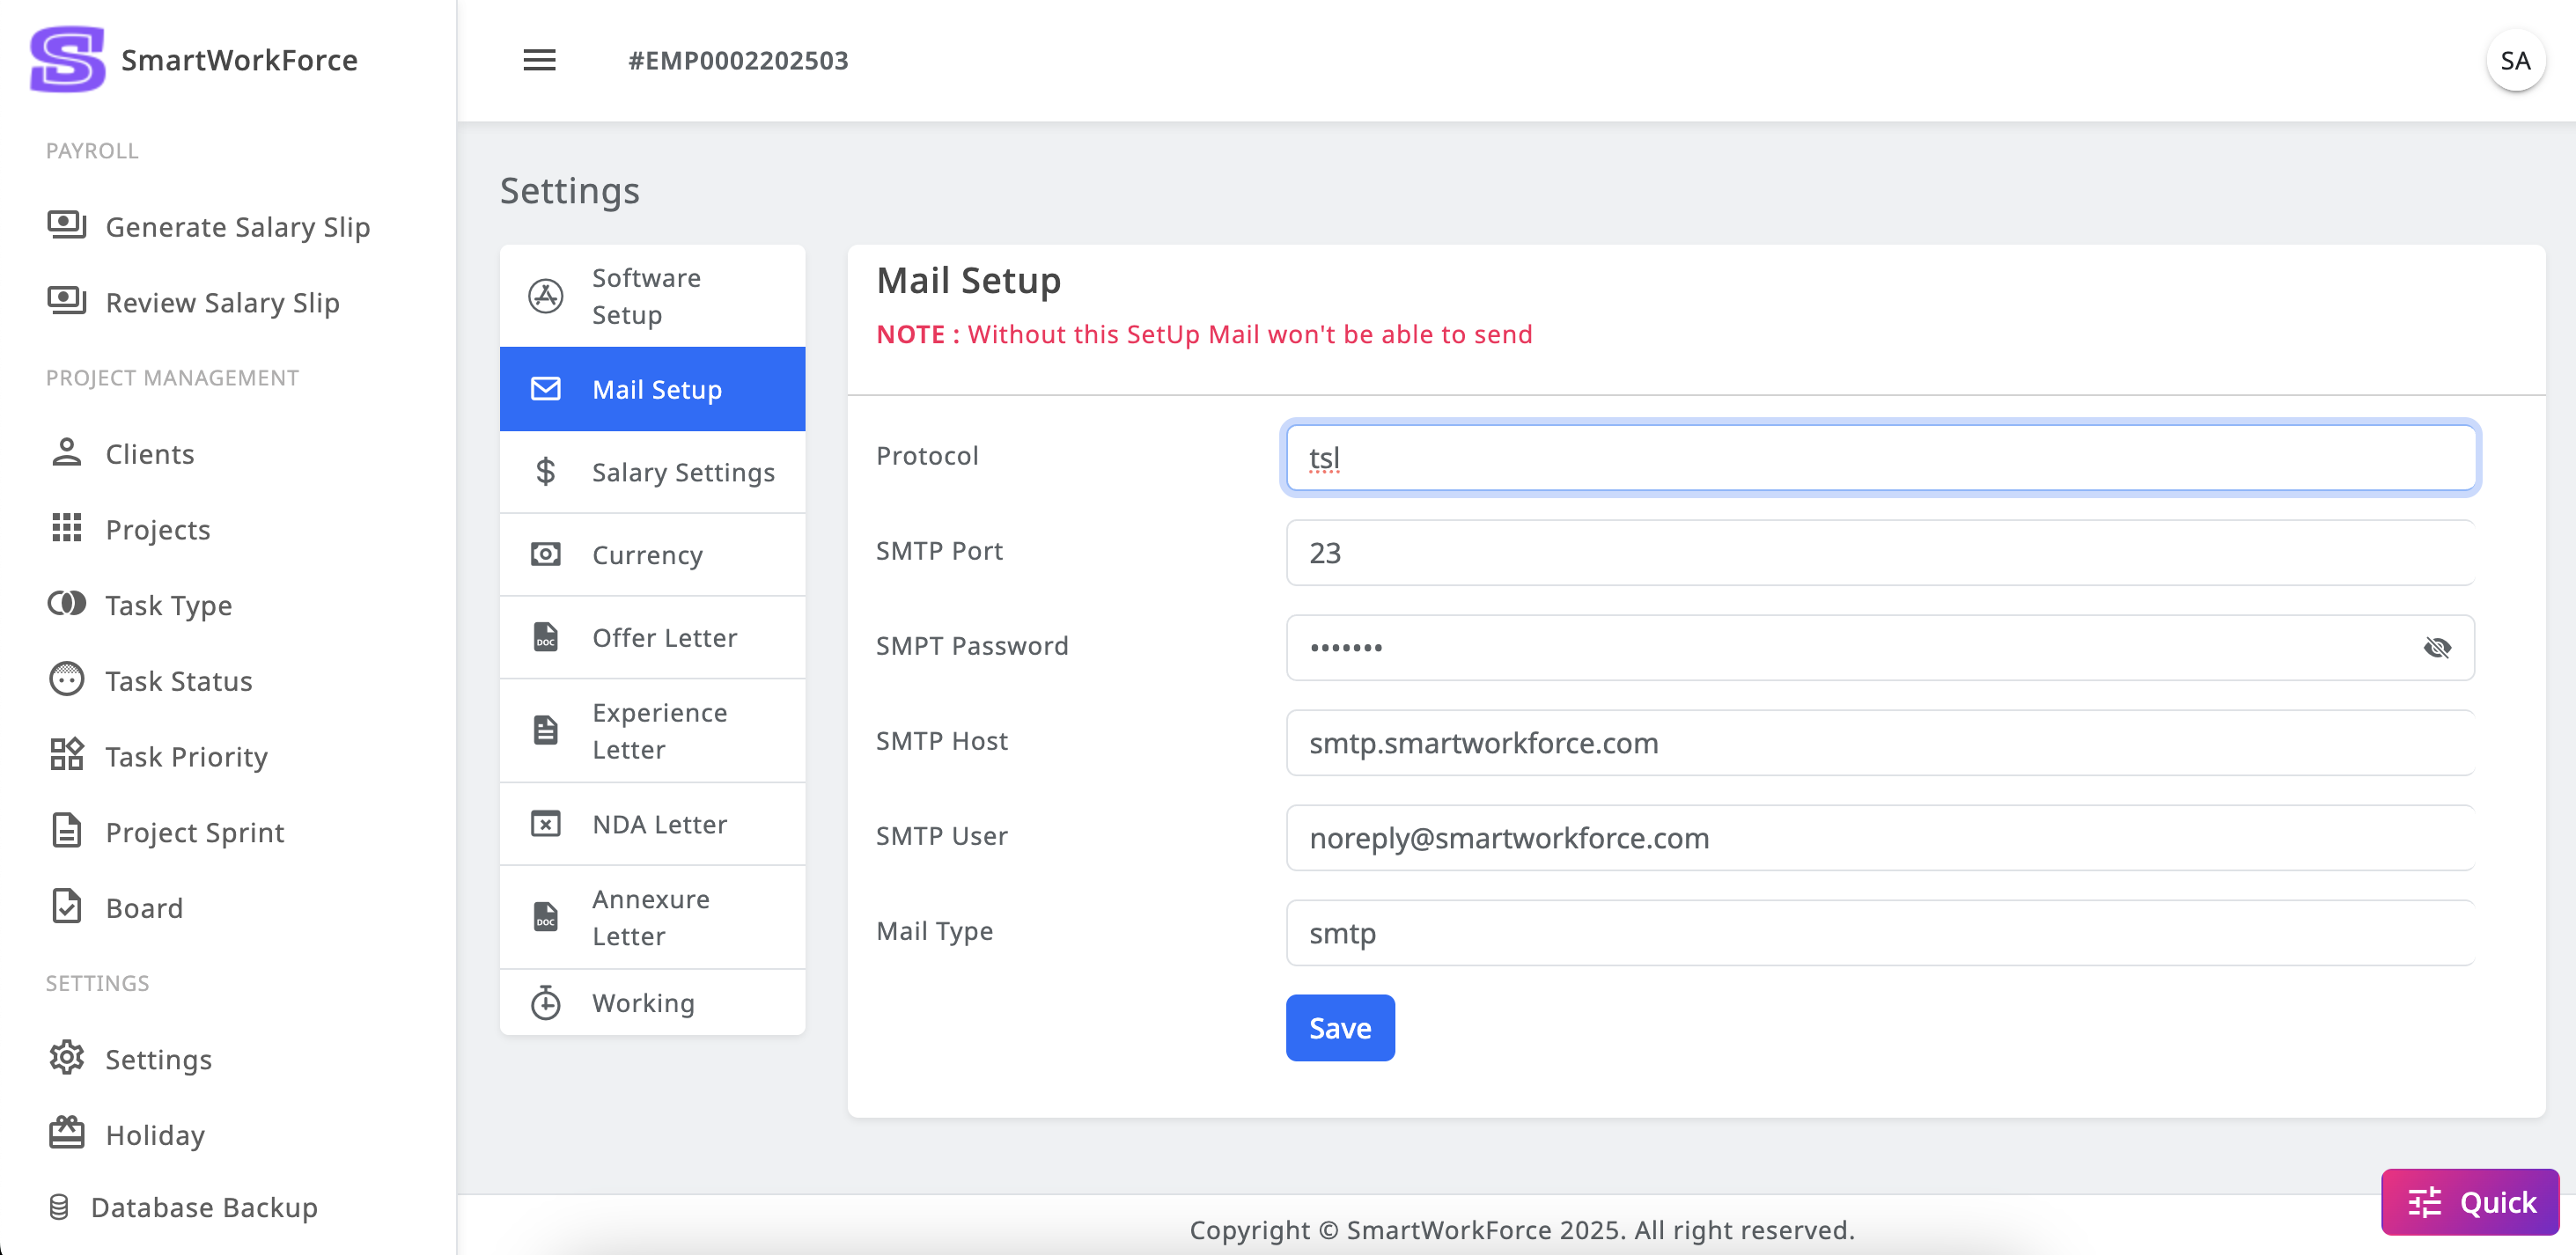
Settings : Mail Setup
SmartWorkForce includes a Mail Configuration feature, which must be properly
set up to enable the system to send emails. Without this setup, emails, such
as those for employment letters or other notifications to employees, will
not be triggered or delivered successfully.
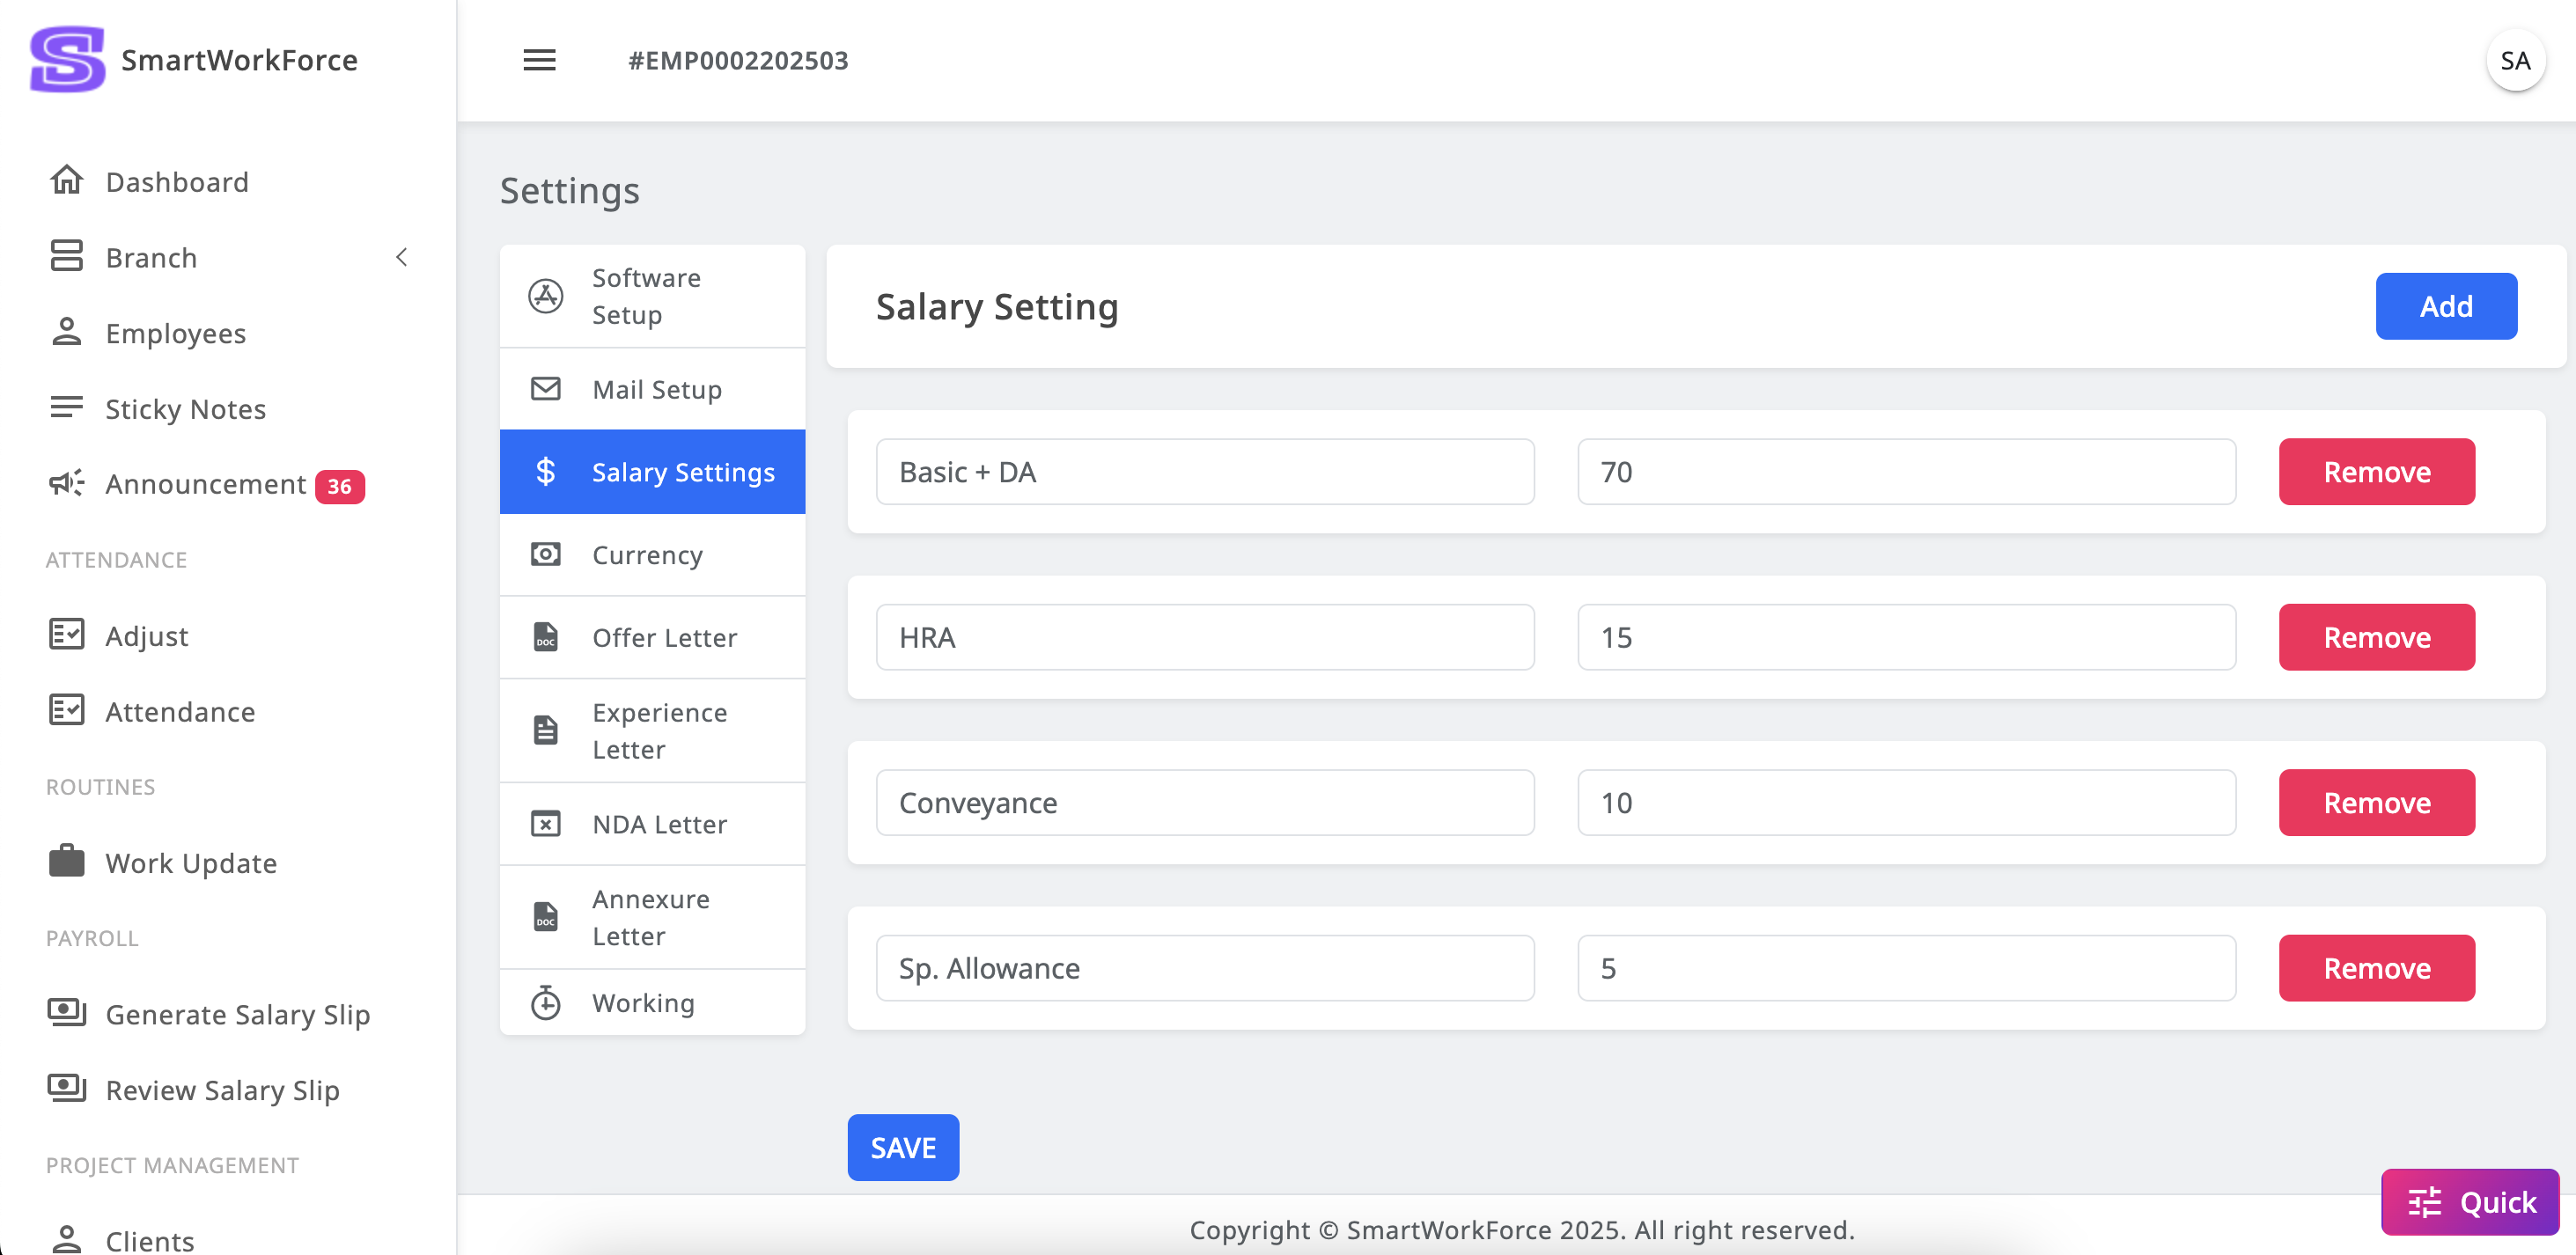
Settings : Salary Setting
SmartWorkForce features a Salary Setting Module where admins can define
various salary components, including:
Basic + DA (Dearness Allowance)
HRA (House Rent Allowance)
Conveyance
Special Allowance
The total of these components must add up to 100% of the salary. Admins can
adjust the percentages as per the requirements, ensuring that the overall
total always equals 100% for accurate salary calculations based on the base
month.
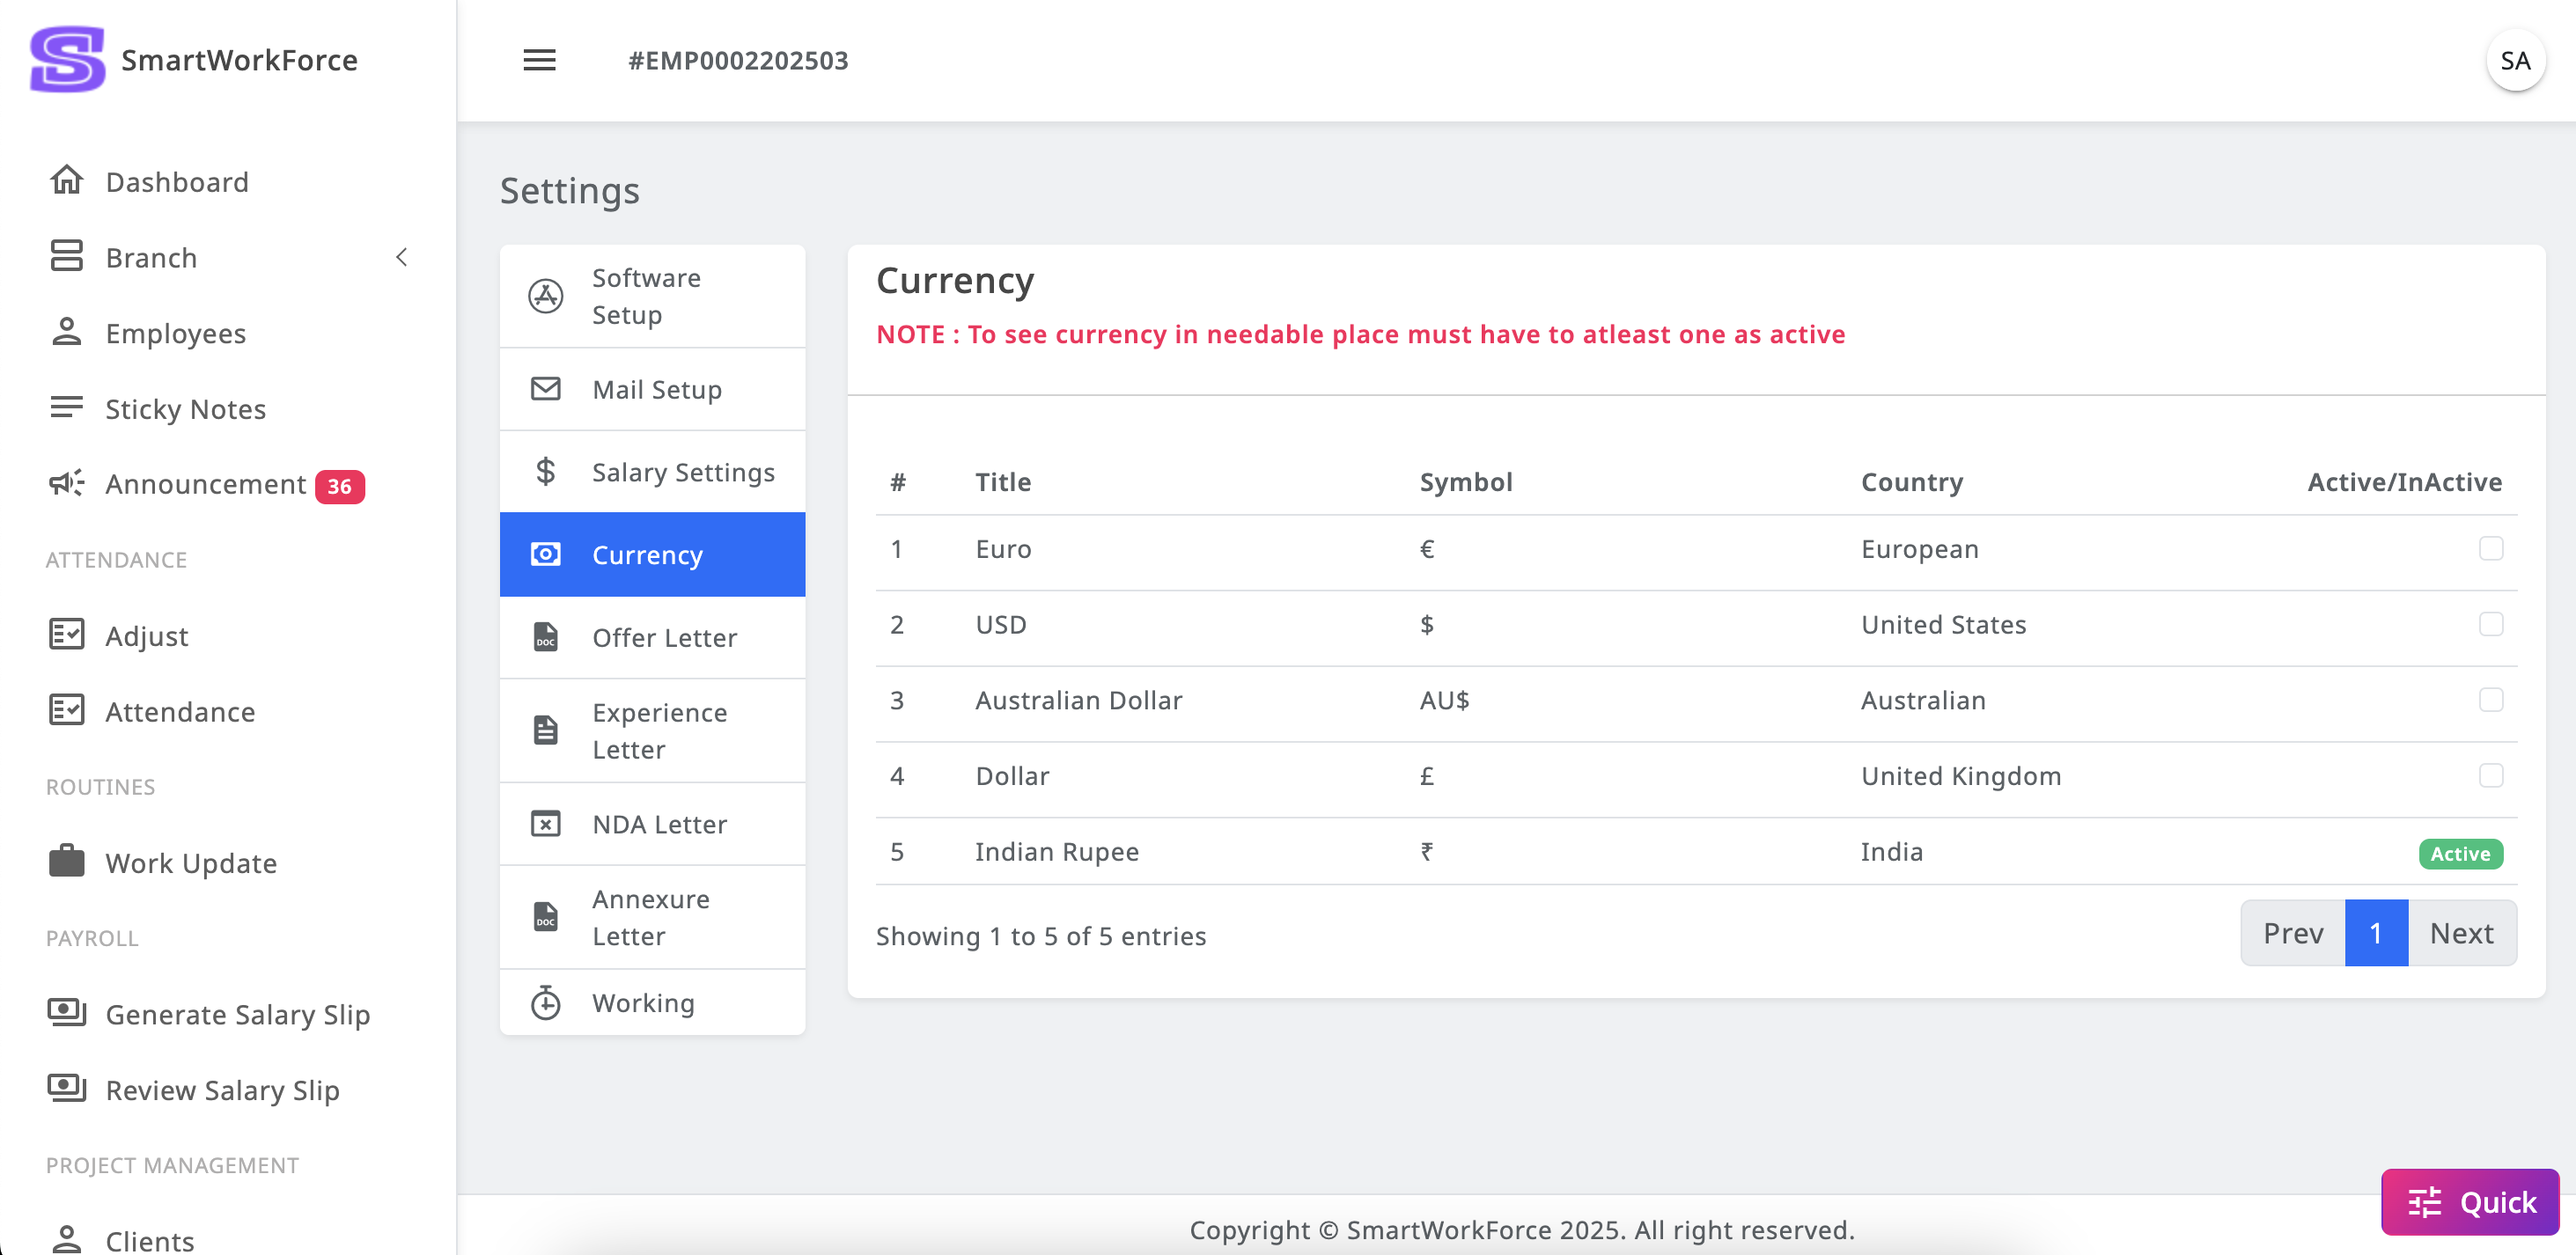
Settings : Currency
SmartWorkForce includes a Standard Currency Setting feature, where one
currency must be marked as active. This active currency will then be
displayed in relevant sections, such as on salary slips, ensuring that the
correct currency is shown wherever necessary across the system.
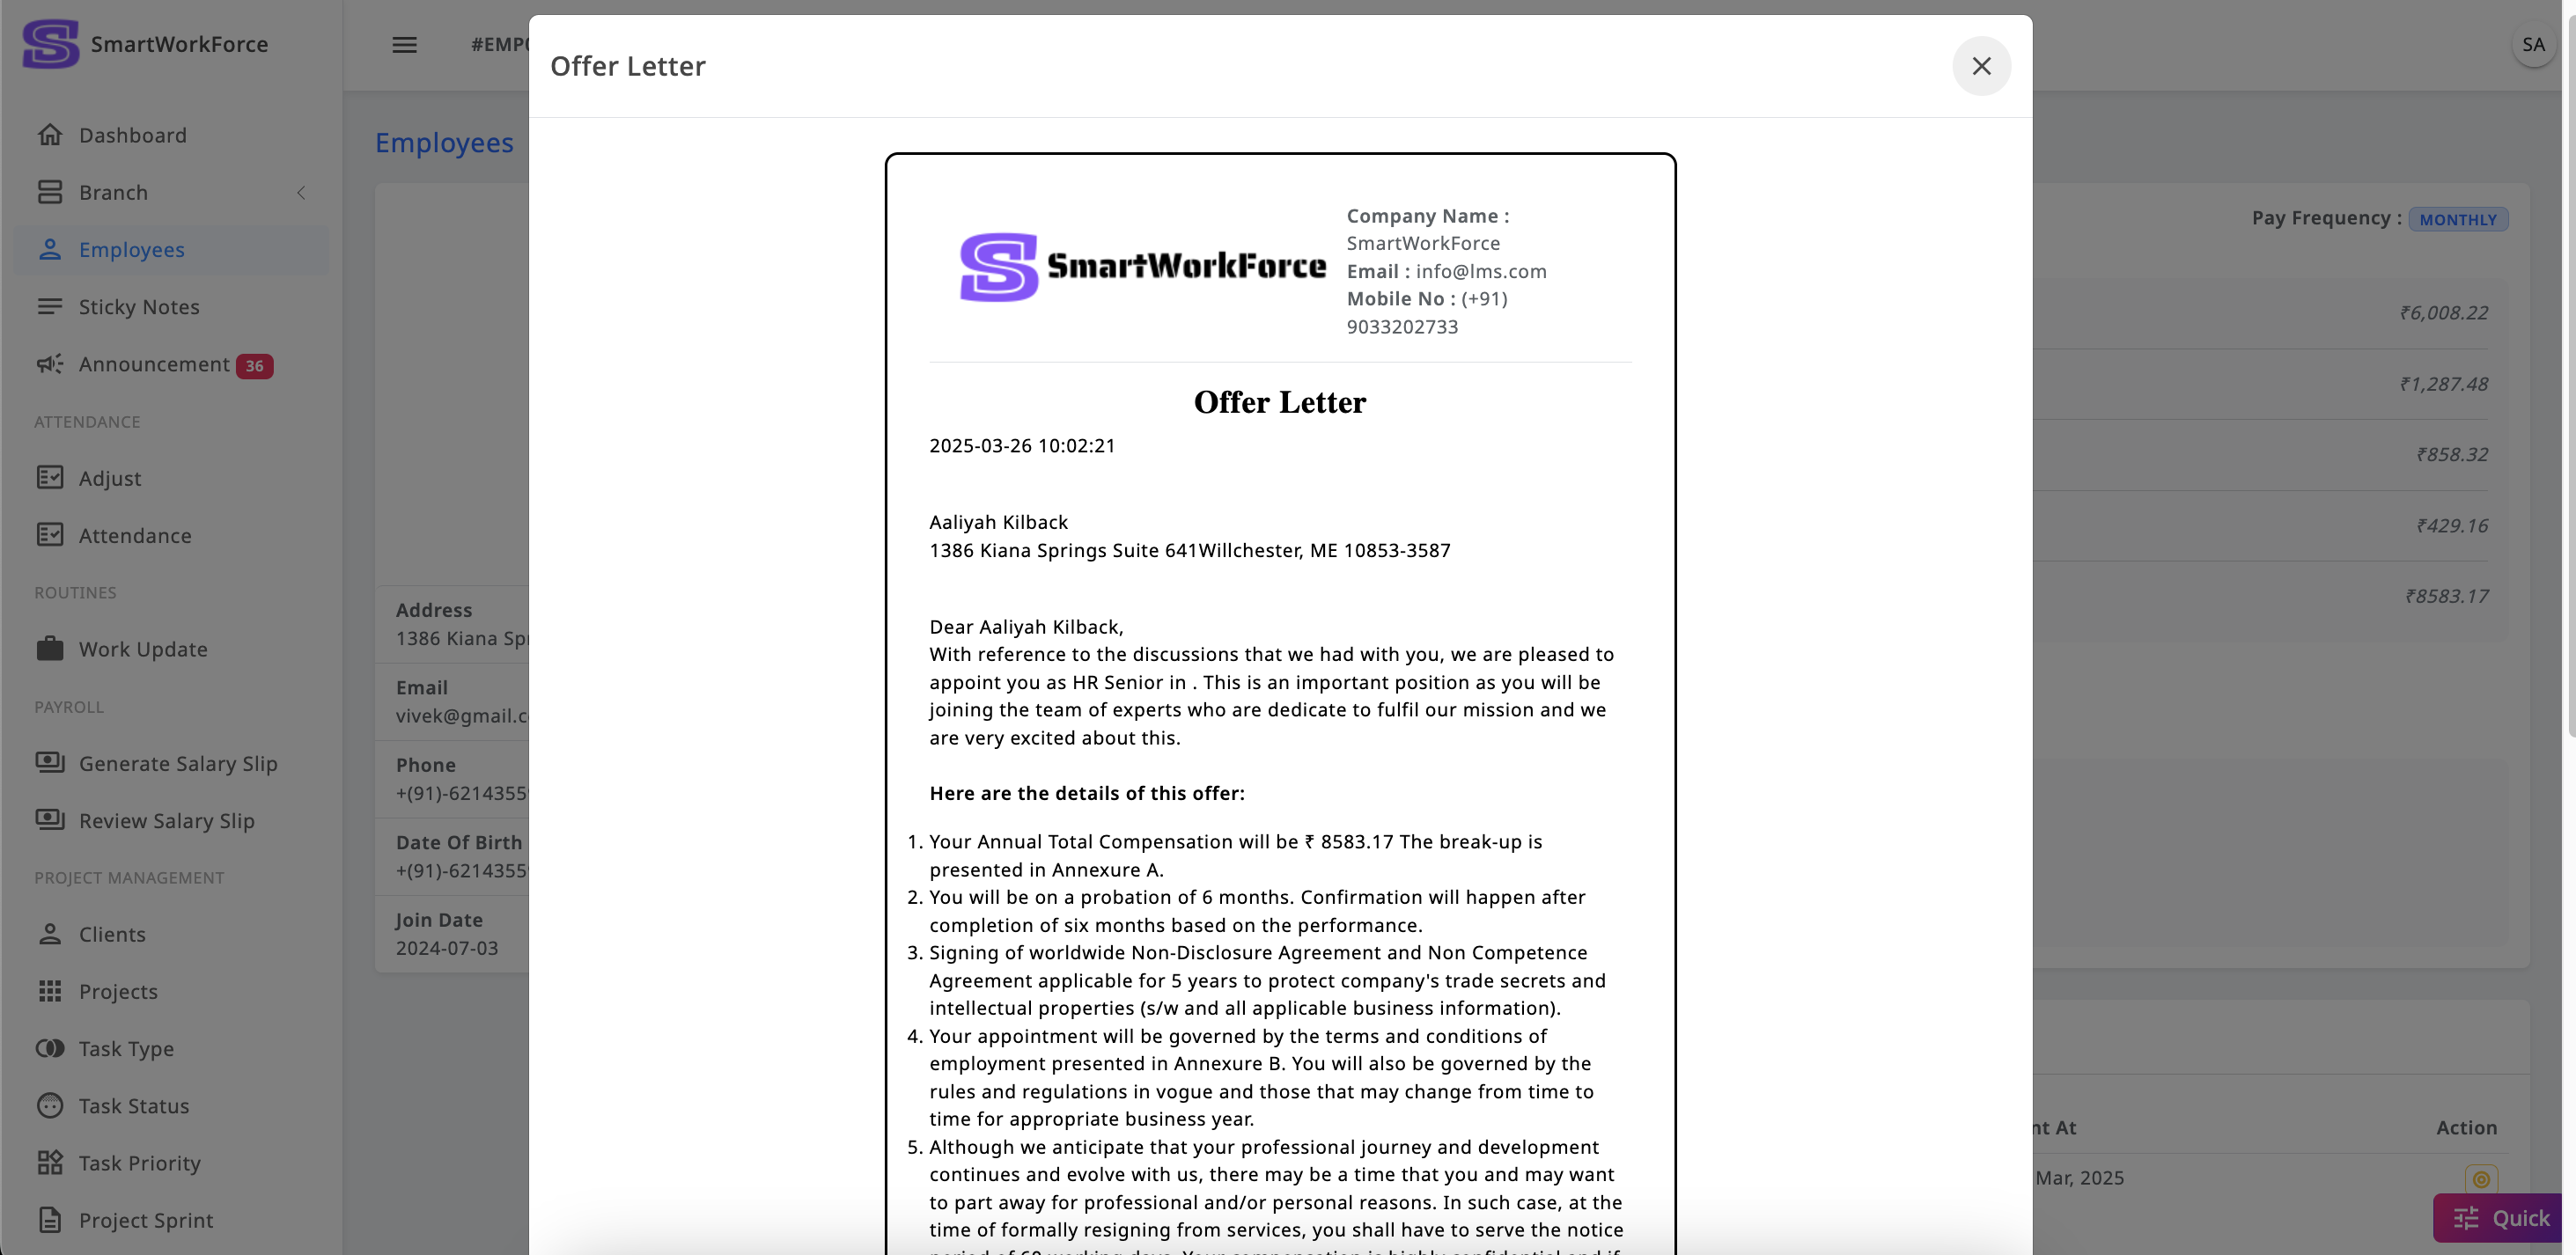
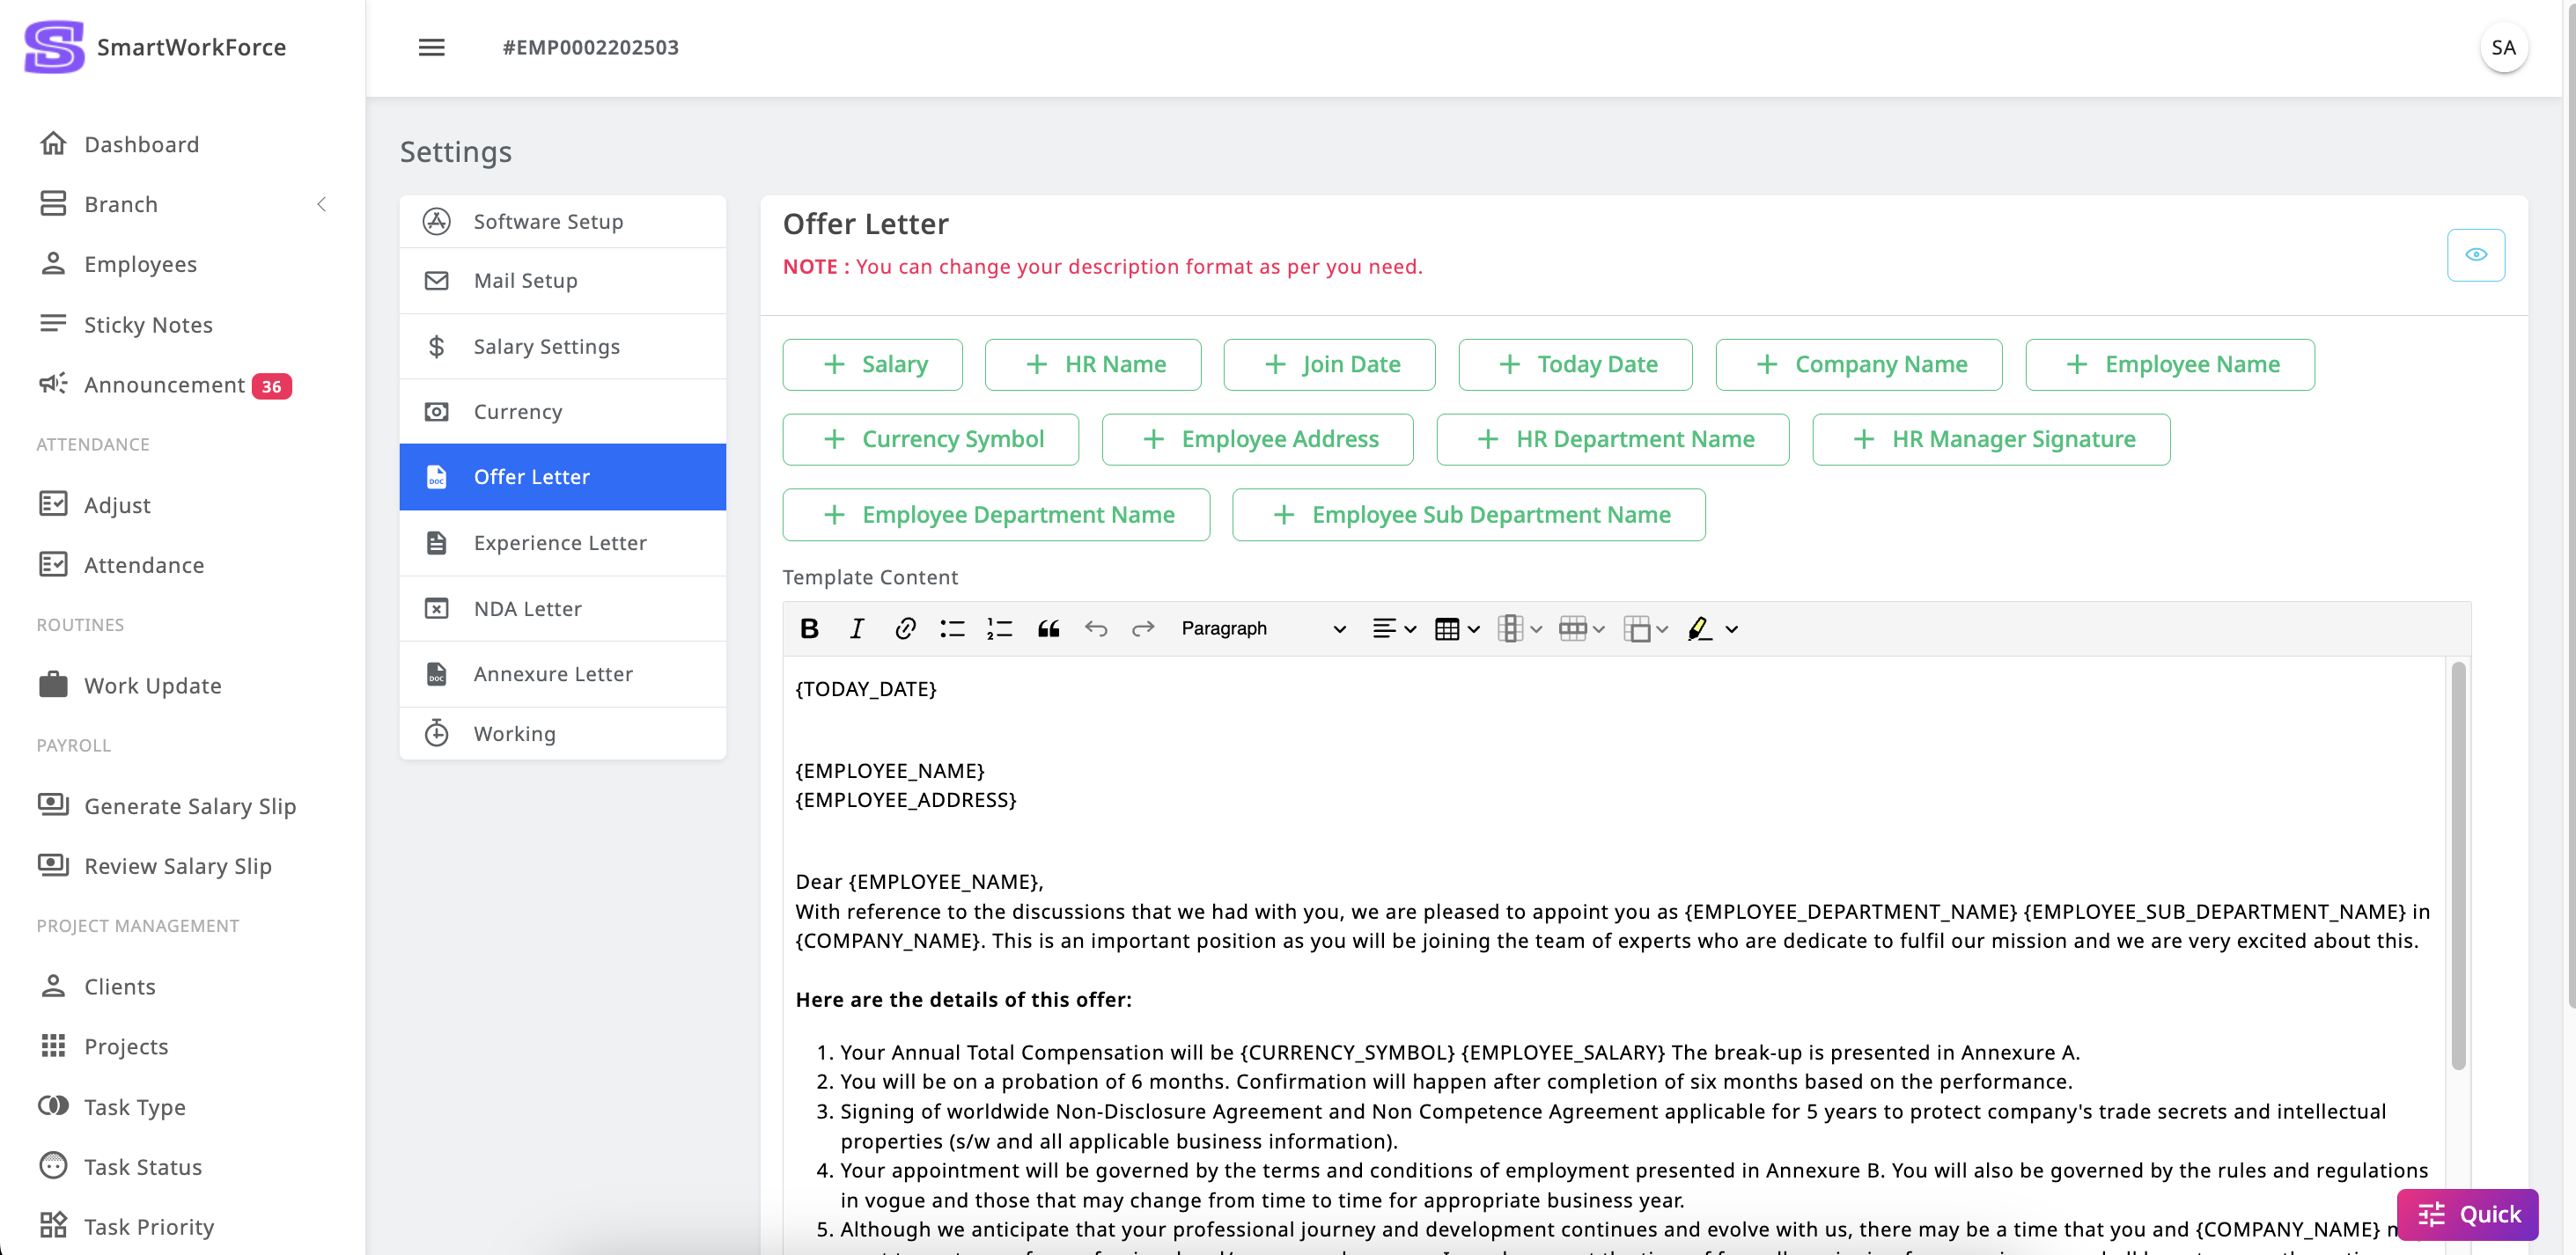
Settings : Offer Letter
SmartWorkForce includes an Offer Letter Setting feature, allowing admins to
customize the content of the offer letter that is sent to employees. The
offer letter can be tailored to include the company’s specific requirements.
Once created, the offer letter is accessible in the employee panel, where
employees can view the letters sent to them. This ensures that the necessary
company details are displayed in the letter format as needed.
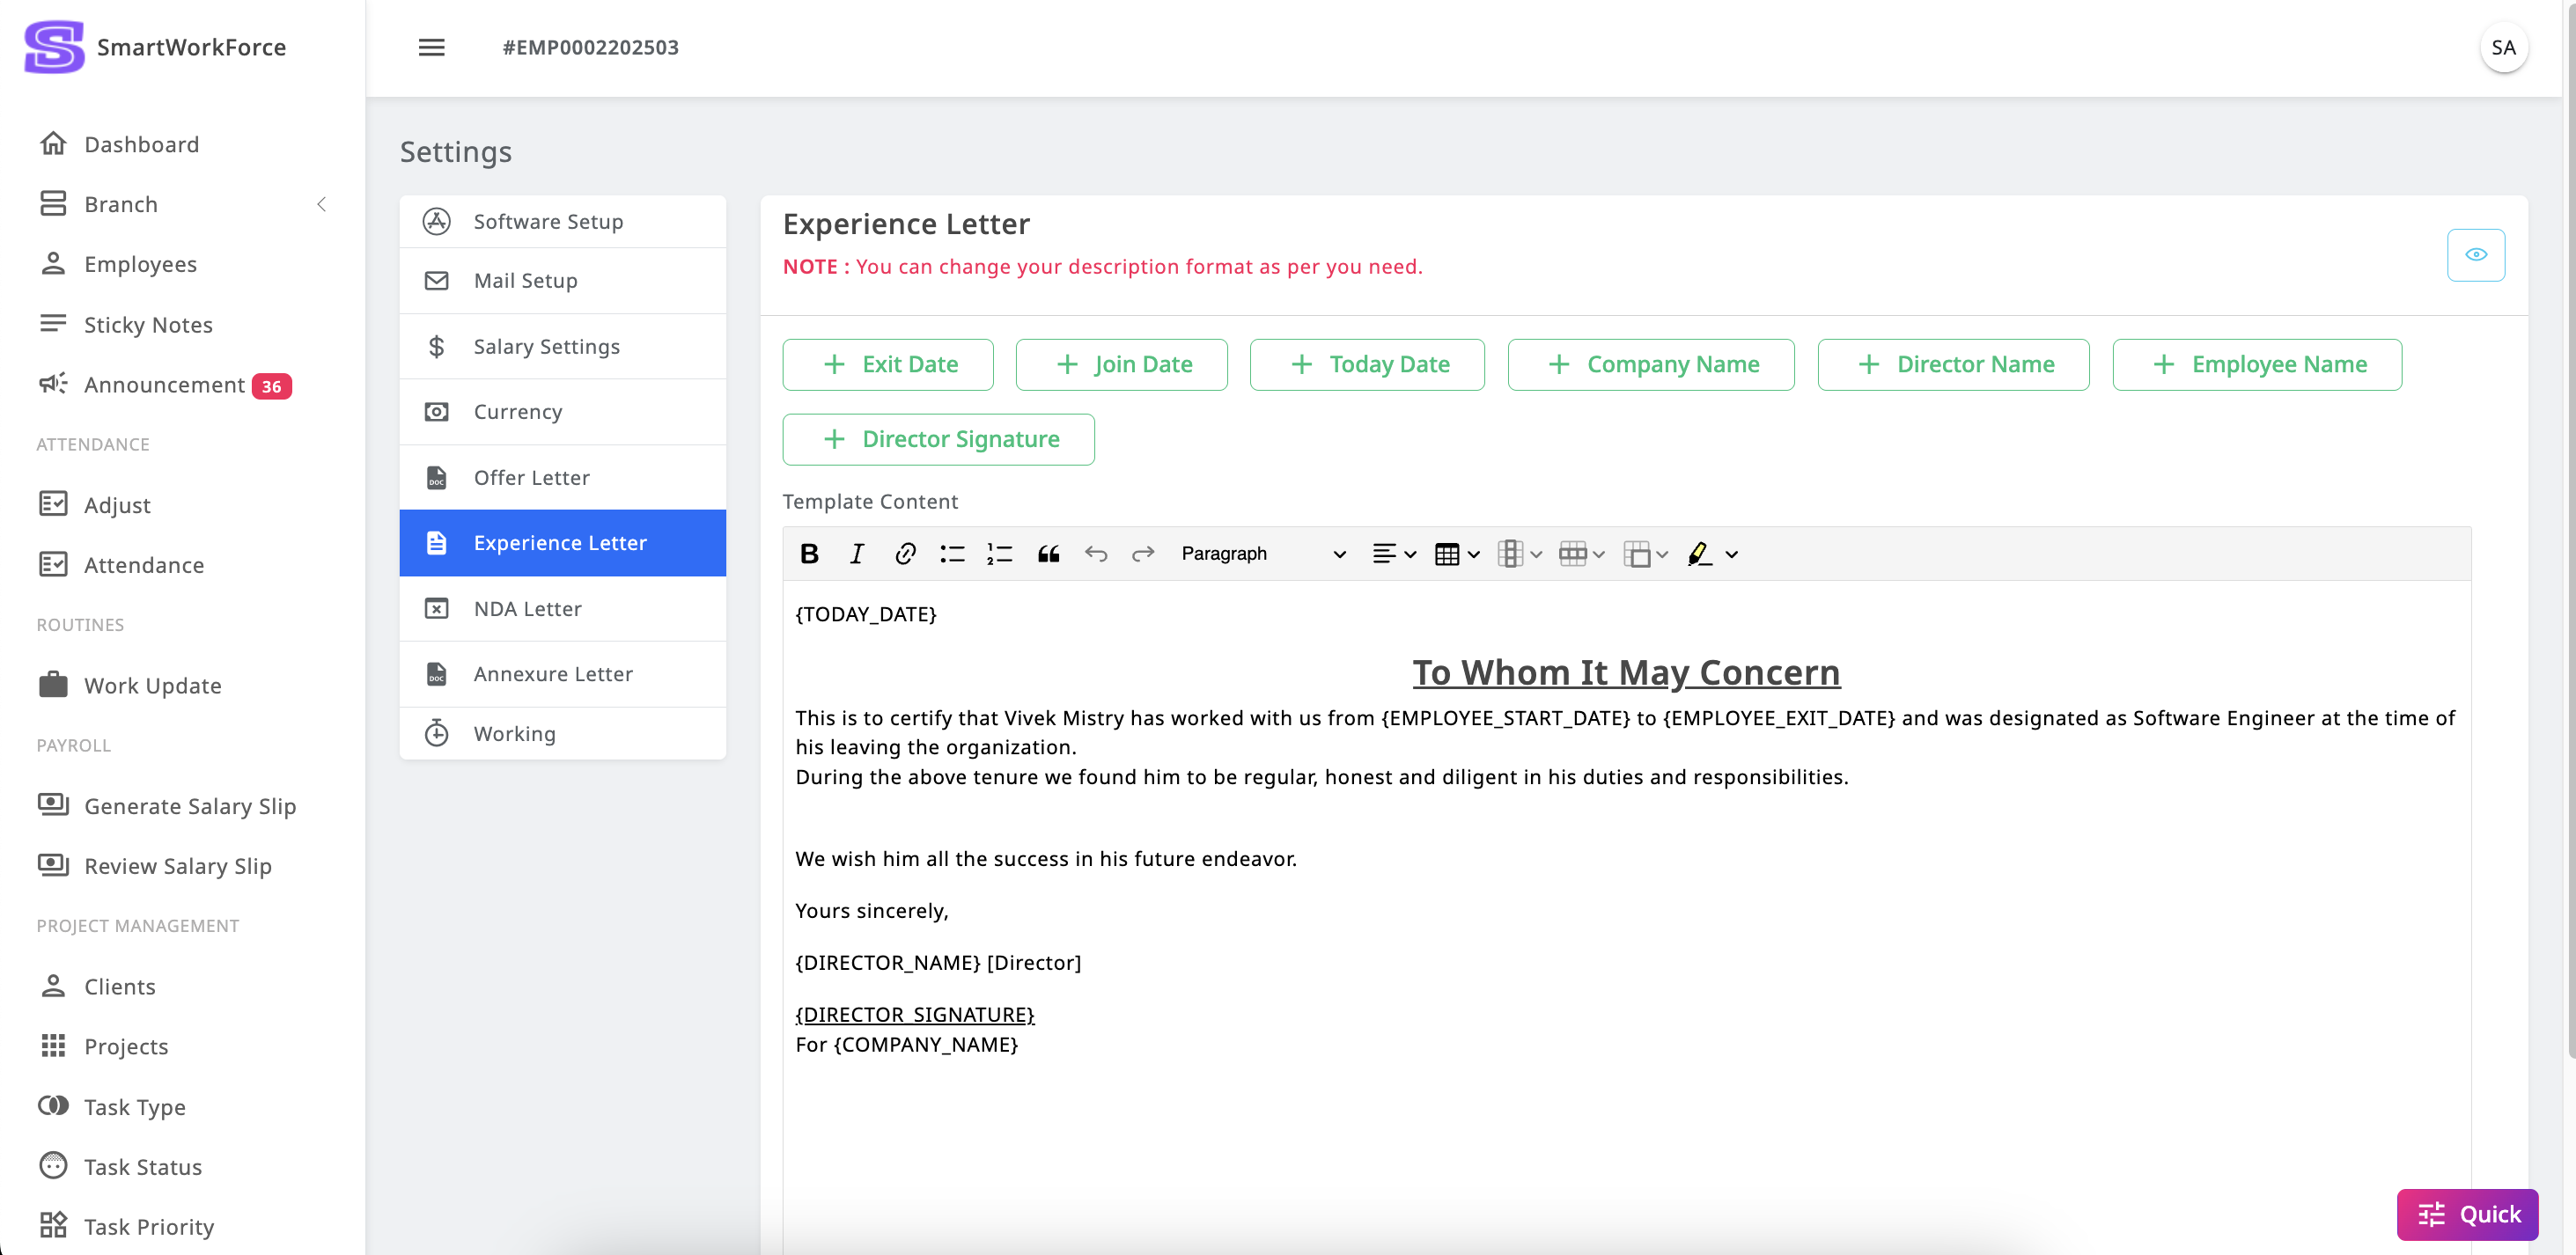
Settings : Experience Letter
SmartWorkForce includes an Experience Letter Setting feature, allowing
admins to
customize the content of the Experience Letter that is sent to employees.
The
Experience Letter can be tailored to include the company’s specific
requirements.
Once created, the Experience Letter is accessible in the employee panel,
where
employees can view the letters sent to them. This ensures that the necessary
company details are displayed in the letter format as needed.
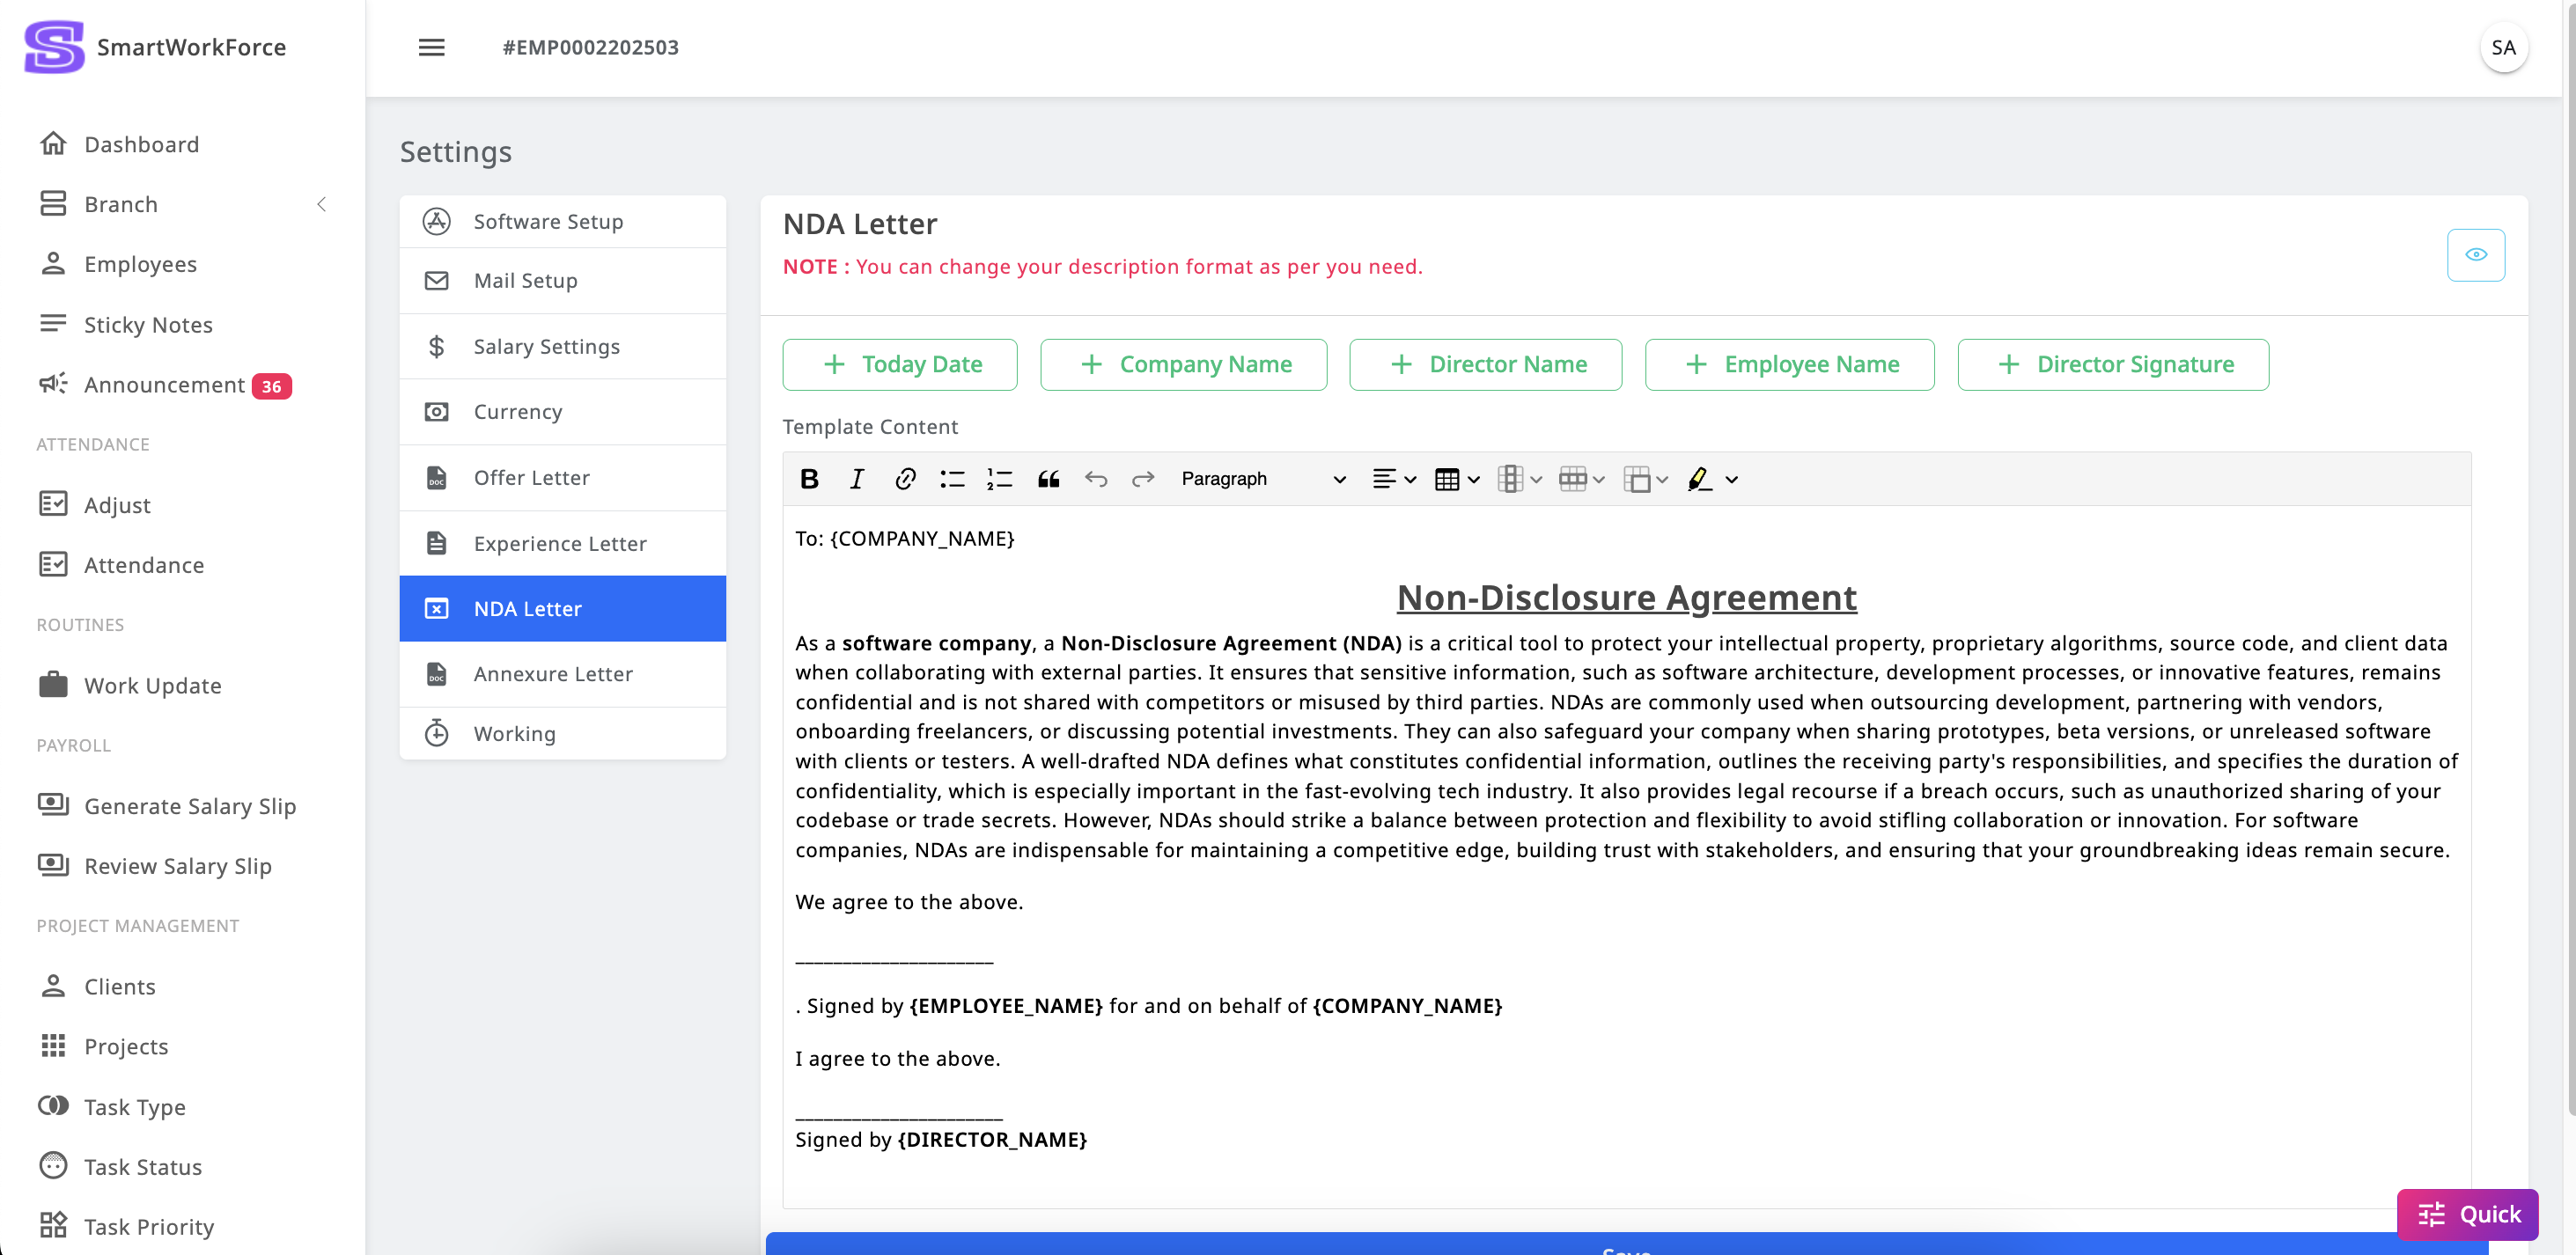
Settings : NDA Letter
SmartWorkForce includes an NDA Letter Setting feature, allowing admins to
customize the content of the NDA Letter that is sent to employees. The
NDA Letter can be tailored to include the company’s specific requirements.
Once created, the NDA Letter is accessible in the employee panel, where
employees can view the letters sent to them. This ensures that the necessary
company details are displayed in the letter format as needed.
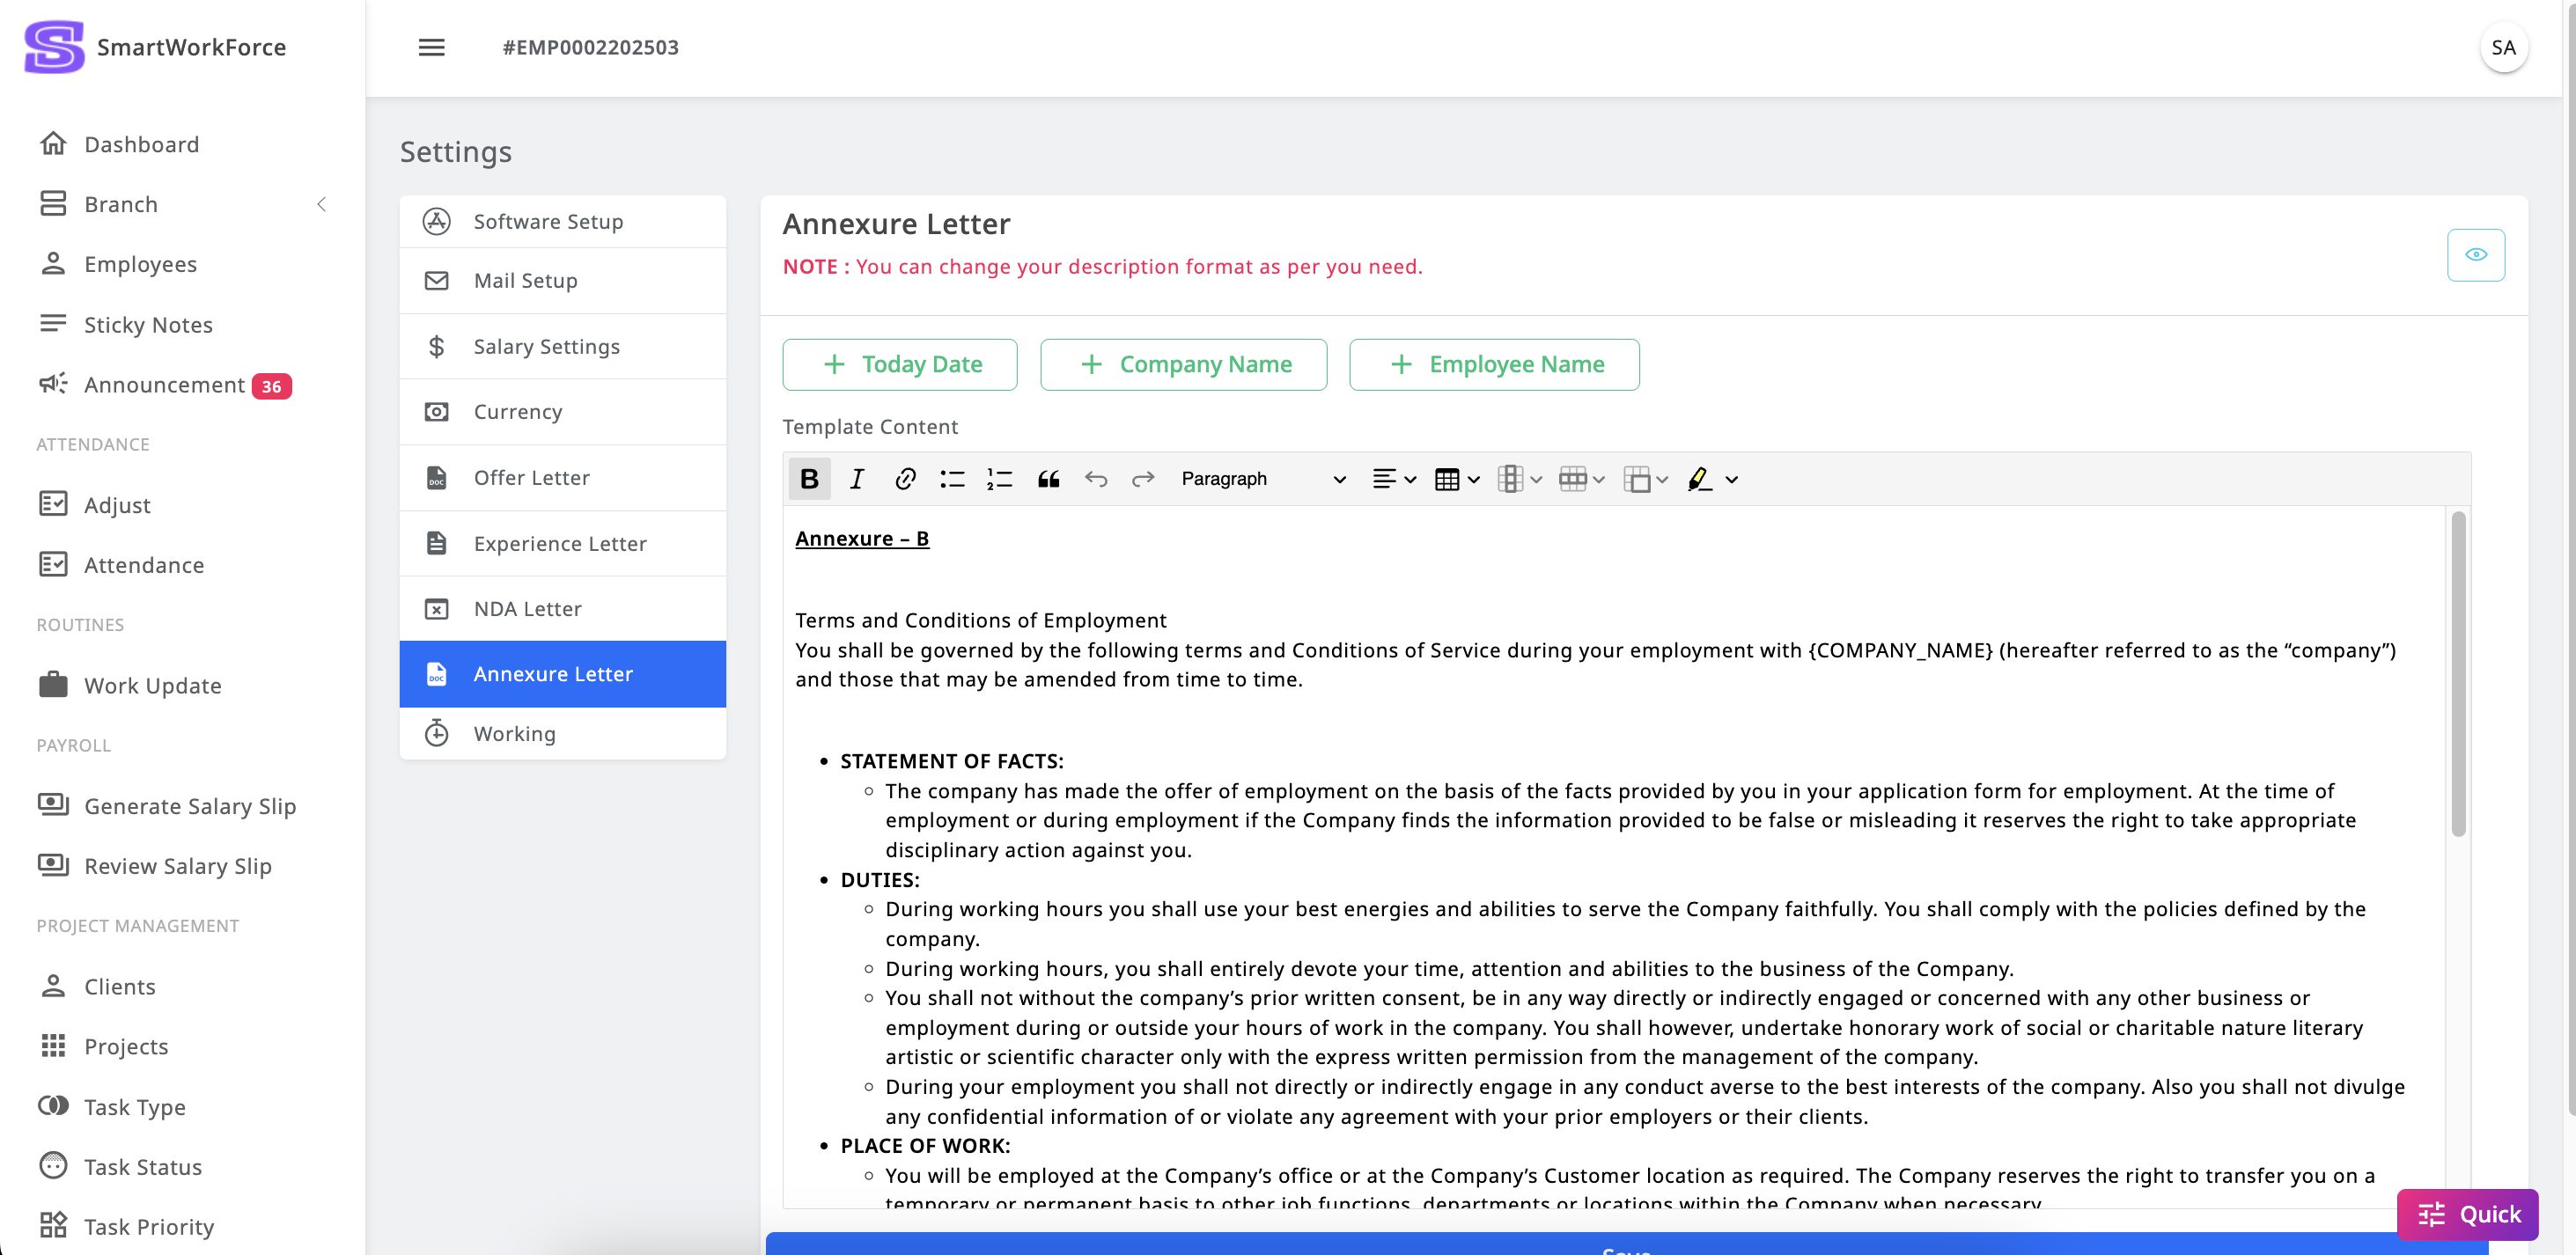
Settings : Annexure Letter
SmartWorkForce includes an Annexure Letter Setting feature, allowing admins
to
customize the content of the Annexure Letter that is sent to employees. The
Annexure Letter can be tailored to include the company’s specific
requirements.
Once created, the Annexure Letter is accessible in the employee panel, where
employees can view the letters sent to them. This ensures that the necessary
company details are displayed in the letter format as needed.
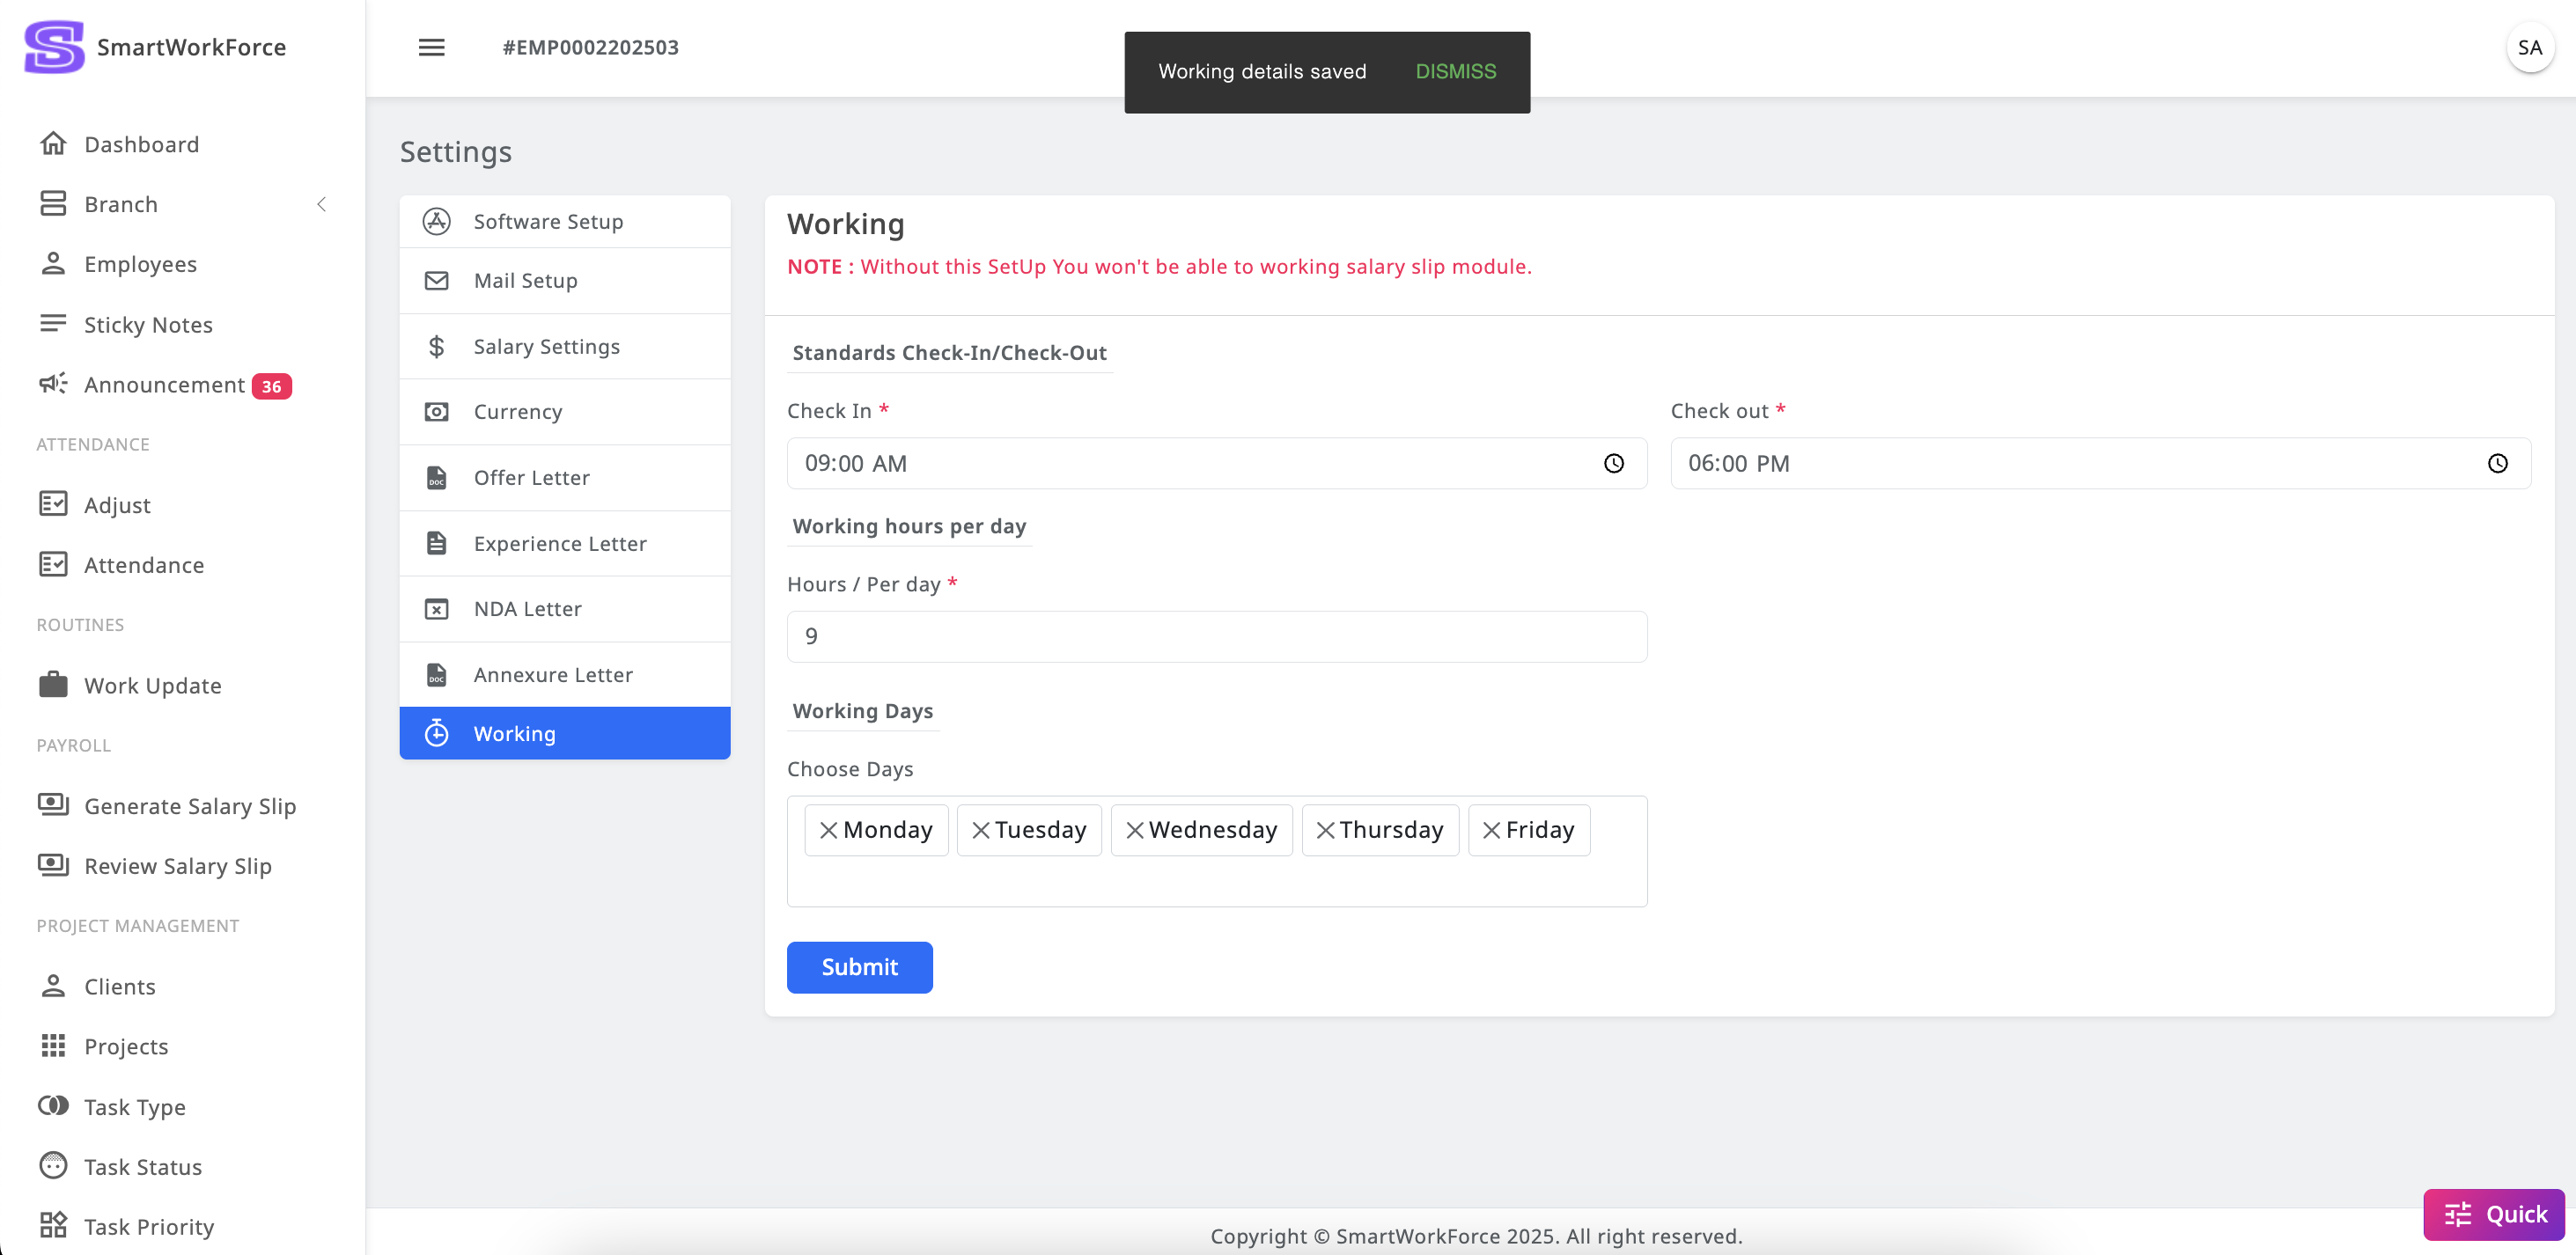
Settings : Working
SmartWorkForce includes a Working Hours Setup feature, allowing admins to
define the organization's working days and hours. Admins can set the
expected working hours per day for employees, and this information will be
used to calculate attendance and work hours. Additionally, there is
flexibility for employees, as they can choose to work at any time during the
day, ensuring a more adaptable work schedule.
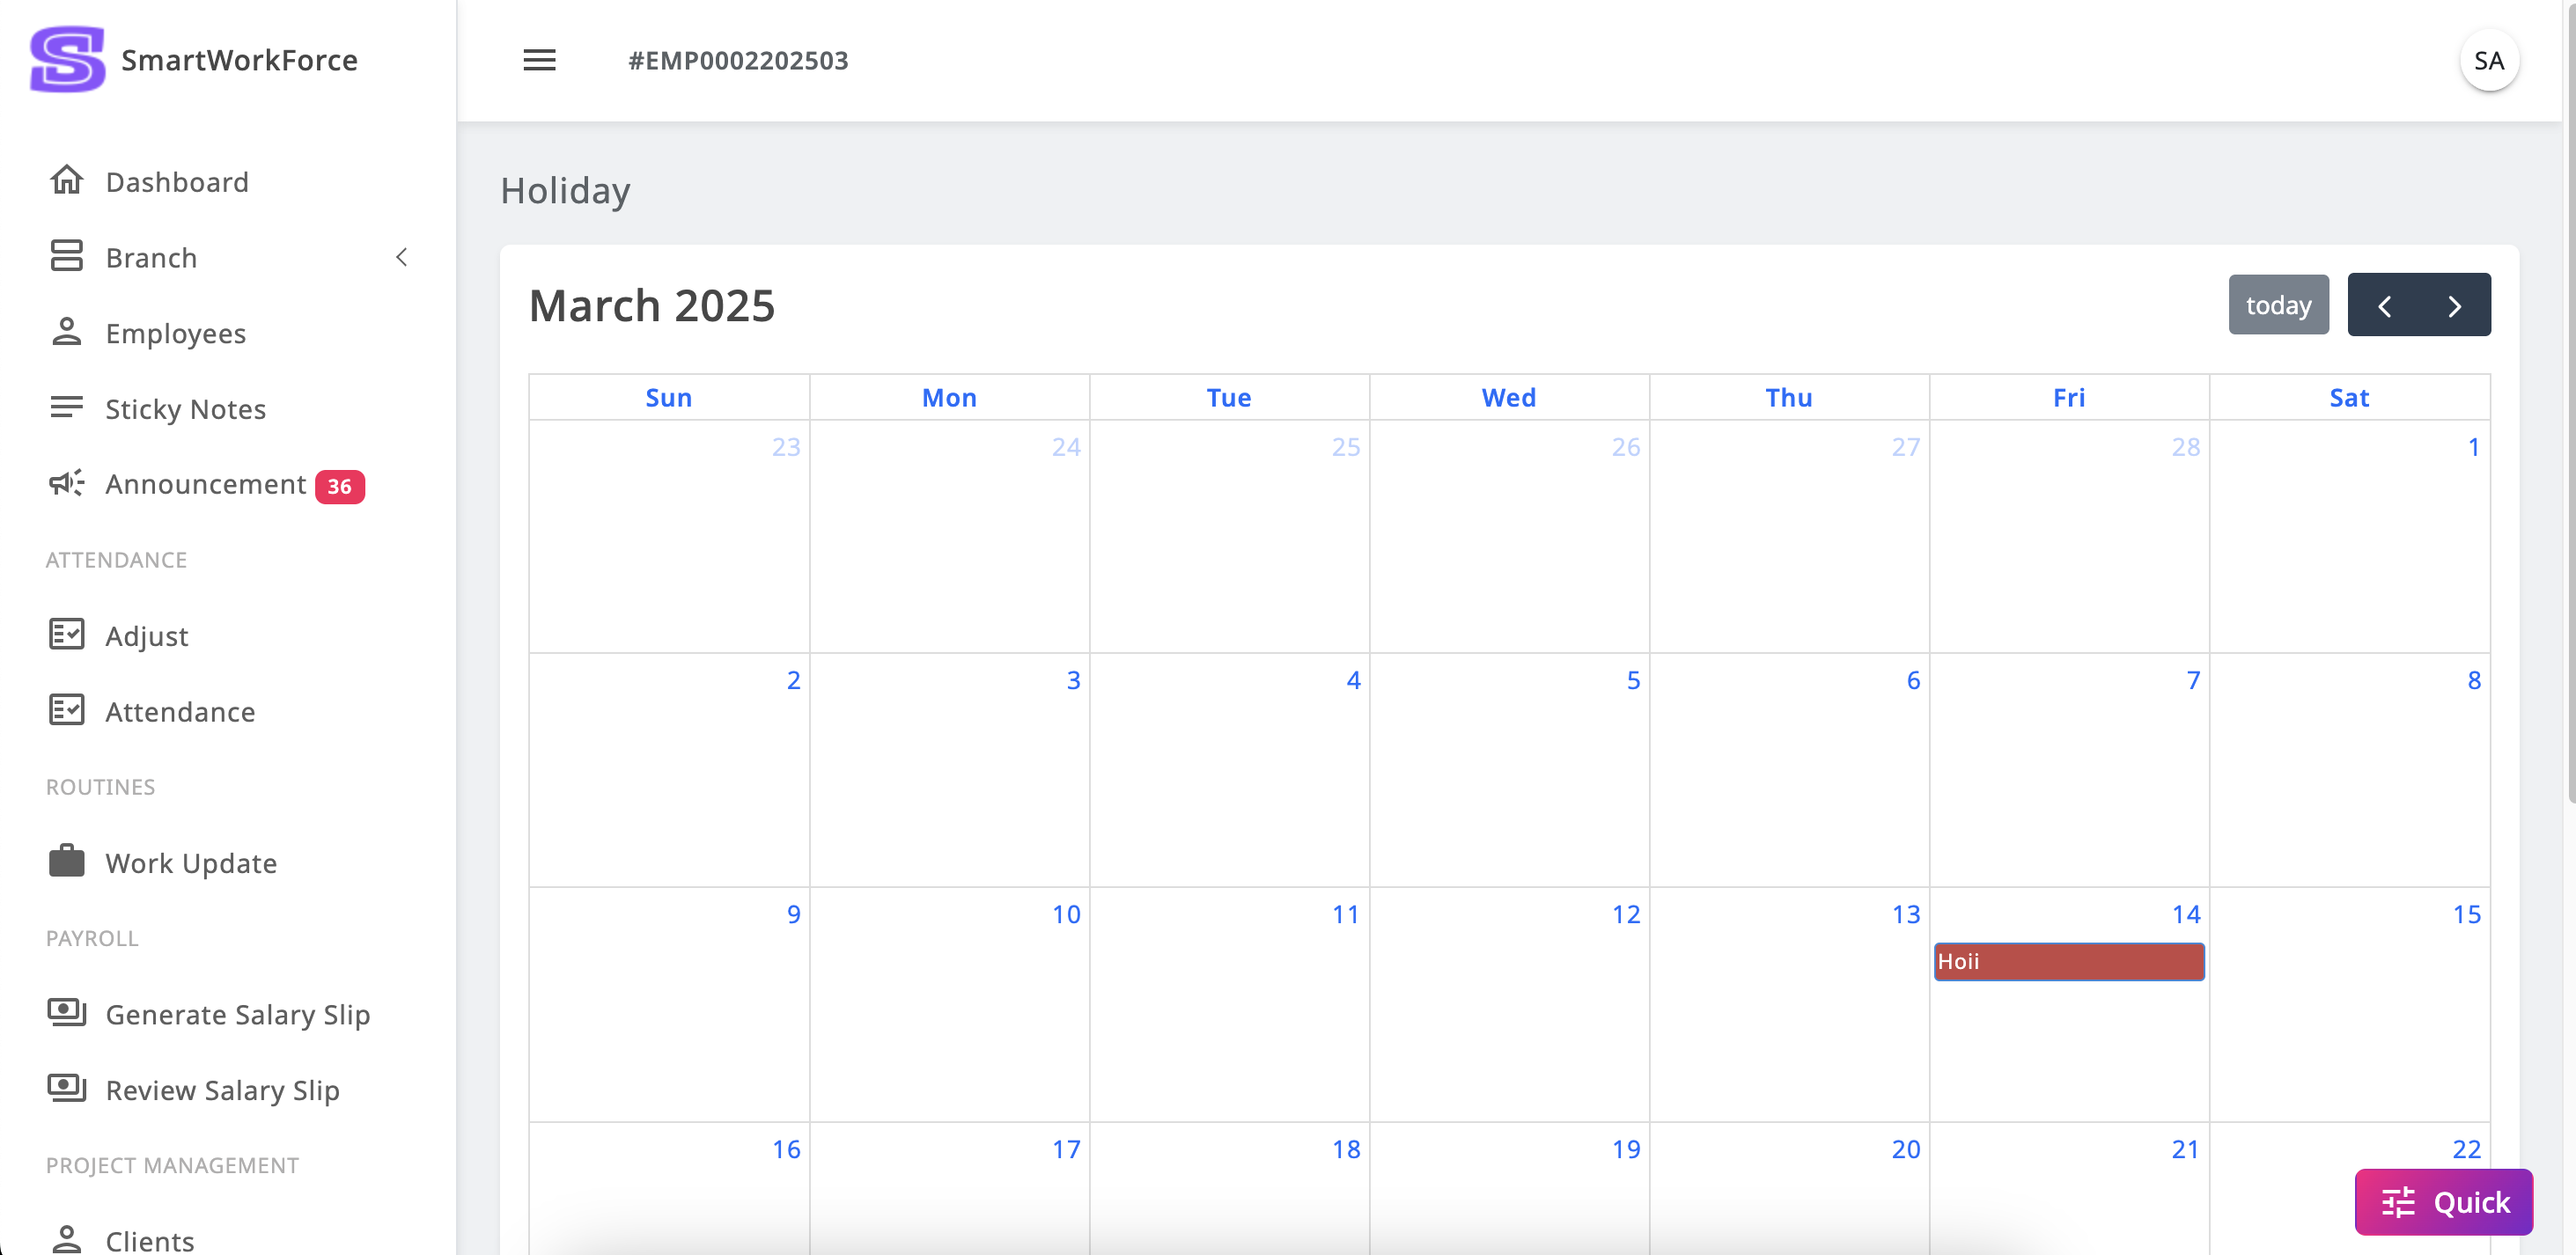
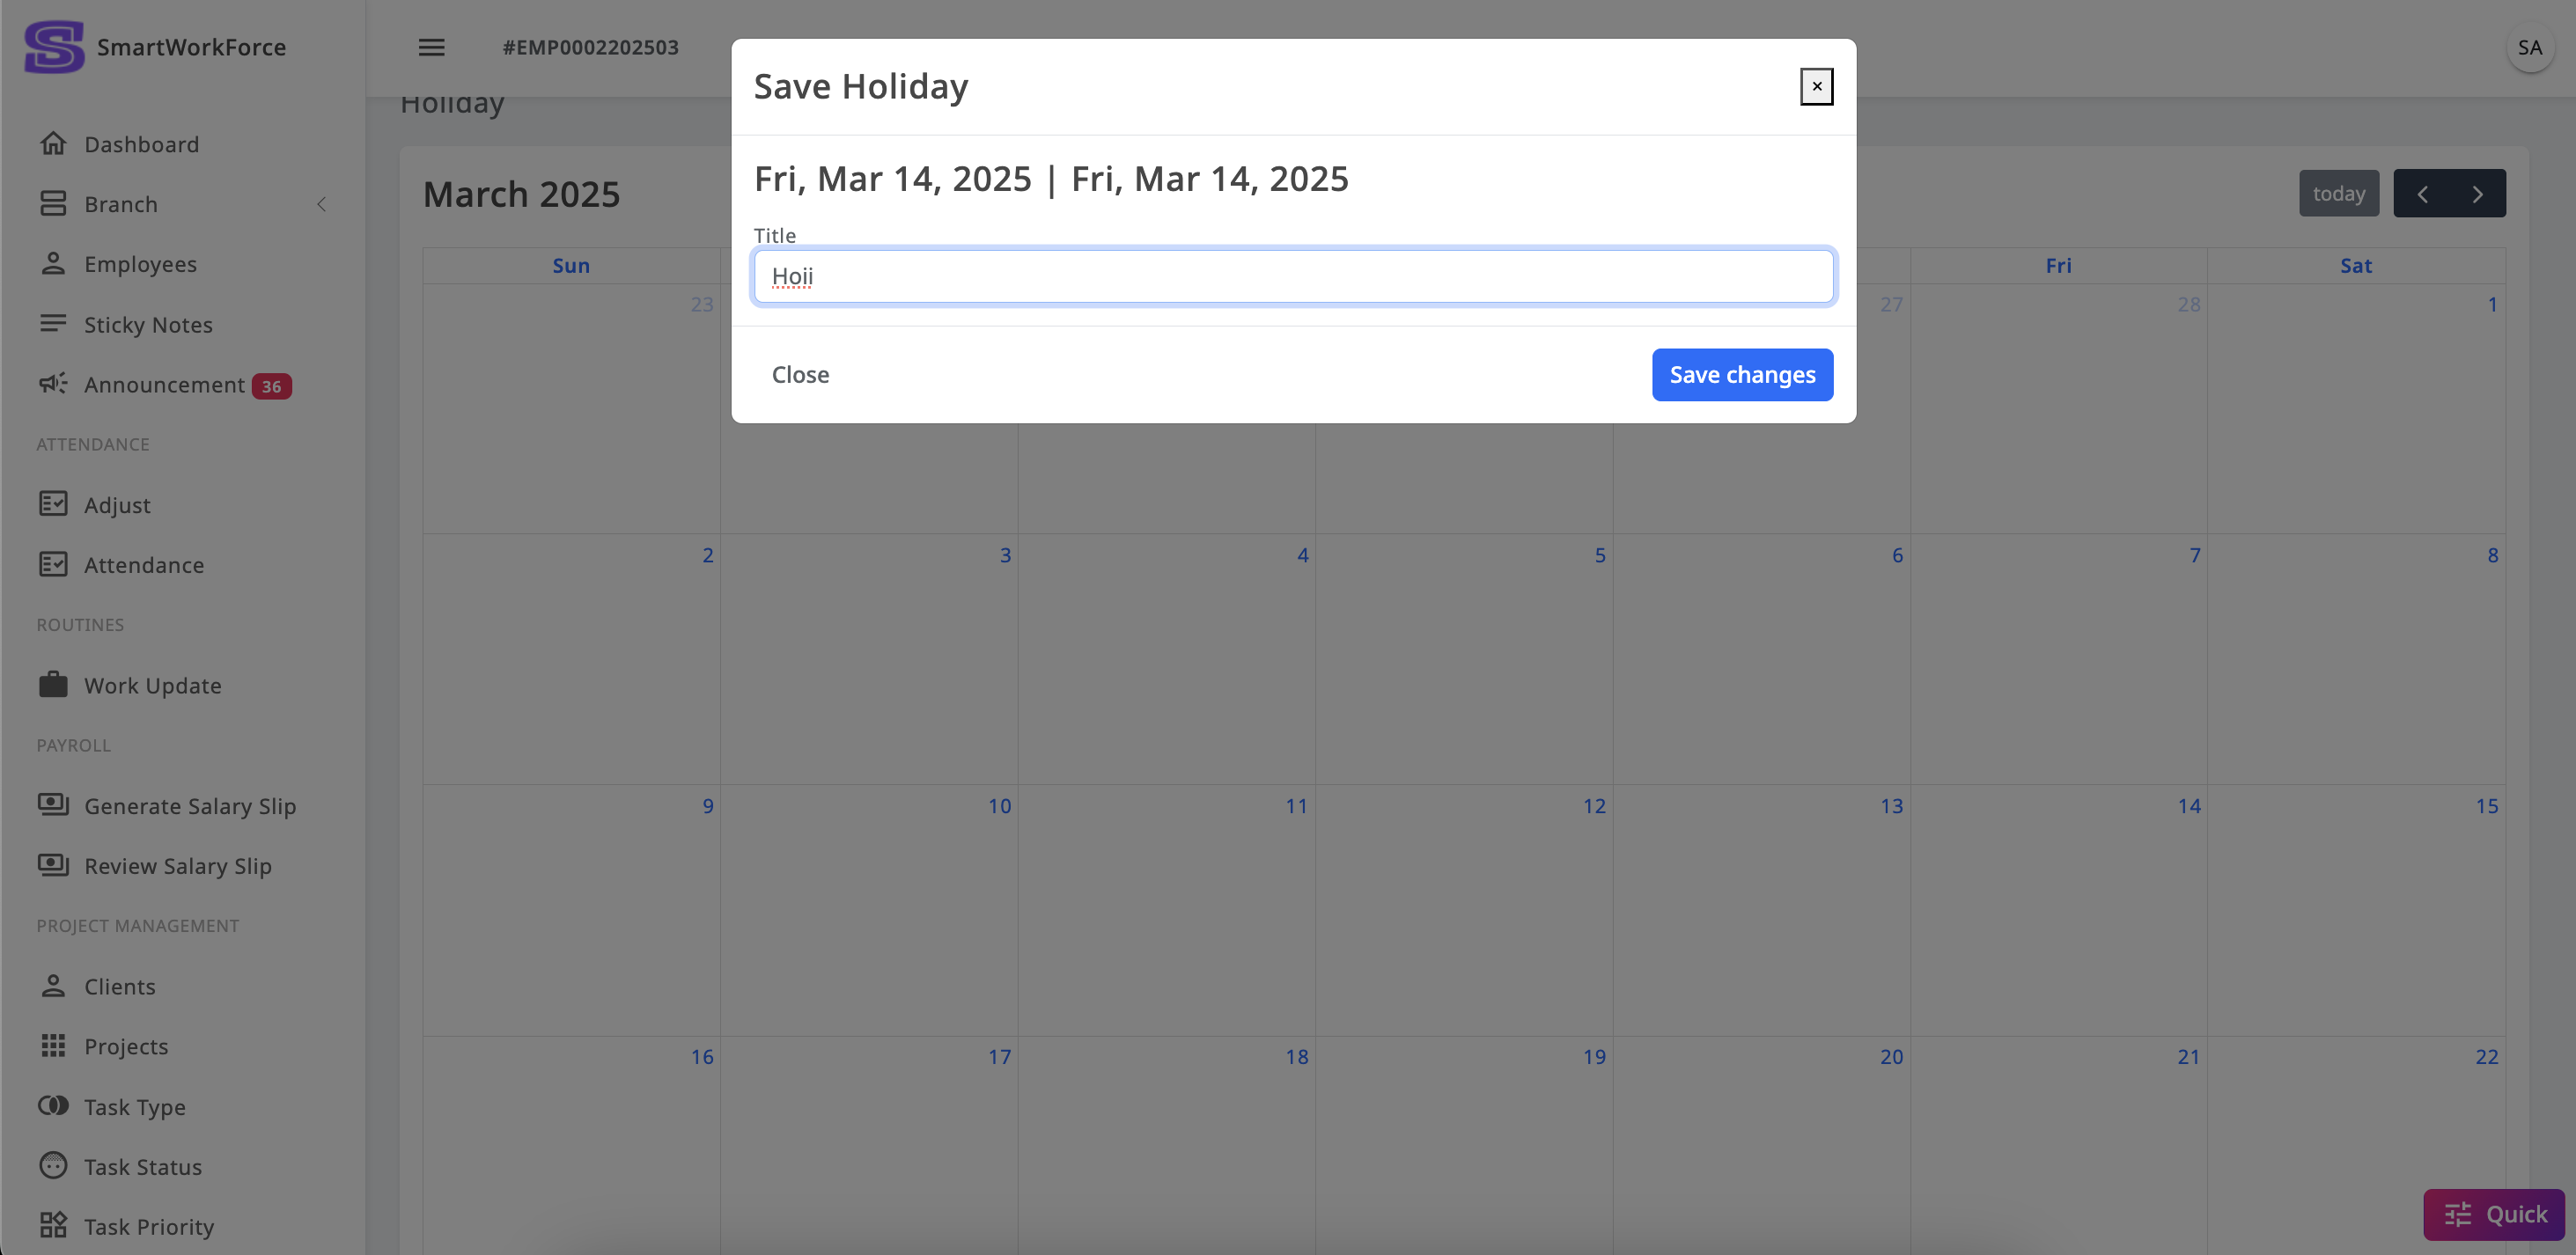
Settings : Holidays
In SmartWorkForce, admins have the ability to add holidays to the system,
ensuring that these days are not considered in the salary slip calculations.
Employees can view the holidays on their personal calendar, keeping them
informed of the non-working days. Admins can add multiple holidays as
needed, providing flexibility in managing company-wide holidays.
HolidayHoliday Create
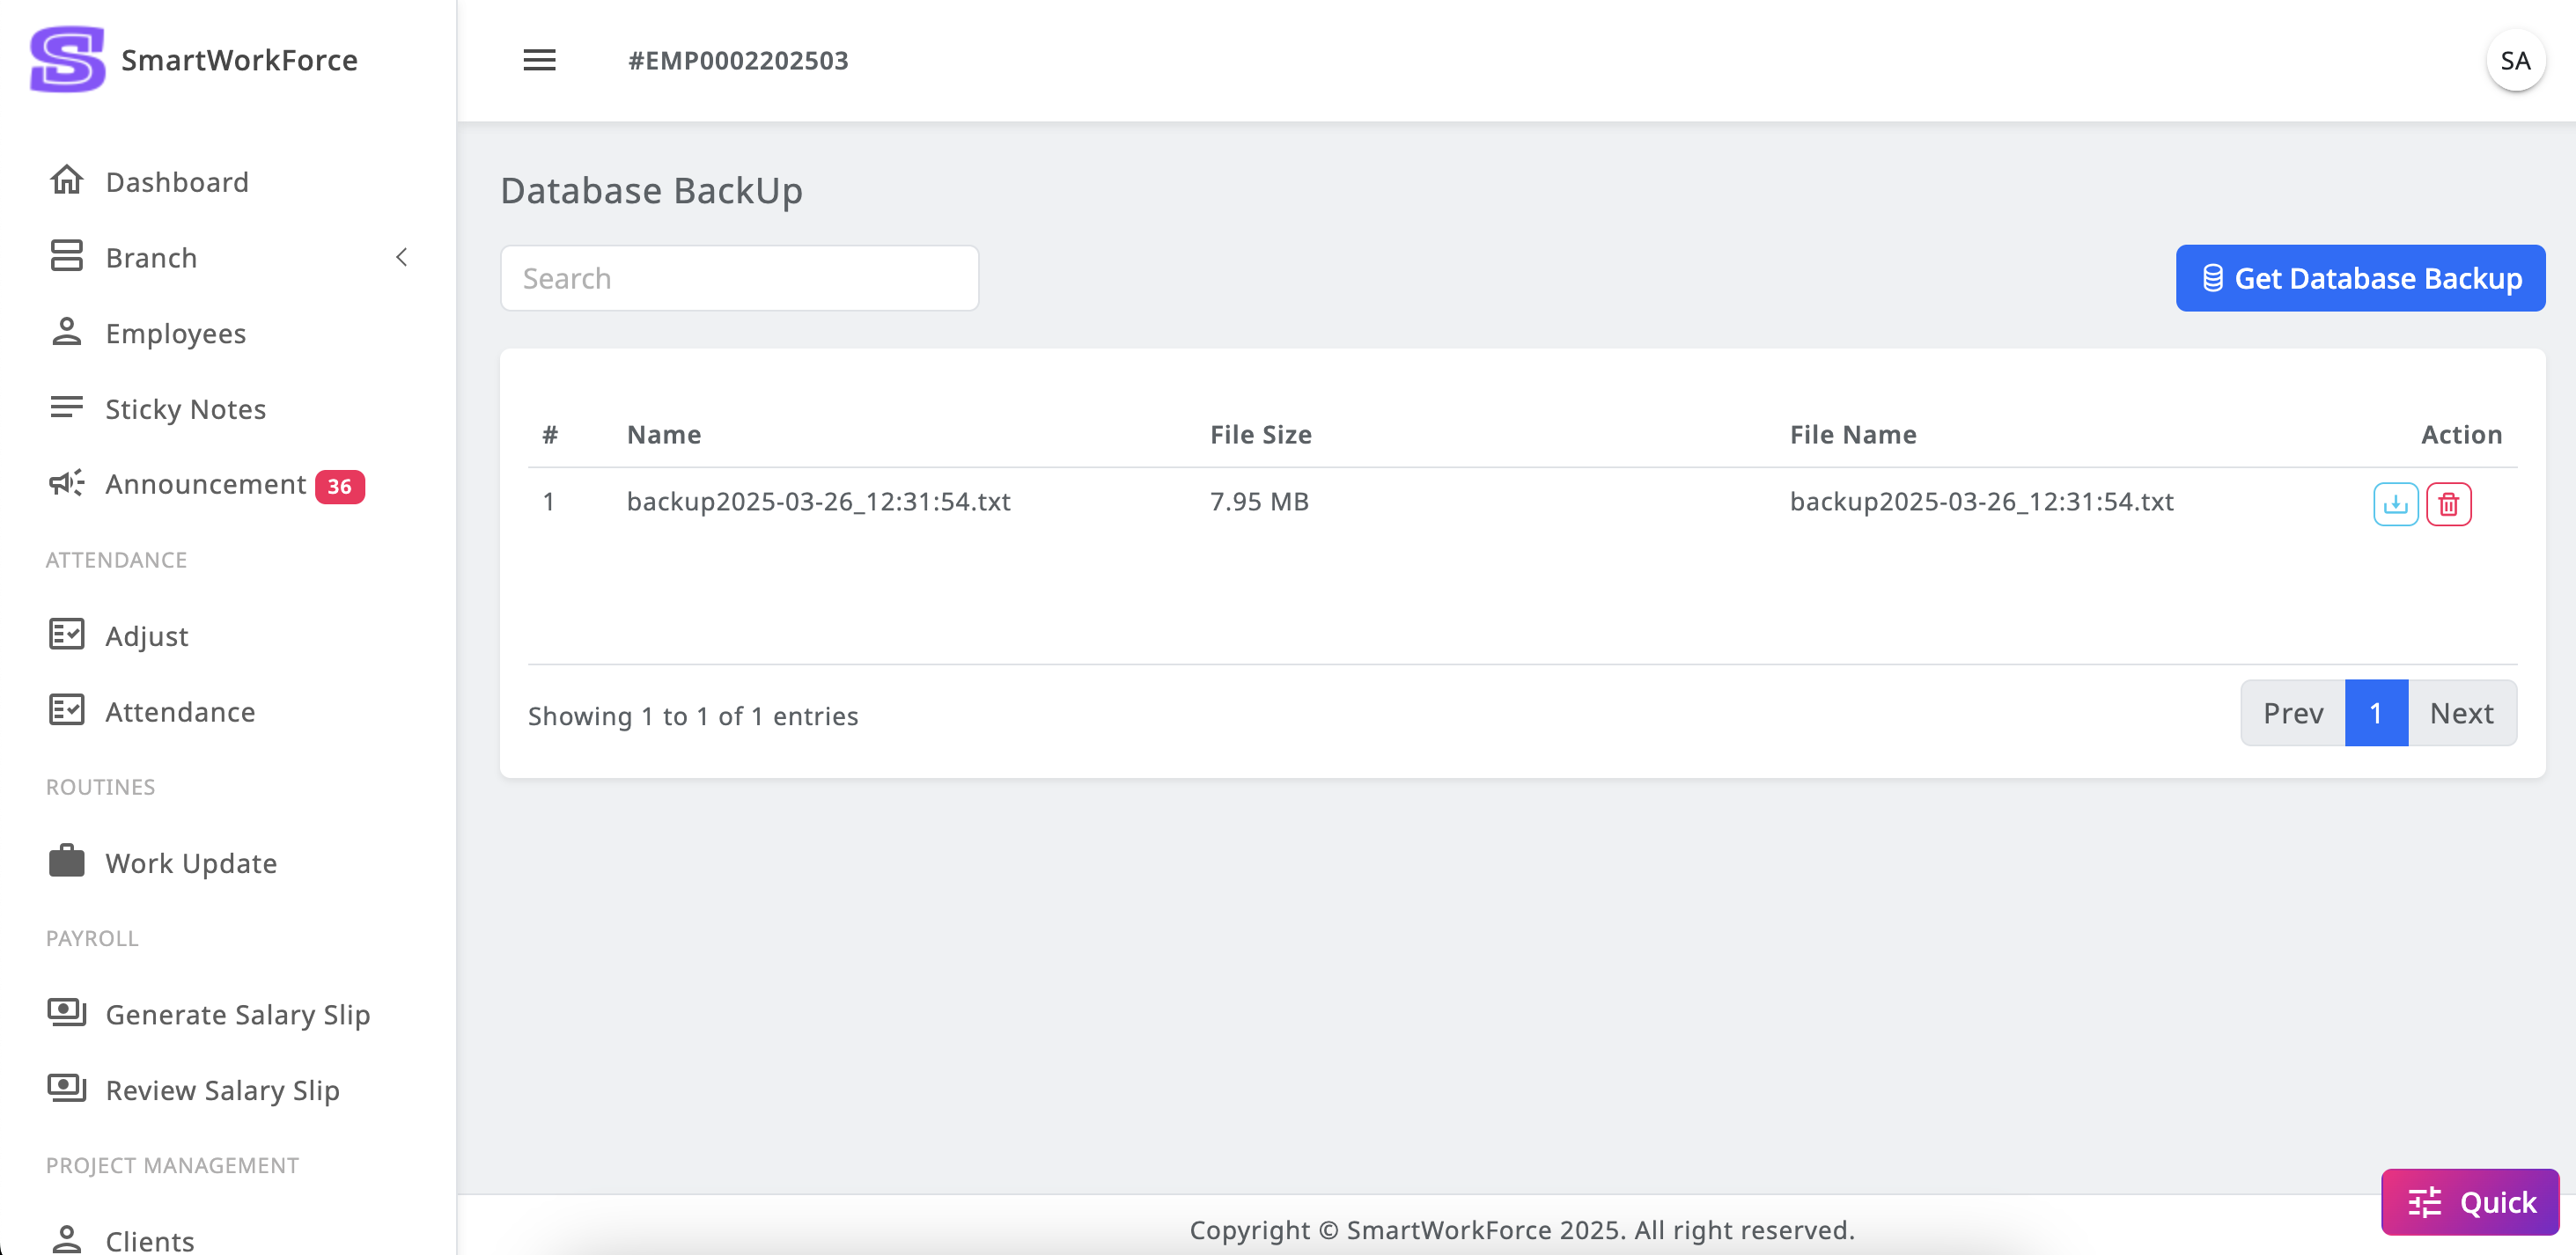
Settings : Database BackUp
In SmartWorkForce, admins have the ability to generate database backups as
needed, ensuring that important data is securely saved. They can also
download the database for external storage or future use, providing a simple
and effective way to manage and protect system data.
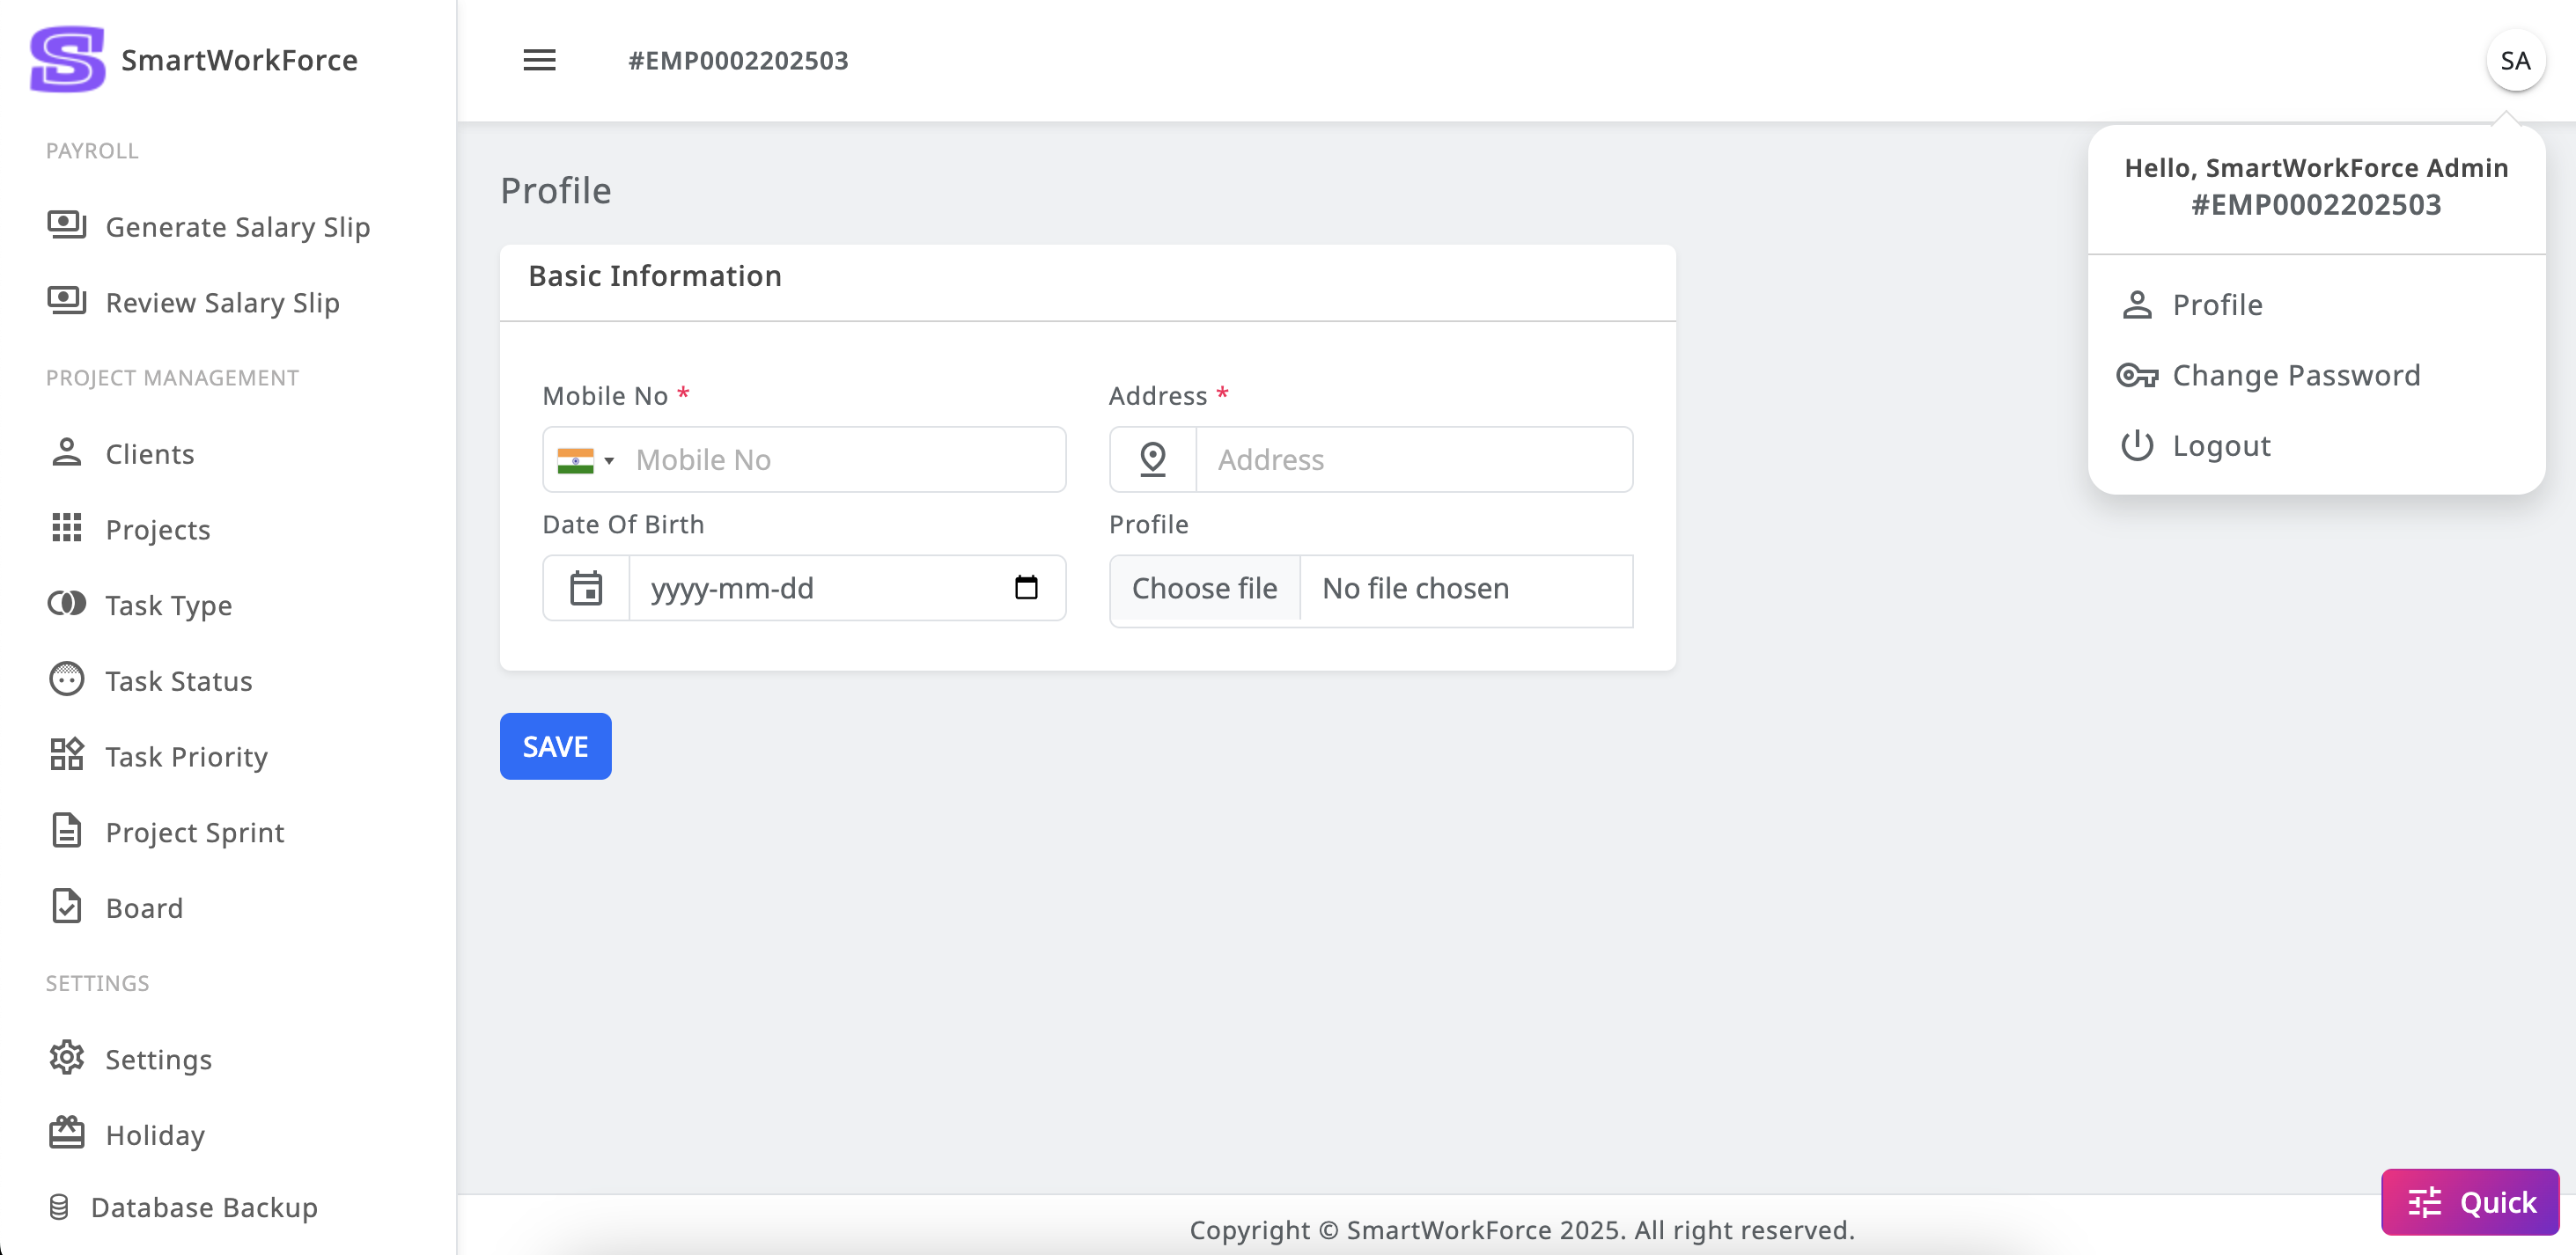
Profile
In SmartWorkForce, admins have the ability to change their basic profile
information, such as name, email, contact details, and other personal
settings. This allows admins to keep their profile up-to-date and manage
their account details as needed.
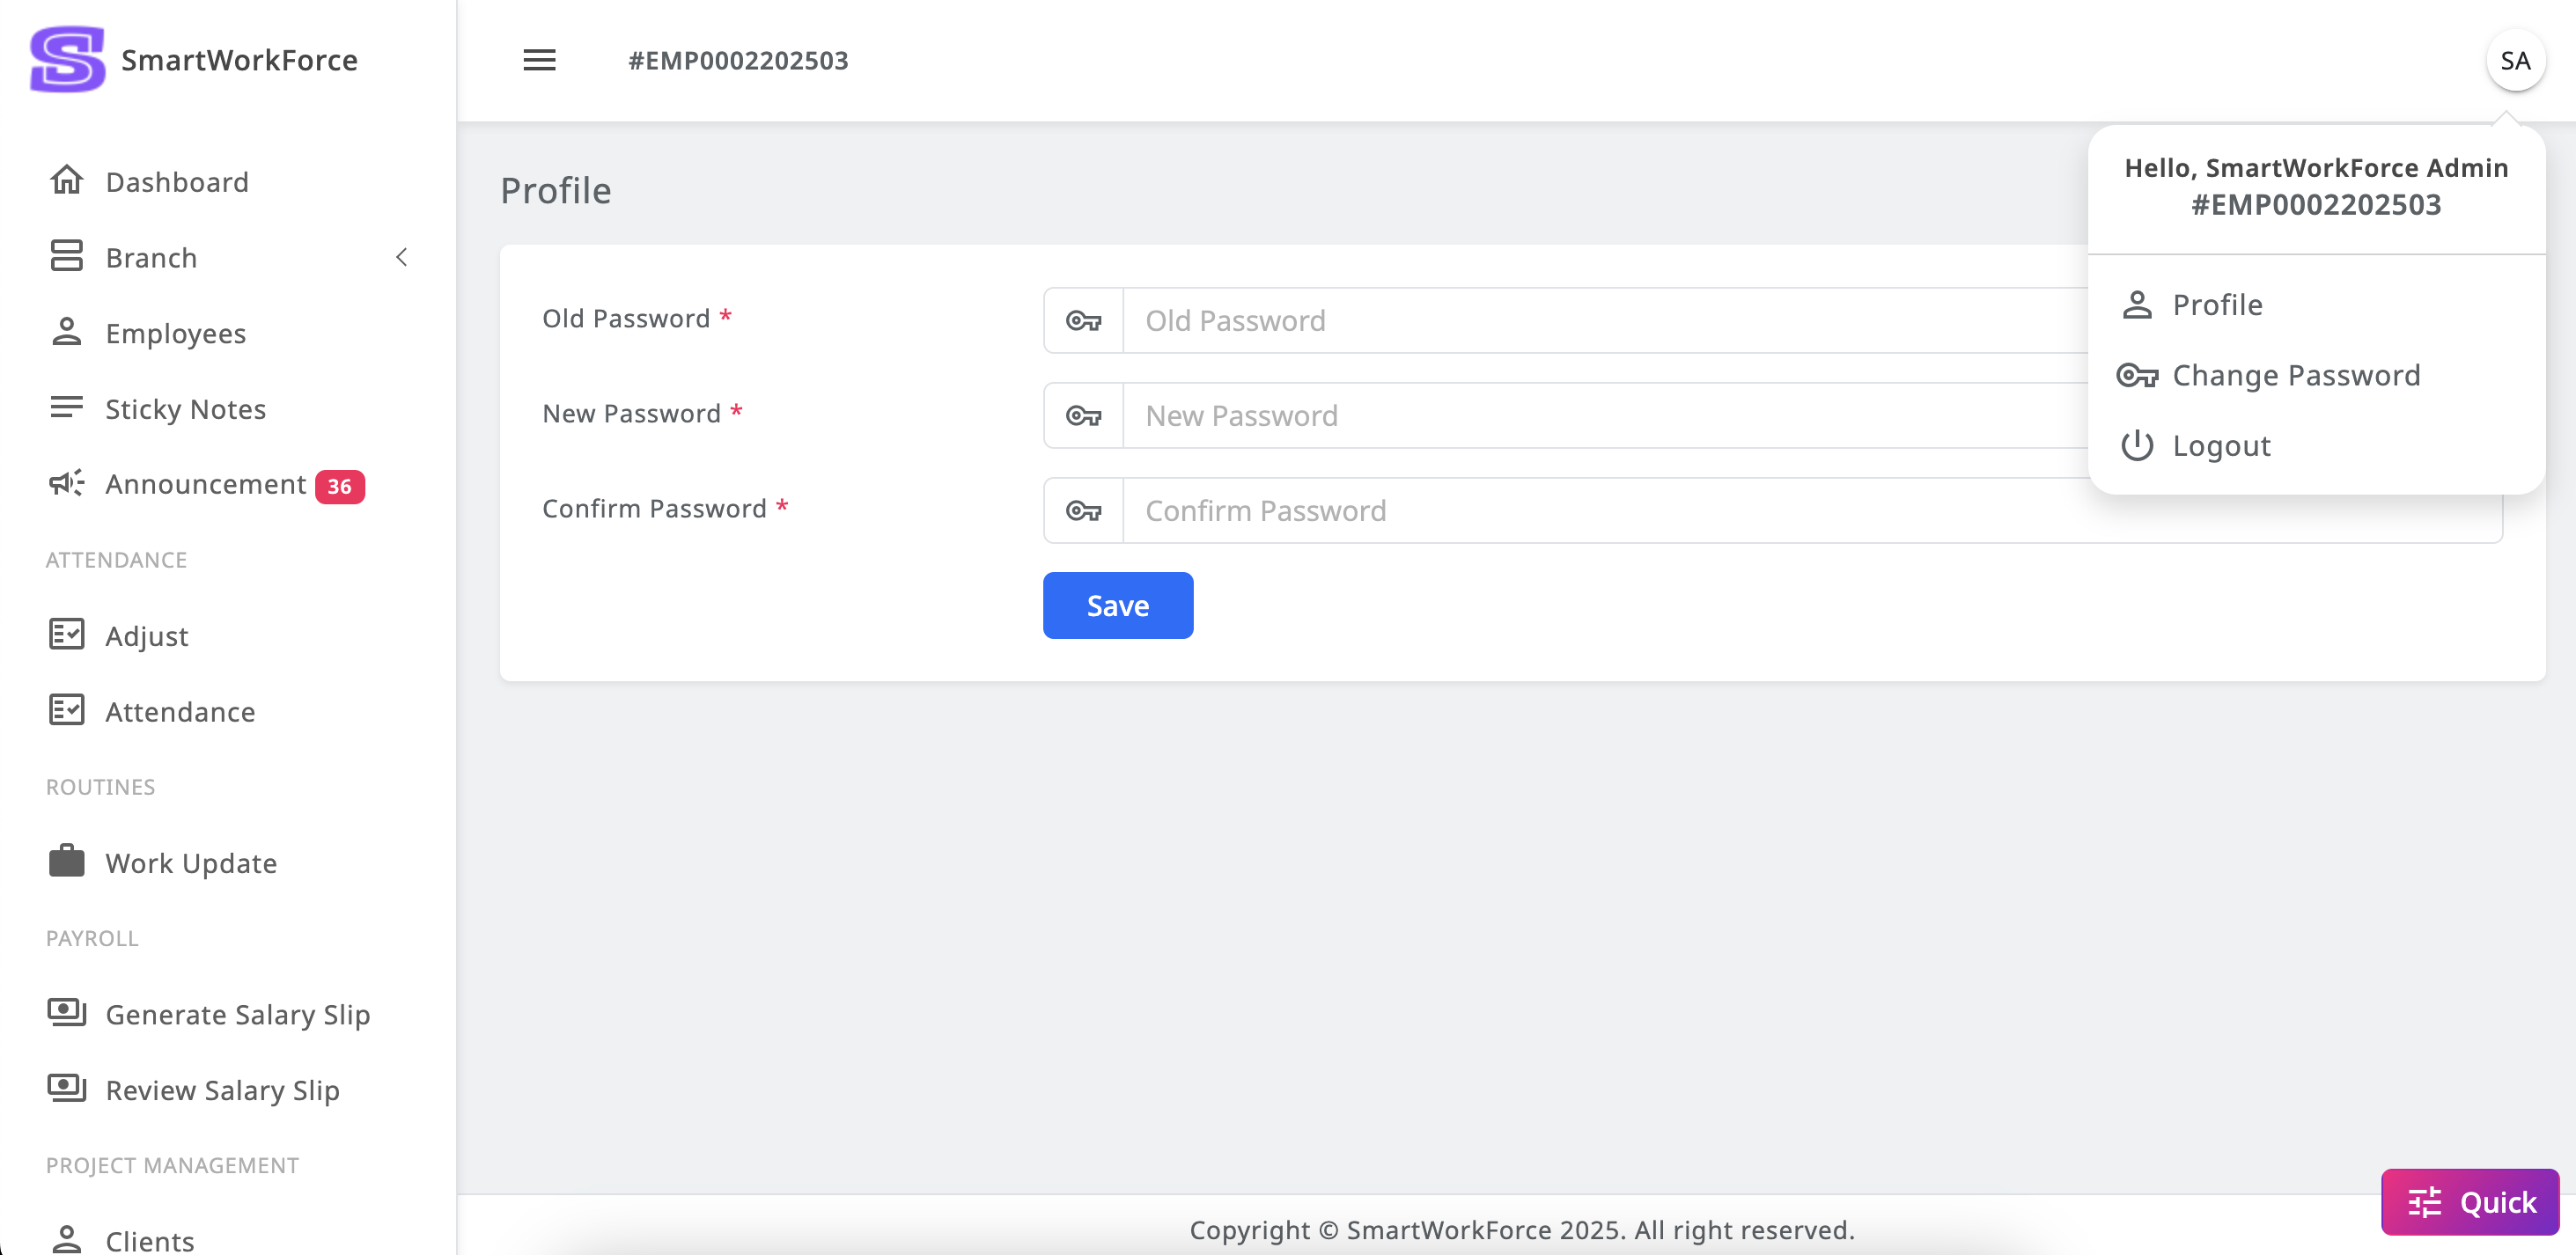
Change Password
In SmartWorkForce, admins have the ability to change their password for
enhanced security. This allows them to update their login credentials
whenever necessary to maintain account protection and privacy.
Employee Features
The Employee Features in SmartWorkForce allow employees to log in using
credentials generated by the admin. Once logged in, employees can mark their
attendance by checking in and checking out, and they can view their own
check-in and check-out history. Employees also have access to a list of
their attendance records. They can apply for leave, provide daily work
updates, and add sticky notes for personal reminders. Additionally,
employees can add and update project tasks, view the projects they are
assigned to, and see detailed information about project sprints.
Authentication
Employees can log in through a dedicated login page using the credentials
provided by the admin. However, inactive employees will not be able to log
in. Once logged in, active employees can access their personal dashboard to
manage attendance, apply for leave, update work progress, and view assigned
projects and tasks.
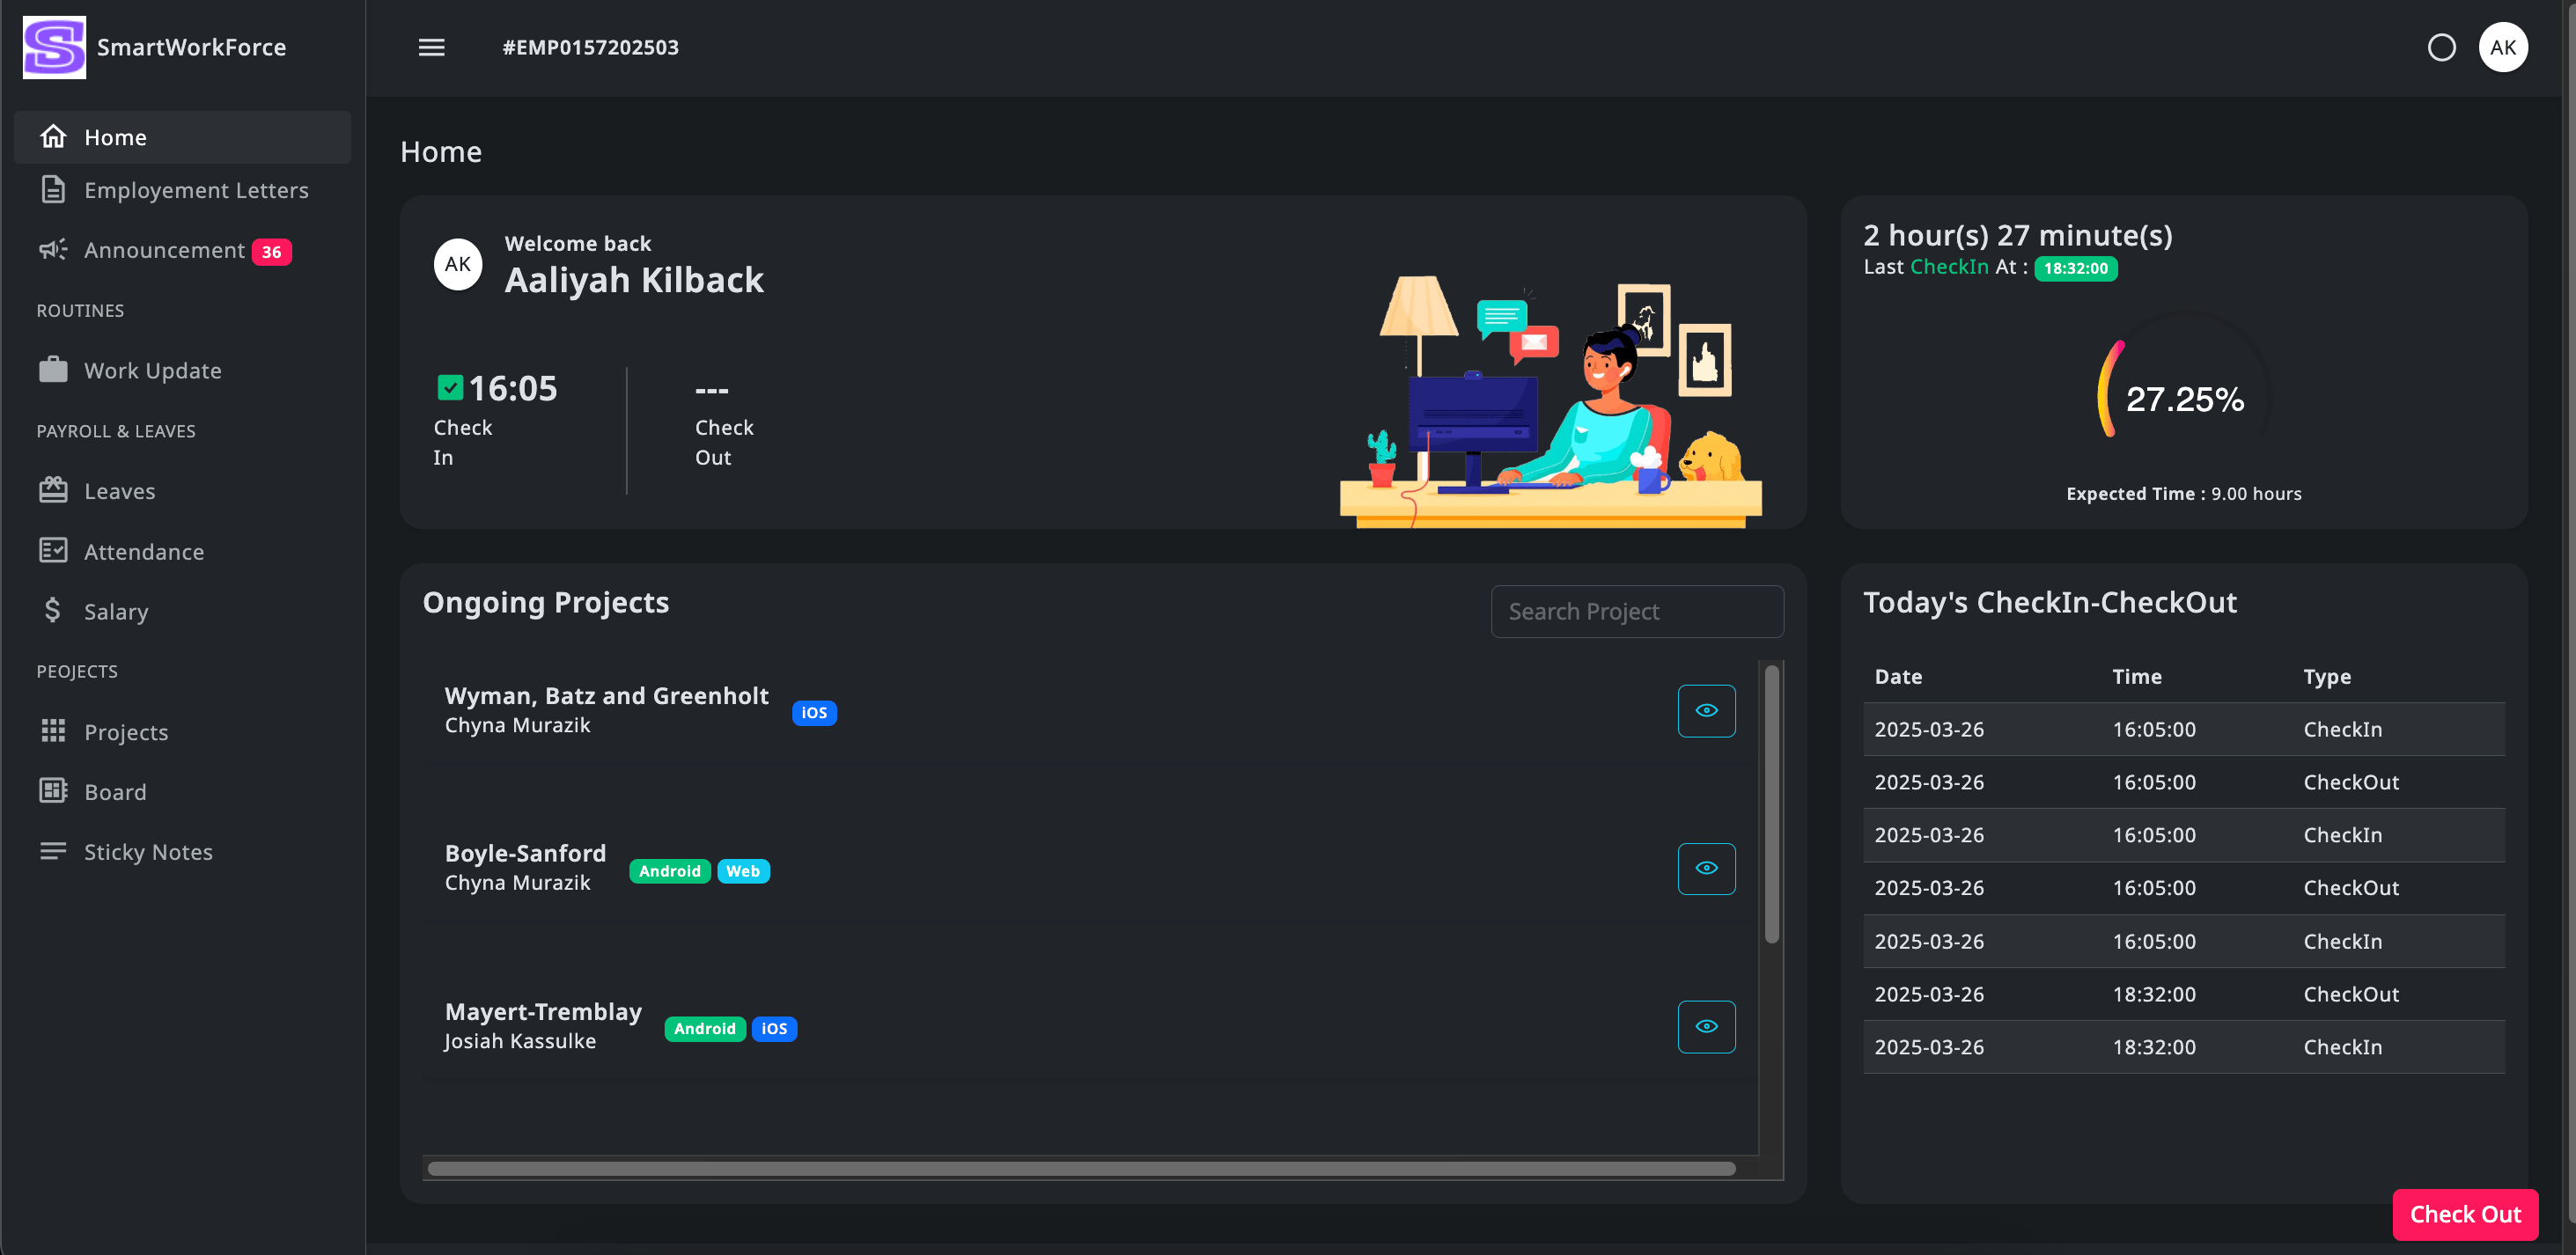
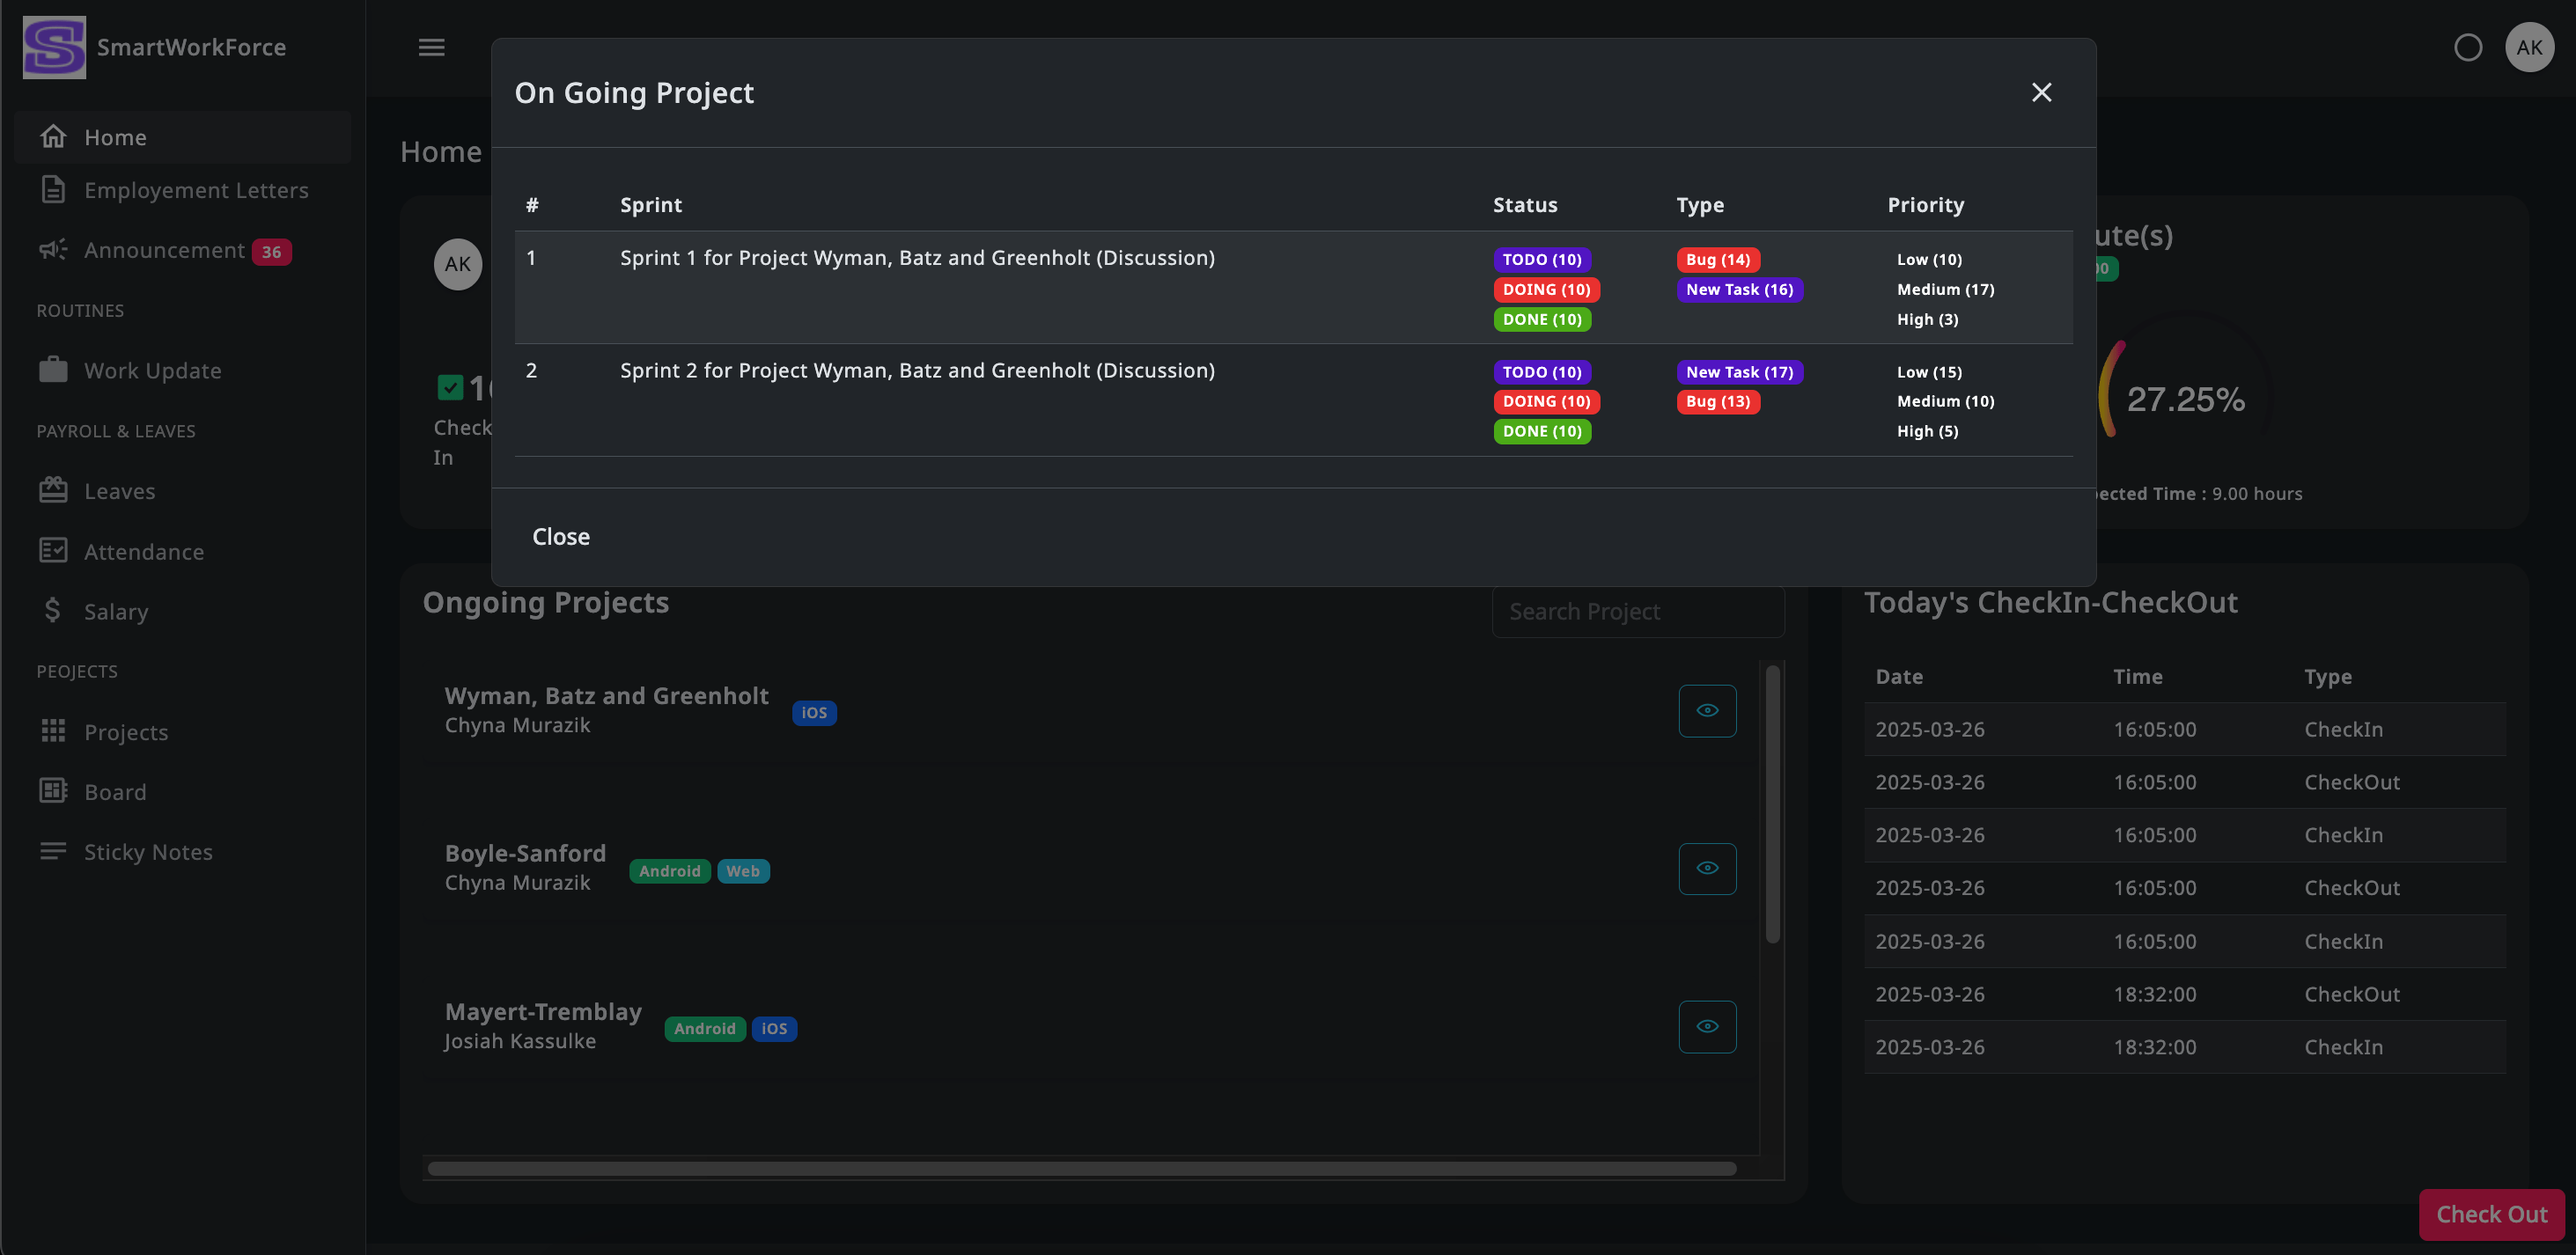
Home
On the homepage, employees can view their total working hours for the day
compared to the expected hours. They can also see their check-in and
check-out history for the day, along with the latest work updates on the
dashboard. Additionally, employees can view a list of assigned projects and
access details about the ongoing projects they are involved in.
HomeOn Going Project Details
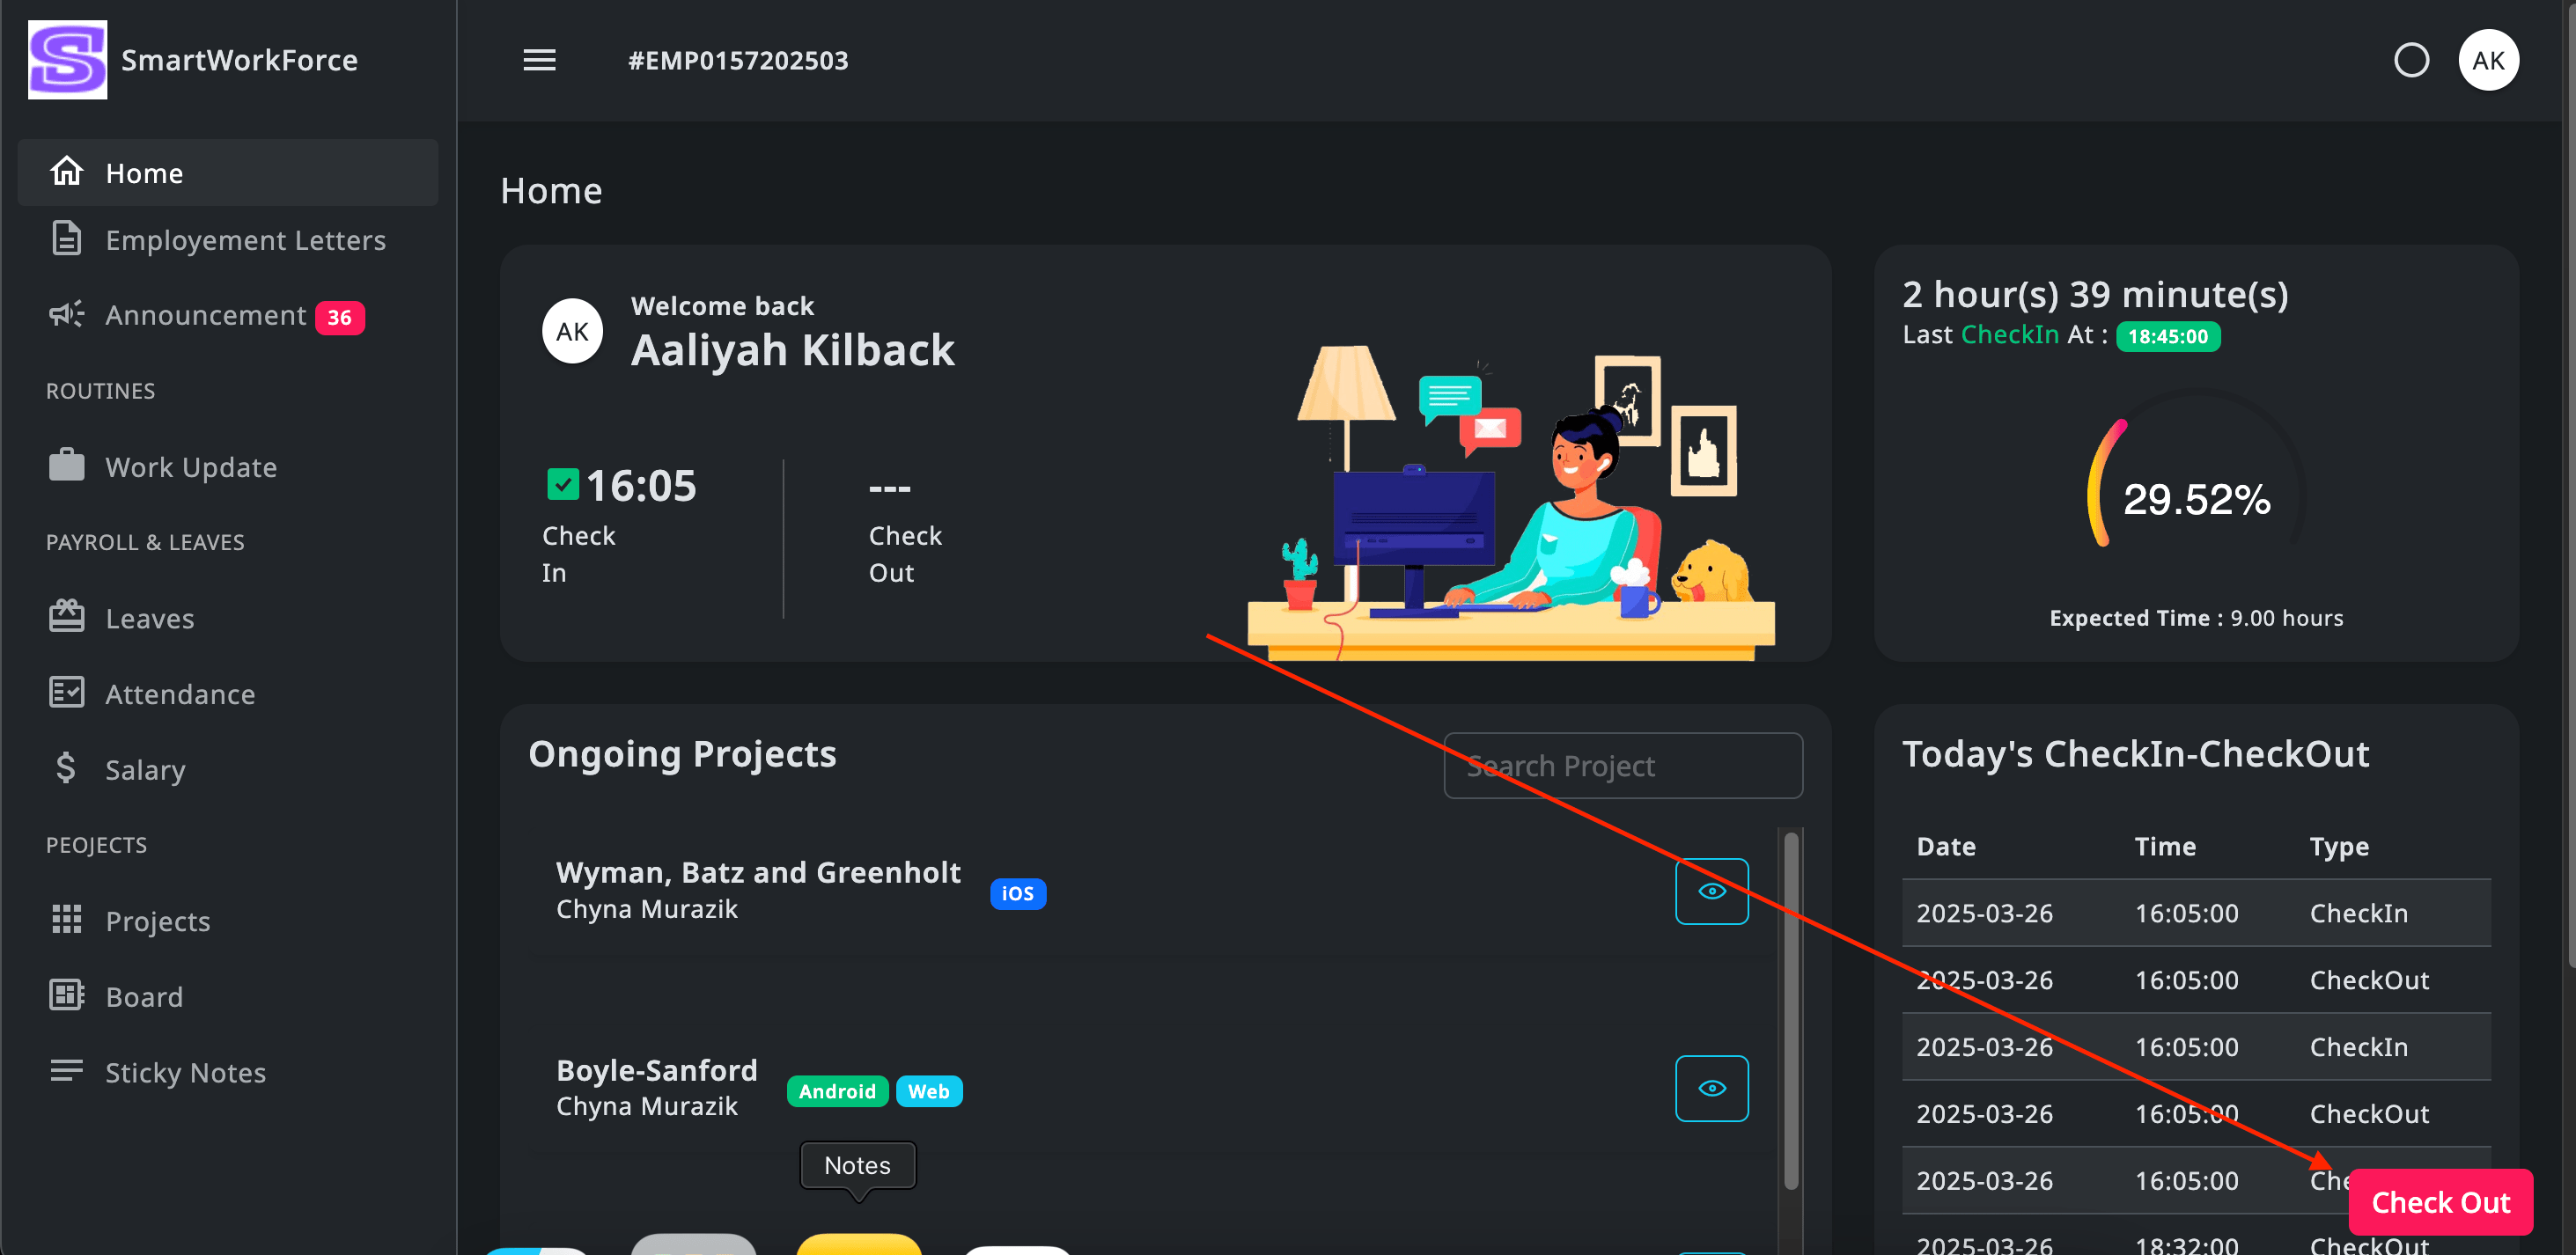
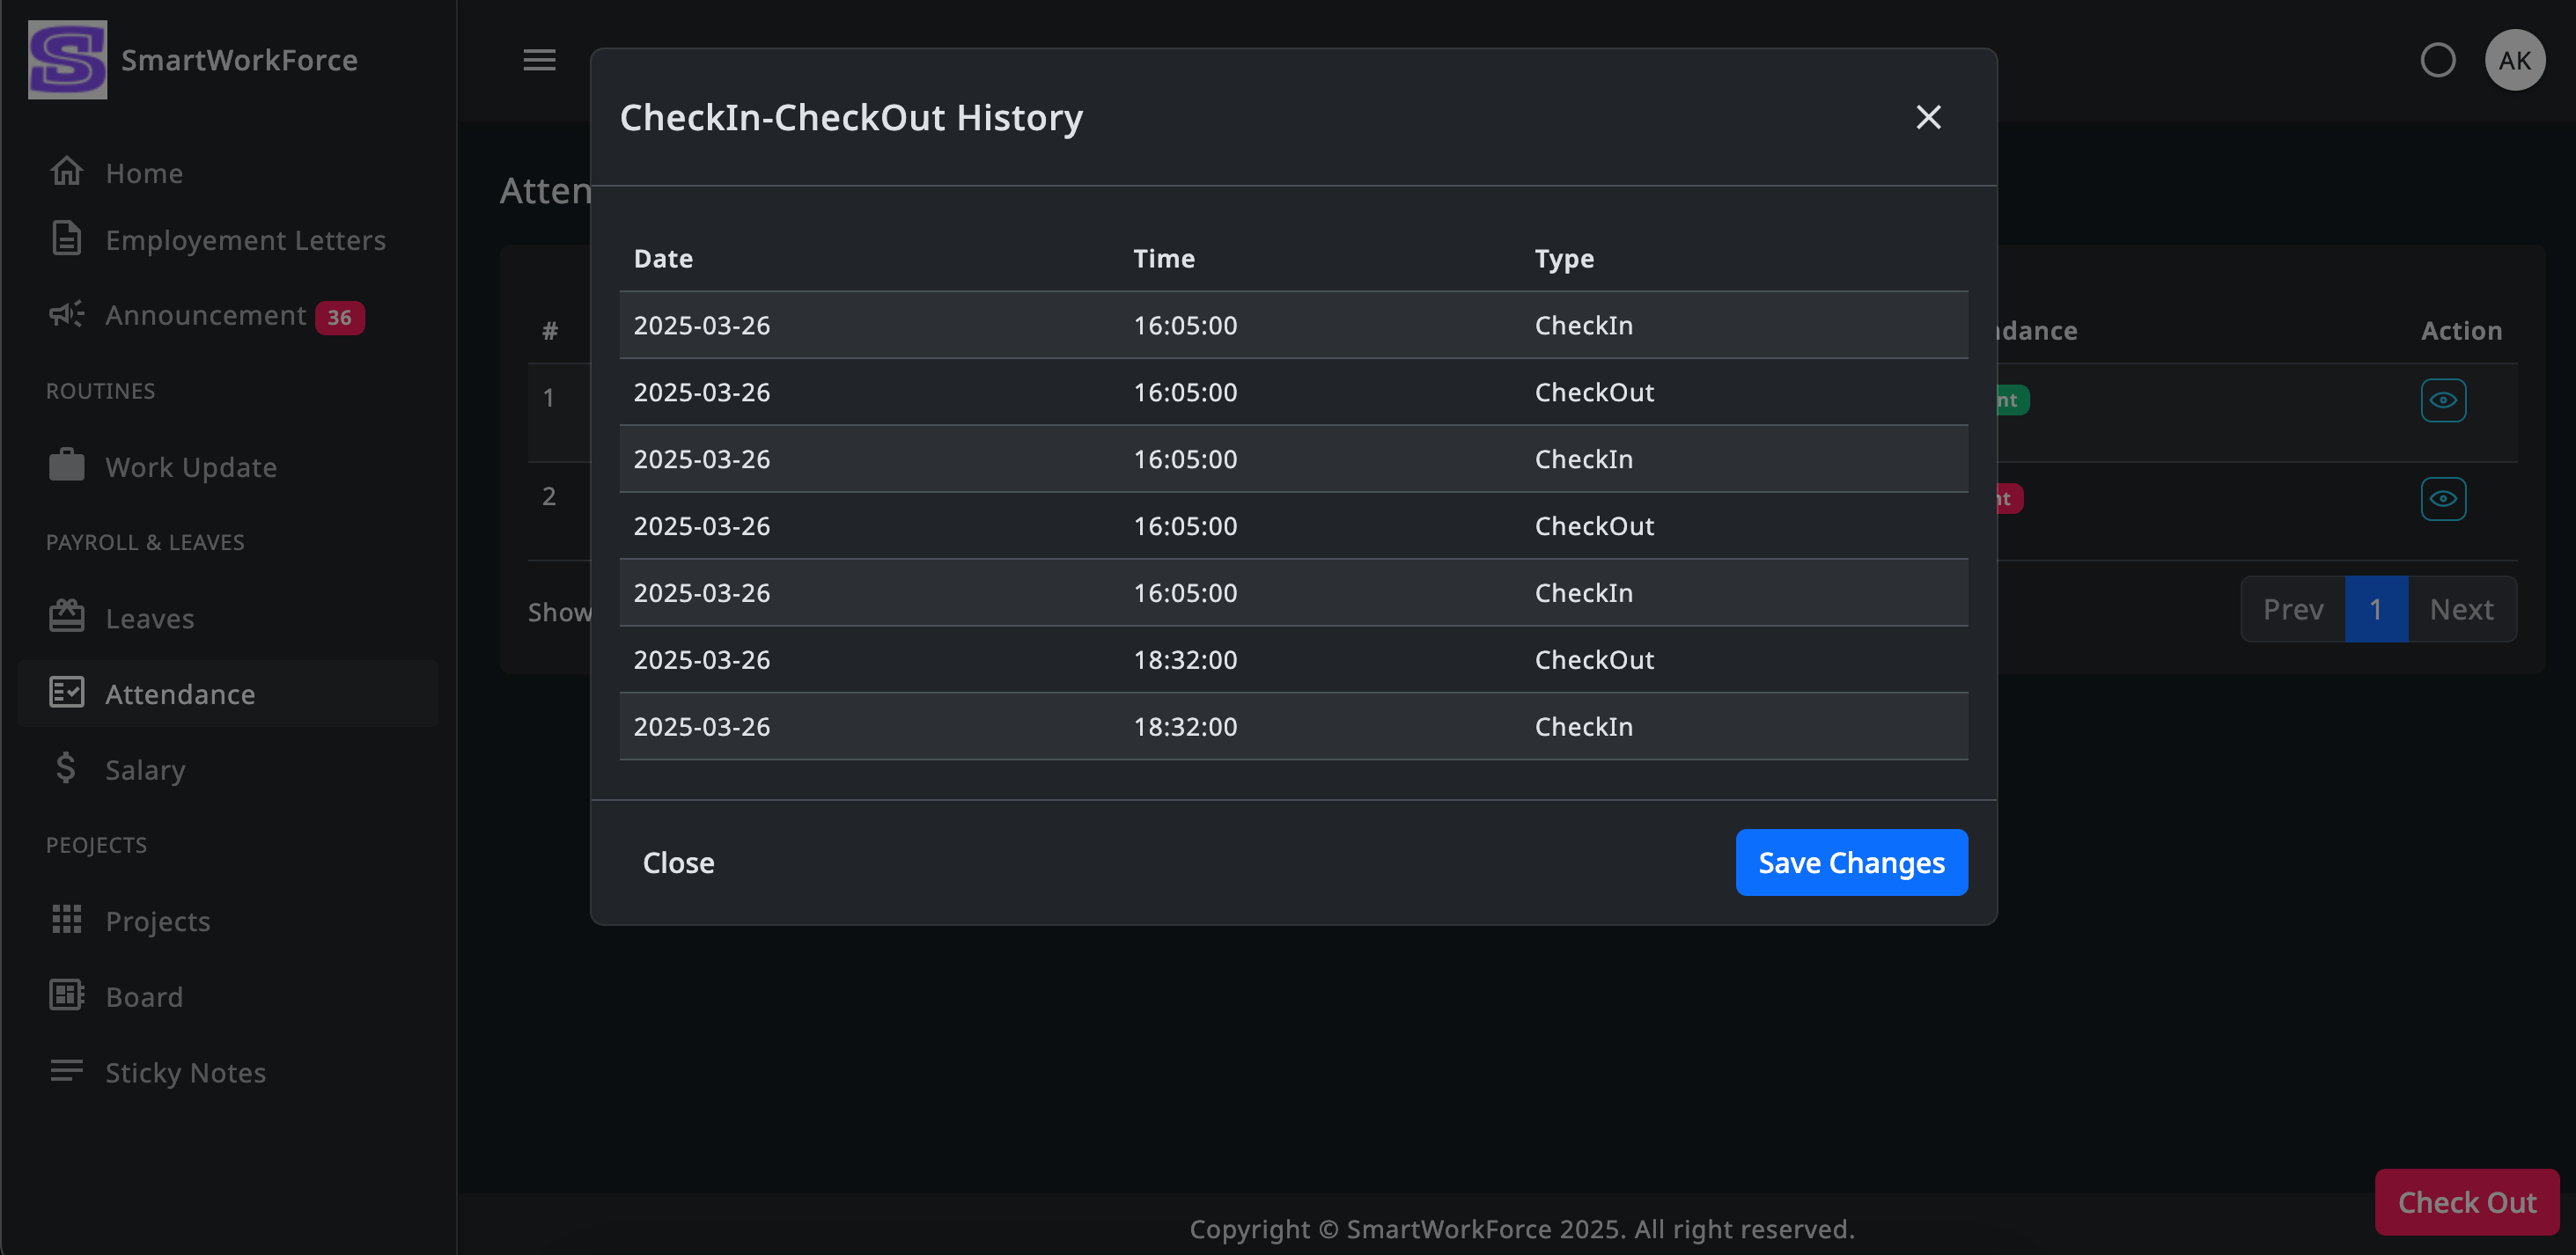
Check In / Check Out
Employees can check in and check out using the Check-in button. However,
before they can do so, the admin must first generate the Today's Attendance
via the Quick Access > Generate Today Attendance option. Once the attendance
is generated, employees will be able to check in and check out for the day.
Check InCheck Out
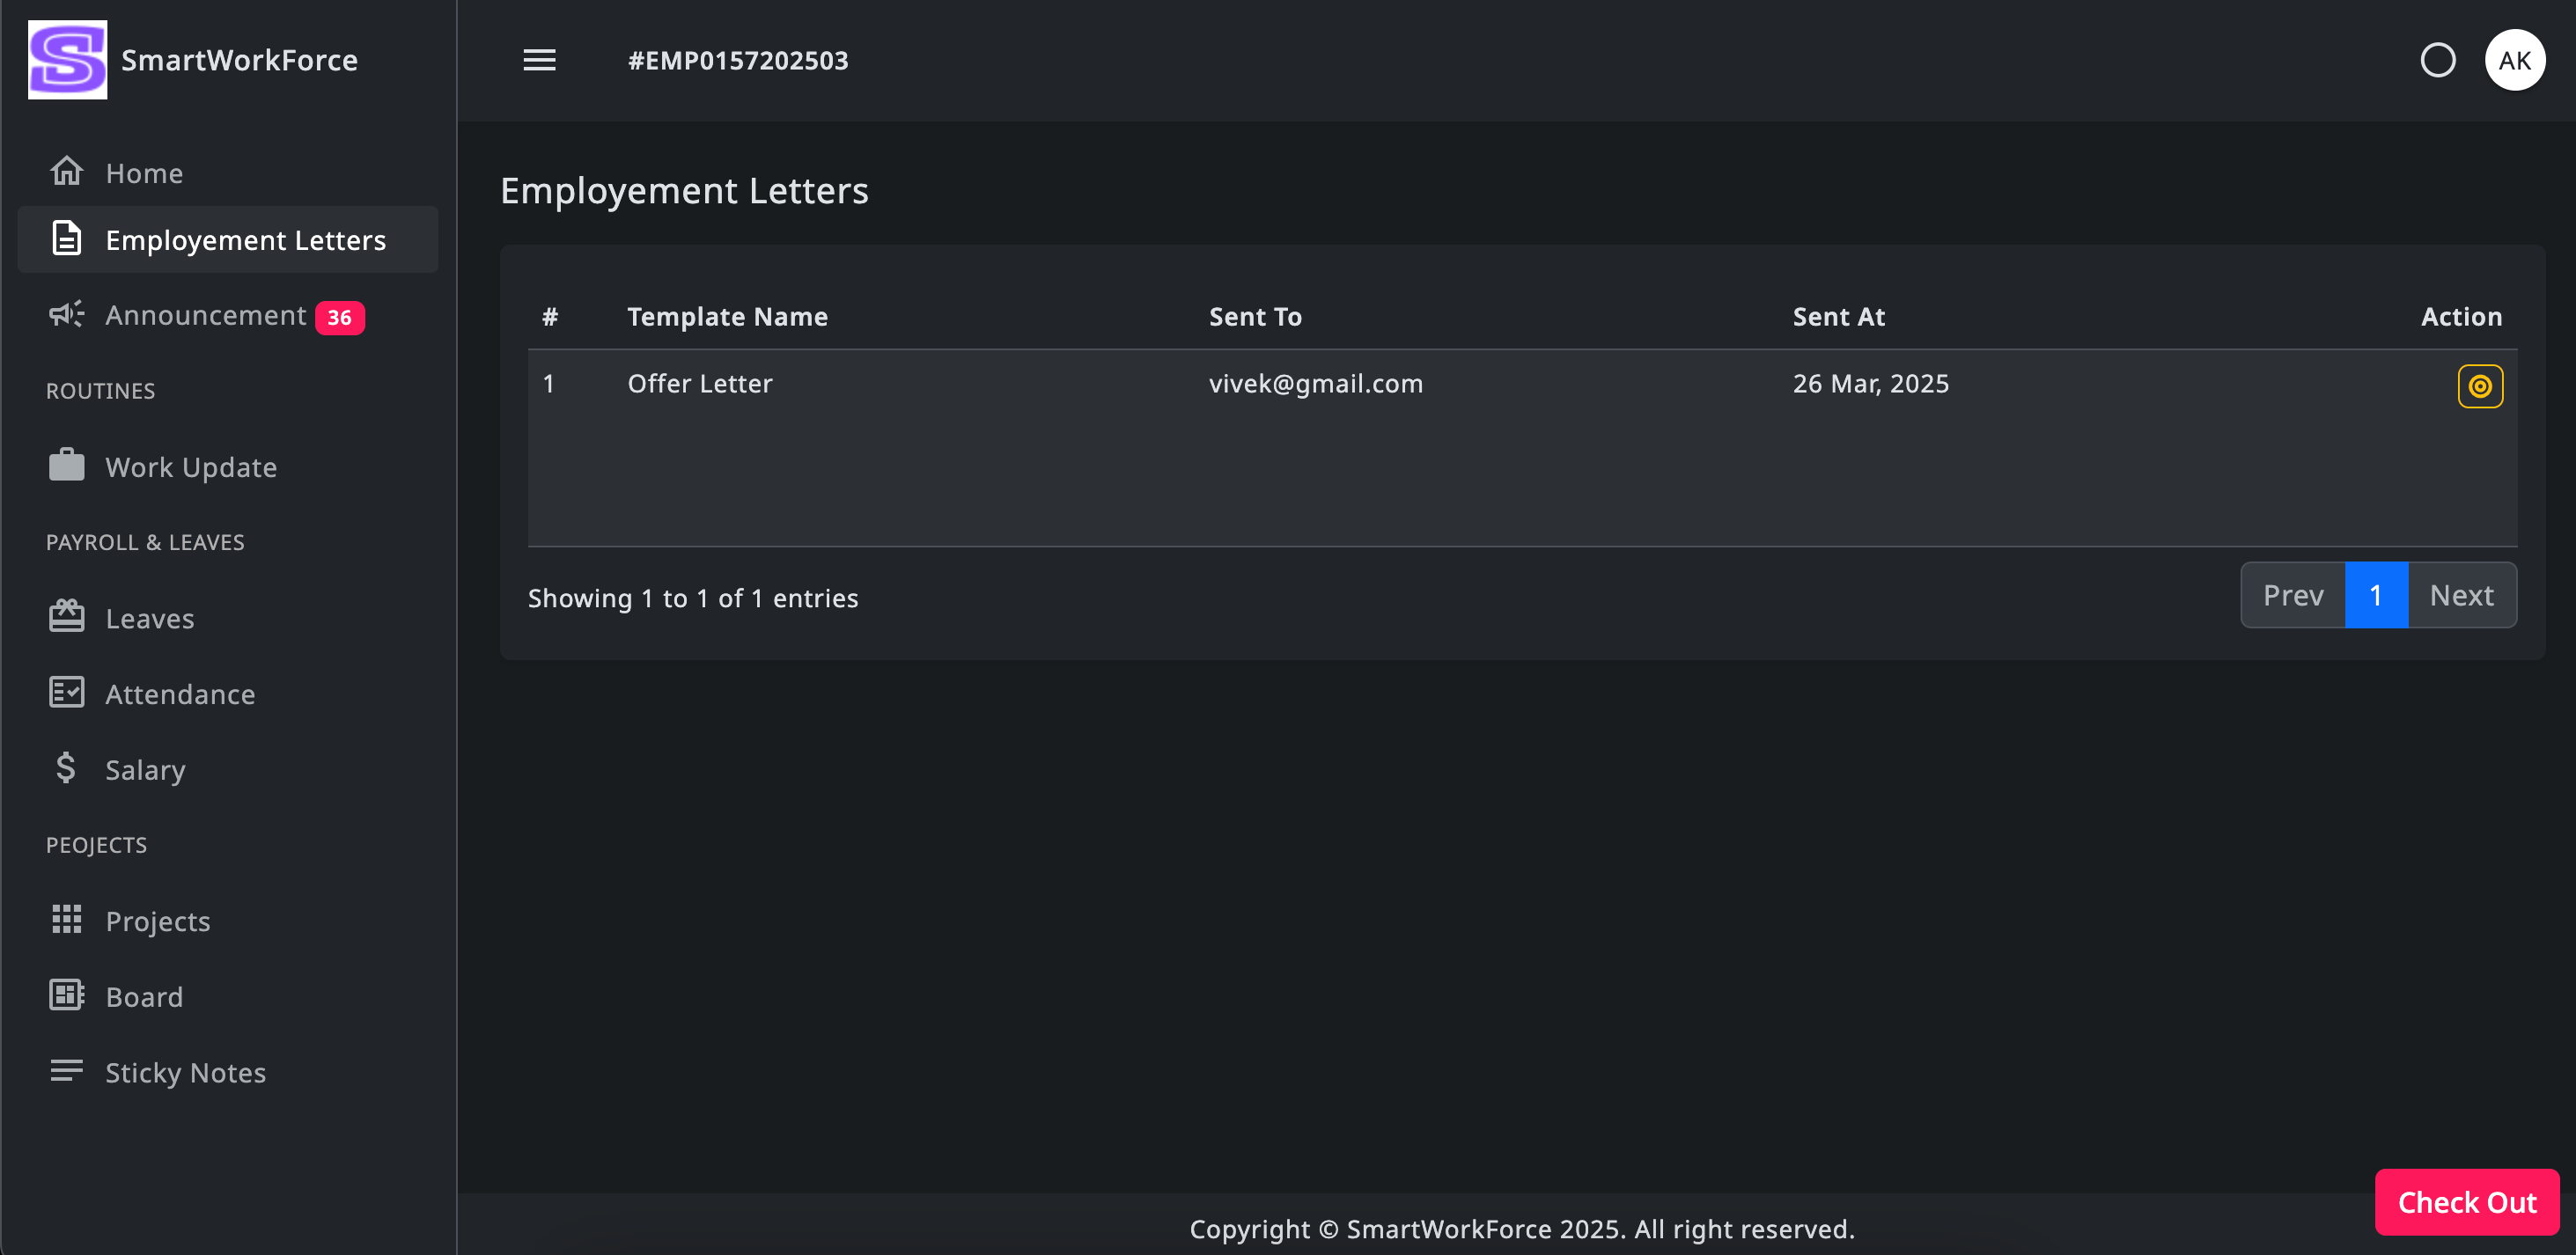
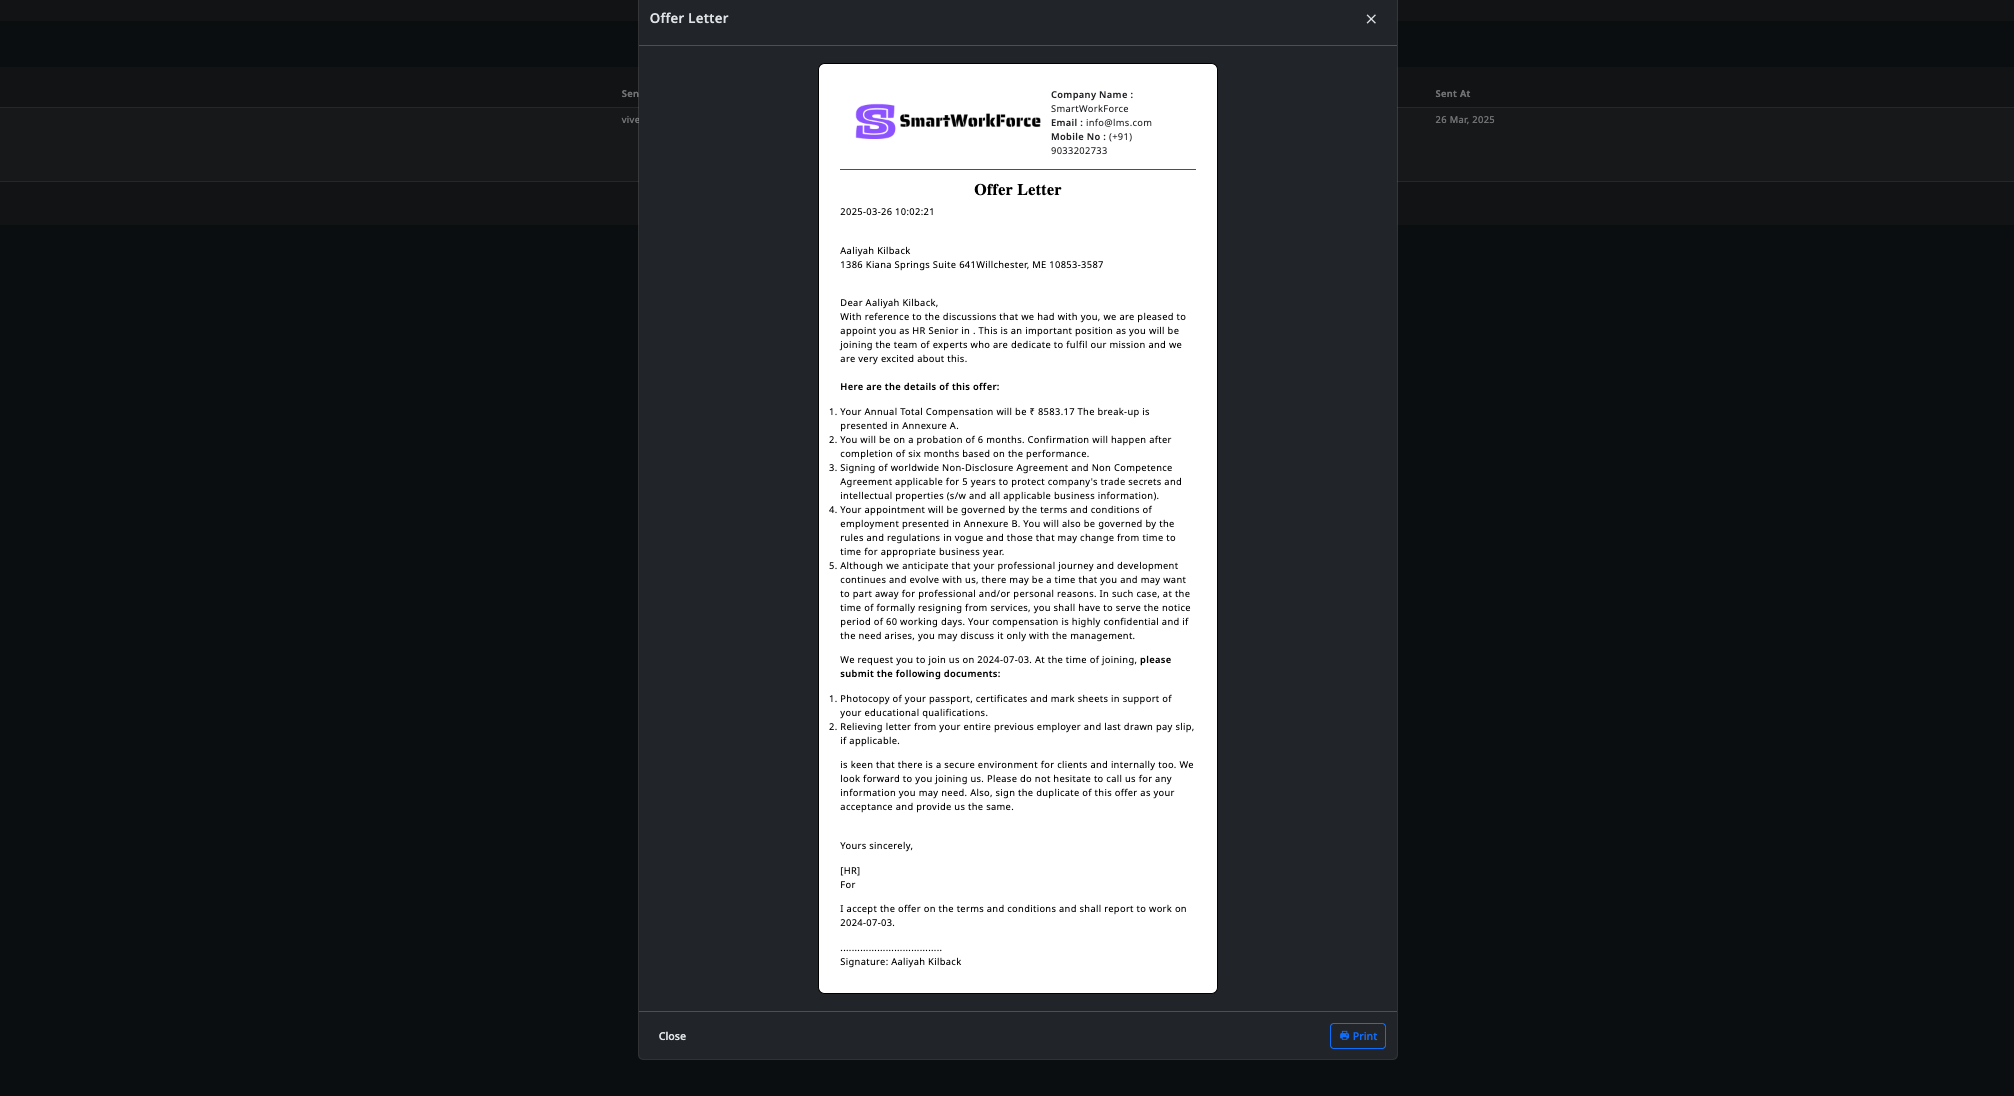
Employement Letters
Employees can view a list of employment letters that have been generated by
the admin. They can print the details of these letters whenever needed,
ensuring easy access to important employment-related documents.
Employement LetterEmployement Letter Detail
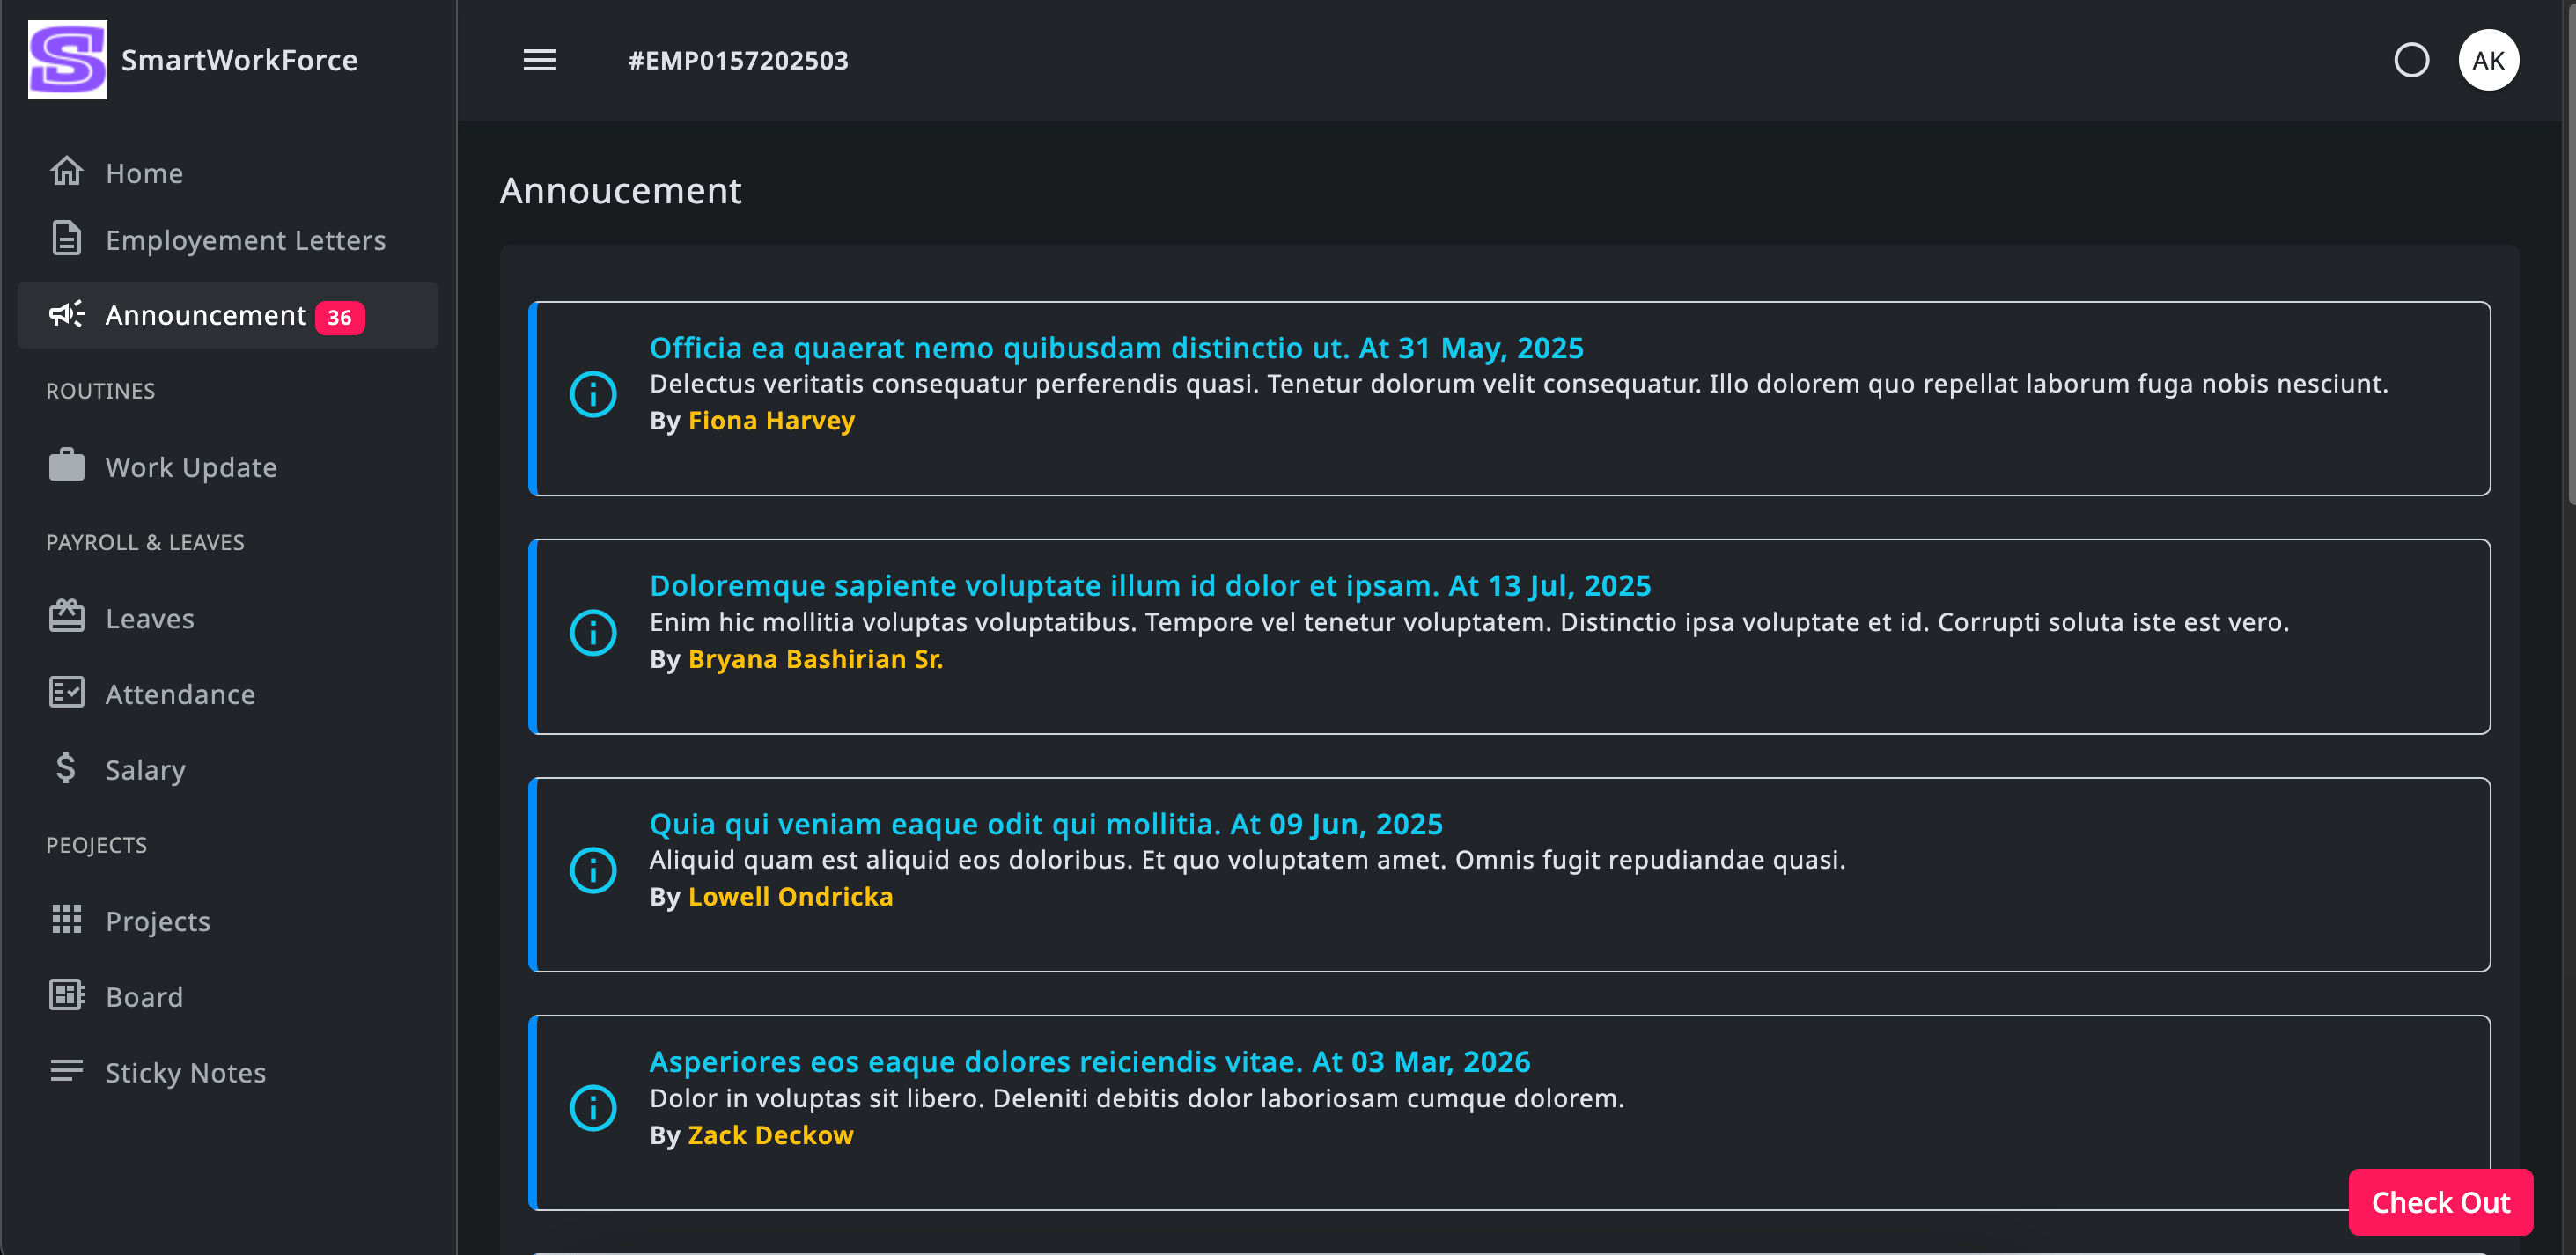
Announcement
Employees can view announcements made by the admin regarding the
organization. They can also see a sidebar counter displaying the number of
upcoming announcements, keeping them informed about future updates.
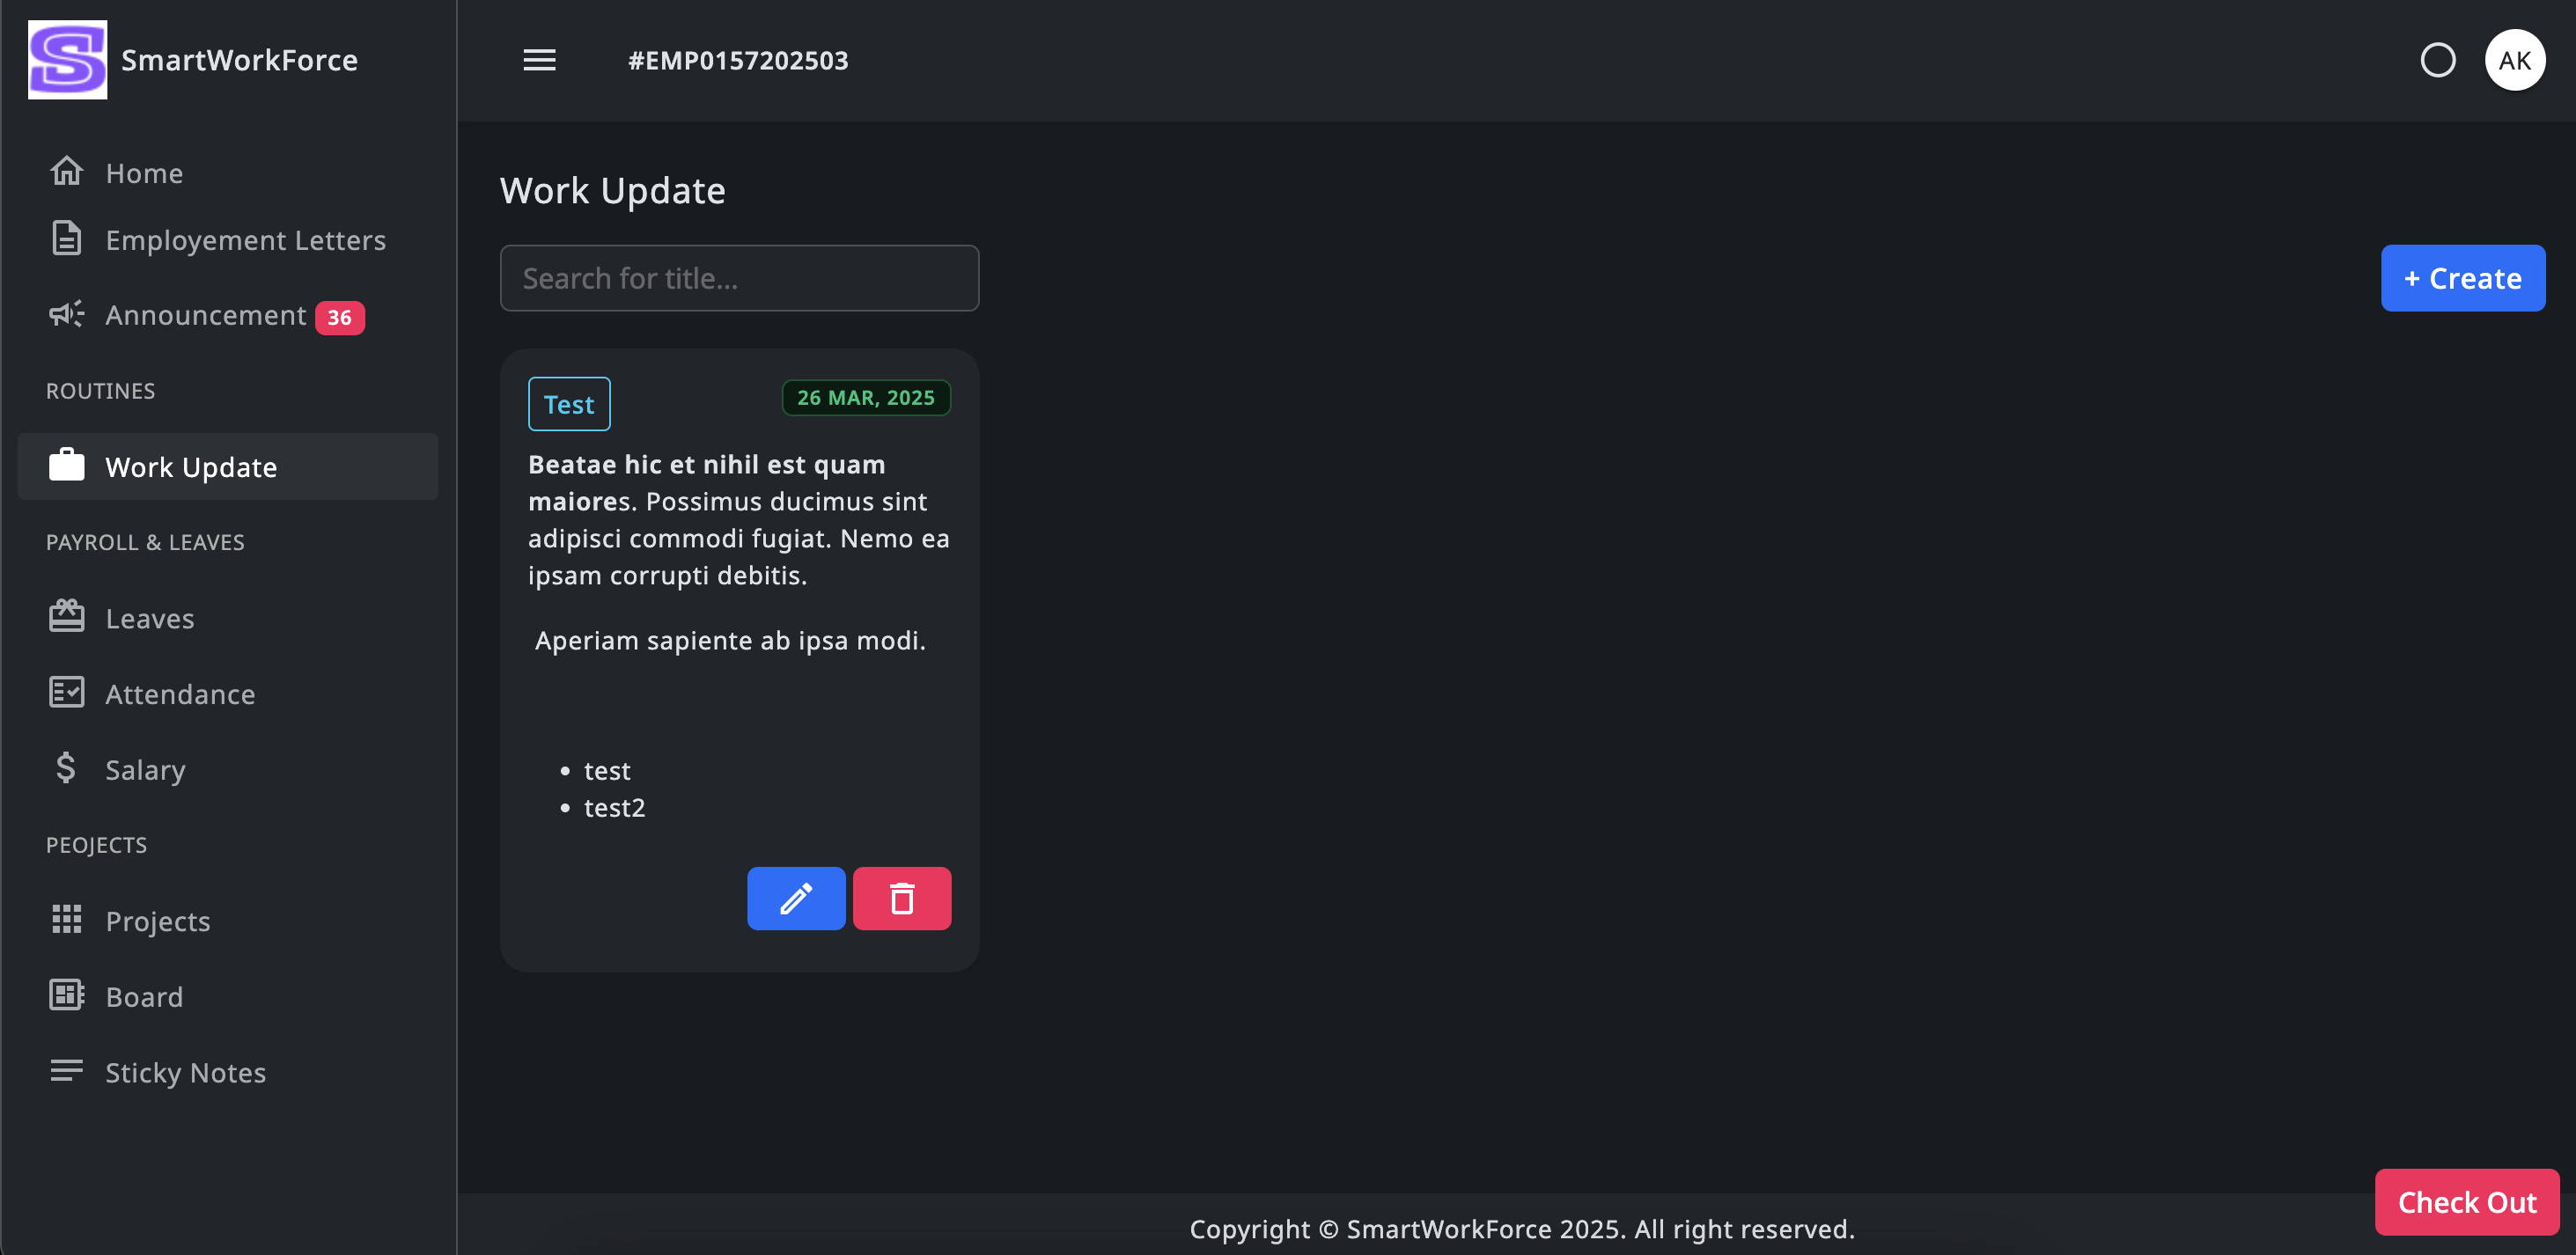
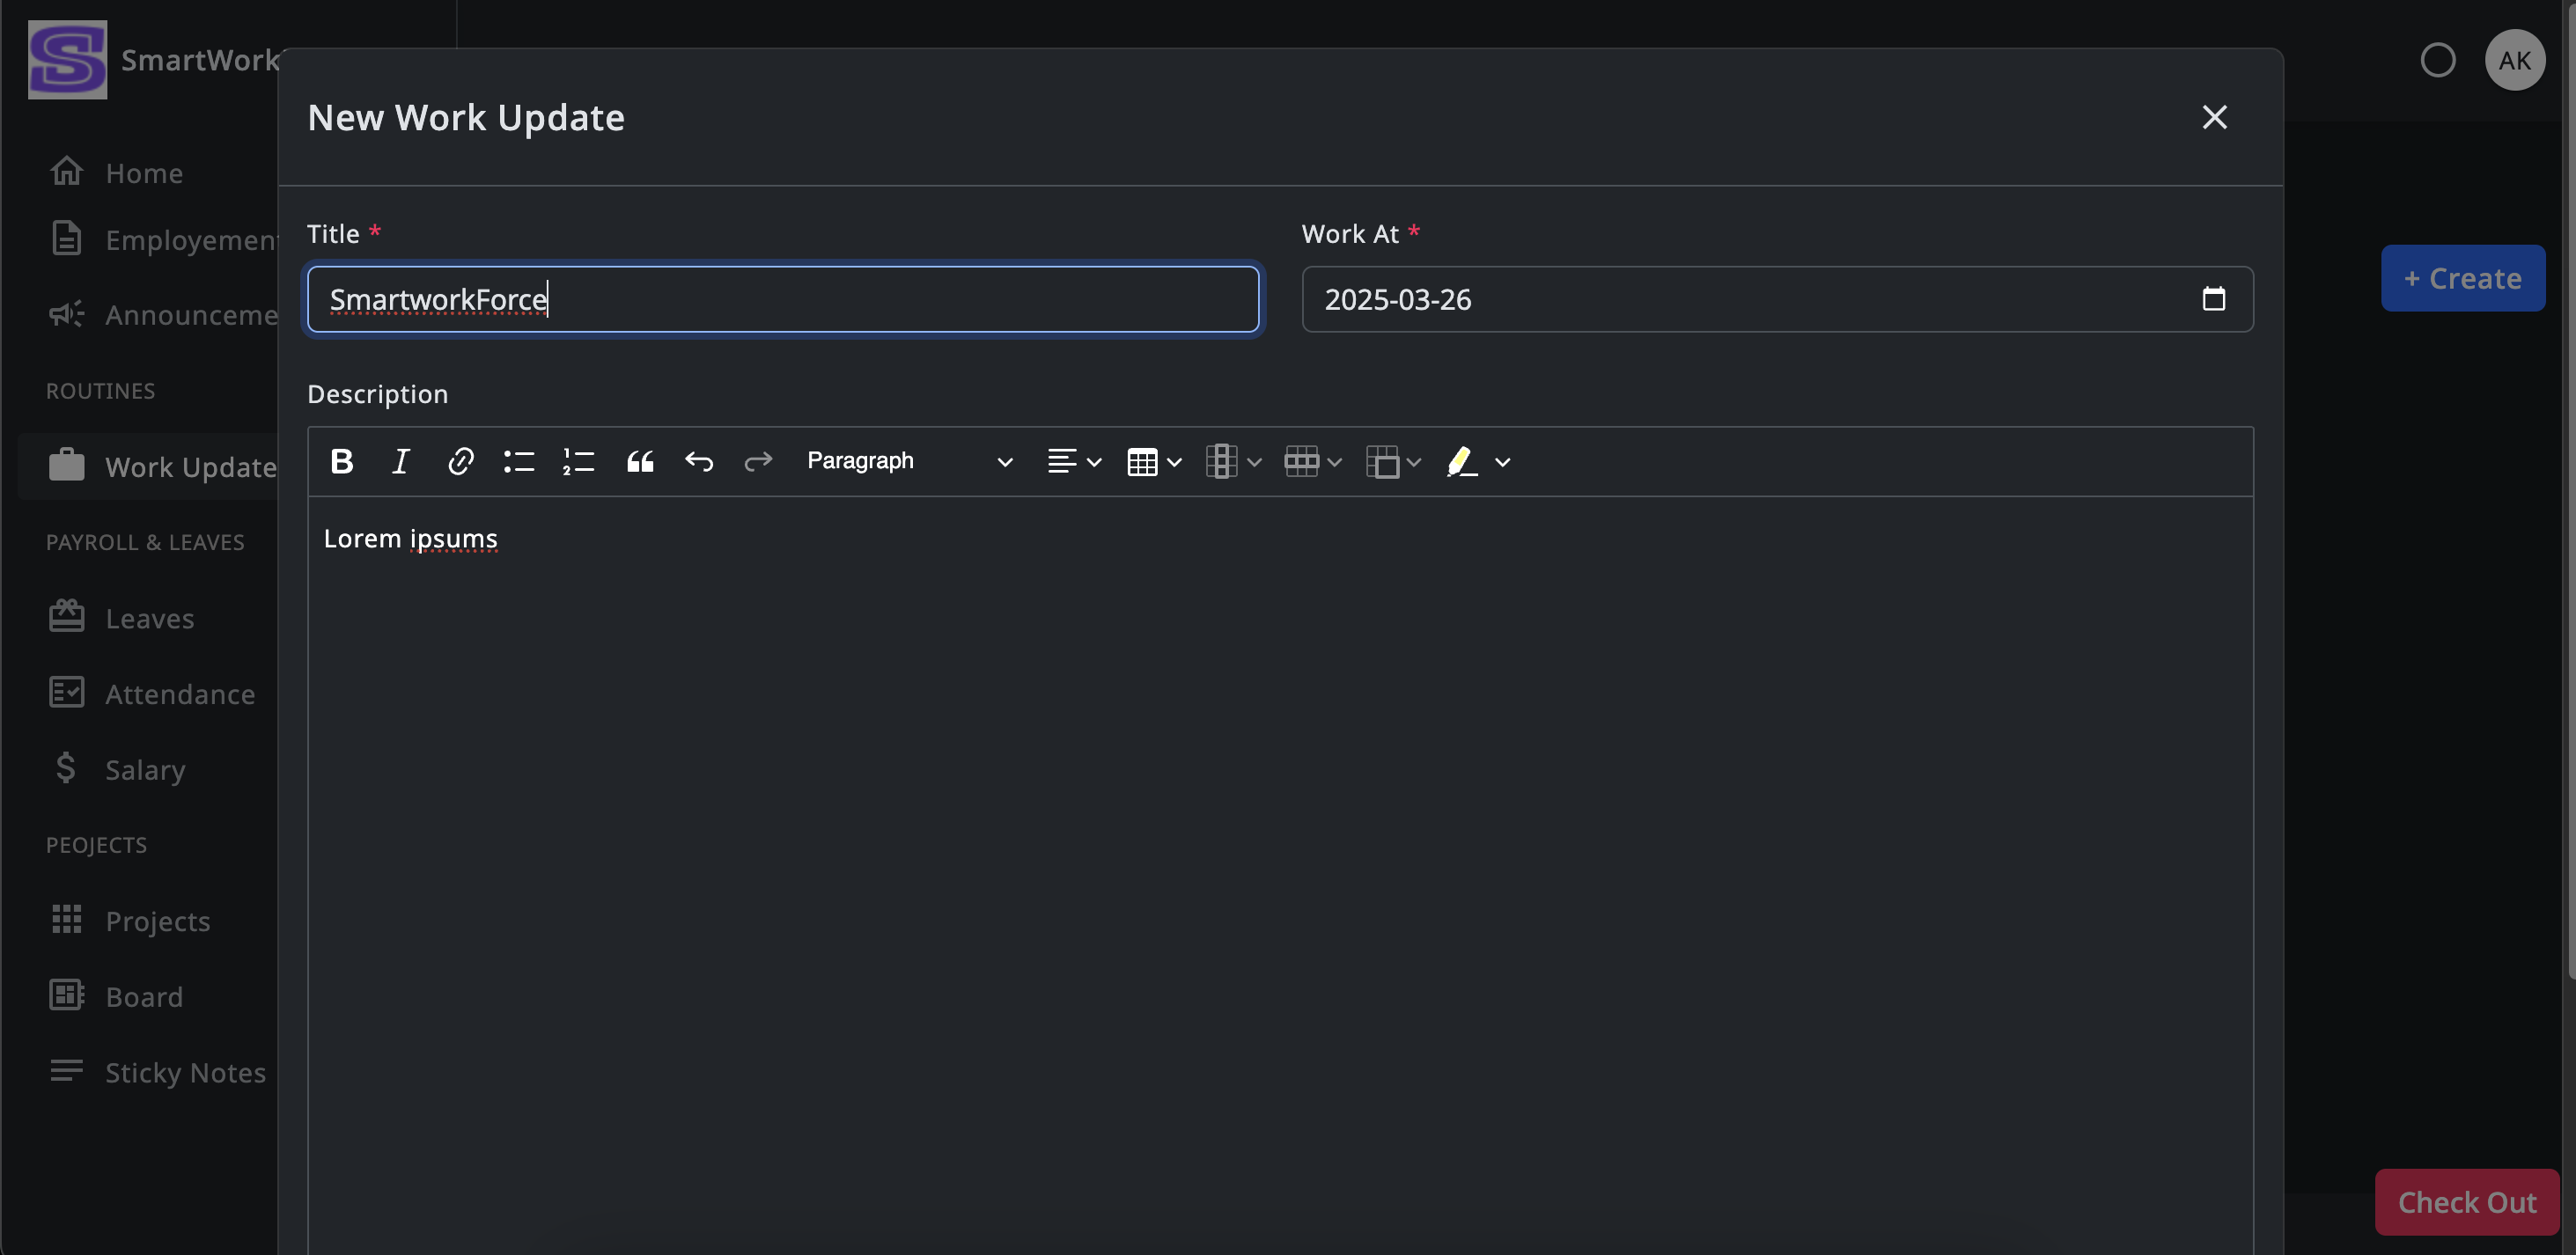
Routines : Work Update
Employees can write and submit their daily work updates to keep track of
their progress. These updates allow them to share what tasks they've
completed and any relevant details with the admin or team.
Work UpdateWork Update Create
Payroll & Leaves : Leaves
In the SmartWorkForce employee panel, employees have the ability to apply
for leave. They can submit leave requests for approval, making it easy to
manage time off within the system.
LeavesLeave Apply
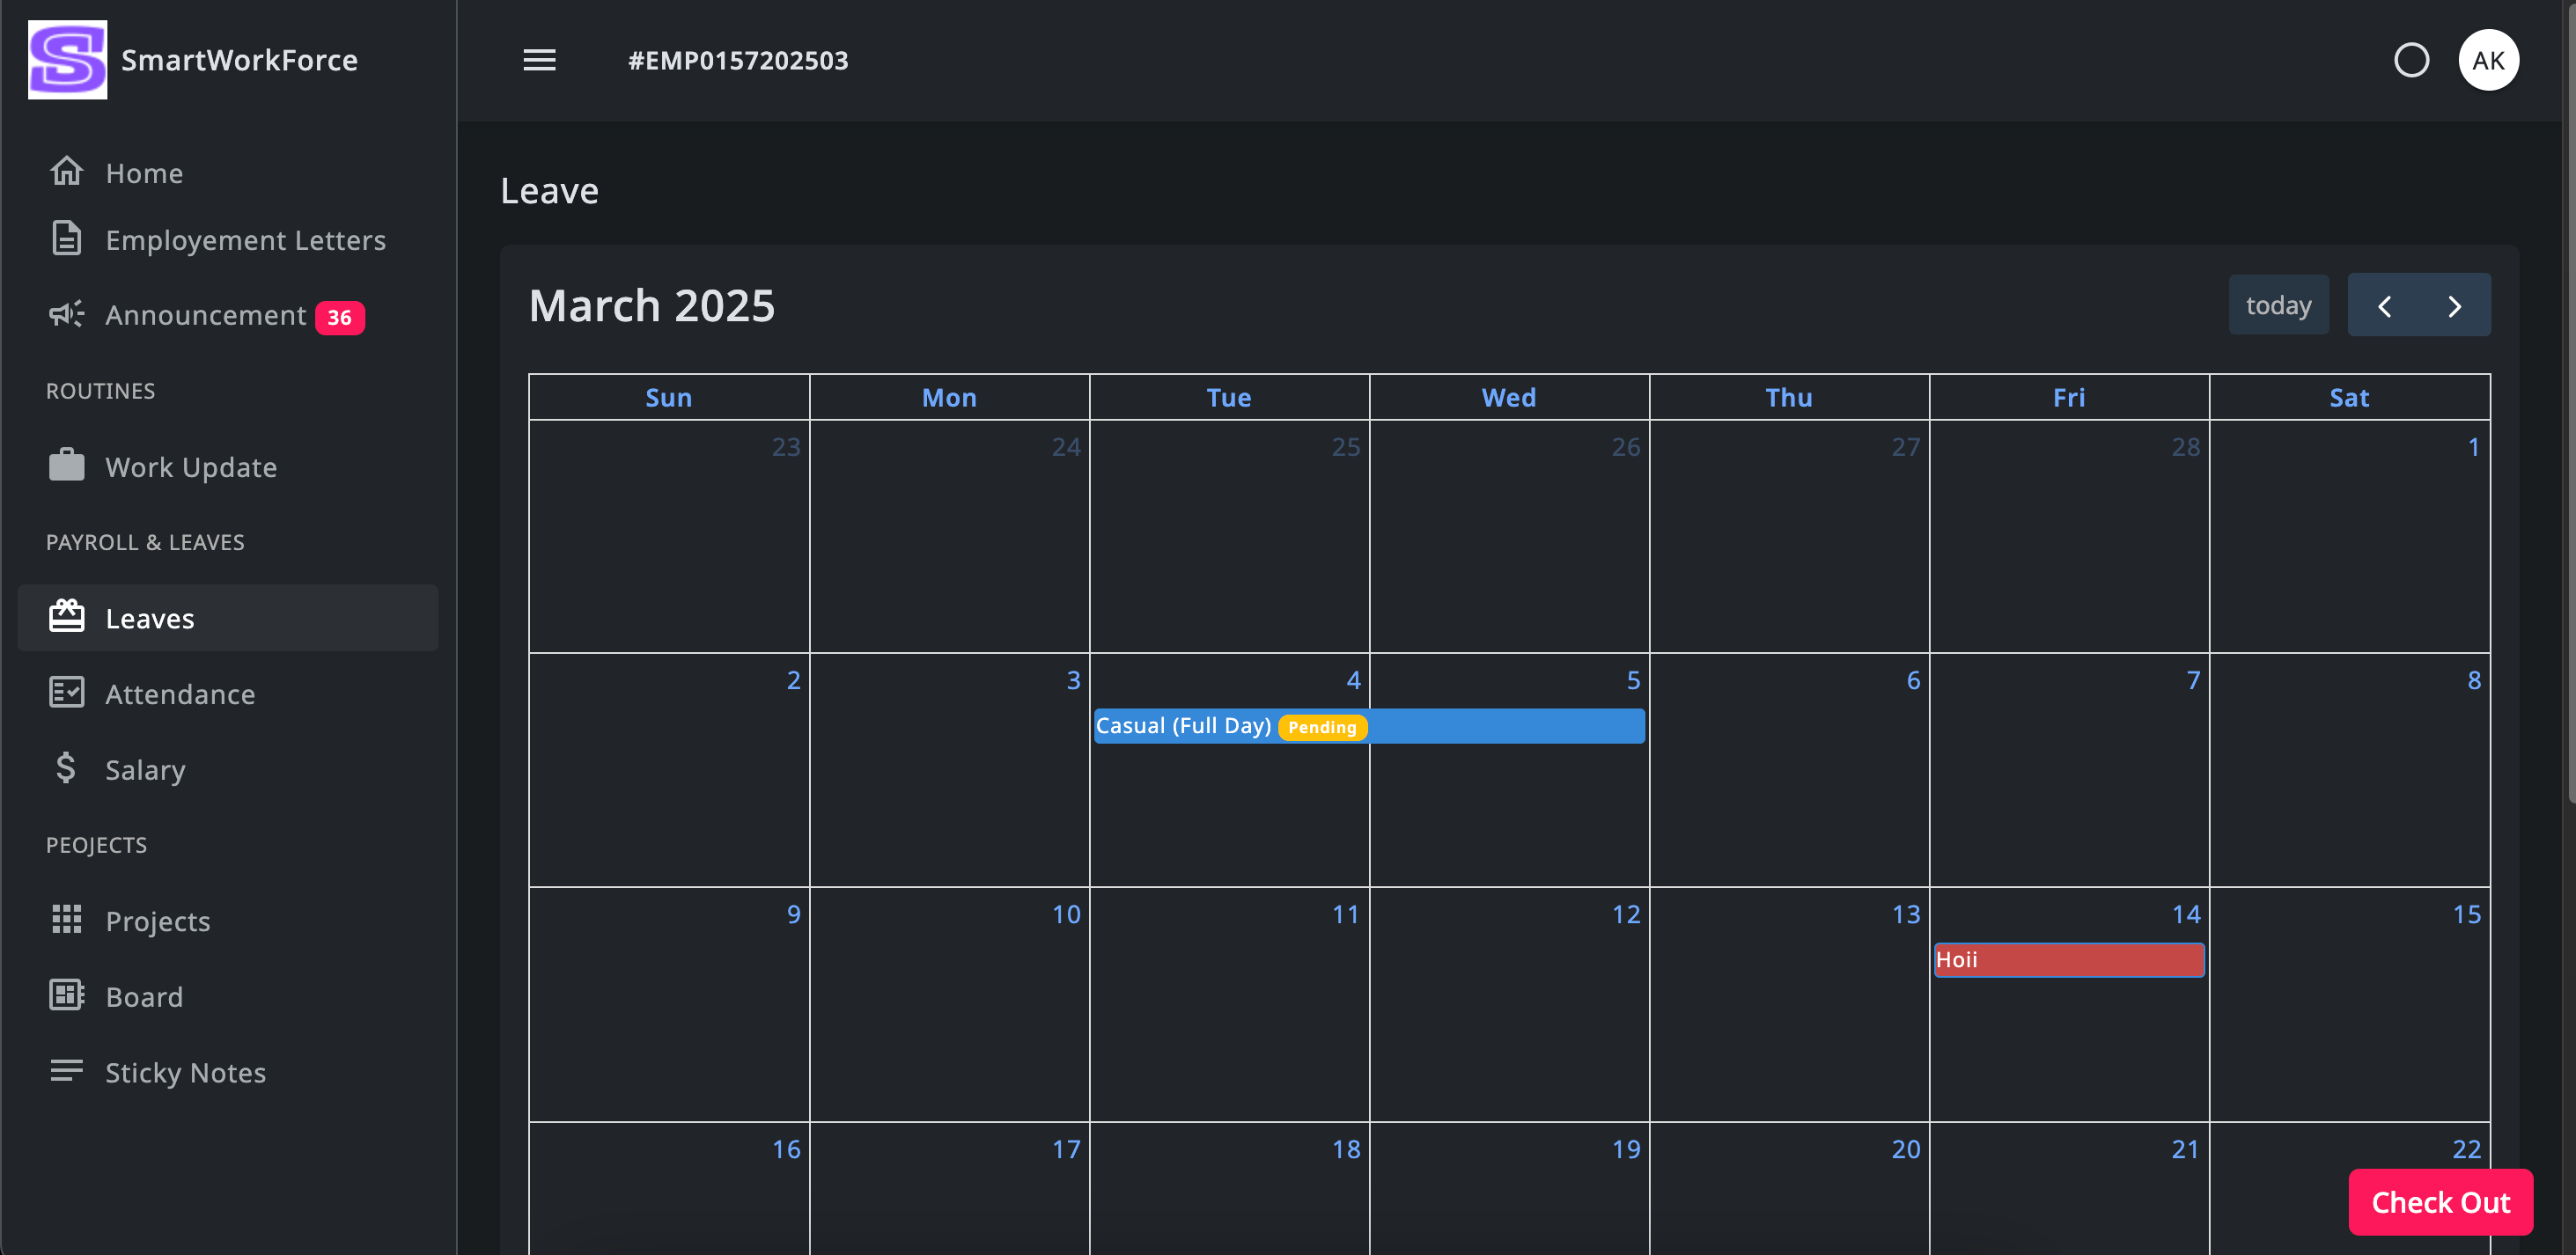
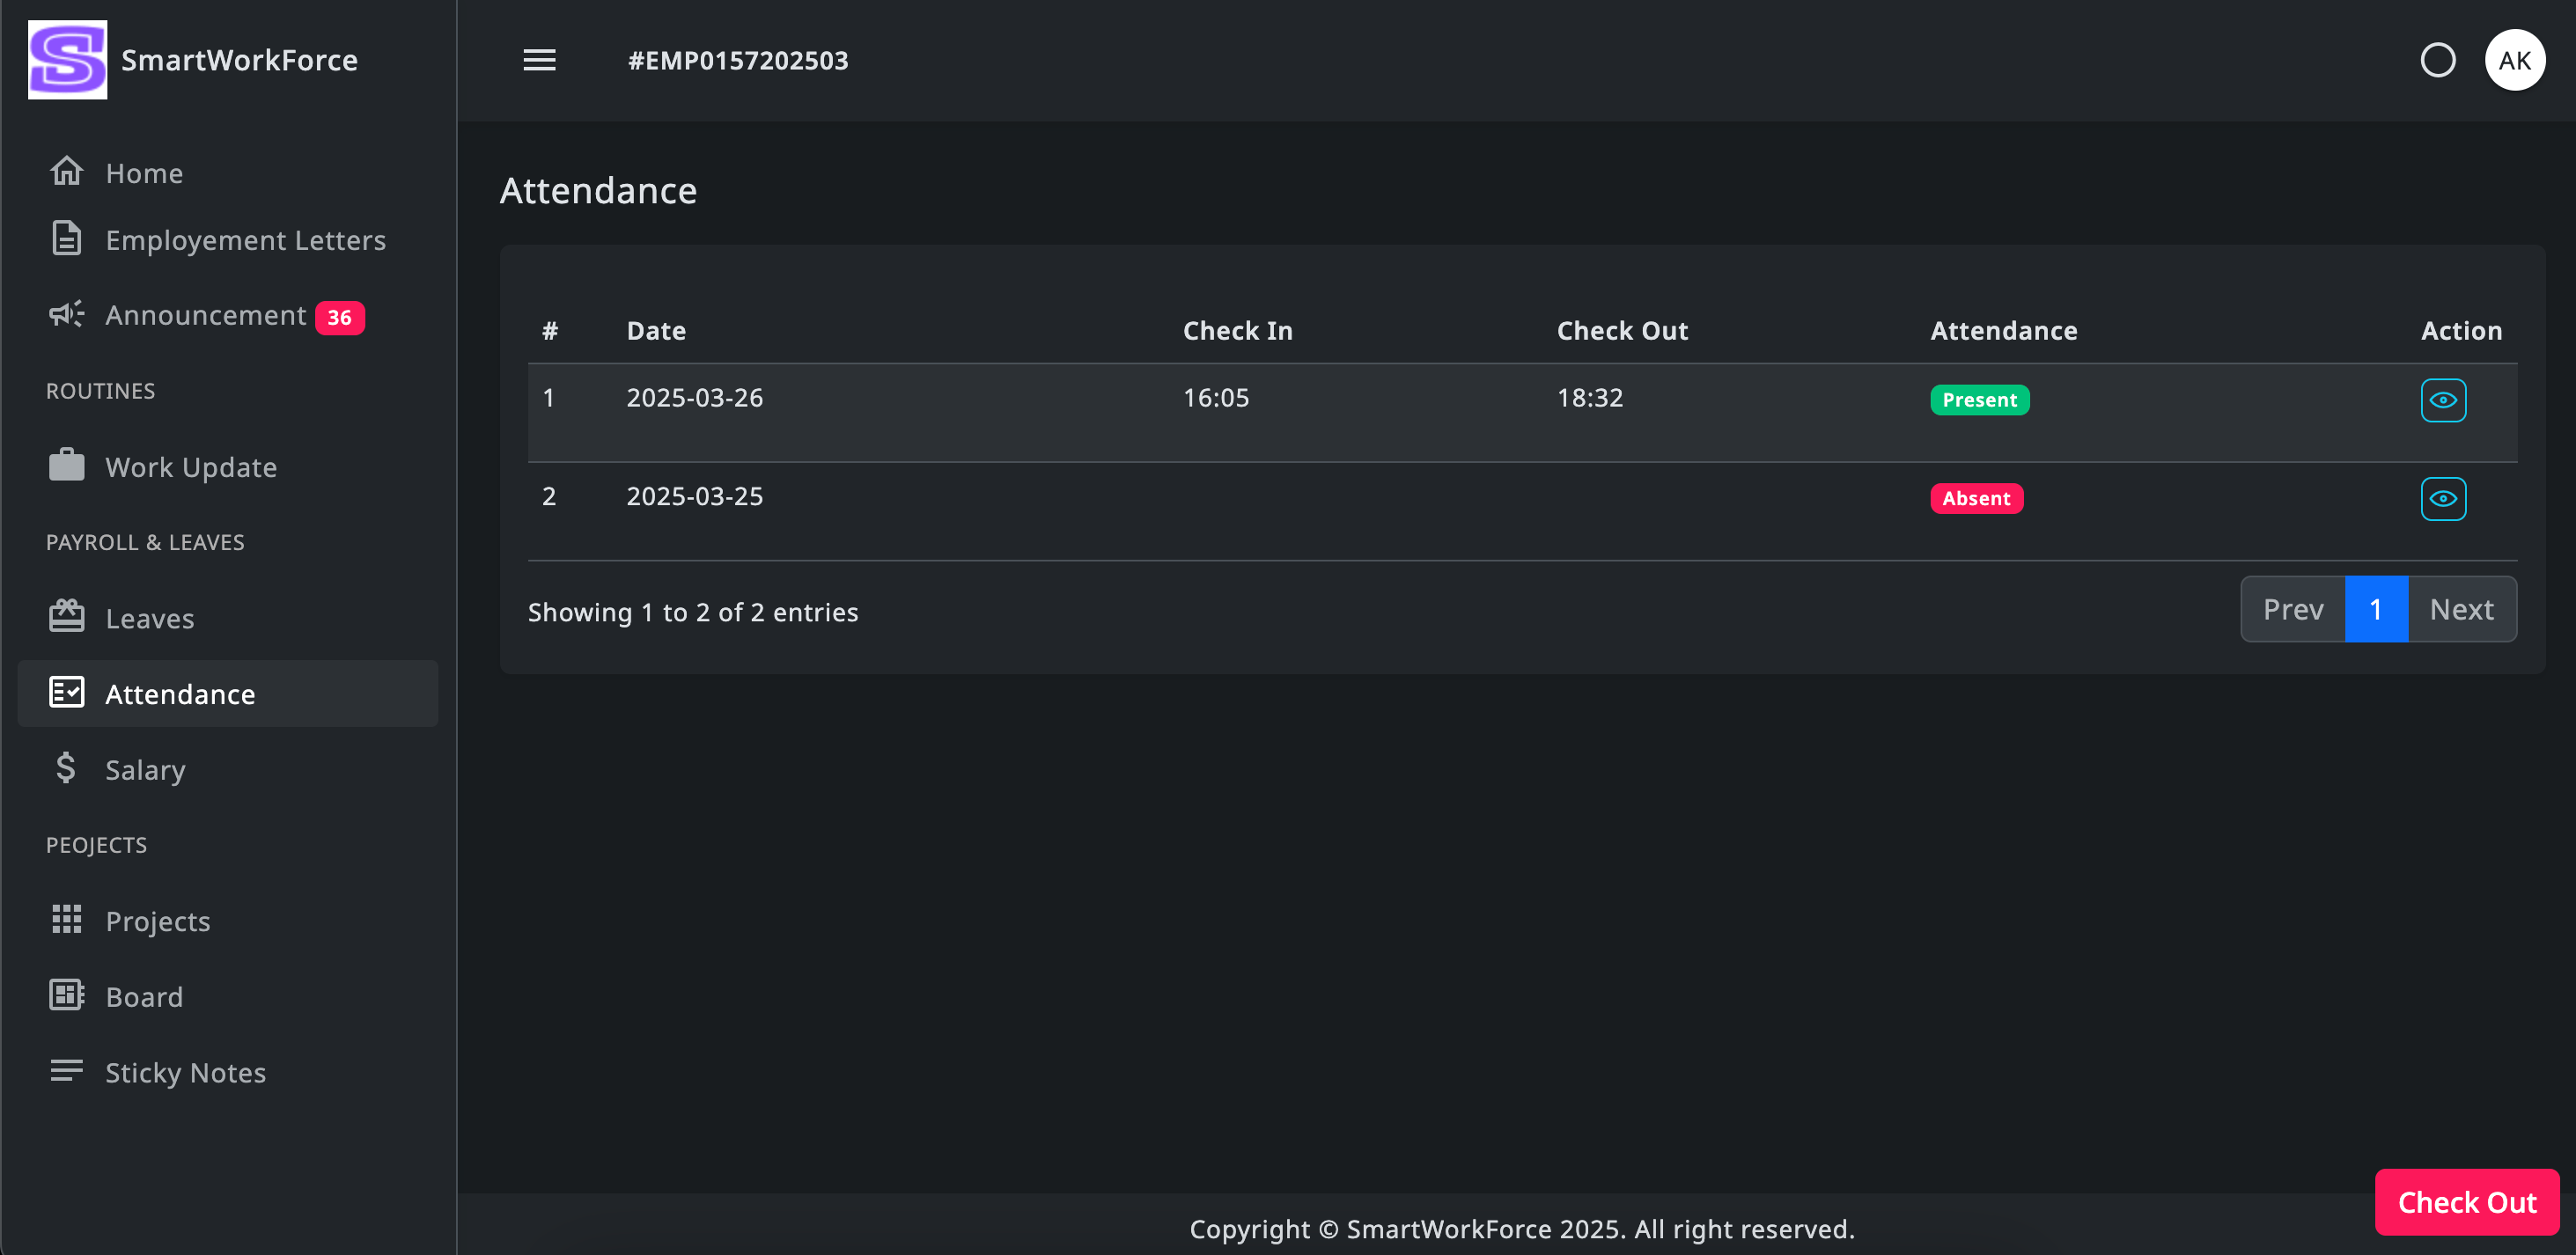
Payroll & Leaves : Attendance
Employees can track their own attendance and view their attendance history
in the SmartWorkForce employee panel. This allows them to keep track of
their check-ins, check-outs, and overall attendance records for easy
reference.
AttendanceAttendance History
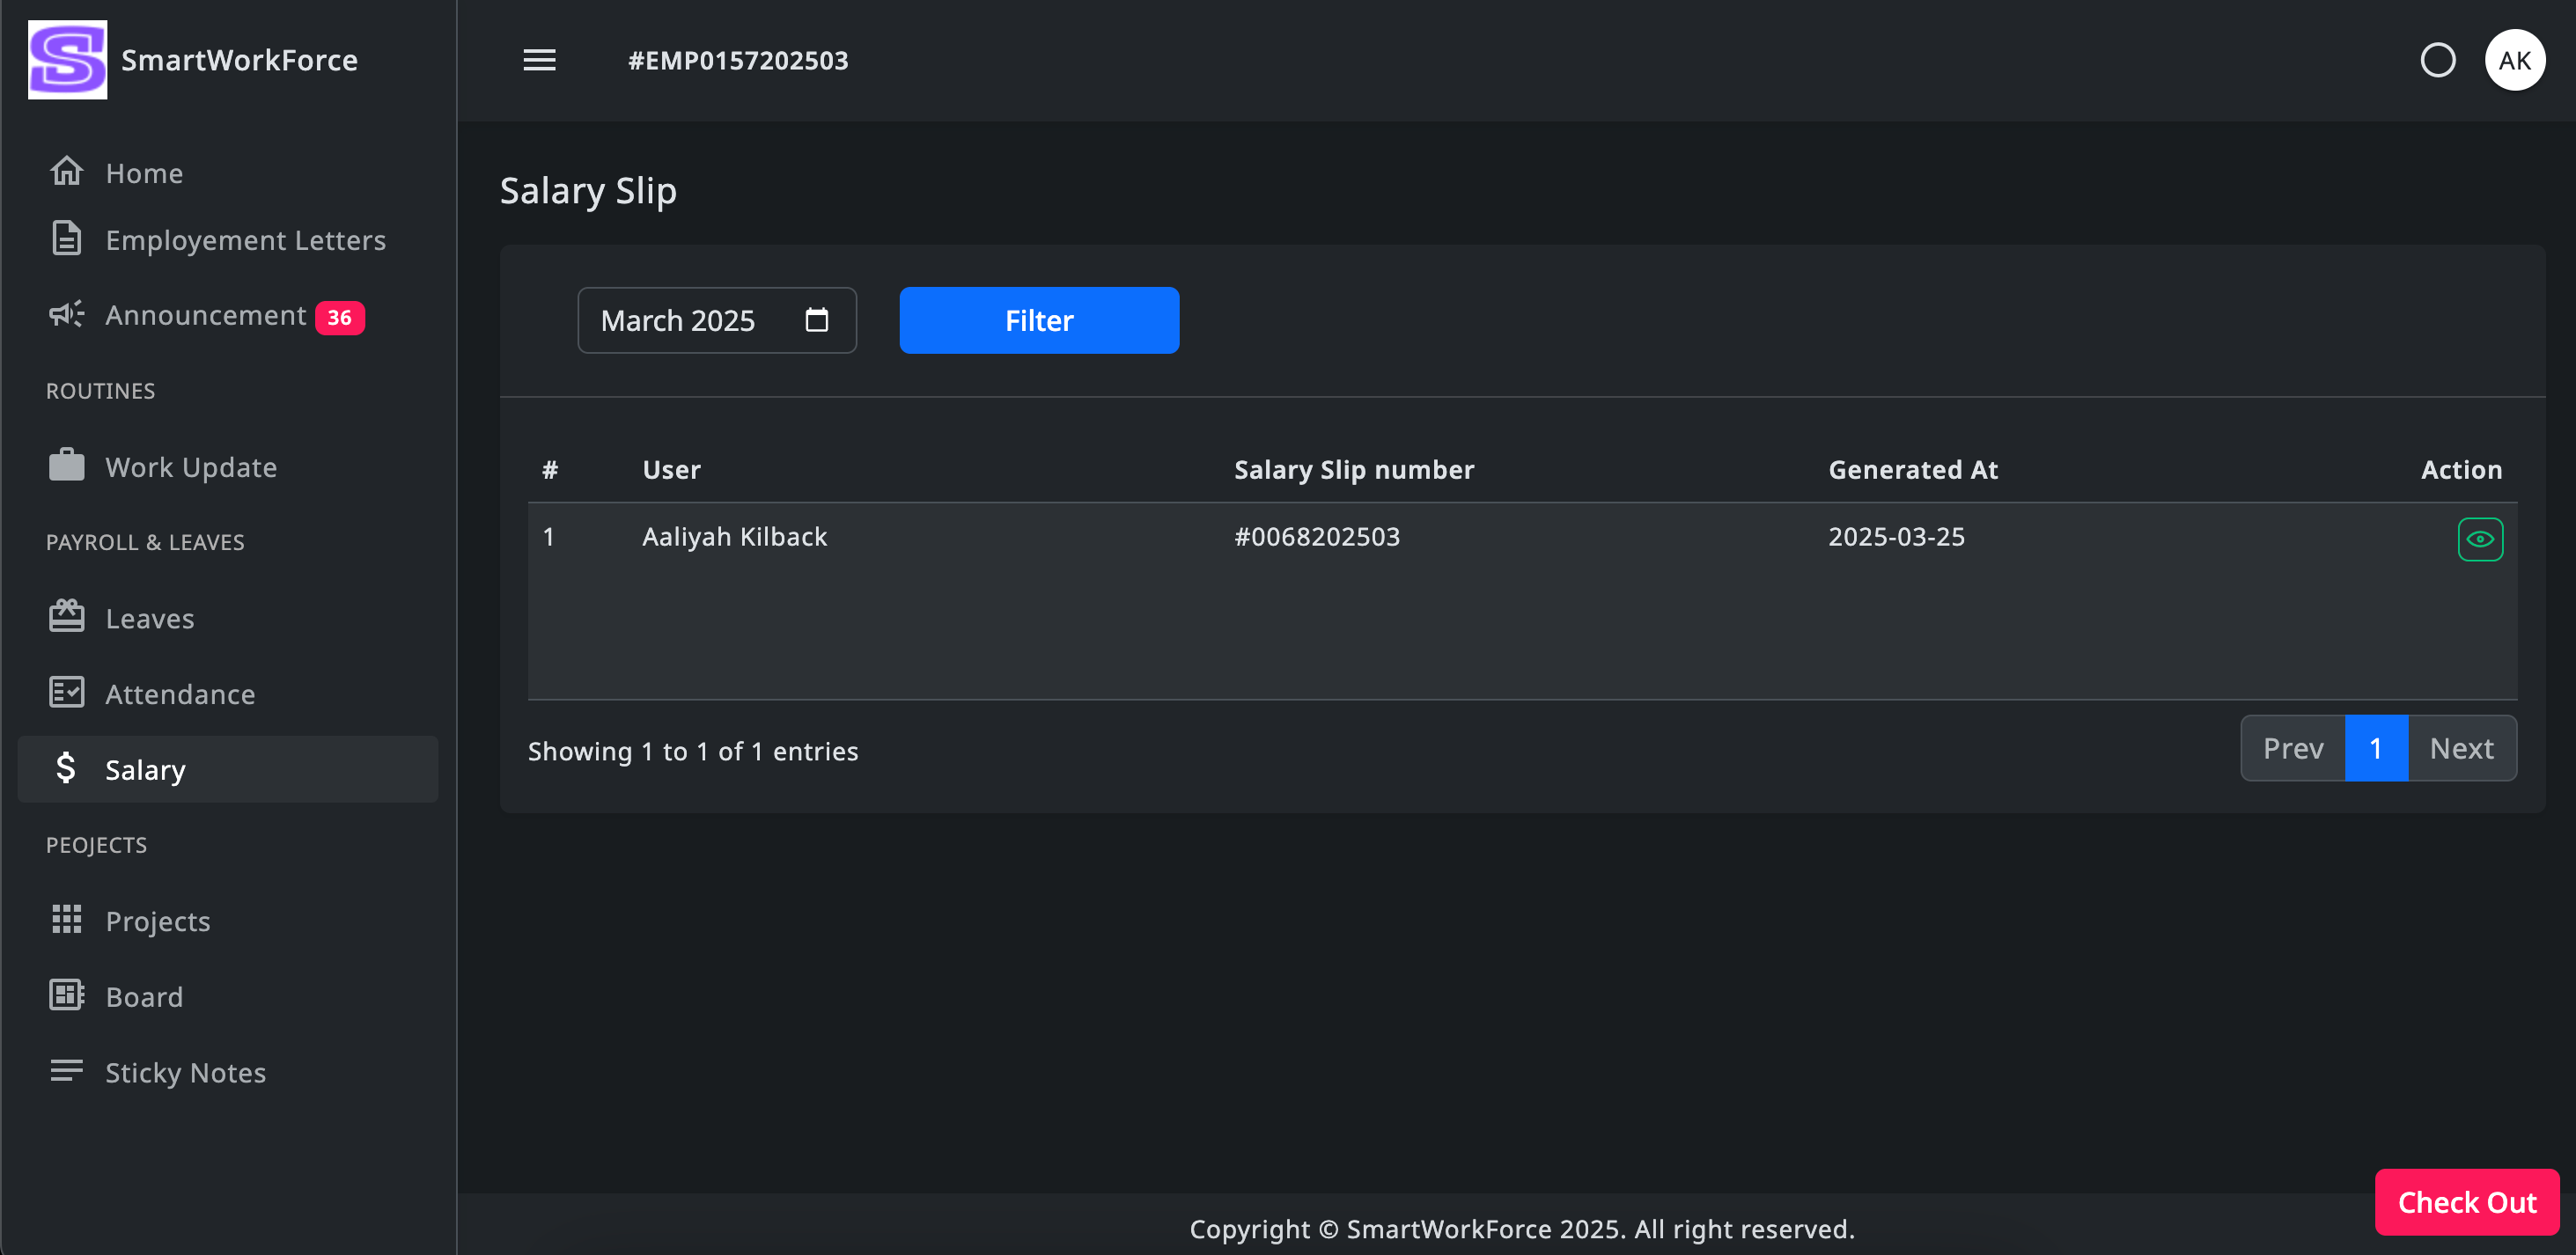
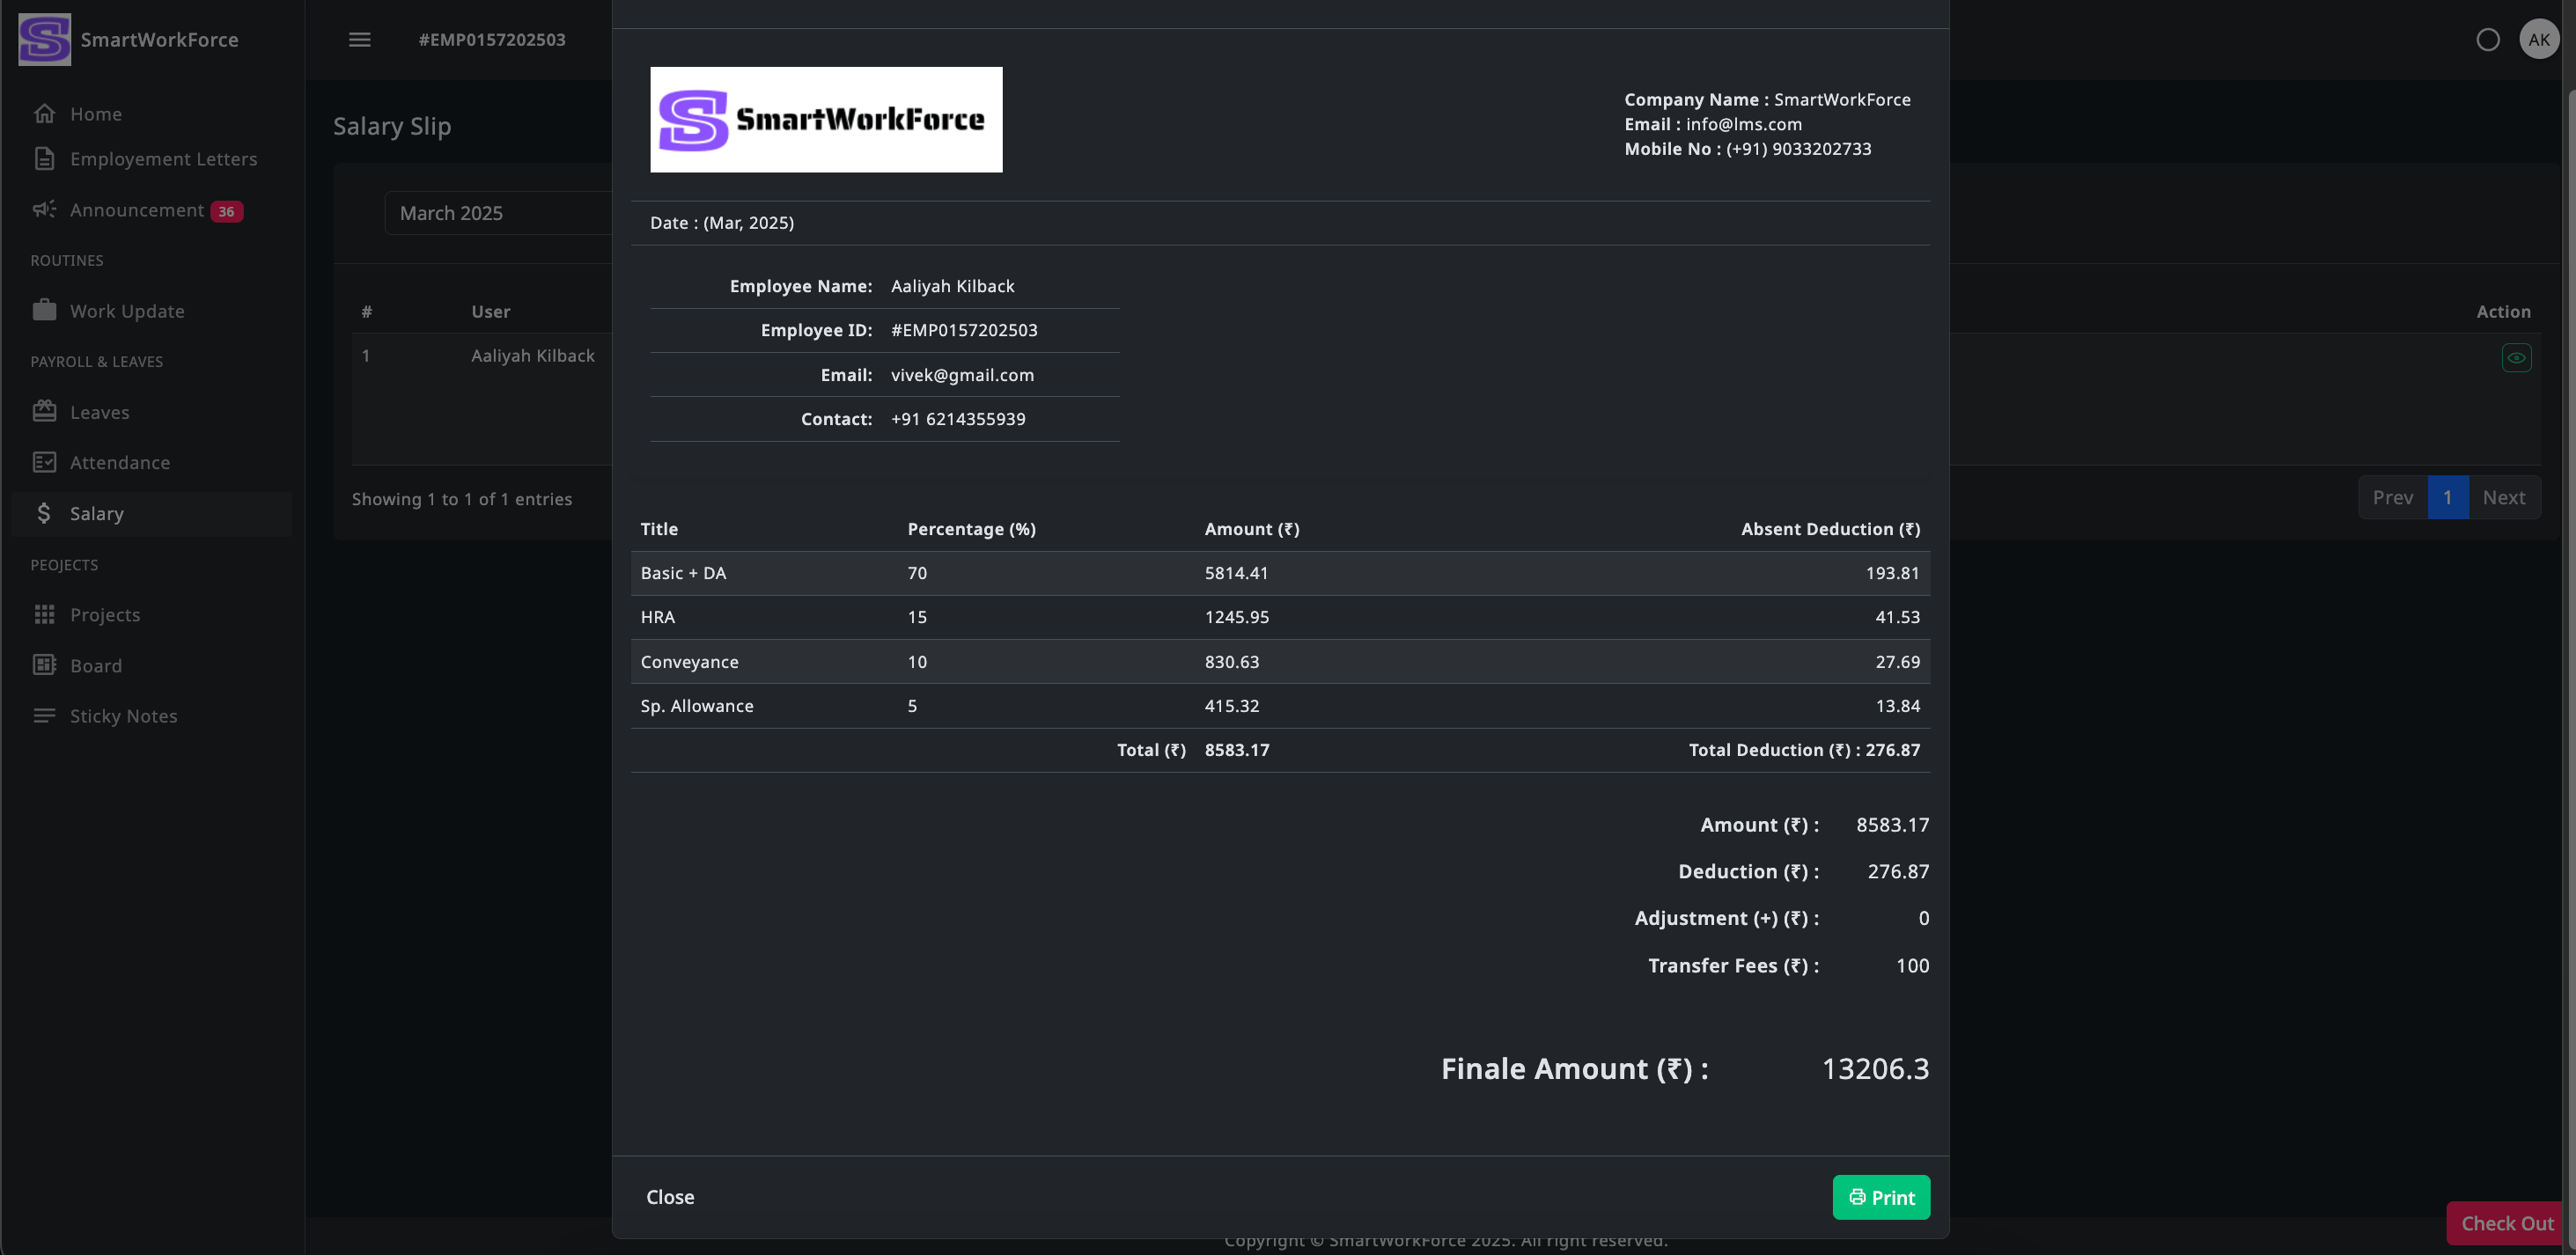
Payroll & Leaves : Salary
Employees can view and download their salary slips generated by the admin
for each month. This allows them to easily access their payment details and
track their earnings over time.
Salary Salary Slip
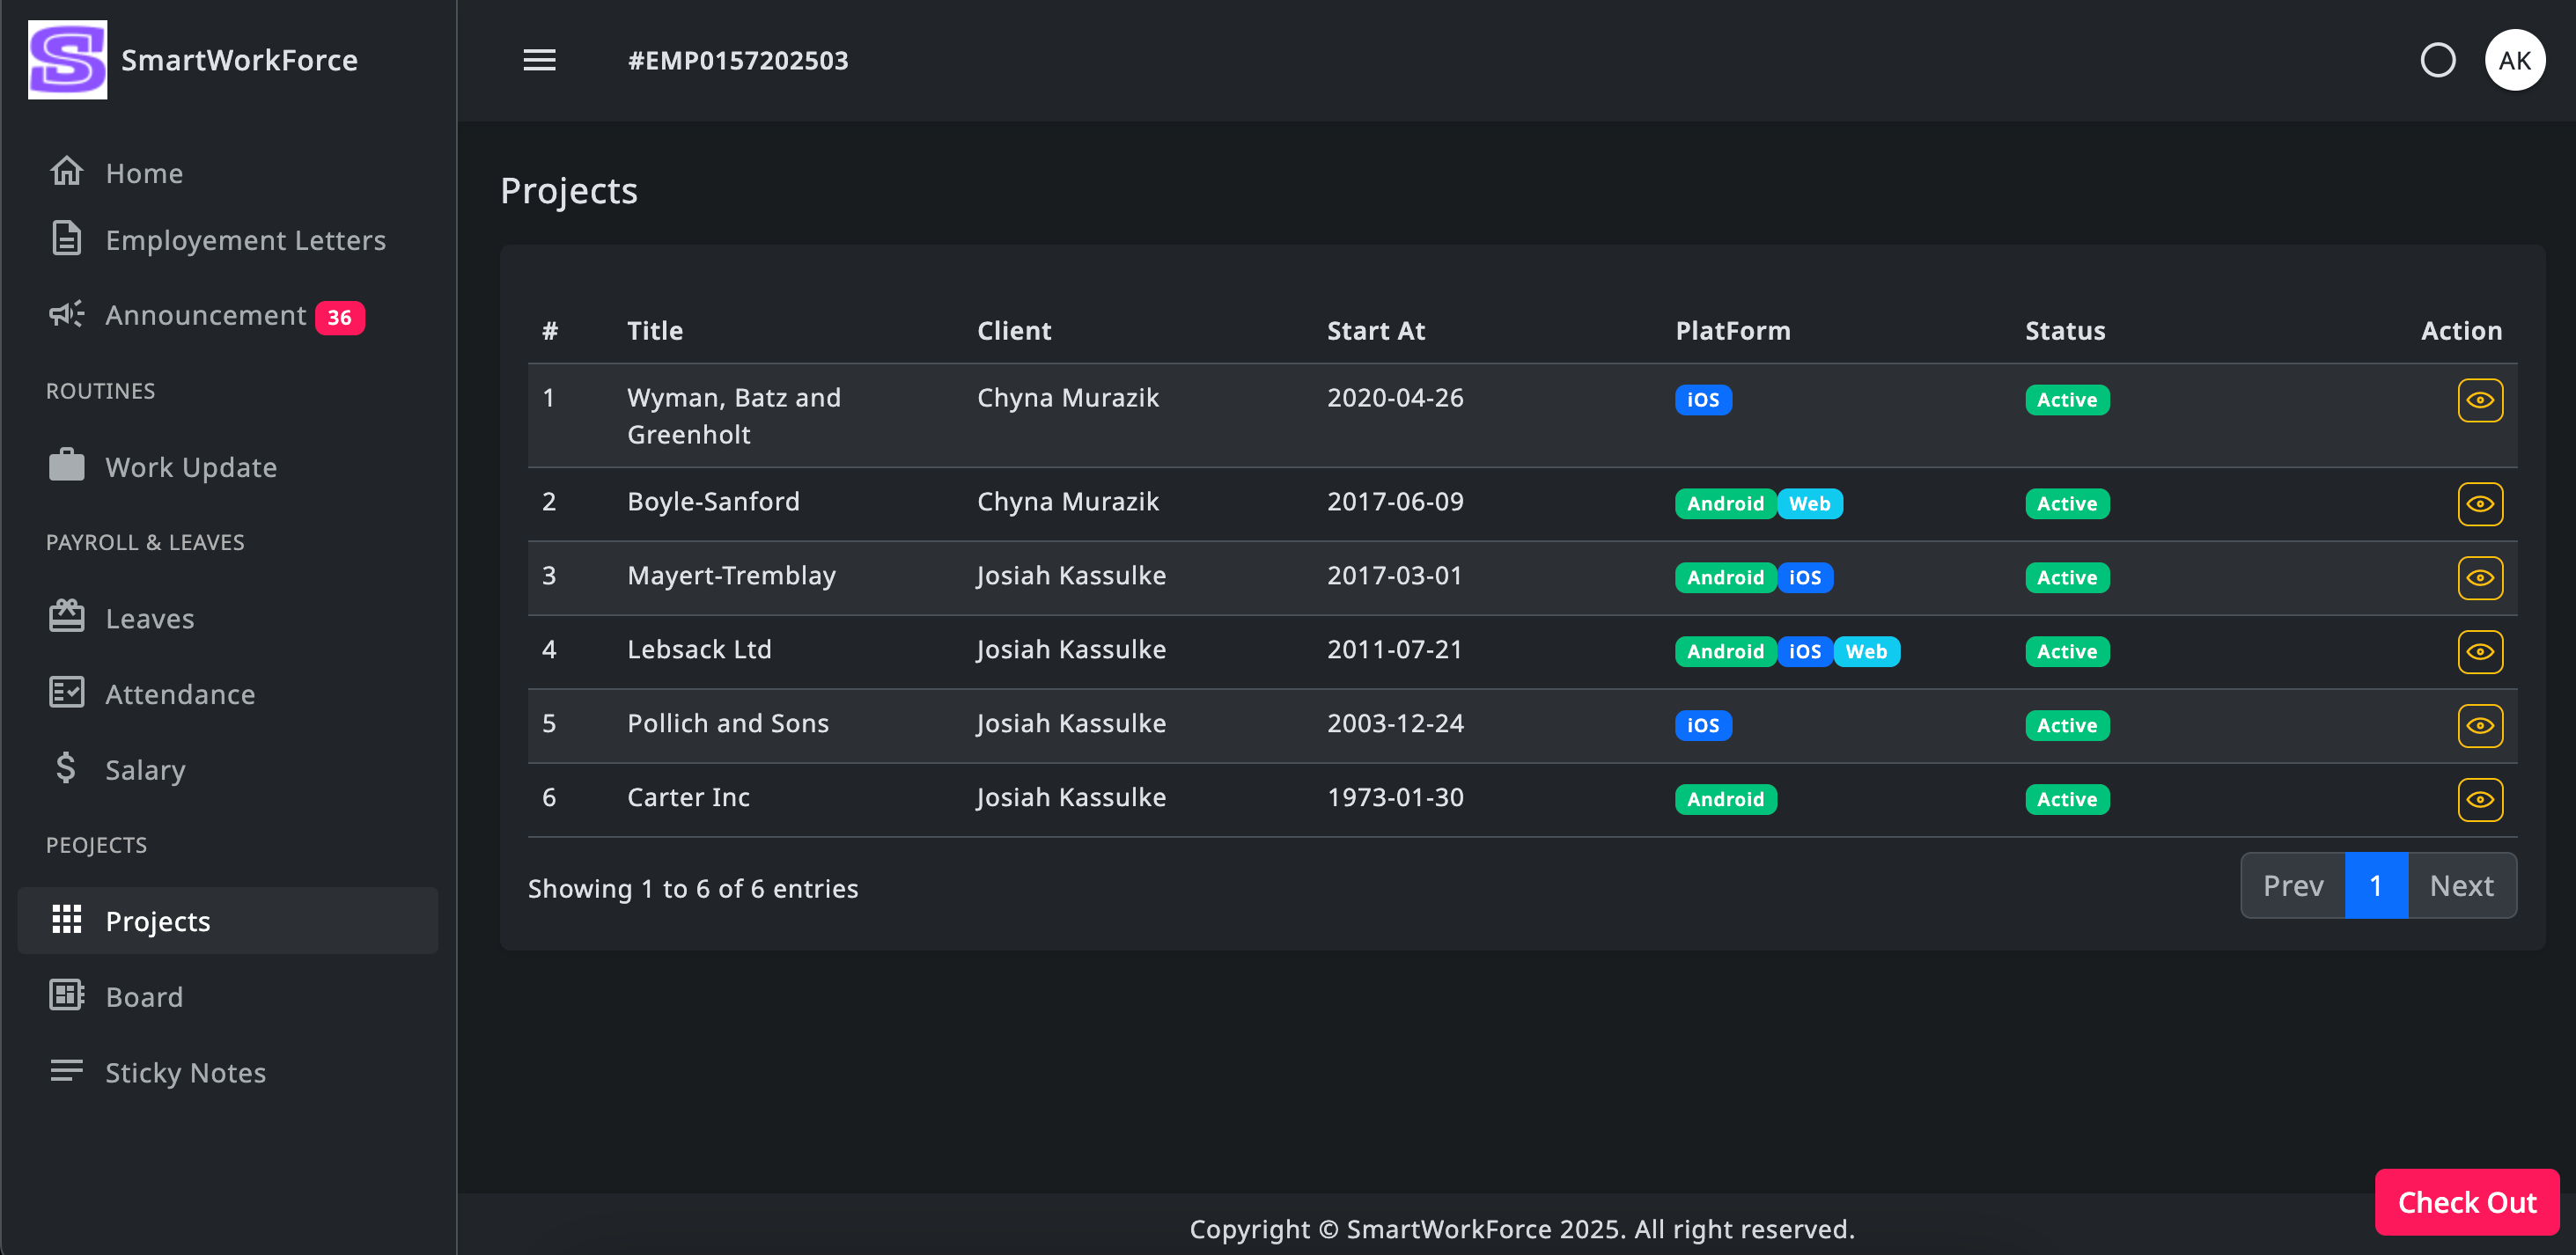
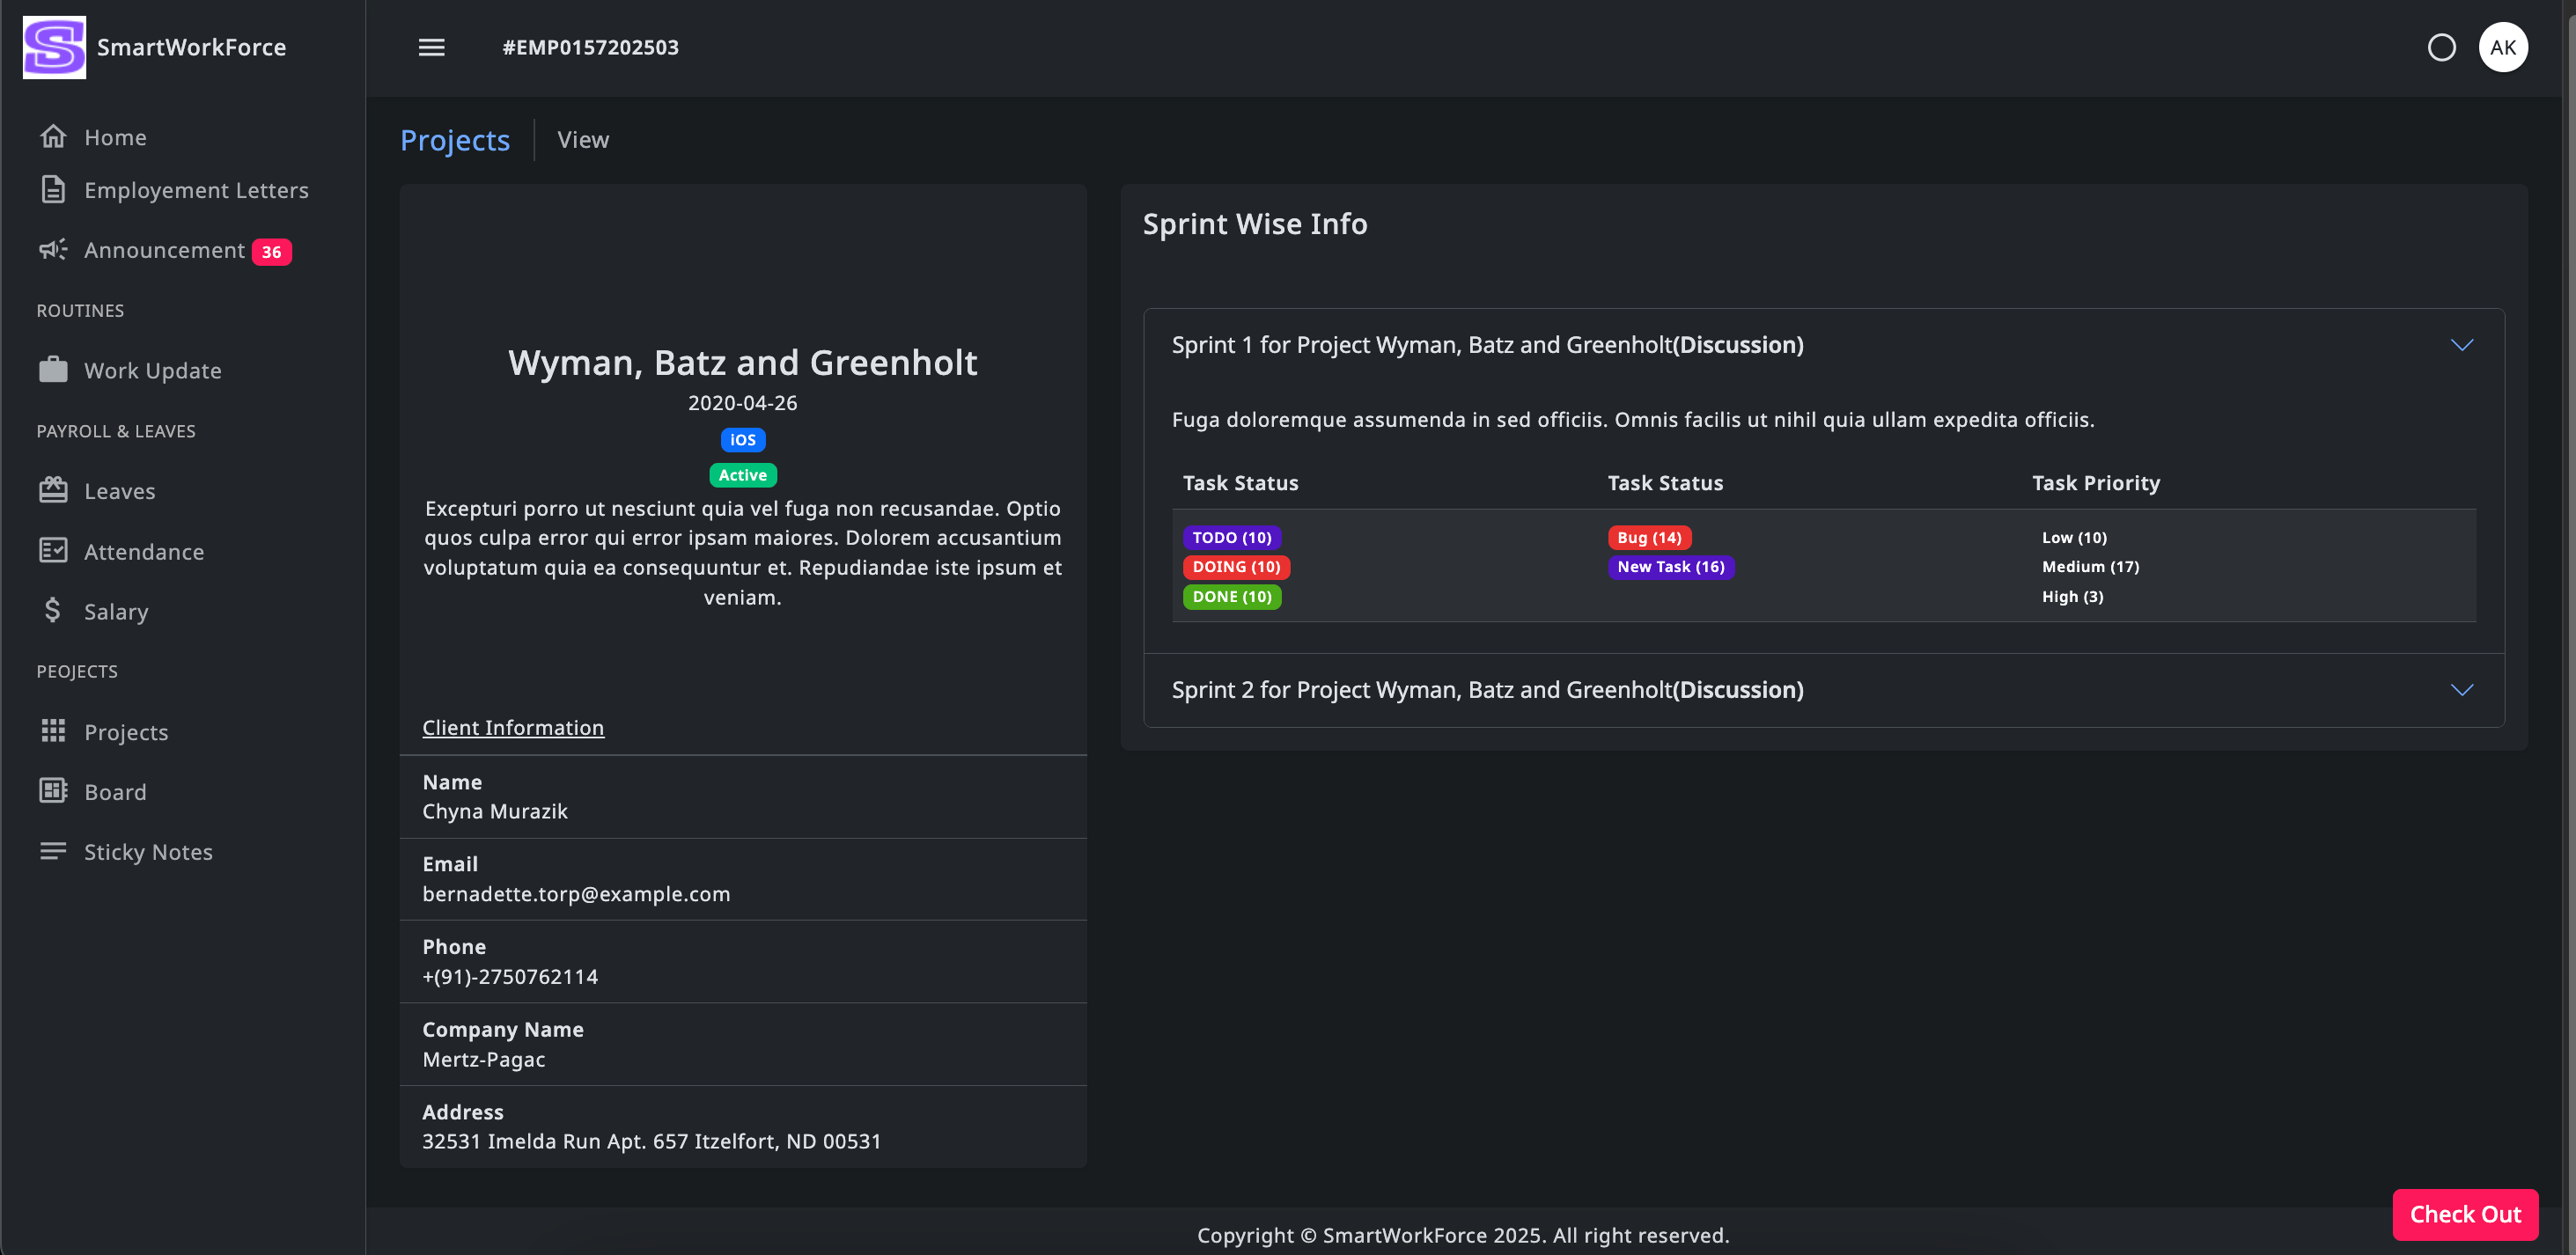
Projects Management : Projects
Employees can view the project list assigned by the admin, along with
detailed information about each project, including the sprint details. This
helps them stay informed about their tasks and the progress of the projects
they are working on.
ProjectsProject Detail
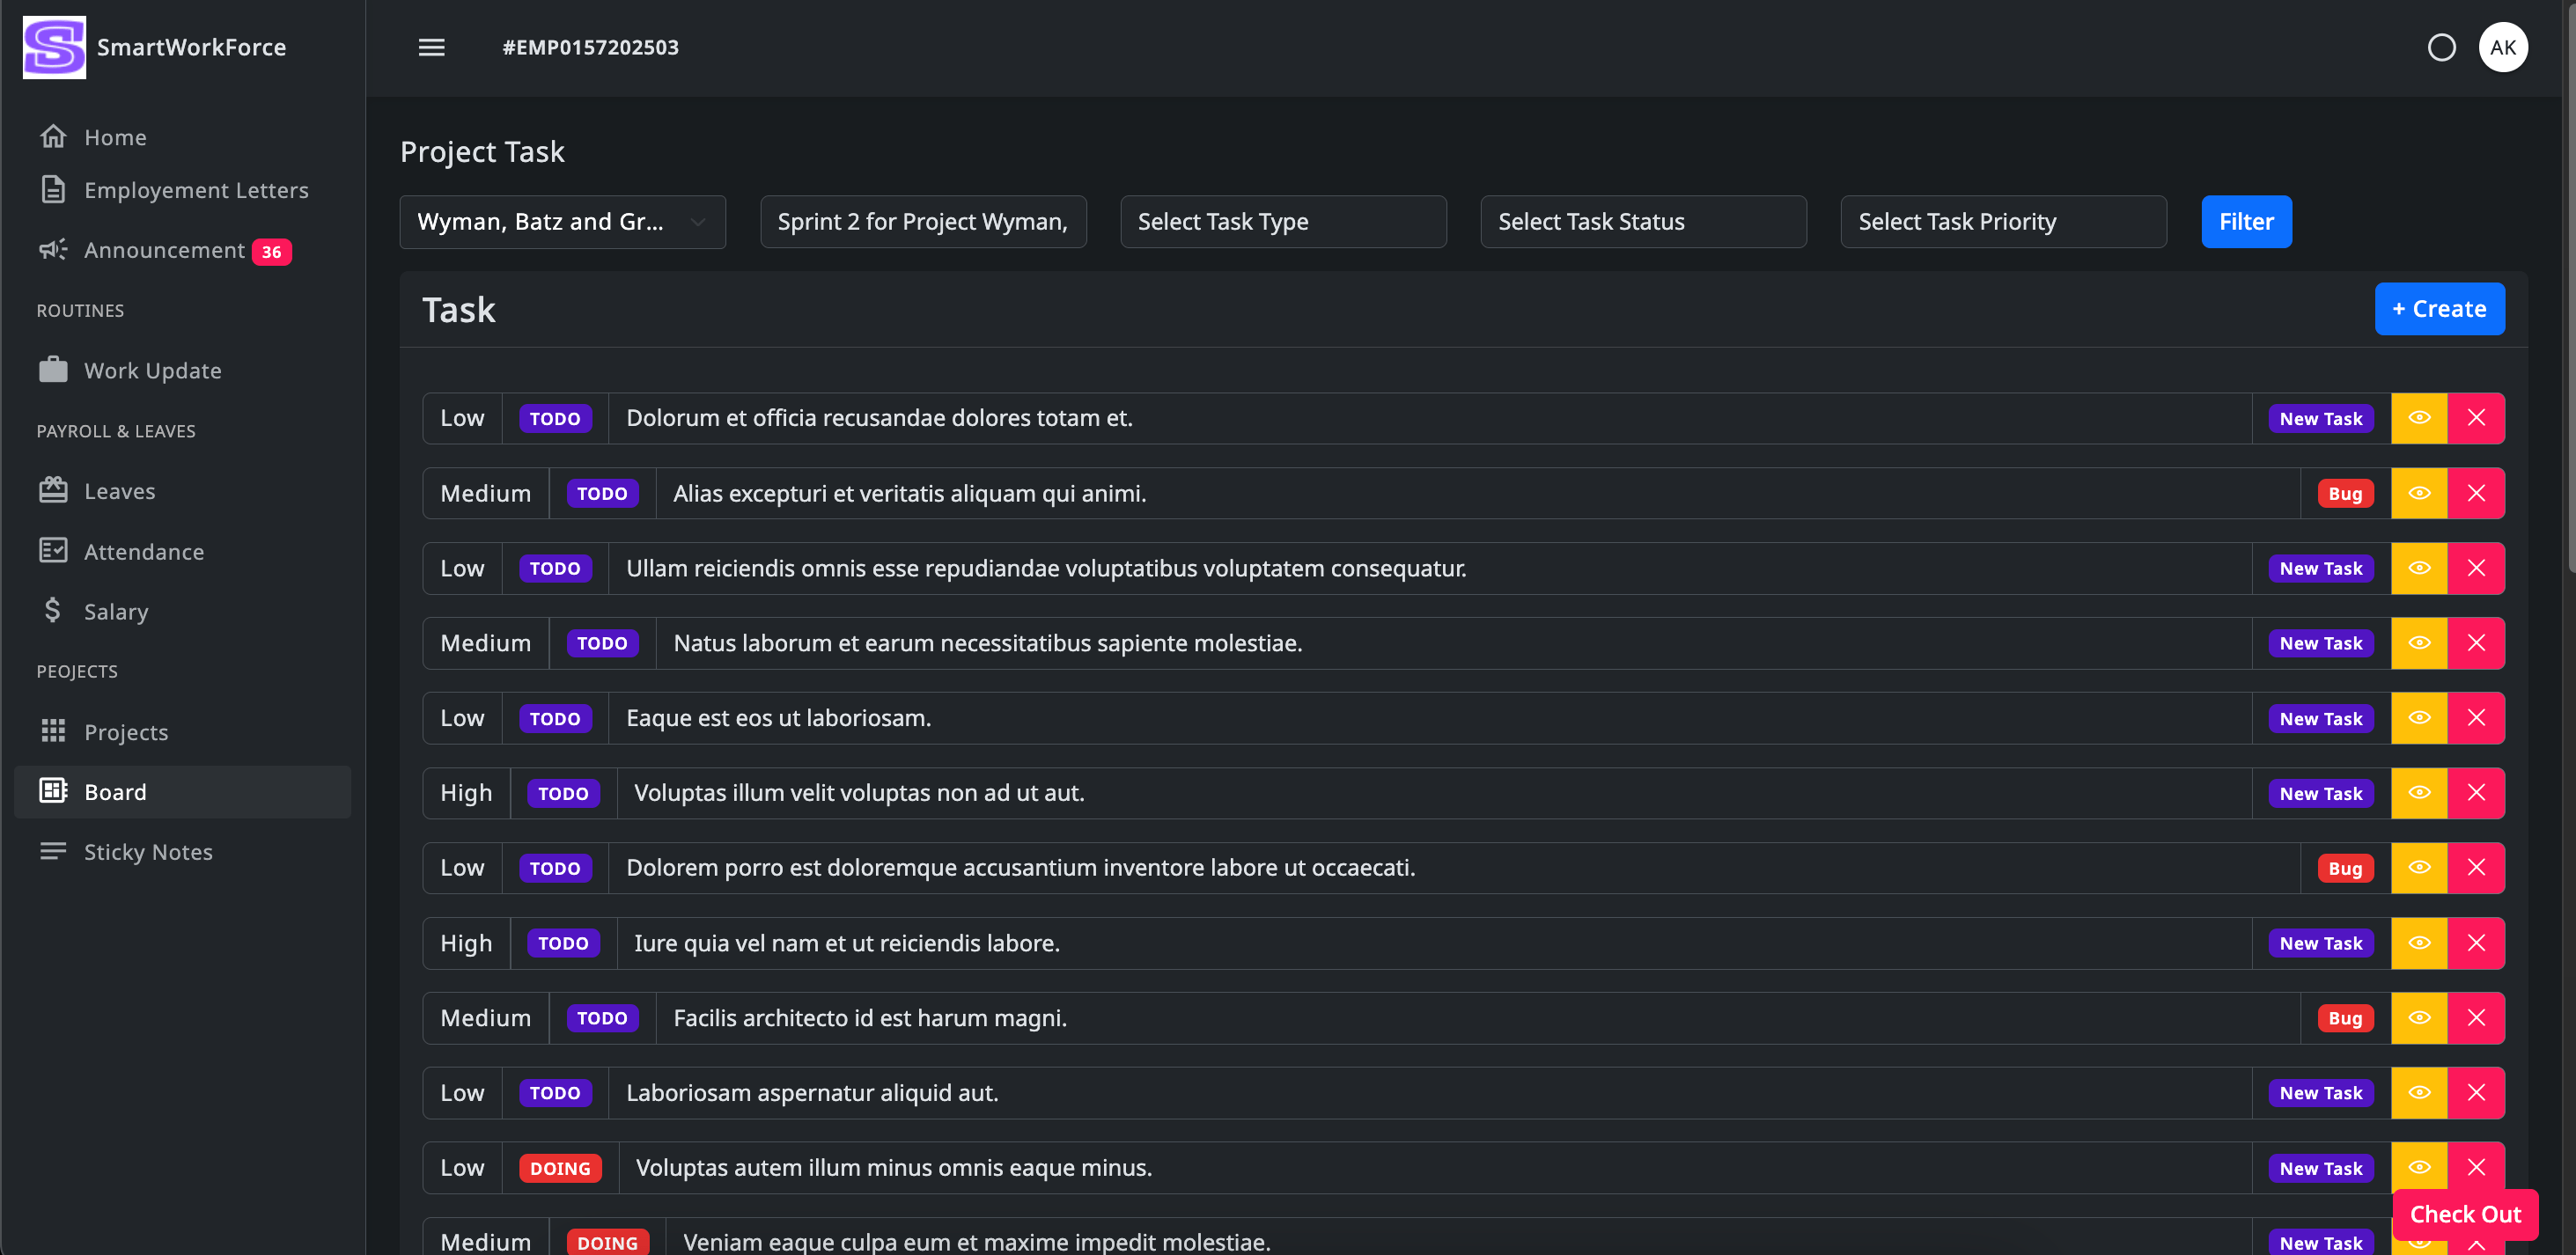
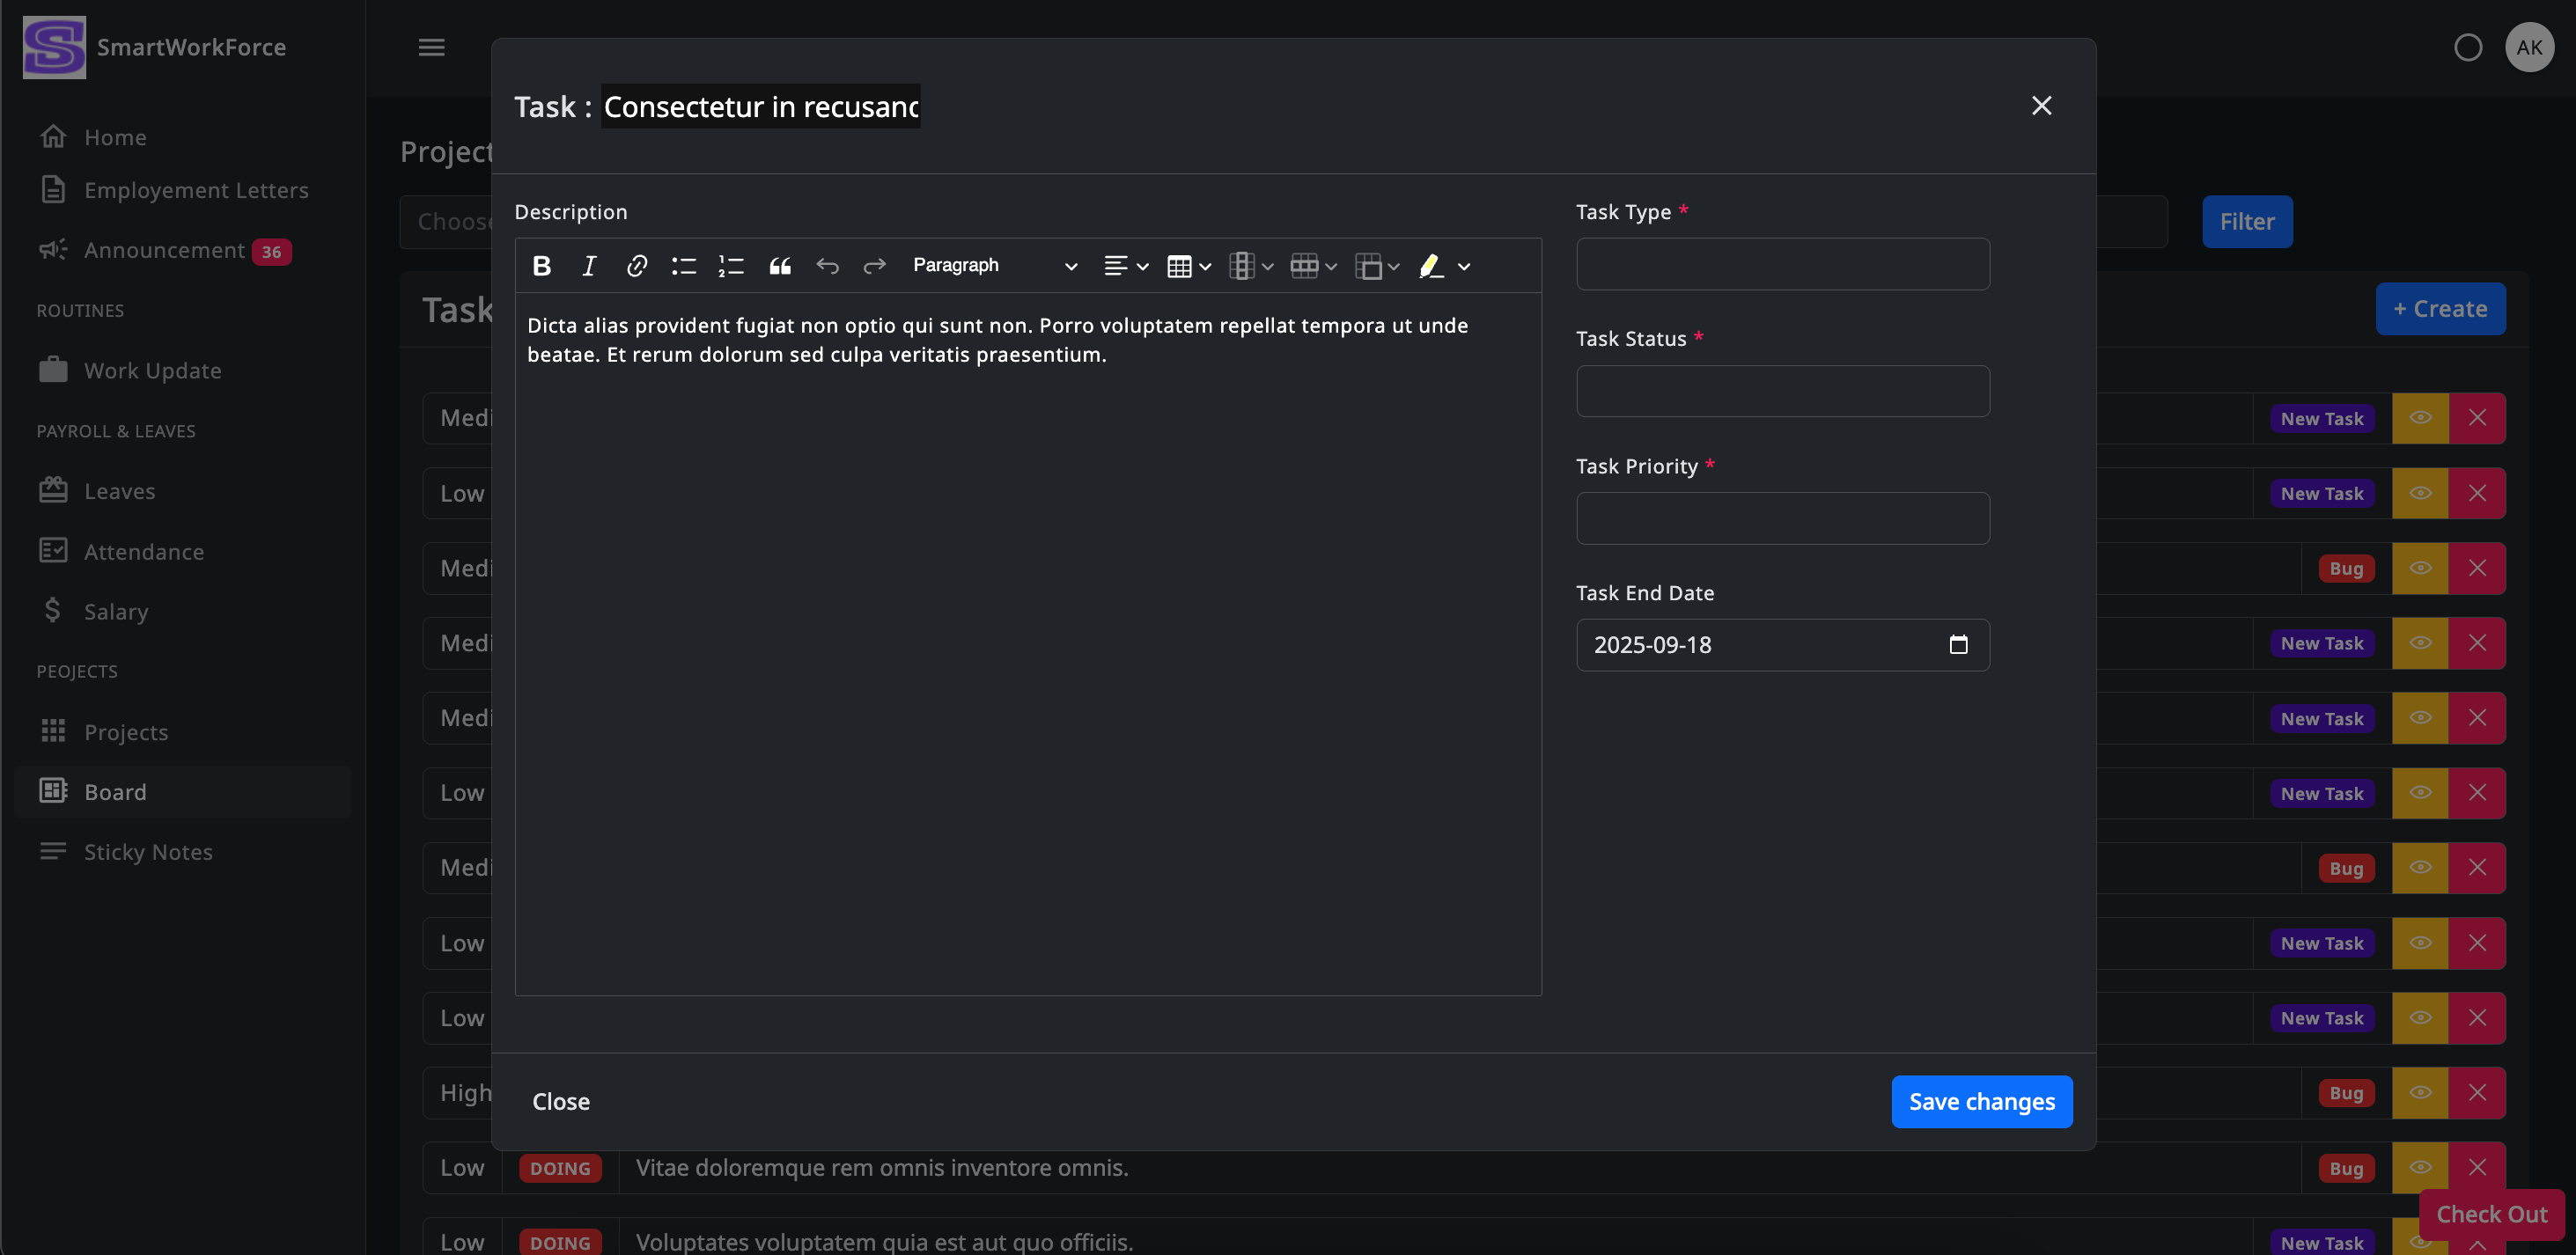
Projects Management : Board
Employees can generate new tasks, as well as edit, update, or delete
existing tasks assigned to them. Additionally, they have access to filter
options, allowing them to easily sort and view tasks in a more organized and
readable manner.
Board TasksBoard Tasks CreateBoard Tasks Detail
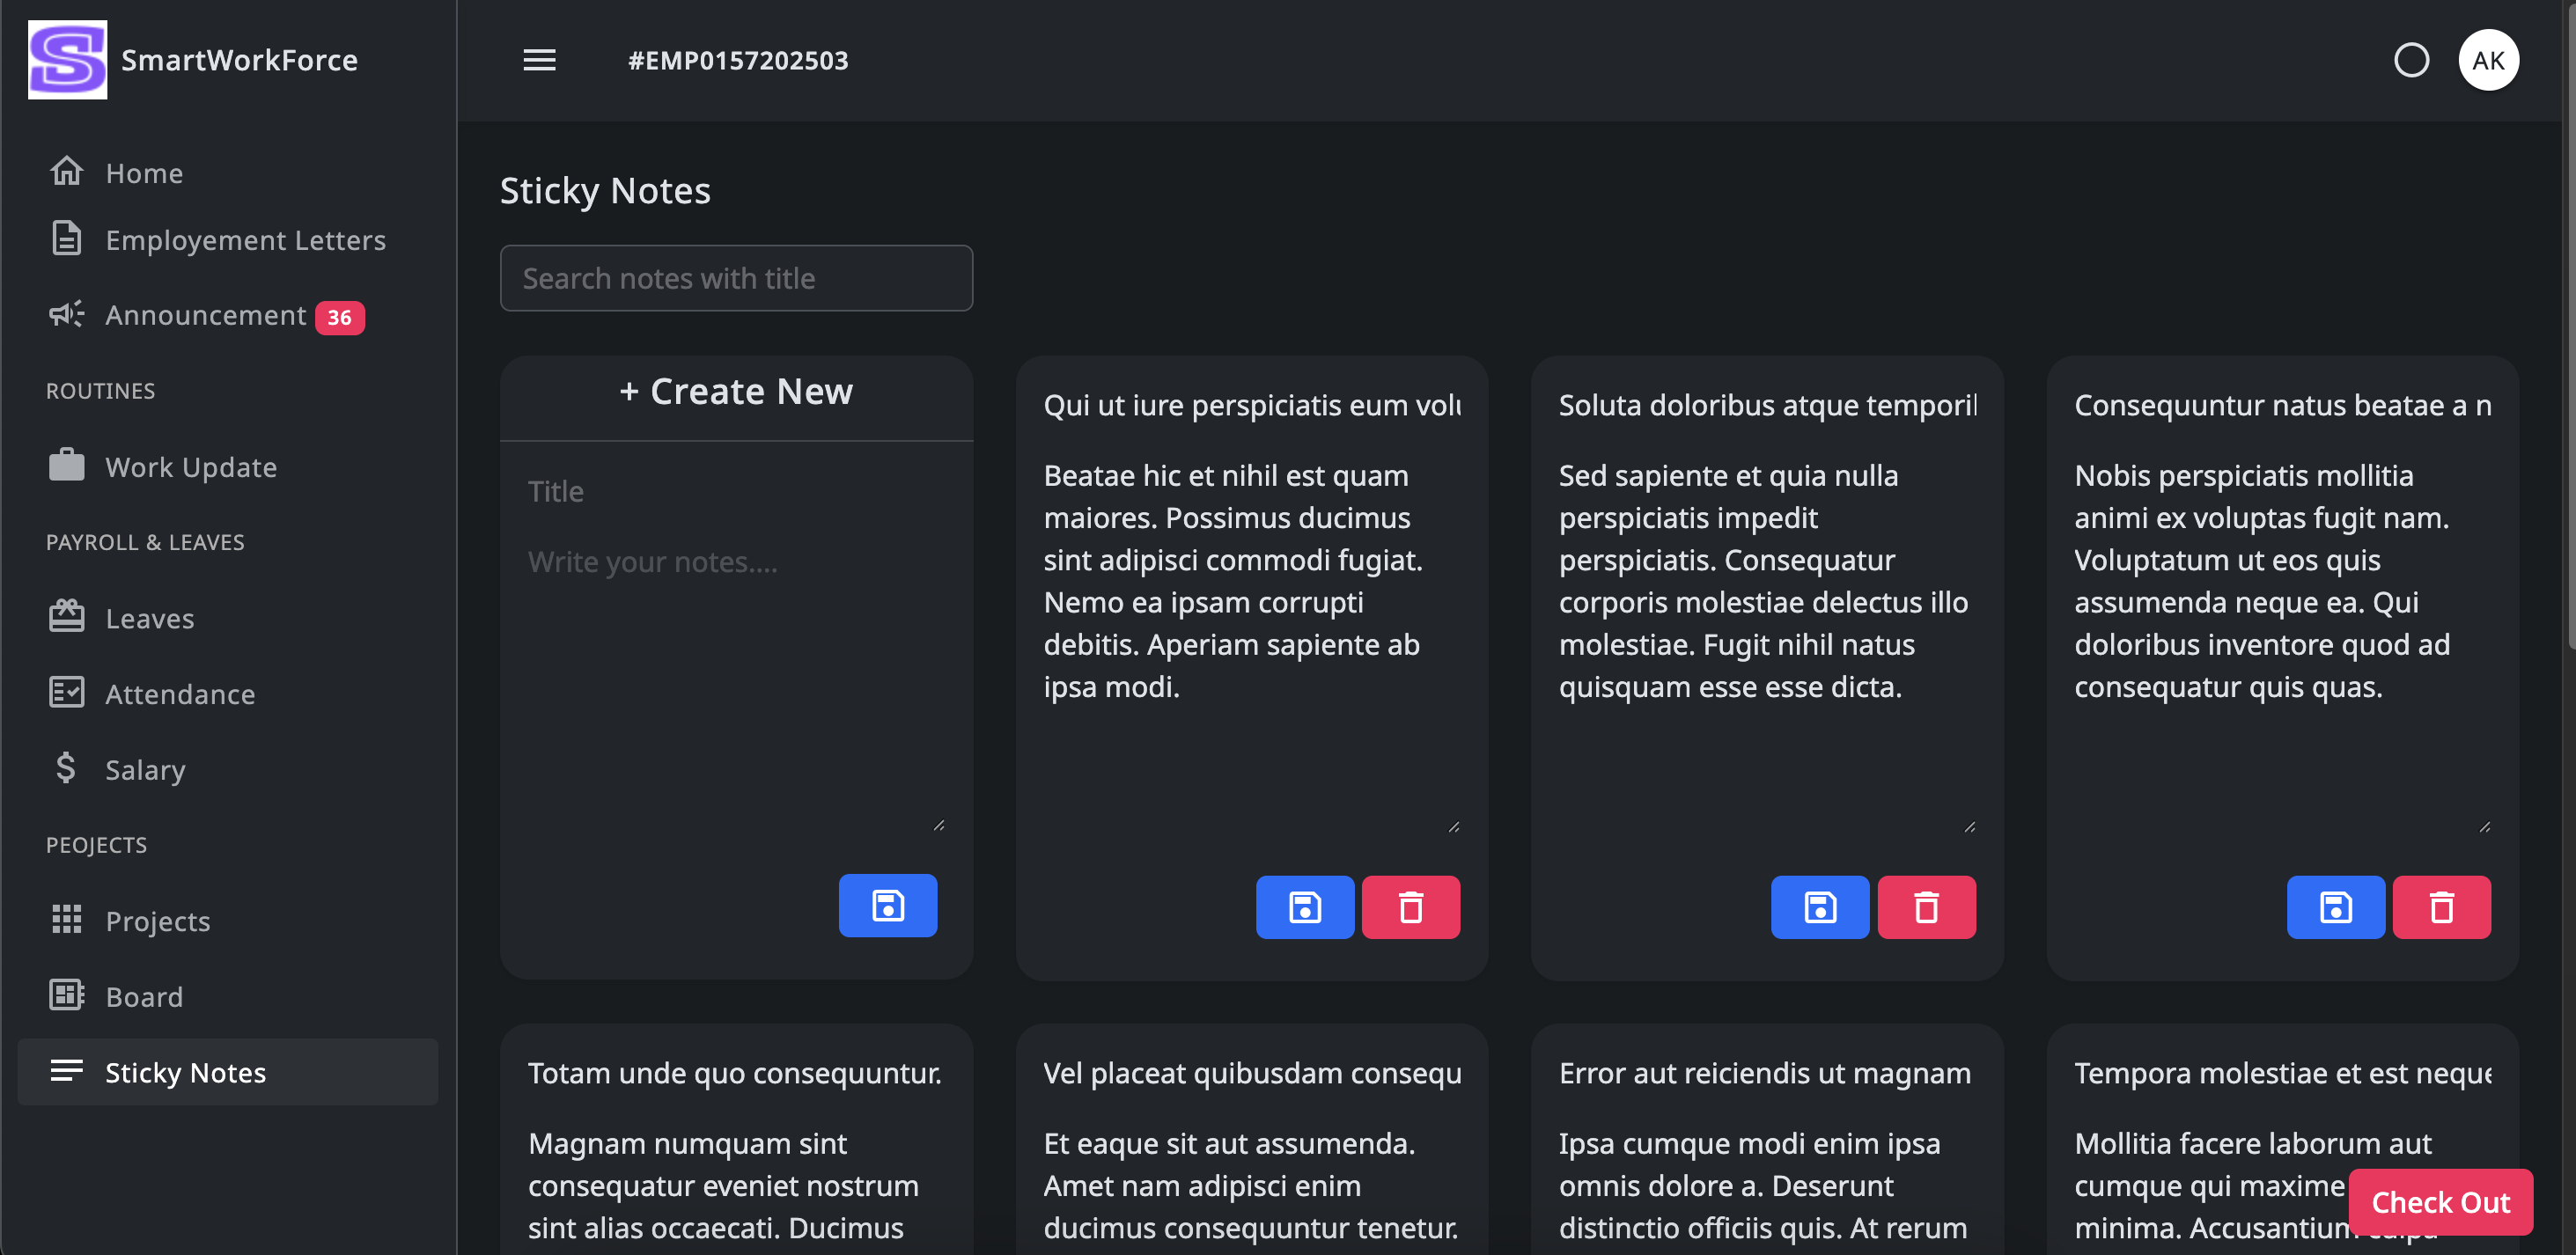
Projects Management : Sticky Notes
Employees can add personal notes for their own use within the system. These
notes help them keep track of important reminders, tasks, or thoughts,
ensuring they stay organized and focused.
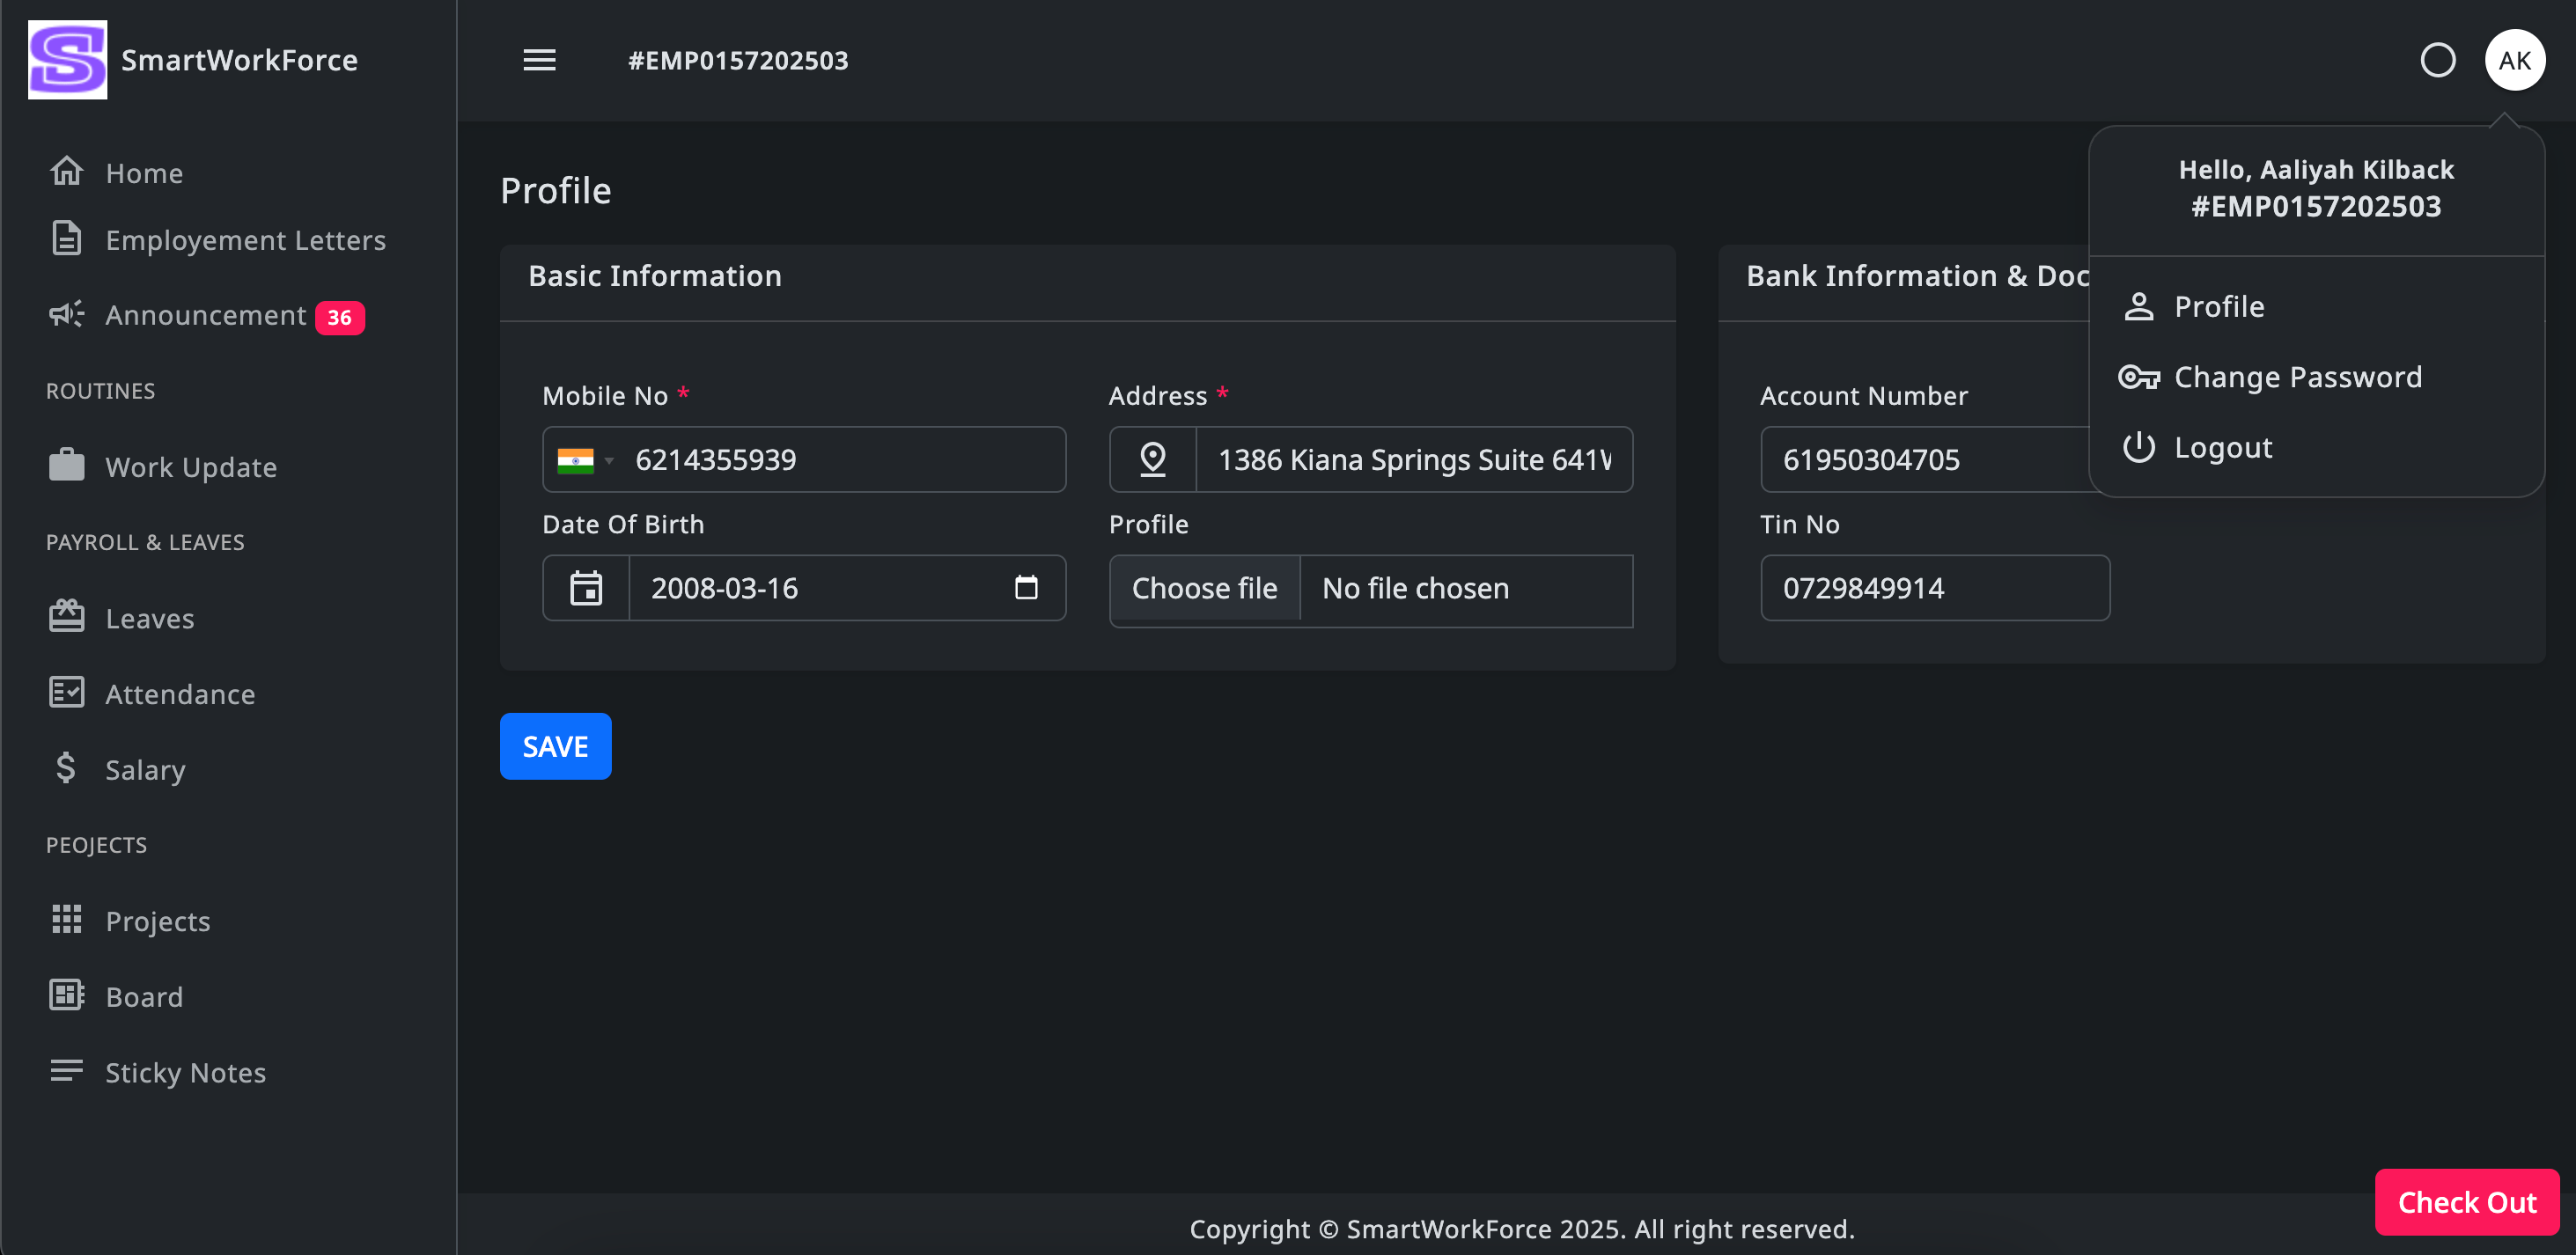
Profile
Employees can update their basic information through the profile update
feature. This allows them to modify details such as their name, contact
information, and other personal settings to keep their profile current.
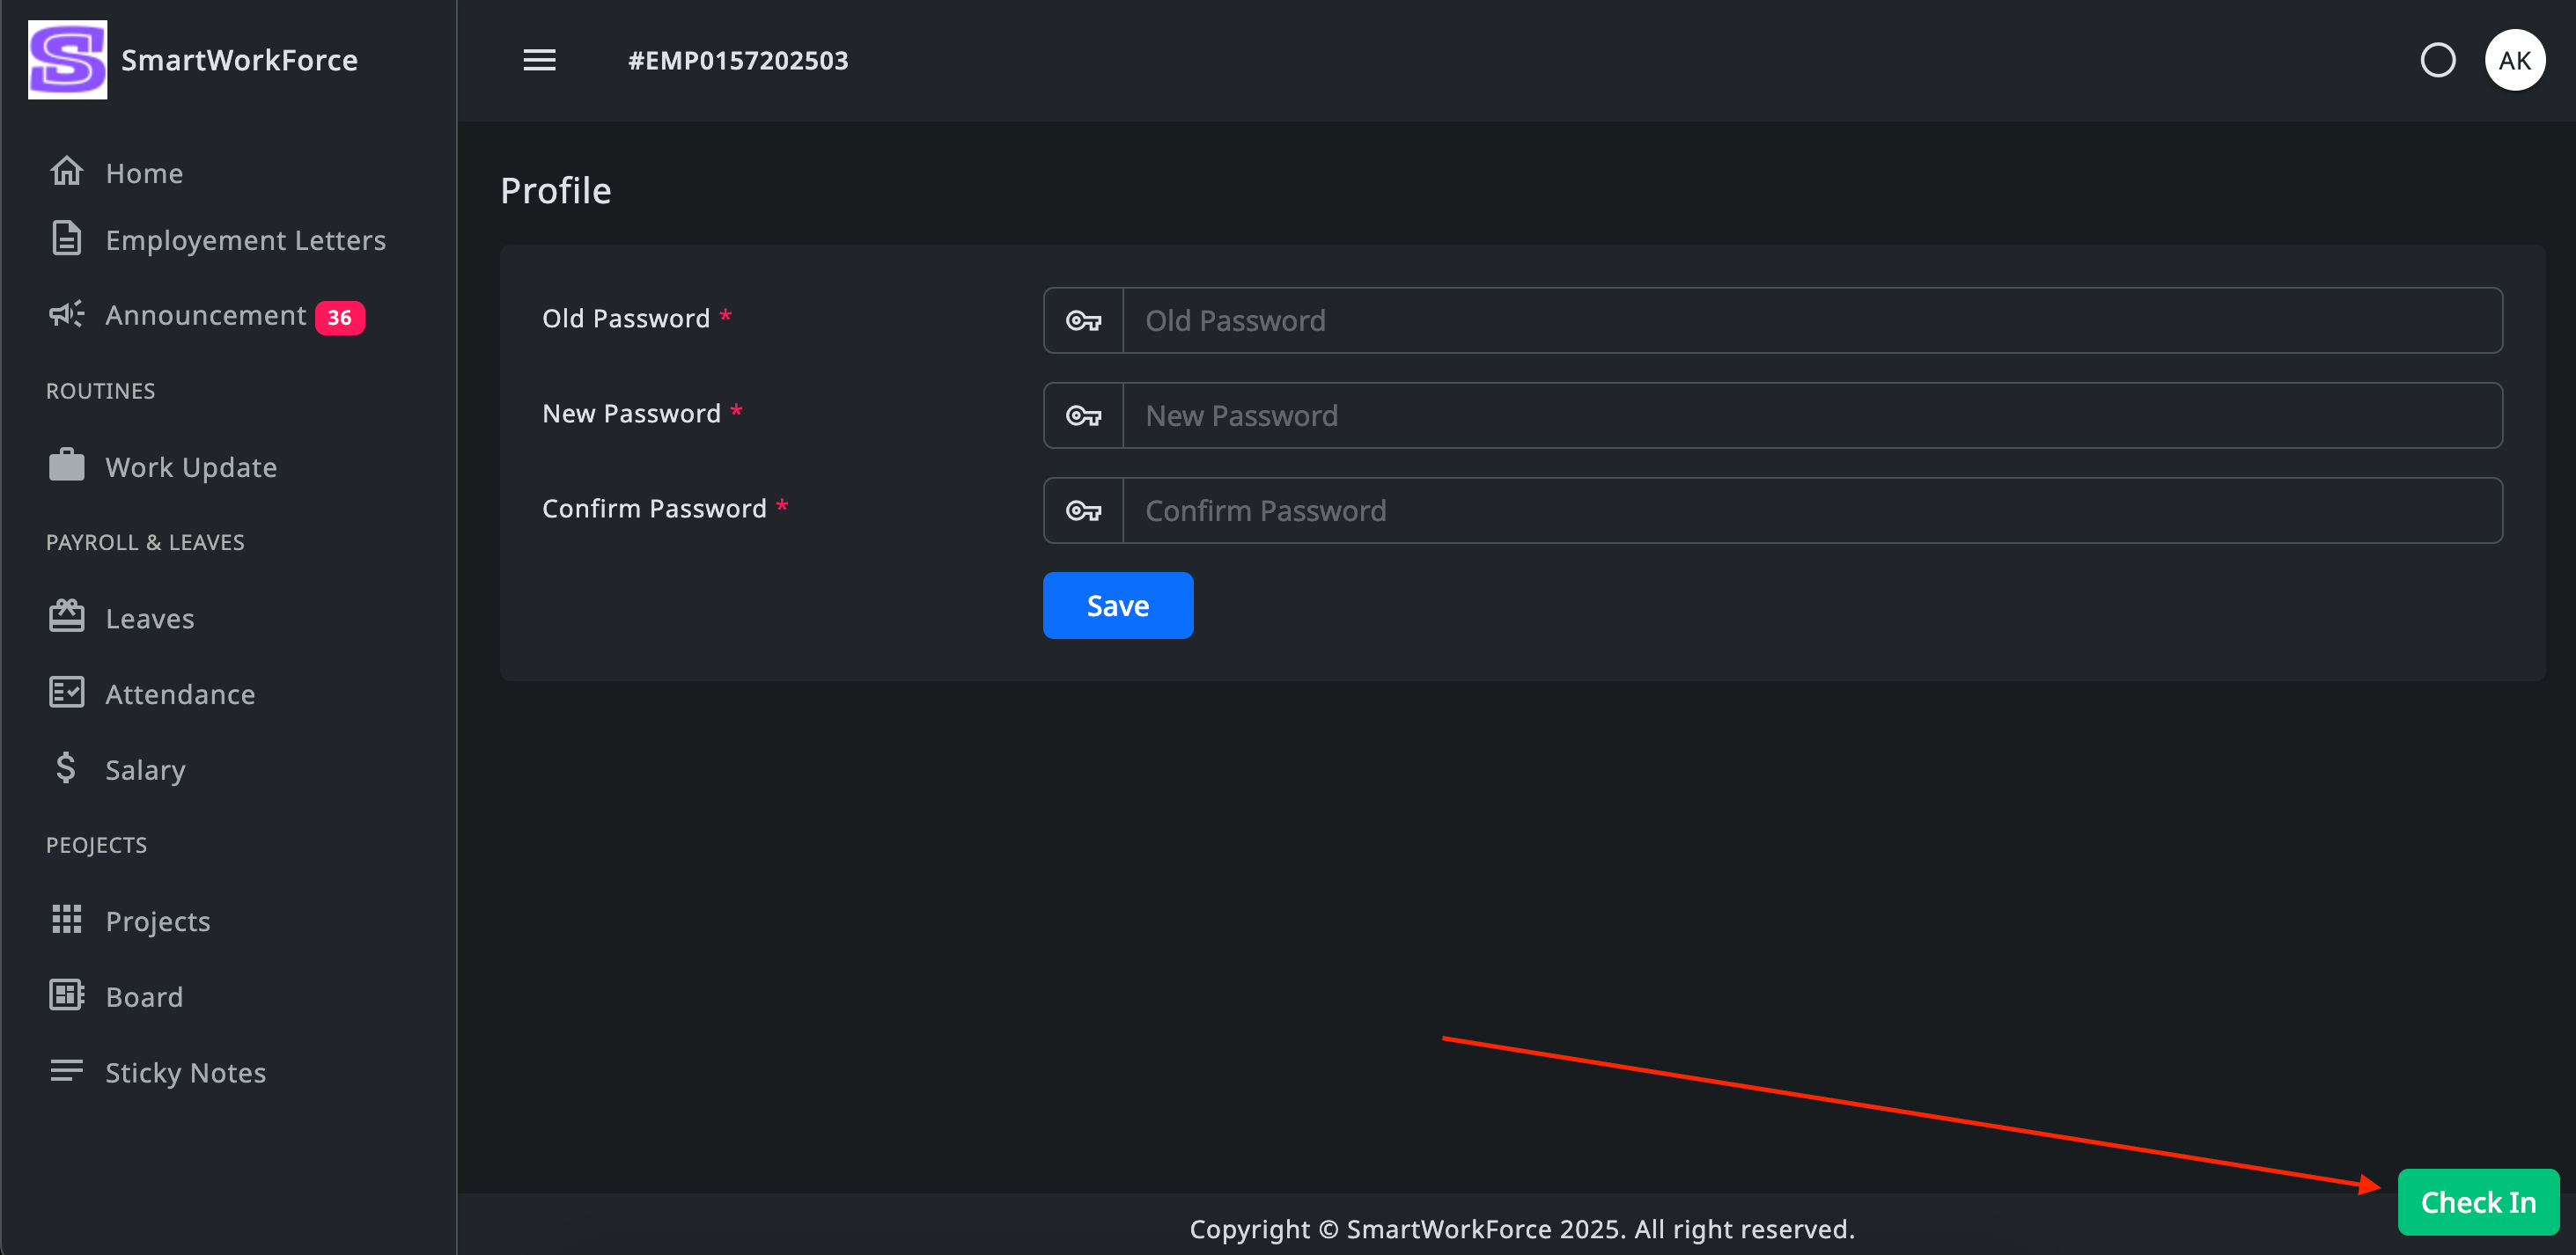
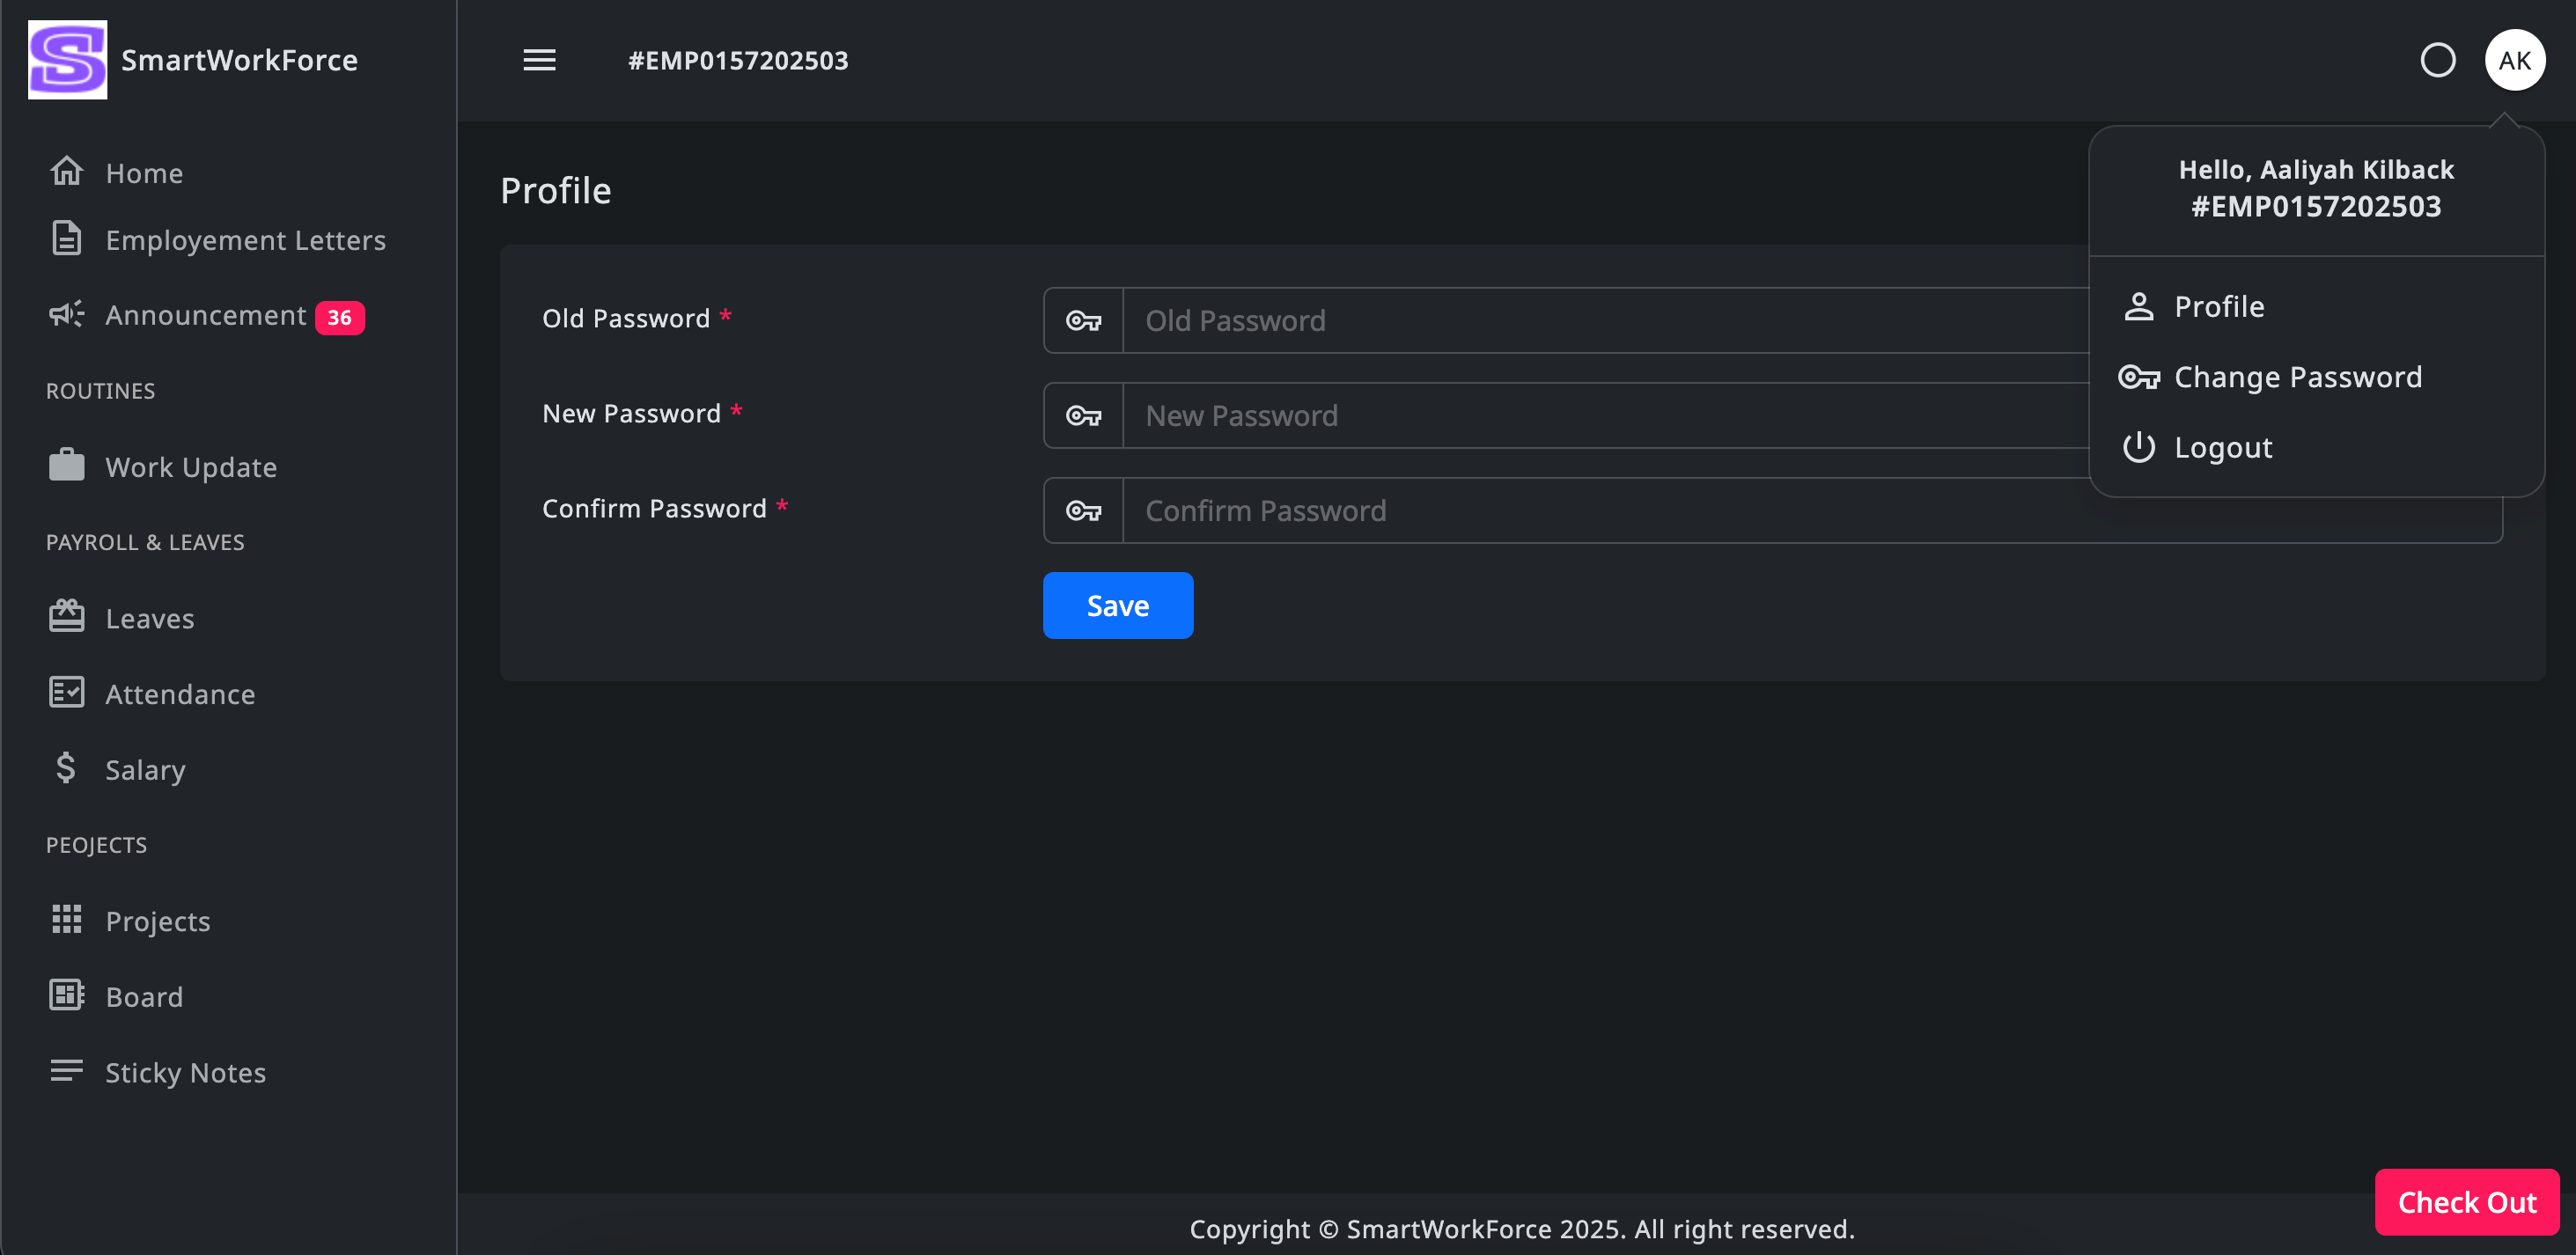
Change Password
Employees can change their password through the system, allowing them to
update their login credentials for enhanced security and privacy.
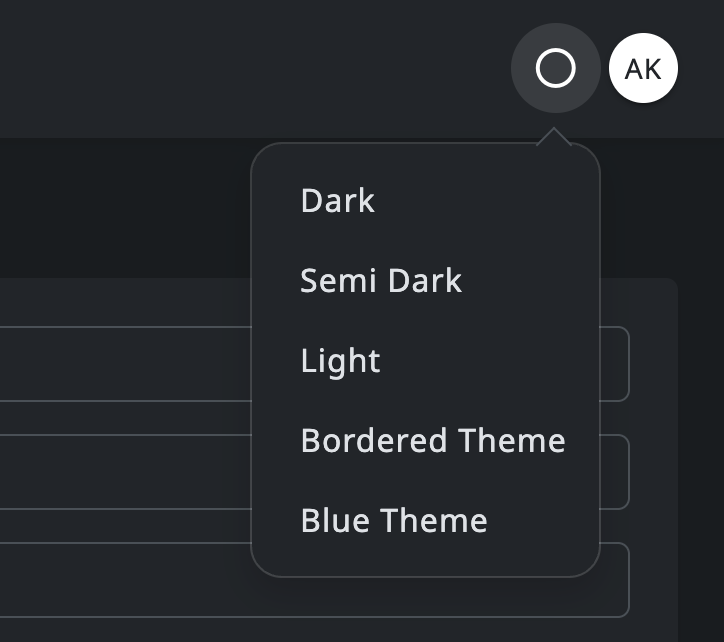
Theme Change
Employees can change the theme mode of the interface, choosing between
different options such as light, dark, or other available themes, to
customize their viewing experience according to personal preference.
JavaScript Files
Change Logs
											29 May, 2025

												Major Fixes

													Added New at (Admin) :


															Leave


															Leave Report
											25 May, 2025 Initial Release

												Dashboard
												Project Management
												Attendance
												Salary
												Routines
												Sticky Notes
												Holidays
												Leave Apply
												Basic Settings
Support
For SmartWorkForce clients, support is available through the
Code Canyon Author -
Vivek Mistry.
Clients can reach out for assistance, and they
will receive real-time support during working hours, from Monday to Friday.
The support is available for up to 3 hours each day, ensuring that clients
receive prompt responses and solutions to any issues or questions they may
have. Whether it's technical help, guidance on using the platform, or
troubleshooting, clients can rely on this dedicated support to keep things
running smoothly.
Thank you on behalf of SmartWorkForce for choosing our services. We are
committed to providing you with the best support and ensuring a smooth
experience with our platform. If you have any questions or need assistance,
feel free to reach out to us anytime. We appreciate your trust and look
forward to helping you succeed.